Page 56 of 506

50
2004 SIENNA from Aug. ’04 Prod. (OM45422U)
Reactivating the system
Once set, the system is automatically re-
set after the alarm stopped automatically
after one minute.
The")
04 SIENNA_U (L/O 0408)
50
2004 SIENNA from Aug. ’04 Prod. (OM45422U)
Reactivating the system
Once set, the system is automatically re-
set after the alarm stopped automatically
after one minute.
The alarm will activate again under the
same circumstances described in
“Activating the system”.
Stopping the alarm
The alarm will be stopped by the following
these ways:
�Unlock any of the side doors or the
back door with the key or wireless re-
mote control transmitter.
�Turn the ignition key from the “LOCK”
to “ON” position.
These ways cancel the system at the
same time. If the battery becomes discharged due
to the vehicle being unused for a long
time, etc.,
when the battery is recharged
or replaced, the system will give the
alarm. If this happens, immediately unlock
any of the side doors or the back door
with the key or the wireless remote con-
trol transmitter, and the alarm will stop.
TESTING THE SYSTEM
1. Open all the windows.
2. Set the system as described above. All the side doors and back door should
be locked with the key or wireless re-
mote control transmitter. Be sure to
wait until the indicator light starts flash-
ing.
3. Unlock any side door from the inside. The system should activate the alarm.
4. Stop the alarm as described above.
5. Repeat this operation for the other doors and hood. When testing the
hood, also check that the system is
activated when the battery terminal is
disconnected and then reconnected.
If the system does not work properly,
have it checked by your Toyota dealer.This indicates that the fuel filler door
is on the left side of your vehicle.
Fuel tank cap
Page 57 of 506
04 SIENNA_U (L/O 0408)
51
2004 SIENNA from Aug. ’04 Prod. (OM45422U)
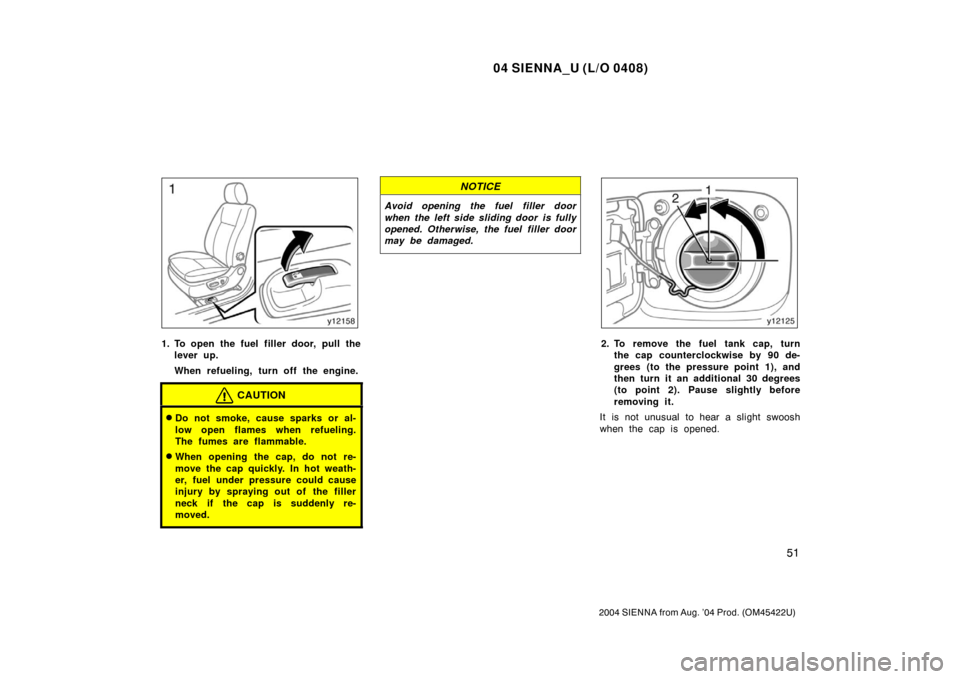
1. To open the fuel filler door, pull thelever up.
When refueling, turn off the engine.
CAUTION
�Do not smoke, cause sparks or al-
low open flames when refueling.
The fumes are flammable.
�When opening the cap, do not re-
move the cap quickly. In hot weath-
er, fuel under pressure could cause
injury by spraying out of the filler
neck if the cap is suddenly re-
moved.
NOTICE
Avoid opening the fuel filler door
when the left side sliding door is fully
opened. Otherwise, the fuel filler door
may be damaged.
2. To remove the fuel tank cap, turnthe cap counterclockwise by 90 de-
grees (to the pressure point 1), and
then turn it an additional 30 degrees
(to point 2). Pause slightly before
removing it.
It is not unusual to hear a slight swoosh
when the cap is opened.
Page 58 of 506
04 SIENNA_U (L/O 0408)
52
2004 SIENNA from Aug. ’04 Prod. (OM45422U)
3. The removed cap can be stored onthe back side of the fuel filler door.
Position the cap so that the hooks point
to the left and right, and set it in the
receptacle on the back side of the door. When installing the cap, turn the cap
clockwise until you hear one click.
When you hear the click, the cap is
fully closed.
If the cap is not installed securely, the
malfunction indicator lamp comes on.
Make sure the cap is tightened securely.
The indicator lamp goes off after driving
several times. If the indicator lamp does
not go off, contact your Toyota dealer as
soon as possible.
CAUTION
�Make sure the cap is installed se-
curely to prevent fuel sp
illage in
the event of an accident.
�Use only a genuine Toyota fuel tank
cap for replacement. It is designed
to regulate fuel tank pressure.
NOTICE
To prevent damage to the cap, apply
force only in the turning direction to
the cap. Do not pull or pry it.
Page 63 of 506

57
2004 SIENNA from Aug. ’04 Prod. (OM45422U)
Front passenger seat
CAUTION
The SRS front passenger airbag also
deploys with considerable force, and
can cause death or serious")
04 SIENNA_U (L/O 0408)
57
2004 SIENNA from Aug. ’04 Prod. (OM45422U)
Front passenger seat
CAUTION
The SRS front passenger airbag also
deploys with considerable force, and
can cause death or serious injury es-
pecially if the front passenger is very
close to the airbag. The front passen-
ger seat should be as far from the
airbag as possible with the seatback
adjusted, so the front passenger sits
upright.
CAUTION
The SRS side airbags are installed in
the driver and front passenger seats.
Observe the following precautions.
�Do not lean against the front door
when the vehicle is in use, since
the side airbag inflates with consid-
erable speed and force. Otherwise,
you may be killed or seriously in-
jured.
�Do not use seat accessories which
cover the area where the side air-
bags inflate. Such accessories may
prevent the side airbags from acti-
vating correctly, causing death or
serious injury.
�Do not modify or replace the seats
or upholstery of front seats
equipped with side airbags. Such
changes may prevent the side air-
bags from activating correctly, dis-
able the system or cause the side
airbags to inflate accidentally, re-
sulting in death or serious injury.
CAUTION
�Adjustments should not be made
while the vehicle is moving, as the
seat may unexpectedly move and
cause the driver to lose control of
the vehicle.
�When adjusting the seat, be careful
that the seat does not hit a passen-
ger or luggage.
�After adjusting the seat position, re-
lease the lever and try sliding the
seat forward and backward to make
sure it is locked in position.
�After adjusting the seatback, push
your body back against the seat to
make sure the seat is locked in
position.
�Do not put objects under the seats
except for putting them in the auxil-
iary box. Otherwise, the objects
may interfere with the seat�lock
mechanism or unexpectedly push
up the seat position adjusting lever
and the seat may suddenly move,
causing the driver to lose control of
the vehicle.
—Front seat precautions
(on vehicles with SRS side
airbags) —Seat adjustment precautions
Page 68 of 506
04 SIENNA_U (L/O 0408)
62
2004 SIENNA from Aug. ’04 Prod. (OM45422U)
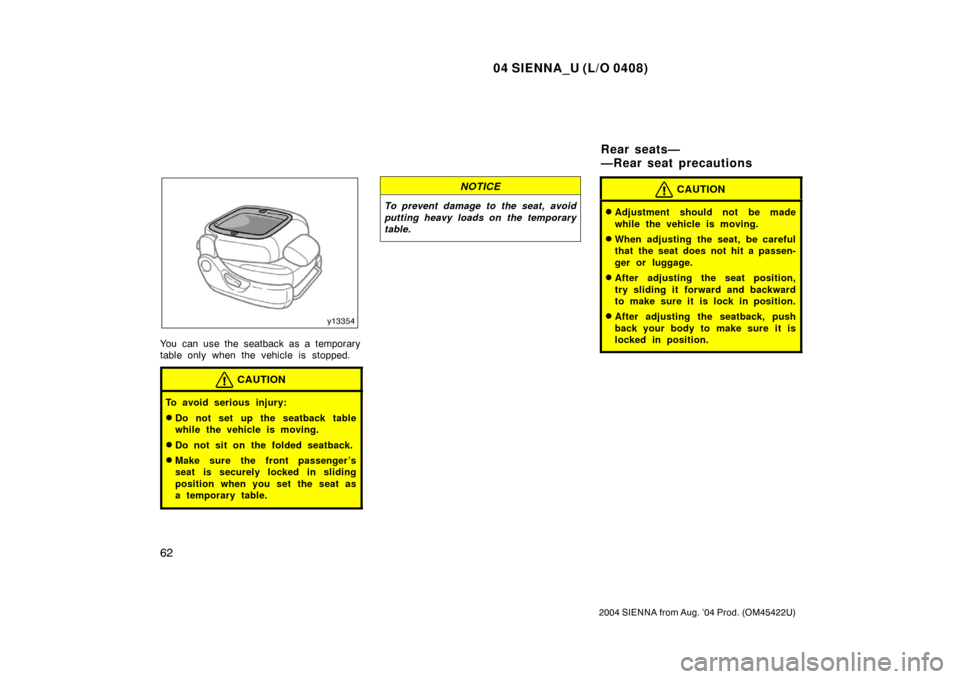
You can use the seatback as a temporary
table only when the vehicle is stopped.
CAUTION
To avoid serious injury:
�Do not set up the seatback table
while the vehicle is moving.
�Do not sit on the folded seatback.
�Make sure the front passenger ’s
seat is securely locked in sliding
position when you set the seat as
a temporary table.
NOTICE
To prevent damage to the seat, avoid
putting heavy loads on the temporary
table.
CAUTION
�Adjustment should not be made
while the vehicle is moving.
�When adjusting the seat, be careful
that the seat does not hit a passen-
ger or luggage.
�After adjusting the seat position,
try sliding it forward and backward
to make sure it is lock in position.
�After adjusting the seatback, push
back your body to make sure it is
locked in position.
Rear seats—
—Rear seat precautions
Page 69 of 506
04 SIENNA_U (L/O 0408)
63
2004 SIENNA from Aug. ’04 Prod. (OM45422U)
�When returning seats to their origi-
nal position, observe the following
precautions in order to prevent per-
sonal injury in a collision or sud-
den stop:
Be careful not to get your hands or
feet pinched in the seat.
Make sure the seat is securely
locked by pushing forward and rear-
ward on the top of the seatback or
by trying to pull up the edge of the
bottom cushion. Failure to do so
will prevent the seat belt from oper-
ating properly.
Make sure the seat belts are not
twisted or caught under the seat
and are arranged in their proper
position and are ready to use.
Folding the seats up will enlarge the lug-
gage compartment. See “—Stowage pre-
cautions” on page 389 in Section 2 for
precautions when loading luggage.
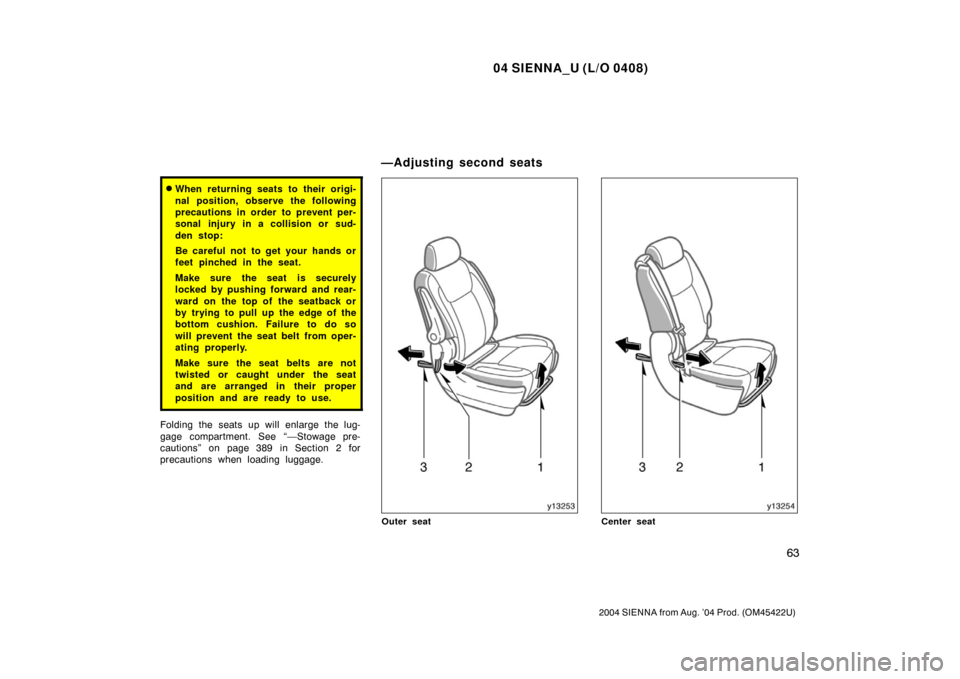
Outer seatCenter seat
—Adjusting second seats
Page 70 of 506

64
2004 SIENNA from Aug. ’04 Prod. (OM45422U)
1. SEAT POSITION ADJUSTING LEVER
Hold the center of the lever and pull it
up. Then slide the seat to the desired
position with sl")
04 SIENNA_U (L/O 0408)
64
2004 SIENNA from Aug. ’04 Prod. (OM45422U)
1. SEAT POSITION ADJUSTING LEVER
Hold the center of the lever and pull it
up. Then slide the seat to the desired
position with slight body pressure and
release the lever.
2. SEATBACK ANGLE ADJUSTING LEVER/STRAP (from front)
Lean forward and pull the lever or strap
toward you. Then lean back to the de-
sired angle and release the lever or
strap.
3. SEATBACK ANGLE ADJUSTING STRAP (from rear)
Pull the strap and push the seatback
forward or pull it backward to the de-
sired angle and release the strap.CAUTION
Avoid reclining the seatback any
more than needed. The seat belts pro-
vide maximum protection in a frontal
or rear collision when the passengers
are sitting up straight and well back
in the seats. If you are reclined, the
lap belt may slide past your hips and
apply restraint forces directly to the
abdomen or your neck may contact
the shoulder belt. In the event of a
frontal collision, the more the seat is
reclined, the greater the risk of death
or personal injury.
For access to the third seat, perform
the following procedure.
Fold down the seatback while pulling the
seatback angle adjusting lever or strap
and swing up the seat.
After passengers are in, return the seat
until it locks securely, and lift up the seat
back by pulling the lever or strap.
—Tumbling second seat for
third seat entry
Page 71 of 506
04 SIENNA_U (L/O 0408)
65
2004 SIENNA from Aug. ’04 Prod. (OM45422U)
CAUTION
After returning the seat, make sure
the seat is securely locked by push-
ing forward and rearward on the top
of the seatback or by trying to pull
up the edge of the bottom cushion.
Failure to do so will prevent seat belt
from operating properly.
When returning the tumbled second
seat to its original position:
Once the seat is moved from the
tumbled position to the folded�down
position, it cannot be directly returned
to the tumbled position again. (It is im-
possible to operate the seat in the or-
der 1→2→ 1.) When you return the
folded�down seat (position 2) to its
tumbled position (position 1), you must
return the folded�down seat (position 2)
to its original position (position 3)
once. (It is possible to operate the seat
in the order 1→ 2→ 3→ 1.)

52
2004 SIENNA from Aug. ’04 Prod. (OM45422U)
3. The removed cap can be stored onthe back side of the fuel filler door.
Position the cap so that the hooks point
to the left an")

65
2004 SIENNA from Aug. ’04 Prod. (OM45422U)
CAUTION
After returning the seat, make sure
the seat is securely locked by push-
ing forward and rearward on the top
of the seatb")