Page 67 of 119

Corolla_MATRIX_Navi_U (L/O 0305)
59
2004 COROLLA MATRIX Navigation from May. ’03 Prod. (OM12800U)
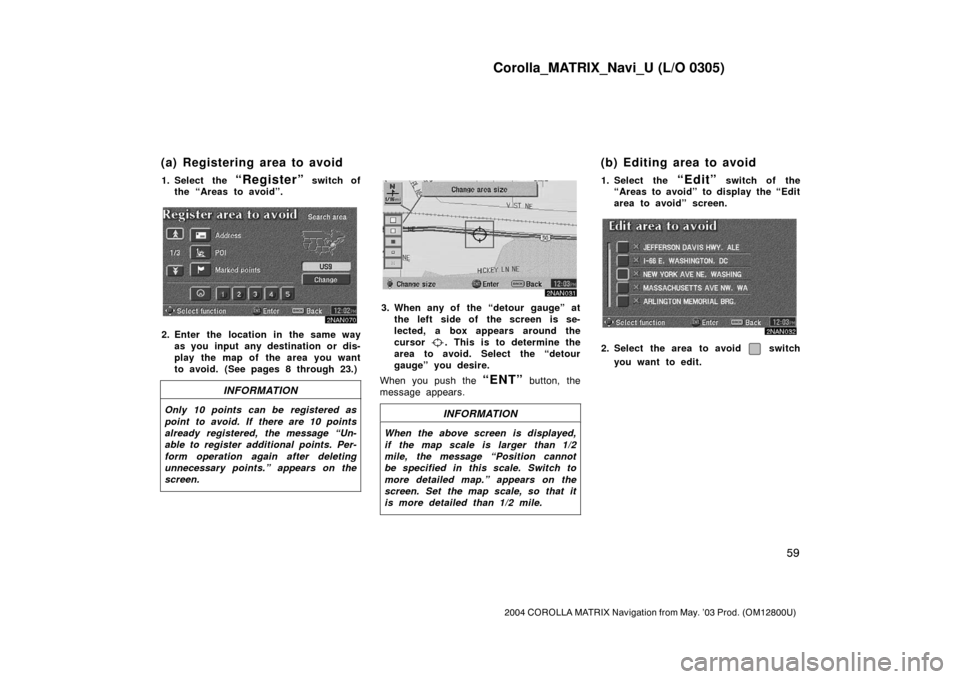
1. Select the “Register” switch of
the “Areas to avoid”.
2NAN070
2. Enter the location in the same way
as you input any destination or dis-
play the map of the area you want
to avoid. (See pages 8 through 23.)
INFORMATION
Only 10 points can be registered as
point to avoid. If there are 10 points
already registered, the message “Un-
able to register additional points. Per-
form operation again after deleting
unnecessary points.” appears on the
screen.
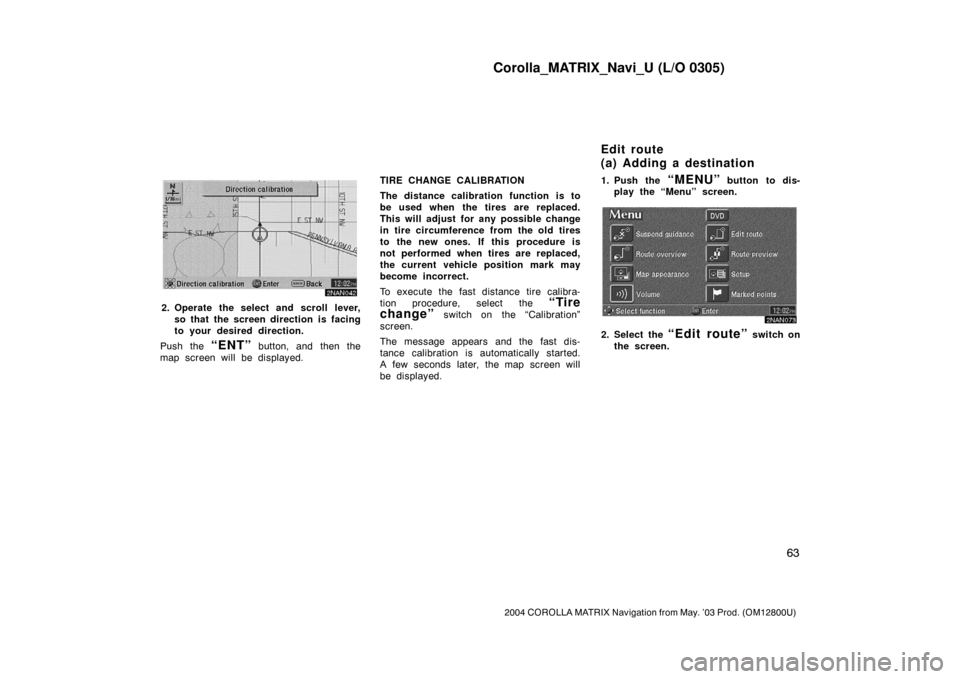
2NAN031
3. When any of the “detour gauge” at
the left side of the screen is se-
lected, a box appears around the
cursor
. This is to determine the
area to avoid. Select the “detour
gauge” you desire.
When you push the
“ENT” button, the
message appears.
INFORMATION
When the above screen is displayed,
if the map scale is larger than 1/2
mile, the message “Position cannot
be specified in this scale. Switch to
more detailed map.” appears on the
screen. Set the map scale, so that it
is more detailed than 1/2 mile.
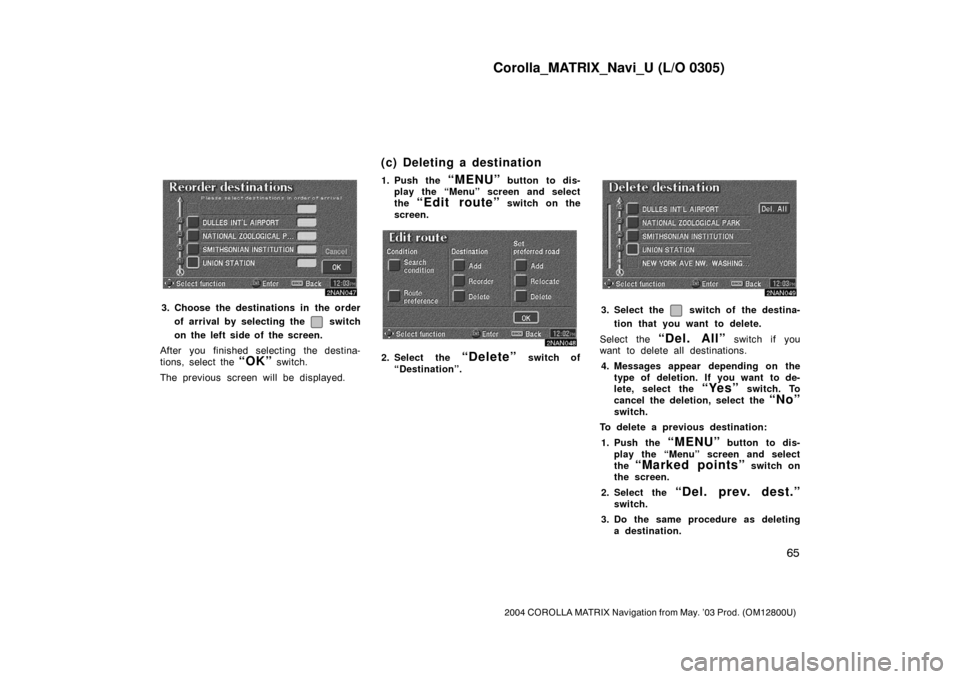
1. Select the “Edit” switch of the
“Areas to avoid” to display the “Edit
area to avoid” screen.
2NAN032
2. Select the area to avoid switch
you want to edit.
(a) Registering area to avoid (b) Editing area to avoid
Page 68 of 119
Corolla_MATRIX_Navi_U (L/O 0305)
60
2004 COROLLA MATRIX Navigation from May. ’03 Prod. (OM12800U)
2NAN033
3. Select the “Name”, “Location” or
“Change area size” on this screen.CHANGING THE NAME
2NAN034
Select alphabet or numeral keys to in-
put the name.
After you finish your entry, select the
“OK” switch on the screen.
The previous screen will be displayed.CHANGING THE LOCATION
2NAN035
Move the cursor to your desired point,
and push the
“ENT” button.
Page 69 of 119
Corolla_MATRIX_Navi_U (L/O 0305)
61
2004 COROLLA MATRIX Navigation from May. ’03 Prod. (OM12800U)
CHANGING THE AREA SIZE
2NAN036
Select one of the “detour gauge” on the
left side of this screen if you want to
change the area size.1. Select the
“Delete” switch of the
“Areas to avoid” to display the “De-
lete area to avoid” screen.
2NAN037
2. Select the area you want to delete
from the list.
“Del. All”: All registered areas to avoid
in the system are deleted.
3. Messages appear depending on the
type of deletion. If you want to de-
lete, select the
“Yes” switch. To
cancel the deletion, select the
“No”
switch.The current vehicle position mark will
be automatically corrected while you
are driving on reception of GPS sig-
nals. If your vehicle cannot receive GPS
signals, you can correct the current
position mark manually.
2NAN071
1. Push the “MENU” button to dis-
play the “Menu” screen, and then
select the
“Setup” switch.
(c) Deleting area to avoid Current position calibration
Page 71 of 119

Corolla_MATRIX_Navi_U (L/O 0305)
63
2004 COROLLA MATRIX Navigation from May. ’03 Prod. (OM12800U)
2NAN042
2. Operate the select and scroll lever,
so that the screen direction is facing
to your desired direction.
Push the
“ENT” button, and then the
map screen will be displayed.TIRE CHANGE CALIBRATION
The distance calibration function is to
be used when the tires are replaced.
This will adjust for any possible change
in tire circumference from the old tires
to the new ones. If this procedure is
not performed when tires are replaced,
the current vehicle position mark may
become incorrect.
To execute the fast distance tire calibra-
tion procedure, select the
“Tire
change”
switch on the “Calibration”
screen.
The message appears and the fast dis-
tance calibration is automatically started.
A few seconds later, the map screen will
be displayed.1. Push the
“MENU” button to dis-
play the “Menu” screen.
2NAN073
2. Select the “Edit route” switch on
the screen.
Edit route
(a) Adding a destination
Page 73 of 119

Corolla_MATRIX_Navi_U (L/O 0305)
65
2004 COROLLA MATRIX Navigation from May. ’03 Prod. (OM12800U)
2NAN047
3. Choose the destinations in the order
of arrival by selecting the
switch
on the left side of the screen.
After you finished selecting the destina-
tions, select the
“OK” switch.
The previous screen will be displayed.1. Push the
“MENU” button to dis-
play the “Menu” screen and select
the
“Edit route” switch on the
screen.
2NAN
2. Select the “Delete” switch of
“Destination”.
2NAN049
3. Select the switch of the destina-
tion that you want to delete.
Select the
“Del. All” switch if you
want to delete all destinations.
4. Messages appear depending on the
type of deletion. If you want to de-
lete, select the
“Yes” switch. To
cancel the deletion, select the
“No”
switch.
To delete a previous destination:
1. Push the
“MENU” button to dis-
play the “Menu” screen and select
the
“Marked points” switch on
the screen.
2. Select the
“Del. prev. dest.”
switch.
3. Do the same procedure as deleting
a destination.
(c) Deleting a destination
Page 77 of 119
Corolla_MATRIX_Navi_U (L/O 0305)
69
2004 COROLLA MATRIX Navigation from May. ’03 Prod. (OM12800U)
You can see the entire route from the
starting point to the destination.
2NAN074
1. Push the “MENU” button to dis-
play the “Menu” screen and select
the
“Route overview” switch on
the screen.
2NAN061
The entire route from the starting point to
the destination is displayed.You can preview the route from the
starting point to the destination.
2NAN075
1. Push the “MENU” button to dis-
play the “Menu” screen and select
the
“Route preview” switch. The
“Route preview” screen appears.
Route overview Route preview
Page 78 of 119
Corolla_MATRIX_Navi_U (L/O 0305)
70
2004 COROLLA MATRIX Navigation from May. ’03 Prod. (OM12800U)
2NAN
To display the next destination
To preview the route to the next
destination
To preview the route to the next
destination fast
To stop previewing
To preview the route to the pre-
vious departure position
To preview the route to the pre-
vious departure position fast
To display the previous departure
position
2NAN064
2. Select the “Edit” switch. The “Edit
route preview” screen appears.
“Next POI”: To preview the next POI
“Next
”: To preview the next destina-
tion
If the points of interest you selected are
on the route, they are displayed on the
screen.
“Select POI”: To select the POI icon
“Delete”: To delete the POI icon
2NAN065
3. Select your desired category of point
of interest.
2NAN066
4. Select your desired icon from the
list and select the
“OK” switch.
Page 80 of 119

Corolla_MATRIX_Navi_U (L/O 0305)
72
2004 COROLLA MATRIX Navigation from May. ’03 Prod. (OM12800U)
You can set the values shown on the
“Setup” screen.
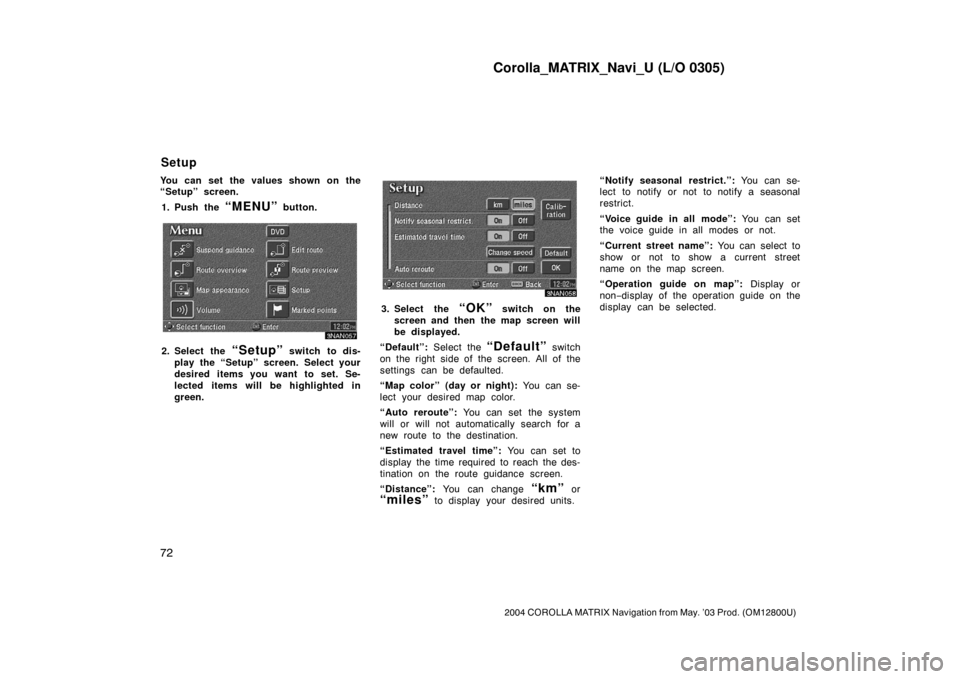
1. Push the
“MENU” button.
3NAN057
2. Select the “Setup” switch to dis-
play the “Setup” screen. Select your
desired items you want to set. Se-
lected items will be highlighted in
green.
3NAN058
3. Select the “OK” switch on the
screen and then the map screen will
be displayed.
“Default”: Select the
“Default” switch
on the right side of the screen. All of the
settings can be defaulted.
“Map color” (day or night): You can se-
lect your desired map color.
“Auto reroute”: You can set the system
will or will not automatically search for a
new route to the destination.
“Estimated travel time”: You can set to
display the time required to reach the des-
tination on the route guidance screen.
“Distance”: You can change
“km” or
“miles” to display your desired units.“Notify seasonal restrict.”: You can se-
lect to notify or not to notify a seasonal
restrict.
“Voice guide in all mode”: You can set
the voice guide in all modes or not.
“Current street name”: You can select to
show or not to show a current street
name on the map screen.
“Operation guide on map”: Display or
non−display of the operation guide on the
display can be selected.
Setup