Page 253 of 342
245
2004 L/C100 from Aug ’03 Prod. (OM60A04U)
TIRES
�Ensure that your vehicle’s tires are
properly inflated. Adjust the tire infla-
tion pressure indicated below:
tire inflation pressure, kPa (psi)Front 220 (32)
Rear 240 (35)
See Section 7 −2 and Section 8 for in-
structions.
�The trailer tires should be inflated to
the pressure recommended by the trail-
er manufacturer in respect to the total
trailer weight.
TRAILER LIGHTS
�Your vehicle is equipped with a wire
harness stored in the rear end under
body. Your vehicle is fitted with a sock-
et for trailer lights under the rear
bumper. Use either of them to connect
and operate the trailer lights. However,
the trailer lights must comply with fed-
eral, state/provincial and local regula-
tions. See your local recreational ve-
hicle dealer or rental agency for the
correct type of wiring and relays for
your trailer. Check for correct operation
of the turn signals and stop lights each
time you hitch up. Direct splicing may
damage your vehicle’s electrical system
and cause a malfunction of your lights. BREAKIN SCHEDULE
�Toyota recommends that you do not
tow a trailer with a new vehicle or a
vehicle with any new power train com-
ponent (engine, transmission, differen-
tial, wheel bearing, etc.) for the first
800 km (500 miles) of driving.
MAINTENANCE
�If you tow a trailer, your vehicle will
require more frequent maintenance due
to the additional load. For this
information, please refer to the
scheduled maintenance information in
the “Scheduled Maintenance Guide” or
“Owner ’s Manual Supplement”.
�Retighten all fixing bolts of the towing
ball and bracket after approximately
1000 km (600 miles) of trailer driving.
PRETOWING SAFETY CHECK
�Check that your vehicle remains level
when a loaded or unloaded trailer is
hitched. Do not drive if the vehicle has
an abnormal nose −up or nose −down
condition, and check for improper
tongue load, overload, worn suspension
or other possible causes.
�Make sure the trailer cargo is securely
loaded so that it cannot shift.
Page 269 of 342
261
2004 L/C100 from Aug ’03 Prod. (OM60A04U)
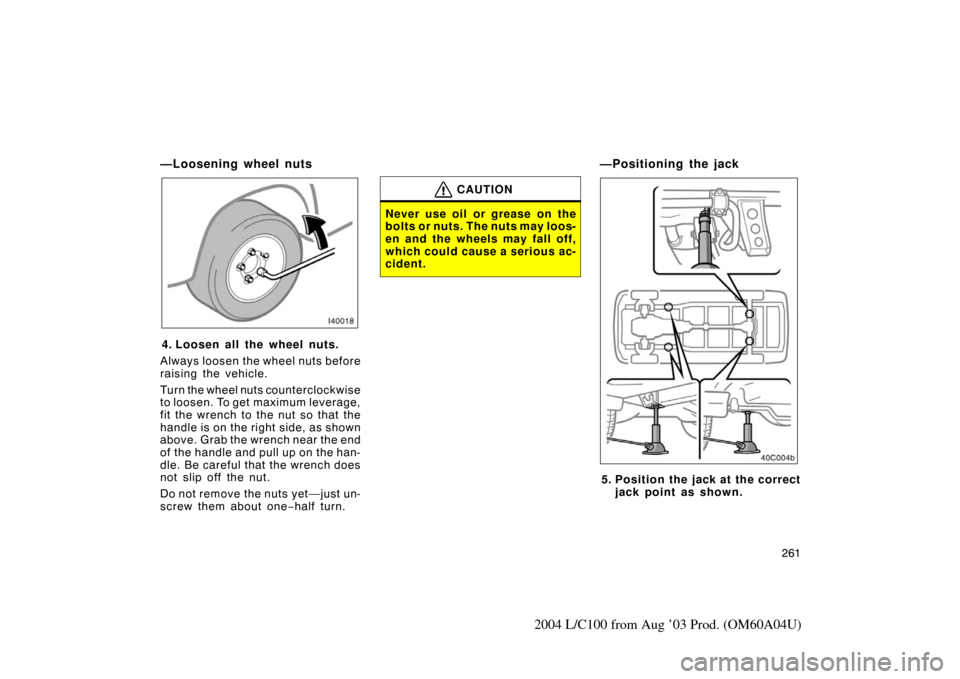
—Loosening wheel nuts
4. Loosen all the wheel nuts.
Always loosen the wheel nuts before
raising the vehicle.
Turn the wheel nuts counterclockwise
to loosen. To get maximum leverage,
fit the wrench to the nut so that the
handle is on the right side, as shown
above. Grab the wrench near the end
of the handle and pull up on the han-
dle. Be careful that the wrench does
not slip off the nut.
Do not remove the nuts yet—just un-
screw them about one −half turn.
CAUTION
Never use oil or grease on the
bolts or nuts. The nuts may loos-
en and the wheels may fall off,
which could cause a serious ac-
cident.
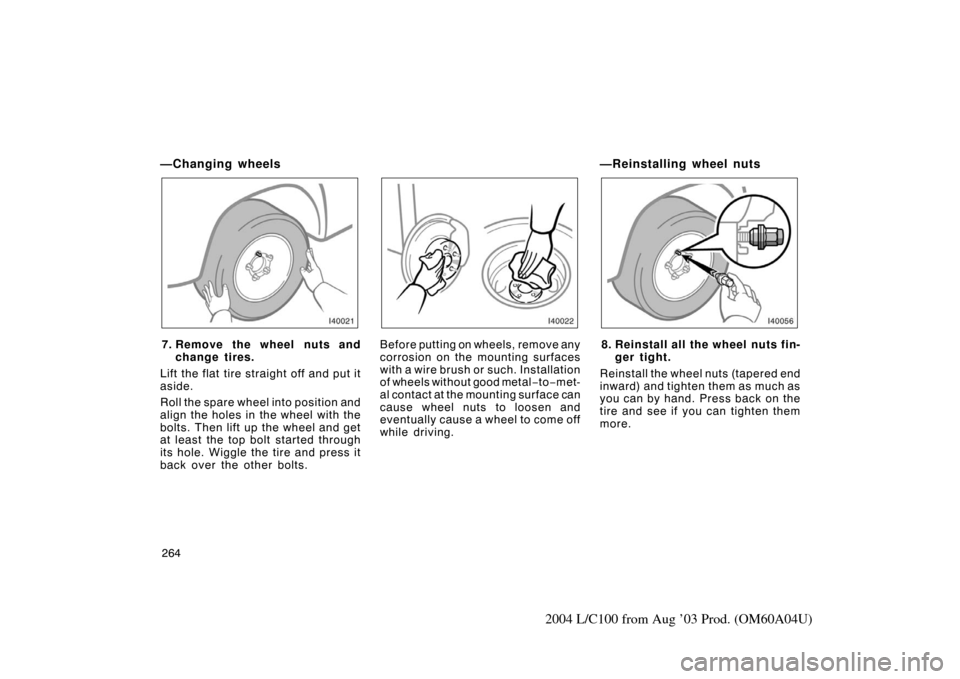
—Positioning the jack
5. Position the jack at the correct
jack point as shown.
Page 272 of 342
264
2004 L/C100 from Aug ’03 Prod. (OM60A04U)
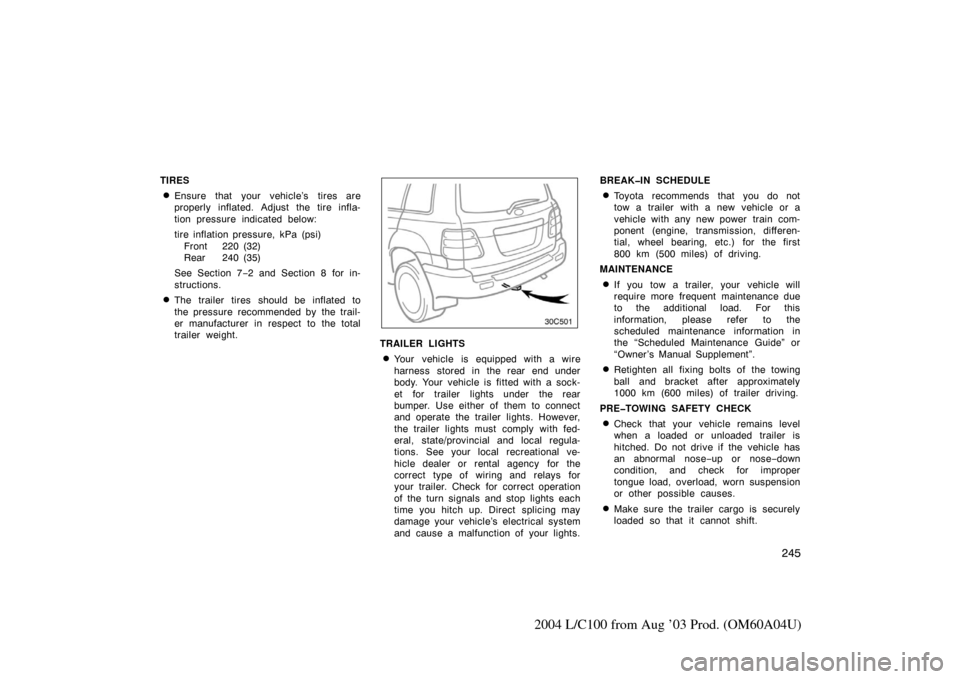
—Changing wheels
7. Remove the wheel nuts andchange tires.
Lift the flat tire straight off and put it
aside.
Roll the spare wheel into position and
align the holes in the wheel with the
bolts. Then lift up the wheel and get
at least the top bolt started through
its hole. Wiggle the tire and press it
back over the other bolts.Before putting on wheels, remove any
corrosion on the mounting surfaces
with a wire brush or such. Installation
of wheels without good metal− to−met-
al contact at the mounting surface can
cause wheel nuts to loosen and
eventually cause a wheel to come off
while driving.
—Reinstalling wheel nuts
8. Reinstall all the wheel nuts fin- ger tight.
Reinstall the wheel nuts (tapered end
inward) and tighten them as much as
you can by hand. Press back on the
tire and see if you can tighten them
more.
Page 273 of 342
265
2004 L/C100 from Aug ’03 Prod. (OM60A04U)
CAUTION
�Never use oil or grease on the
bolts or nuts. Doing so may
lead to overtightening the nuts
and damaging the bolts. The
nuts may loosen and the
wheels may fall off, which
could cause a serious acci-
dent. If there is oil or grease
on any bolt or nut, clean it.
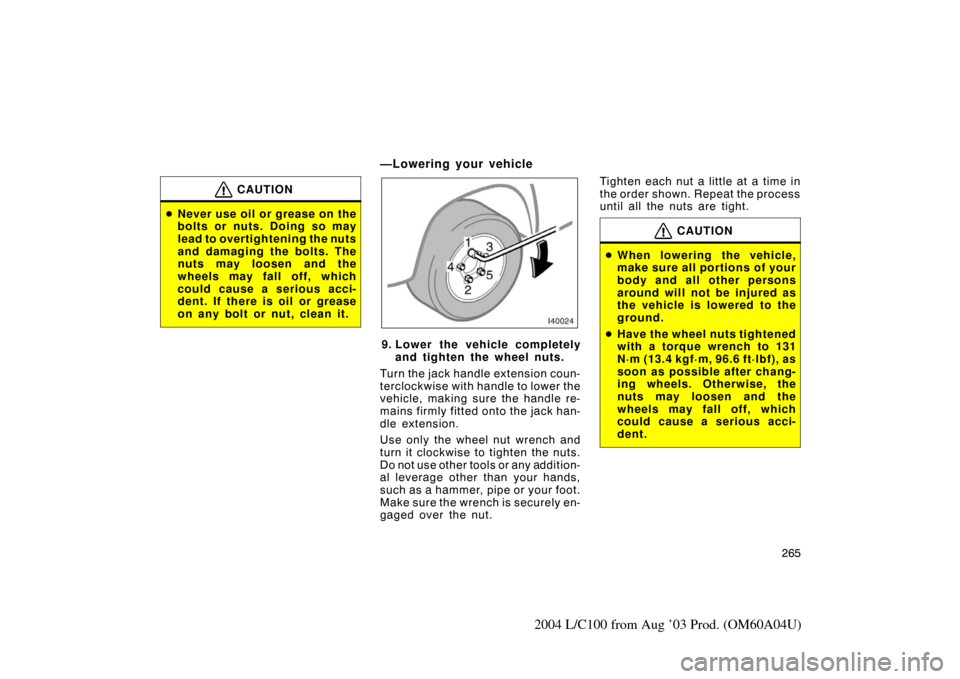
—Lowering your vehicle
9. Lower the vehicle completely
and tighten the wheel nuts.
Turn the jack handle extension coun-
terclockwise with handle to lower the
vehicle, making sure the handle re-
mains firmly fitted onto the jack han-
dle extension.
Use only the wheel nut wrench and
turn it clockwise to tighten the nuts.
Do not use other tools or any addition-
al leverage other than your hands,
such as a hammer, pipe or your foot.
Make sure the wrench is securely en-
gaged over the nut. Tighten each nut a little at a time in
the order shown. Repeat the process
until all the nuts are tight.
CAUTION
�
When lowering the vehicle,
make sure all portions of your
body and all other persons
around will not be injured as
the vehicle is lowered to the
ground.
� Have the wheel nuts tightened
with a torque wrench to 131
N·m (13.4 kgf·m, 96.6 ft·lbf), as
soon as possible after chang-
ing wheels. Otherwise, the
nuts may loosen and the
wheels may fall off, which
could cause a serious acci-
dent.