Page 26 of 342
18
2004 L/C100 from Aug ’03 Prod. (OM60A04U)
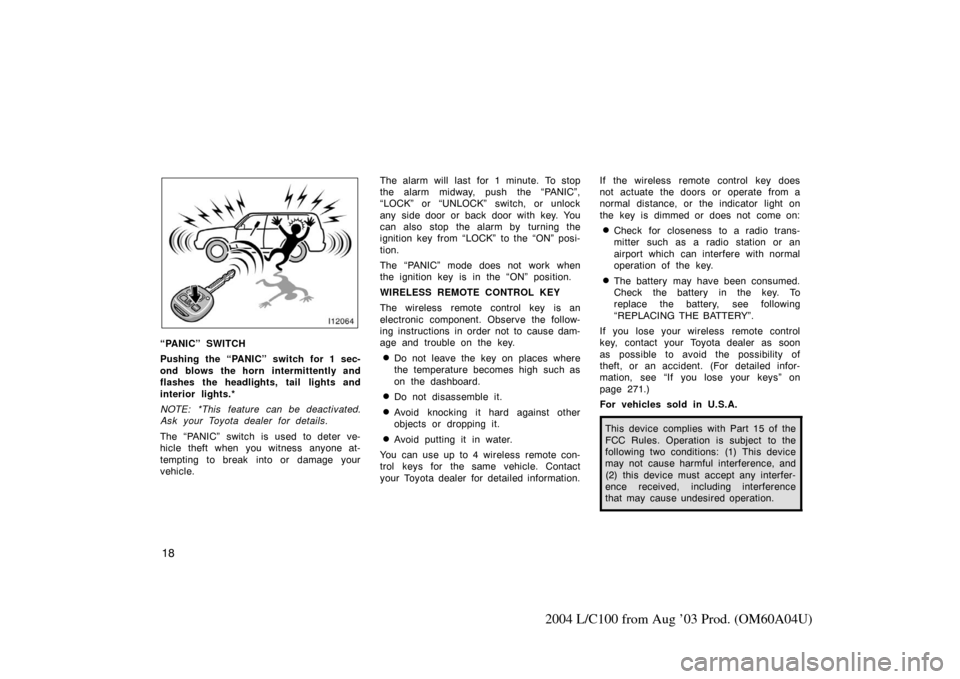
“PANIC” SWITCH
Pushing the “PANIC” switch for 1 sec-
ond blows the horn intermittently and
flashes the headlights, tail lights and
interior lights.*
NOTE: *This feature can be deactivated.
Ask your Toyota dealer for details.
The “PANIC” switch is used to deter ve-
hicle theft when you witness anyone at-
tempting to break into or damage your
vehicle.The alarm will last for 1 minute. To stop
the alarm midway, push the “PANIC”,
“LOCK” or “UNLOCK” switch, or unlock
any side door or back door with key. You
can also stop the alarm by turning the
ignition key from “LOCK” to the “ON” posi-
tion.
The “PANIC” mode does not work when
the ignition key is in the “ON” position.
WIRELESS REMOTE CONTROL KEY
The wireless remote control key is an
electronic component. Observe the follow-
ing instructions in order not to cause dam-
age and trouble on the key.
�Do not leave the key on places where
the temperature becomes high such as
on the dashboard.
�Do not disassemble it.
�Avoid knocking it hard against other
objects or dropping it.
�Avoid putting it in water.
You can use up to 4 wireless remote con-
trol keys for the same vehicle. Contact
your Toyota dealer for detailed information. If the wireless remote control key does
not actuate the doors or operate from a
normal distance, or the indicator light on
the key is dimmed or does not come on:
�Check for closeness to a radio trans-
mitter such as a radio station or an
airport which can interfere with normal
operation of the key.
�The battery may have been consumed.
Check the battery in the key. To
replace the battery, see following
“REPLACING THE BATTERY”.
If you lose your wireless remote control
key, contact your Toyota dealer as soon
as possible to avoid the possibility of
theft, or an accident. (For detailed infor-
mation, see “If you lose your keys” on
page 271.)
For vehicles sold in U.S.A.
This device complies with Part 15 of the
FCC Rules. Operation is subject to the
following two conditions: (1) This device
may not cause harmful interference, and
(2) this device must accept any interfer-
ence received, including interference
that may cause undesired operation.
Page 30 of 342
22
2004 L/C100 from Aug ’03 Prod. (OM60A04U)
l12088a
Window lock
switch
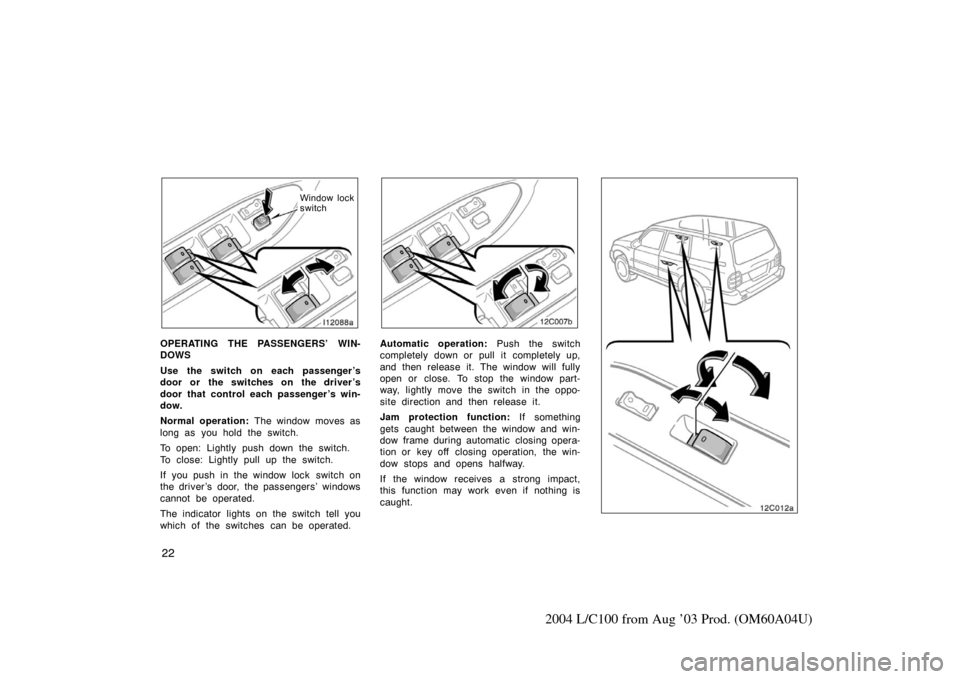
OPERATING THE PASSENGERS’ WIN-
DOWS
Use the switch on each passenger ’s
door or the switches on the driver ’s
door that control each passenger ’s win-
dow.
Normal operation: The window moves as
long as you hold the switch.
To open: Lightly push down the switch.
To close: Lightly pull up the switch.
If you push in the window lock switch on
the driver ’s door, the passengers’ windows
cannot be operated.
The indicator lights on the switch tell you
which of the switches can be operated.
12C007b
Automatic operation: Push the switch
completely down or pull it completely up,
and then release it. The window will fully
open or close. To stop the window part-
way, lightly move the switch in the oppo-
site direction and then release it.
Jam protection function: If something
gets caught between the window and win-
dow frame during automatic closing opera-
tion or key off closing operation, the win-
dow stops and opens halfway.
If the window receives a strong impact,
this function may work even if nothing is
caught.
12c012a
Page 33 of 342
25
2004 L/C100 from Aug ’03 Prod. (OM60A04U)
Back door
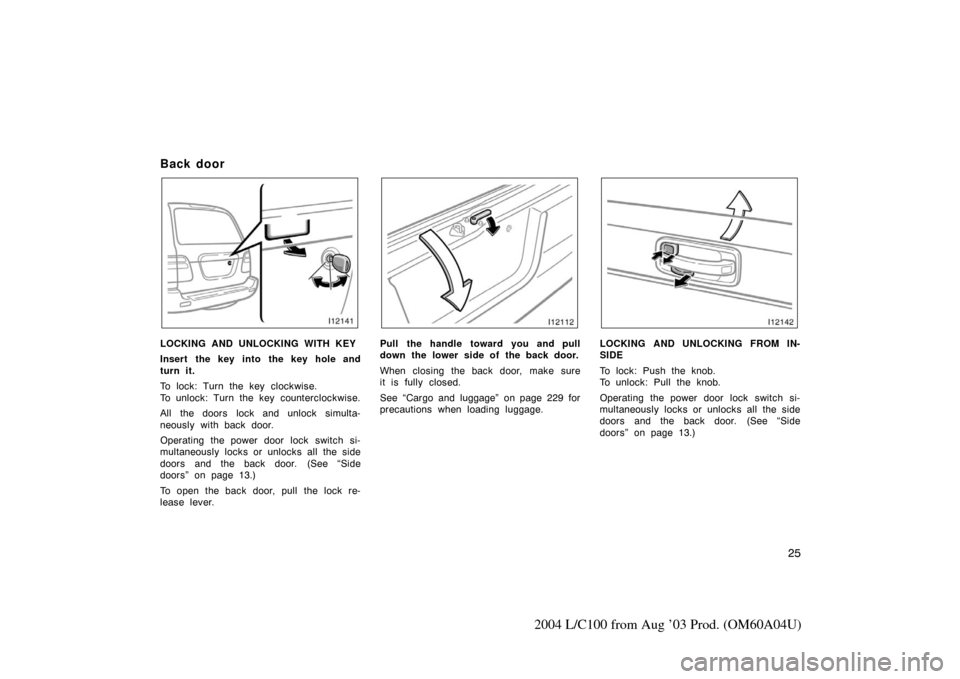
LOCKING AND UNLOCKING WITH KEY
Insert the key into the key hole and
turn it.
To lock: Turn the key clockwise.
To unlock: Turn the key counterclockwise.
All the doors lock and unlock simulta-
neously with back door.
Operating the power door lock switch si-
multaneously locks or unlocks all the side
doors and the back door. (See “Side
doors” on page 13.)
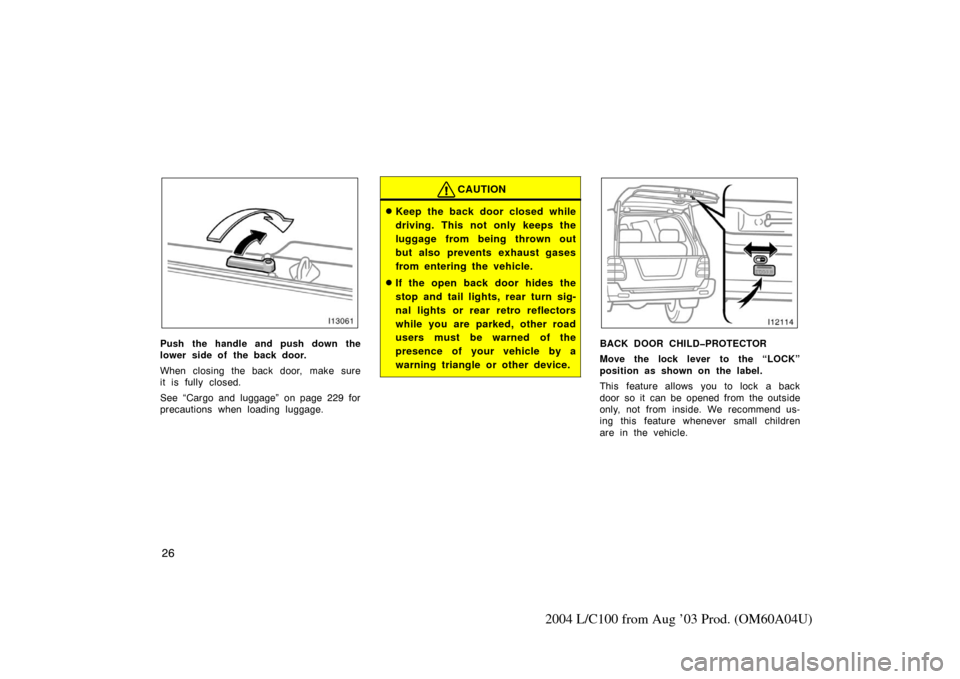
To open the back door, pull the lock re-
lease lever.Pull the handle toward you and pull
down the lower side of the back door.
When closing the back door, make sure
it is fully closed.
See “Cargo and luggage” on page 229 for
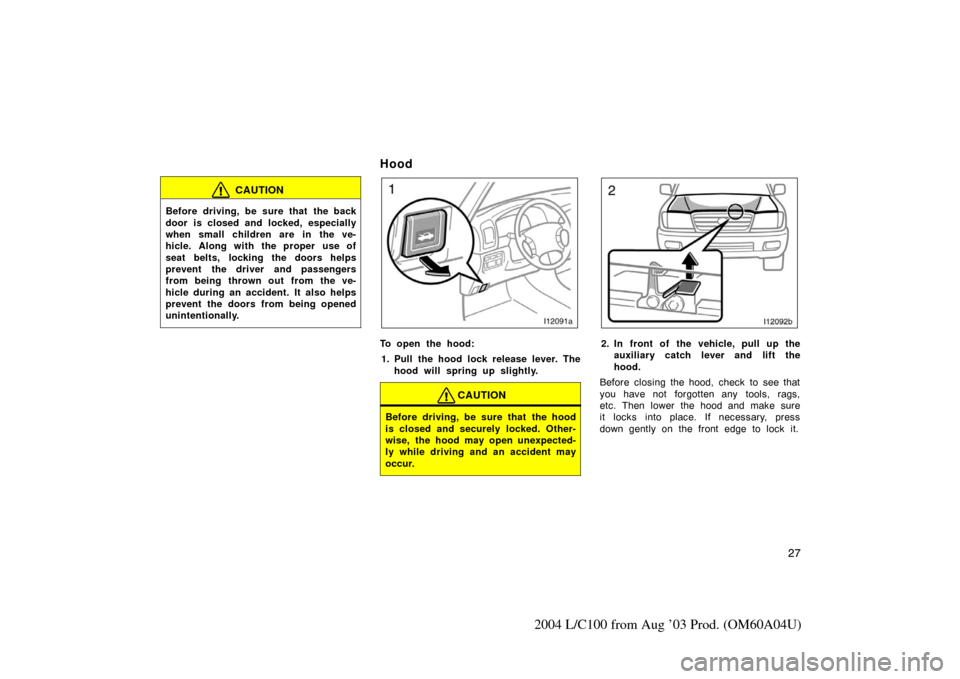
precautions when loading luggage.LOCKING AND UNLOCKING FROM IN-
SIDE
To lock: Push the knob.
To unlock: Pull the knob.
Operating the power door lock switch si-
multaneously locks or unlocks all the side
doors and the back door. (See “Side
doors” on page 13.)
Page 34 of 342
26
2004 L/C100 from Aug ’03 Prod. (OM60A04U)
Push the handle and push down the
lower side of the back door.
When closing the back door, make sure
it is fully closed.
See “Cargo and luggage” on page 229 for
precautions when loading luggage.
CAUTION
�Keep the back door closed while
driving. This not only keeps the
luggage from being thrown out
but also prevents exhaust gases
from entering the vehicle.
�If the open back door hides the
stop and tail lights, rear turn sig-
nal lights or rear retro reflectors
while you are parked, other road
users must be warned of the
presence of your vehicle by a
warning triangle or other device.
BACK DOOR CHILDPROTECTOR
Move the lock lever to the “LOCK”
position as shown on the label.
This feature allows you to lock a back
door so it can be opened from the outside
only, not from inside. We recommend us-
ing this feature whenever small children
are in the vehicle.
Page 35 of 342
27
2004 L/C100 from Aug ’03 Prod. (OM60A04U)
CAUTION
Before driving, be sure that the back
door is closed and locked, especially
when small children are in the ve-
hicle. Along with the proper use of
seat belts, locking the doors helps
prevent the driver and passengers
from being thrown out from the ve-
hicle during an accident. It also helps
prevent the doors from being opened
unintentionally.
Hood
To open the hood:1. Pull the hood lock release lever. The hood will spring up slightly.
CAUTION
Before driving, be sure that the hood
is closed and securely locked. Other-
wise, the hood may open unexpected-
ly while driving and an accident may
occur.
2. In front of the vehicle, pull up theauxiliary catch l ever and lift the
hood.
Before closing the hood, check to see that
you have not forgotten any tools, rags,
etc. Then lower the hood and make sure
it locks into place. If necessary, press
down gently on the front edge to lock it.
Page 36 of 342
28
2004 L/C100 from Aug ’03 Prod. (OM60A04U)
Theft deterrent system
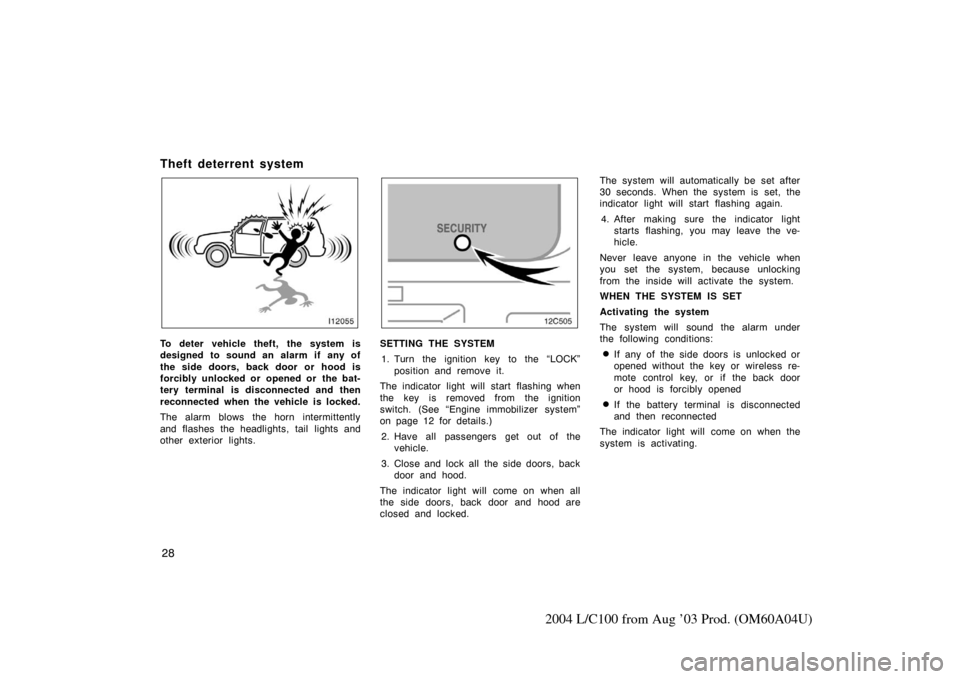
To deter vehicle theft, the system is
designed to sound an alarm if any of
the side doors, back door or hood is
forcibly unlocked or opened or the bat-
tery terminal is disconnected and then
reconnected when the vehicle is locked.
The alarm blows the horn intermittently
and flashes the headlights, tail lights and
other exterior lights.SETTING THE SYSTEM1. Turn the ignition key to the “LOCK” position and remove it.
The indicator light will start flashing when
the key is removed from the ignition
switch. (See “Engine immobilizer system”
on page 12 for details.)
2. Have all passengers get out of the vehicle.
3. Close and lock all the side doors, back door and hood.
The indicator light will come on when all
the side doors, back door and hood are
closed and locked. The system will automatically be set after
30 seconds. When the system is set, the
indicator light will start flashing again.
4. After making sure the indicator light starts flashing, you may leave the ve-
hicle.
Never leave anyone in the vehicle when
you set the system, because unlocking
from the inside will activate the system.
WHEN THE SYSTEM IS SET
Activating the system
The system will sound the alarm under
the following conditions:�If any of the side doors is unlocked or
opened without the key or wireless re-
mote control key, or if the back door
or hood is forcibly opened
�If the battery terminal is disconnected
and then reconnected
The indicator light will come on when the
system is activating.
Page 37 of 342
29
2004 L/C100 from Aug ’03 Prod. (OM60A04U)
If any of the side door or back door is
unlocked without the key or wireless re-
mote control key and the key is not in the
ignition switch, all the side doors and
back door will be automatically locked
again.
After one minute, the alarm will automati-
cally stop and the indicator light will starts
flashing again.
Reactivating the alarm
Once set, the system automatically resets
the alarm after the alarm stops.
The alarm will activate again under the
same circumstances described in
“Activating the system”.
Stopping the alarm
The alarm will be stopped by the following
two ways:
�Turn the ignition key from the “LOCK”
to “ON” position.
�Unlock any of the side doors or back
door with the key or wireless remote
control key.
These ways cancel the system at the
same time. TESTING THE SYSTEM
1. Open all the windows.
2. Set the system as described above. The side doors and back door should
be locked with the key or wireless re-
mote control key. Be sure to wait until
the indicator light goes off or starts
flashing.
3. Unlock any side door or back door from the inside. The system should ac-
tivate the alarm.
4. Stopping the alarm as described above.
5. Repeat this operation for the other doors, back door and hood. When test-
ing the hood, also check that the sys-
tem is activated when the battery ter-
minal is disconnected and then
reconnected.
If the system does not work properly,
have it checked by your Toyota dealer.
Fuel tank cap
12C503
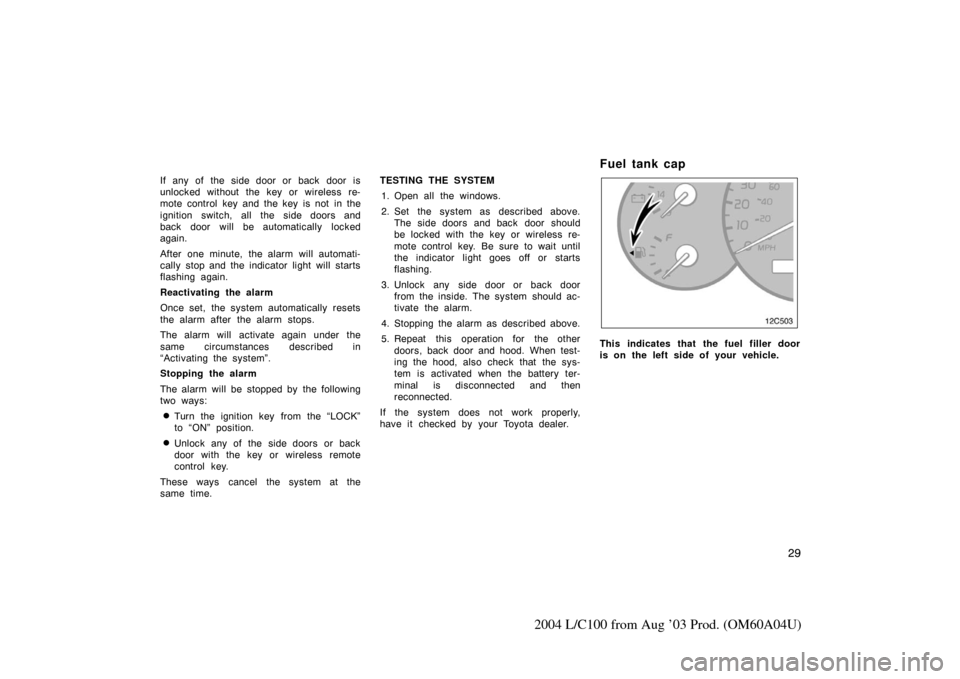
This indicates that the fuel filler door
is on the left side of your vehicle.
Page 38 of 342
30
2004 L/C100 from Aug ’03 Prod. (OM60A04U)
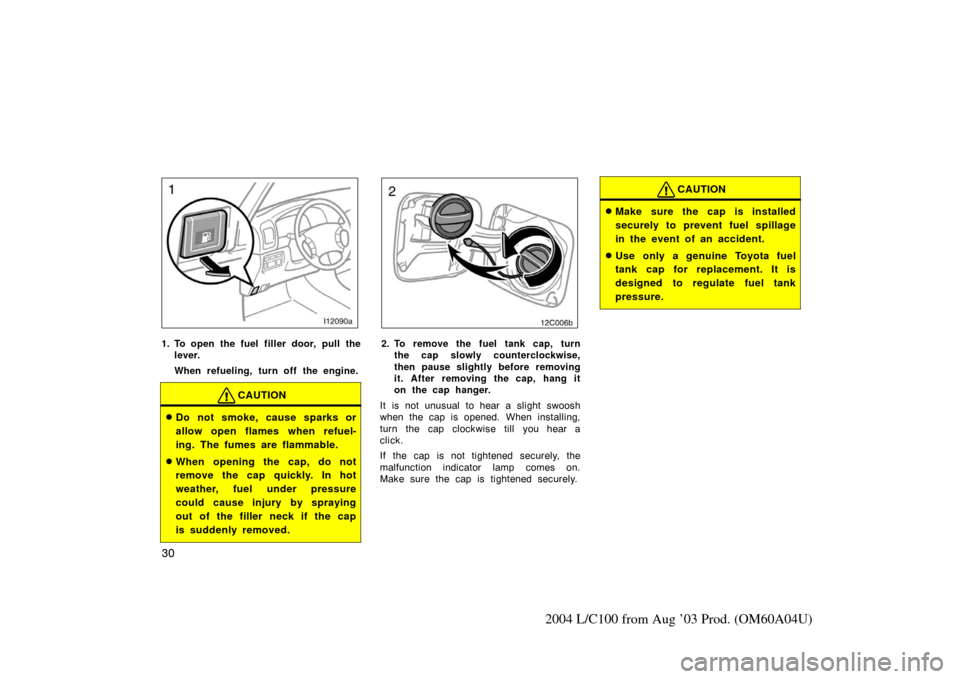
1. To open the fuel filler door, pull thelever.
When refueling, turn off the engine.
CAUTION
�Do not smoke, cause sparks or
allow open flames when refuel-
ing. The fumes are flammable.
�When opening the cap, do not
remove the cap quickly. In hot
weather, fuel under pressure
could cause injury by spraying
out of the filler neck if the cap
is suddenly removed.
12C006b
2. To remove the fuel tank cap, turnthe cap slowly counterclockwise,
then pause slightly before removing
it. After removing the cap, hang it
on the cap hanger.
It is not unusual to hear a slight swoosh
when the cap is opened. When installing,
turn the cap clockwise till you hear a
click.
If the cap is not tightened securely, the
malfunction indicator lamp comes on.
Make sure the cap is tightened securely.
CAUTION
�Make sure the cap is installed
securely to prevent fuel sp illage
in the event of an accident.
�Use only a genuine Toyota fuel
tank cap for replacement. It is
designed to regulate fuel tank
pressure.