Page 103 of 173
93
3. Touch the desired color for day and/or
night map color and then touch the
“OK”switch to return the map screen.
Touch the
“Normal” switch to return to the
default map color.
Screen animation
When the “Screen Animation” feature is
turned on, some switches and screens be-
come animated. (e.g.: change map guid-
ance on the map screen)
To turn the “Screen Animation” mode on:
1. Push the
“MENU” button.
2. Touch the “Setup” switch. Then
touch
switch three times to display
page 4 of the “Setup” screen.
3. Touch the “On” switch of “Screen
Animation” and touch the
“OK” switch.
Page 111 of 173
101
(c) Delete dealer
1. Touch the “Delete Dealer” switch
on the screen.
2. A message will appear on the screen.
To delete, touch the
“Yes” switch. To
cancel the deletion, touch the
“No” or
“Back” switch.
(d) Set as destination
Touch the “Enter ” switch on “Set
Dealer” screen. The screen changes and
displays the map location of the registered
dealer and the “Route Preference”. (See
“ — Entering destination” on page 38.)
Calendar with memo
This system informs you of the memo
entry. At the specified date, the memo in-
formation will be displayed, when the navi-
gation system is in operation. The memo
information screen will appear every time
the system is turned on. To disable this
screen, touch the
“Do not display this
message again”
switch.
Page 122 of 173
11 2
Depending on the position of the headlight
switch, the screen changes to the day
mode or night mode.
To display the screen in the day mode even
with the headlight switch on, touch the
“DAY
MODE”
switch on the adjustment screen for
brightness and contrast control.
However, if the instrument panel light control
switch is turned fully to the right, mode switch-
ing cannot be done. It remains in the day
mode. In this case,
“DAY MODE” is not
shown on the screen.
If the screen is set in the day mode with the
headlight switch turned to on, this condition is
memorized in the system even with the en-
gine turned off.
Clock adjustment
The clock can be corrected manually or by
using signals from the GPS. Daylight Sav-
ing Time setting or your desired time set-
ting is available.
Push the “” button to display the “Ad-
just Clock” screen.
Page 123 of 173
11 3
�To adjust a clock automatically
Before you use the auto adjust function, se-
lect the time zone (see “Time Zone” described
below). Touch the
“ON” switch of “Auto Ad-
just”. The time is automatically adjusted by
the GPS clock.
“Time Zone”: You can select the time zone.
When you touch this switch, the display will be
change to the time zone selection screen.
The initial setting is “Eastern”.
Touch the switch of your desired area. The
time zone for the area is set and the previous
screen returns.
“Others”: You can adjust the time zone
manually with “�”, “�” switches.
�To adjust a clock manually
Touch the “OFF” switch of “Auto Adjust”.
You can adjust the clock manually with
“H”,
“M” and “:00” switches.
“H”: To set the hour.
“M”: To set the minute.
“:00”: To adjust the time to the nearest hour,
touch this switch.
Page 131 of 173

121
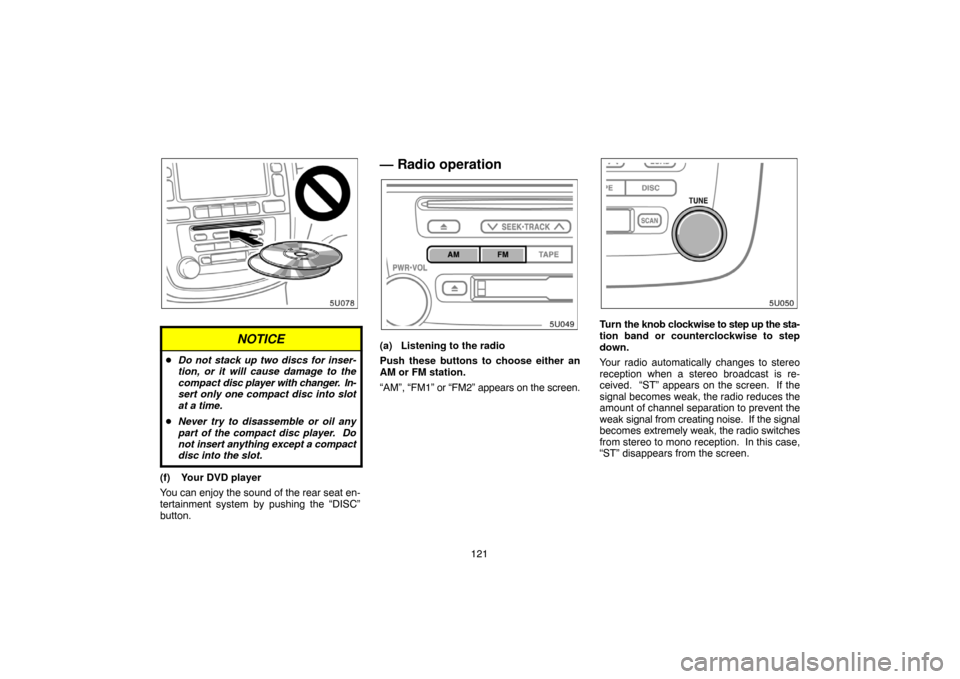
NOTICE
�Do not stack up two discs for inser-
tion, or it will cause damage to the
compact disc player with changer. In-
sert only one compact disc into slot
at a time.
�Never try to disassemble or oil any
part of the compact disc player. Do
not insert anything except a compact
disc into the slot.
(f) Your DVD player
You can enjoy the sound of the rear seat en-
tertainment system by pushing the “DISC”
button.
— Radio operation
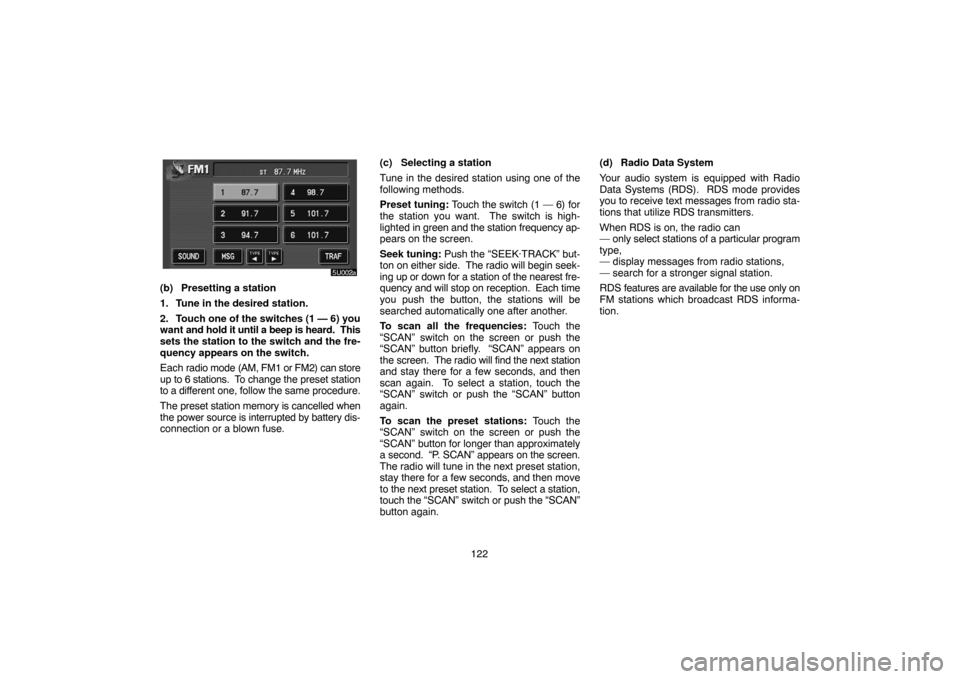
(a) Listening to the radio
Push these buttons to choose either an
AM or FM station.
“AM”, “FM1” or “FM2” appears on the screen.
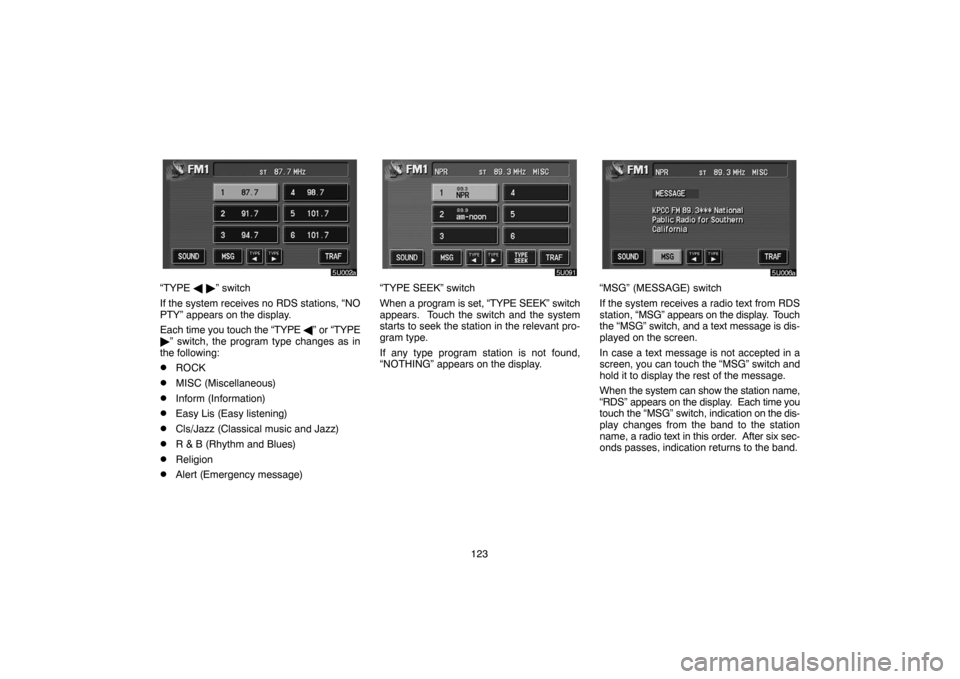
Turn the knob clockwise to step up the sta-
tion band or counterclockwise to step
down.
Your radio automatically changes to stereo
reception when a stereo broadcast is re-
ceived. “ST” appears on the screen. If the
signal becomes weak, the radio reduces the
amount of channel separation to prevent the
weak signal from creating noise. If the signal
becomes extremely weak, the radio switches
from stereo to mono reception. In this case,
“ST” disappears from the screen.
Page 132 of 173

122
(b) Presetting a station
1. Tune in the desired station.
2. Touch one of the switches (1 — 6) you
want and hold it until a beep is heard. This
sets the station to the switch and the fre-
quency appears on the switch.
Each radio mode (AM, FM1 or FM2) can store
up to 6 stations. To change the preset station
to a different one, follow the same procedure.
The preset station memory is cancelled when
the power source is interrupted by battery dis-
connection or a blown fuse.(c) Selecting a station
Tune in the desired station using one of the
following methods.
Preset tuning: Touch the switch (1 — 6) for
the station you want. The switch is high-
lighted in green and the station frequency ap-
pears on the screen.
Seek tuning: Push the “SEEK·TRACK” but-
ton on either side. The radio will begin seek-
ing up or down for a station of the nearest fre-
quency and will stop on reception. Each time
you push the button, the stations will be
searched automatically one after another.
To scan all the frequencies: Touch the
“SCAN” switch on the screen or push the
“SCAN” button briefly. “SCAN” appears on
the screen. The radio will find the next station
and stay there for a few seconds, and then
scan again. To select a station, touch the
“SCAN” switch or push the “SCAN” button
again.
To scan the preset stations: Touch the
“SCAN” switch on the screen or push the
“SCAN” button for longer than approximately
a second. “P. SCAN” appears on the screen.
The radio will tune in the next preset station,
stay there for a few seconds, and then move
to the next preset station. To select a station,
touch the “SCAN” switch or push the “SCAN”
button again.(d) Radio Data System
Your audio system is equipped with Radio
Data Systems (RDS). RDS mode provides
you to receive text messages from radio sta-
tions that utilize RDS transmitters.
When RDS is on, the radio can
— only select stations of a particular program
type,
— display messages from radio stations,
— search for a stronger signal station.
RDS features are available for the use only on
FM stations which broadcast RDS informa-
tion.
Page 133 of 173

123
“TYPE � �” switch
If the system receives no RDS stations, “NO
PTY” appears on the display.
Each time you touch the “TYPE �” or “TYPE
�” switch, the program type changes as in
the following:
�ROCK
�MISC (Miscellaneous)
�Inform (Information)
�Easy Lis (Easy listening)
�Cls/Jazz (Classical music and Jazz)
�R & B (Rhythm and Blues)
�Religion
�Alert (Emergency message)
“TYPE SEEK” switch
When a program is set, “TYPE SEEK” switch
appears. Touch the switch and the system
starts to seek the station in the relevant pro-
gram type.
If any type program station is not found,
“NOTHING” appears on the display.“MSG” (MESSAGE) switch
If the system receives a radio text from RDS
station, “MSG” appears on the display. Touch
the “MSG” switch, and a text message is dis-
played on the screen.
In case a text message is not accepted in a
screen, you can touch the “MSG” switch and
hold it to display the rest of the message.
When the system can show the station name,
“RDS” appears on the display. Each time you
touch the “MSG” switch, indication on the dis-
play changes from the band to the station
name, a radio text in this order. After six sec-
onds passes, indication returns to the band.
Page 137 of 173
127
NOTICE
Do not insert one disc stacked on top of
another one or feed them in continuous-
ly, to prevent discs from getting stuck in
the player.
�Ejecting a single disc alone:
1. Touch the disc number you want to
eject on the screen.
The selected disc number is highlighted in
green.
2. Push the “
” button for the compact
disc briefly.
At this time, the red indicators of the slot start
blinking. After the disc is ejected, the red indi-
cators change to green.
�Ejecting all the discs:
Push the “
” button for the compact
disc until you hear a beep.
The numbers of the trays where the compact
disc is not set are dimmed.