010BM±01
Z11554
Seal Lock Adhesive 01±4
± INTRODUCTIONREPAIR INSTRUCTION
1CD±FTV ENGINE REPAIR MANUAL (RM927E)
REPAIR INSTRUCTION
PRECAUTION
1. TO PREVENT FROM ENTERING FOREIGN SUBSTANCES.
(a) When foreign substances such as dust, grain of sand or metallic dust enter inside of engine, it often
causes functional failure of the engine.
(1) Precaution before disassembly.
�Remove adequately all sand and mud adhere to the outside of engine .
(2) Precaution at reassembly.
�Protect disassembled parts from dust by using vinyl sheet to cover.
2. TO PREVENT SCRATCHES ON THE PARTS.
(a) The existence of scratches on the contact and revolving surfaces often causes oil leak and seisure.
(1) Precautions at disassembly and reassembly.
�When disassemble the contact surface of the parts, use plastic hummer striking lightly. (Do
not pry out by screwdriver).
�When fix the parts to the vise, do not directly catch it in the vise. Fix the parts through alumi-
num bar.
3. TO CLEAN AND WASH THE PARTS.
(a) Each parts needs to be well cleaned, washed, and dried by air, and apply specified oil before reas-
sembly.
(1) Cleaning and washing by alkaline solvent is prohibited:
�Parts made of aluminum and rubber. (ex. cylinder head cover gasket etc.)
(2) Cleaning and washing by flushing oil (ex. kerosene, white gasoline etc.) is prohibited:
�Parts made of rubber. (ex. cylinder head cover gasket etc.)
4. POSITION AND DIRECTION OF EACH PARTS.
(a) Each parts needs to be reassembled as the same position and direction as it disassembled.
(1) Precautions at disassembly and reassembly.
�Follow the directions when the manual designates to mark the matchmark and/or direction
mark.
�Disassembled parts needs to be put in order as disassembled, not to change position and/
or direction.
�Follow the directions when the manual instructs the position and direction.
5. INSTALL ENGINE ASSEMBLY TO OVERHAUL STAND WHEN OVERHAUL THE ENGINE.
6. PUT THE DISASSEMBLED PARTS IN ORDER AS THEY DISASSEMBLED.
7. APPLY ENGINE OIL TO THE SLIDING AND ROTATING SURFACES.
8. NON±REUSABLE PARTS SUCH AS GASKET AND SEAL NEEDS TO BE CHANGED TO THE NEW
PARTS.
9. BASIC REPAIR HINT
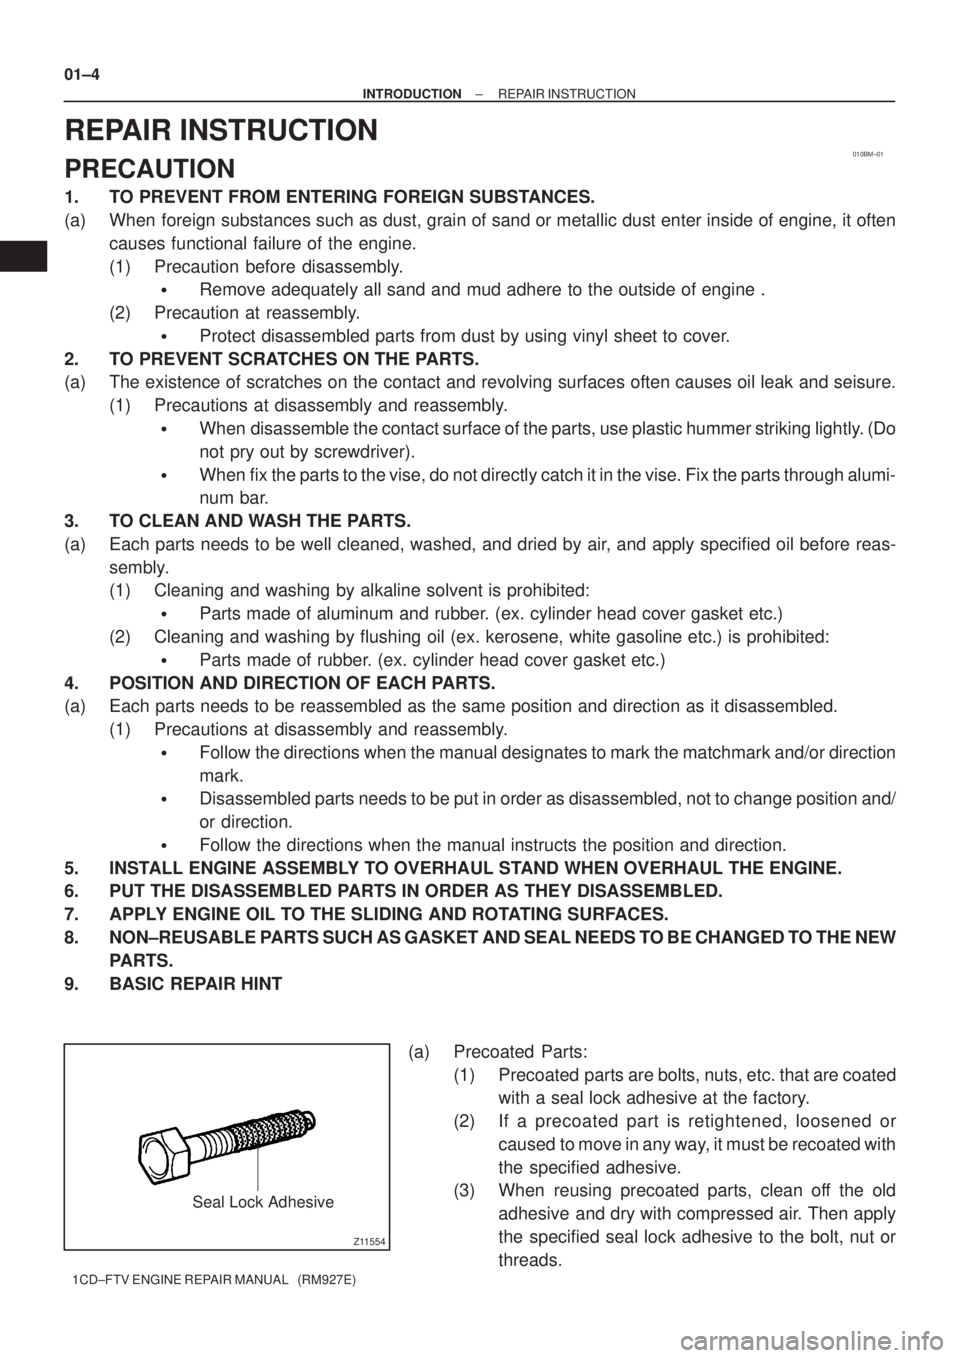
(a) Precoated Parts:
(1) Precoated parts are bolts, nuts, etc. that are coated
with a seal lock adhesive at the factory.
(2) If a precoated part is retightened, loosened or
caused to move in any way, it must be recoated with
the specified adhesive.
(3) When reusing precoated parts, clean off the old
adhesive and dry with compressed air. Then apply
the specified seal lock adhesive to the bolt, nut or
threads.
B09793
Convex
Concave
B08249
Upward
B08253
± ENGINE MECHANICALPARTIAL ENGINE ASSY (1CD±FTV)
14±19
1CD±FTV ENGINE REPAIR MANUAL (RM927E)
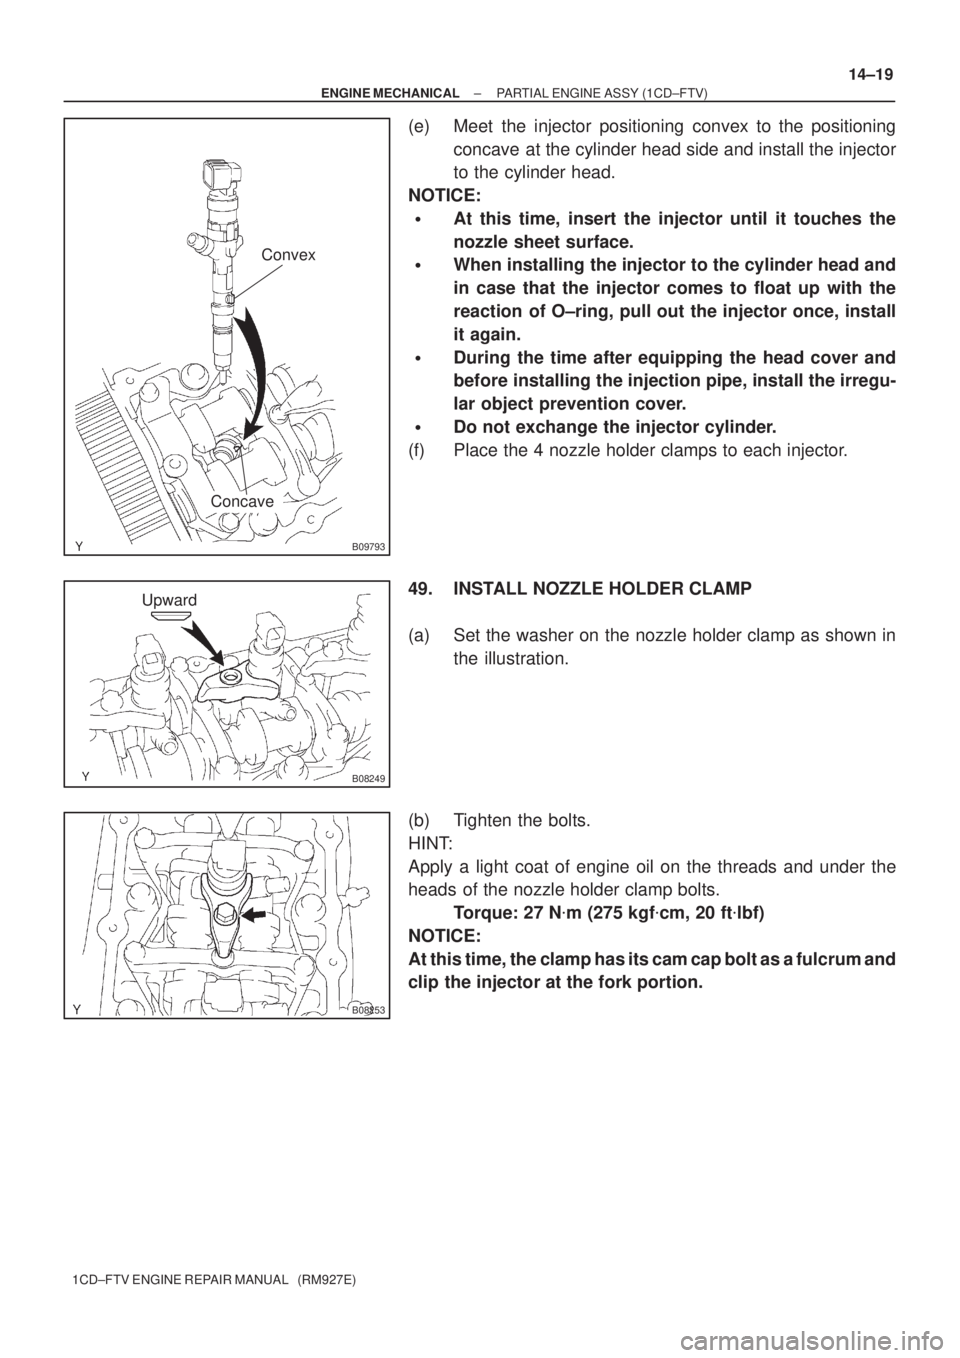
(e) Meet the injector positioning convex to the positioning
concave at the cylinder head side and install the injector
to the cylinder head.
NOTICE:
�At this time, insert the injector until it touches the
nozzle sheet surface.
�When installing the injector to the cylinder head and
in case that the injector comes to float up with the
reaction of O±ring, pull out the injector once, install
it again.
�During the time after equipping the head cover and
before installing the injection pipe, install the irregu-
lar object prevention cover.
�Do not exchange the injector cylinder.
(f) Place the 4 nozzle holder clamps to each injector.
49. INSTALL NOZZLE HOLDER CLAMP
(a) Set the washer on the nozzle holder clamp as shown in
the illustration.
(b) Tighten the bolts.
HINT:
Apply a light coat of engine oil on the threads and under the
heads of the nozzle holder clamp bolts.
Torque: 27 N�m (275 kgf�cm, 20 ft�lbf)
NOTICE:
At this time, the clamp has its cam cap bolt as a fulcrum and
clip the injector at the fork portion.