Page 9 of 491

6
Safety precautions when driving !Seatbelt and SRS airbag
"All persons in the vehicle should fasten their
seatbelts BEFORE the vehicle starts to move.
Otherwise, the possibility of serious injury be-
comes greater in the event of a sudden stop or
accident. " To obtain maximum protection in the event of
an accident, the driver and all passengers in the
vehicle should always wear seatbelts when the
vehicle is moving. The SRS (Supplemental Re-
straint System) airbag does not do away with
the need to fasten seatbelts. In combination
with the seatbelts, it offers the best combined
protection in case of a serious accident.
Not wearing a seatbelt increases the chance of
severe injury or death in a crash even when the
car has the SRS airbag. " The SRS airbags deploy with considerable
speed and force. Occupants who are out of
proper position when the SRS airbag deploys
could suffer very serious injuries. Because the
SRS airbag needs enough space for deploy-
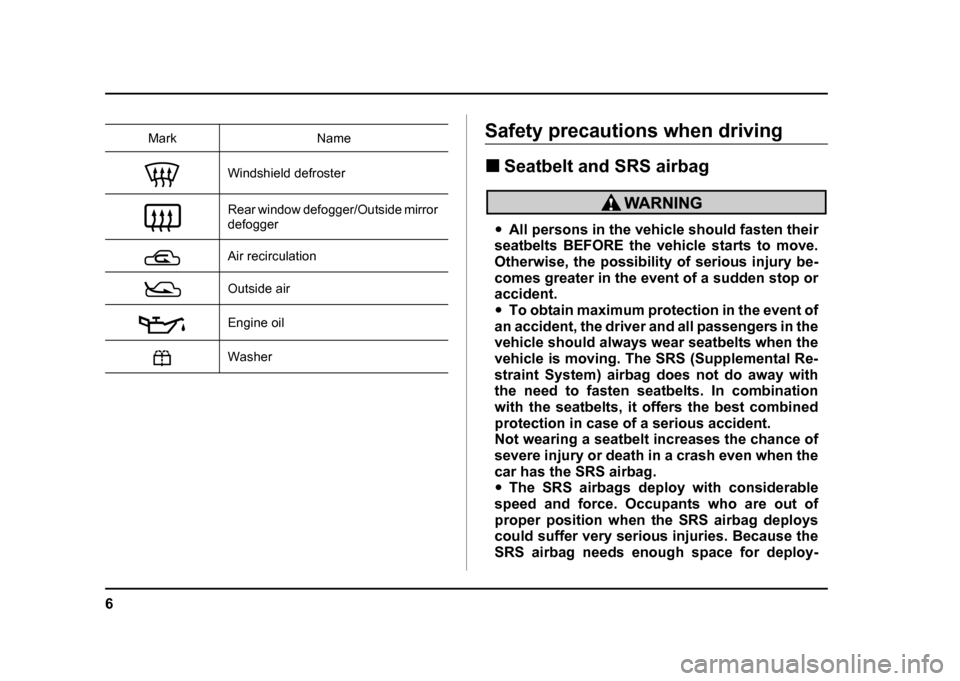
Windshield defroster
Rear window defogger/Outside mirror
defogger
Air recirculation
Outside air
Engine oilWasher
Mark Name
Page 21 of 491
18
!
Instrument panel
12345 6
7
8
9
11
12
13
14
15
16 10
UGF056BB
1) Door locks (page 2-3)
2) Light control lever (page 3-29)
3) Combination meter (page 3-15)
4) Wiper control lever (page 3-35)
5) Hazard warning flasher switch
(page 3-6)
6) Audio (page 5-1)
7) Gear shift lever (MT) (page 7- 15)/Selector lever (AT) (page 7-
21)
8) Outside mirror switch (page 3-
48)
9) Climate control (page 4-1)
10) Cruise control (page 7-37)
11) Horn (page 3-50)
12) SRS airbag (page 1-52)
13) Tilt steering (page 3-49)
14) Fuse box (page 11-60)
15) Hood lock release (page 11-5)
16) Power window (page 2-22)
Page 85 of 491
1-58
Seat, seatbelt and SRS airbags
avoid injuries that can result when the SRS air-
bag contacts an occupant not in proper posi-
tion such as one thrown toward the front of the
car during pre-accident braking.
Do not put any objects over the steering wheel
pad and dashboard. If the SRS frontal airbag
deploys, those objects could interfere with its
proper operation and could be propelled inside
the vehicle and cause injury.
Do not attach accessories to the windshield, or
fit an extra-wide mirror over the rear view mir-
ror. If the SRS airbag deploys, those objects
could become projectiles that could seriously
injure vehicle occupants.
UG1513BA
UG1514BA
Page 139 of 491

3-2
Instruments and controls
Daytime running light system (except U.S. spec. WRX-STi) .............................................. 3-31
Turn signal lever ........................................... 3-31
Illumination brightness control ................... 3-32
Illumination brightness control (WRX-STi) 3-33
Headlight beam leveler (U.S. spec. WRX-STi) ................................ 3-33
Parking light switch ..................................... 3-34
Fog light switch (if equipped) ..................... 3-35
Wiper and washer ......................................... 3-35 Windshield wiper and washer switches ......... 3-37
Rear window wiper and washer switch – Wagon .......................................................... 3-39
Rear window defogger switch ..................... 3-40
Windshield wiper deicer (if equipped) ....... 3-42
Intercooler water spray switch (WRX-STi) . 3-43
Mirrors ........................................................... 3-44 Inside mirror ...................................................... 3-44
Outside mirrors ................................................. 3-47
Tilt steering wheel ........................................ 3-49
Horn ............................................................... 3-50
Page 178 of 491
3-41
Instruments and controls
– CONTINUED –
Semi-automatic climate control system
To turn on the defogger, push the switch. To turn it off,
push the switch again.
The indicator light located on the switch lights up while
the rear window defogger is operating.
NOTE
If your vehicle is equipped with the outside mirror
defogger, the outside mirror defogger operates
while the rear window defogger is operating.
" Do not use sharp instruments or window cleaner containing abrasives to clean the inner
surface of the rear window. They may damage
the conductors printed on the window."
To prevent the battery from being dis-
charged, do not operate the defogger continu-
ously for any longer than necessary.
UG3035BA
Page 179 of 491

3-42
Instruments and controls
Windshield wiper deicer (if equipped)
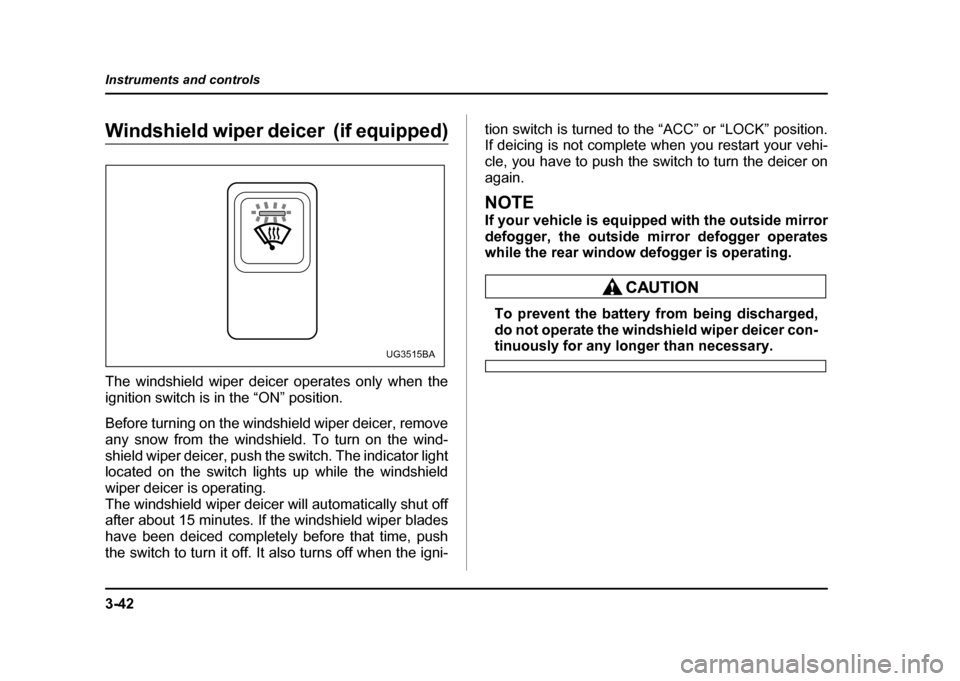
The windshield wiper deicer operates only when the
ignition switch is in the “ON” position.
Before turning on the windshield wiper deicer, remove
any snow from the windshield. To turn on the wind-
shield wiper deicer, push the switch. The indicator light
located on the switch lights up while the windshield
wiper deicer is operating.
The windshield wiper deicer will automatically shut off
after about 15 minutes. If the windshield wiper blades
have been deiced completely before that time, push
the switch to turn it off. It also turns off when the igni-
tion switch is turned to the “ACC” or “LOCK” position.
If deicing is not complete when you restart your vehi-
cle, you have to push the switch to turn the deicer on
again.
NOTE
If your vehicle is equipped with the outside mirror
defogger, the outside mirror defogger operates
while the rear window defogger is operating.
To prevent the battery from being discharged,
do not operate the windshield wiper deicer con-
tinuously for any longer than necessary.UG3515BA
Page 181 of 491
3-44
Instruments and controls
Do not press the switch when the warning light
is illuminated. If the switch is kept pressed
when the tank is short of water, the water pump
motor could overheat.
Mirrors
Always check that the inside and outside mirrors are
properly adjusted before you start driving. !
Inside mirror
1) Tab
The inside mirror has a day and night position. Pull the
tab at the bottom of the mirror toward you for the night
position. Push it away for the day position. The night
position reduces glare from headlights.
1HS3036BB
Page 182 of 491

3-45
Instruments and controls
– CONTINUED –
!Auto-dimming mirror/compass (if equipped)
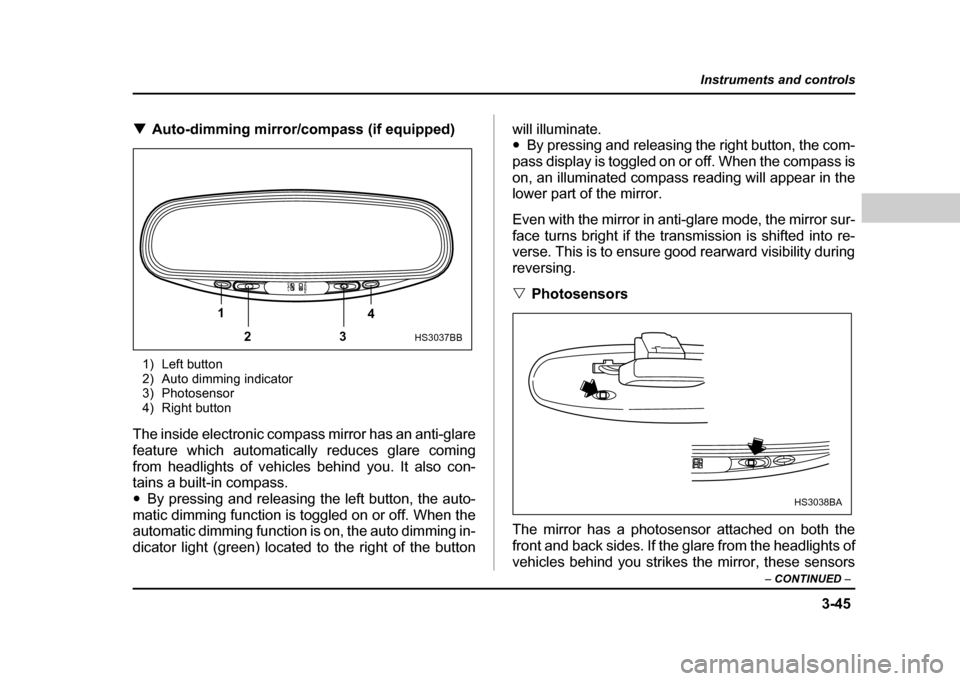
1) Left button
2) Auto dimming indicator
3) Photosensor
4) Right button
The inside electronic compass mirror has an anti-glare
feature which automatically reduces glare coming
from headlights of vehicles behind you. It also con-
tains a built-in compass." By pressing and releasing the left button, the auto-
matic dimming function is toggled on or off. When the
automatic dimming function is on, the auto dimming in-
dicator light (green) located to the right of the button will illuminate. "
By pressing and releasing the right button, the com-
pass display is toggled on or off. When the compass is
on, an illuminated compass reading will appear in the
lower part of the mirror.
Even with the mirror in anti-glare mode, the mirror sur-
face turns bright if the transmission is shifted into re-
verse. This is to ensure good rearward visibility during reversing. " Photosensors
The mirror has a photosensor attached on both the
front and back sides. If the glare from the headlights of
vehicles behind you strikes the mirror, these sensors
1 23 4
HS3037BB
HS3038BA