Page 435 of 491

11 - 5 0
Maintenance and service
!
Tire rotation
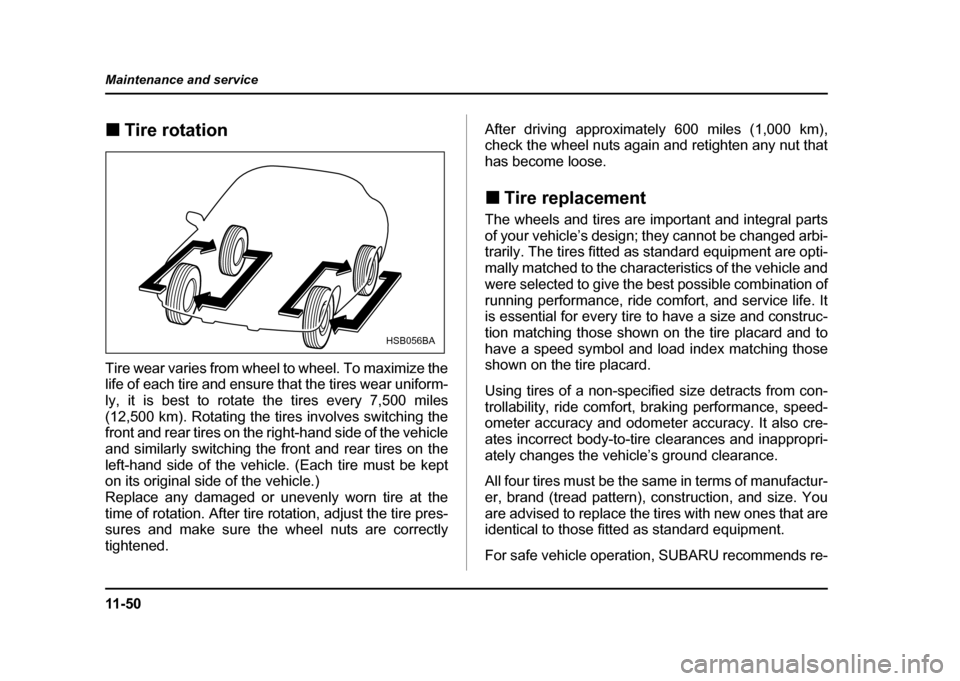
Tire wear varies from wheel to wheel. To maximize the
life of each tire and ensure that the tires wear uniform-
ly, it is best to rotate the tires every 7,500 miles
(12,500 km). Rotating the tires involves switching the
front and rear tires on the right-hand side of the vehicle
and similarly switching the front and rear tires on the
left-hand side of the vehicle. (Each tire must be kept
on its original side of the vehicle.)
Replace any damaged or unevenly worn tire at the
time of rotation. After tire rotation, adjust the tire pres-
sures and make sure the wheel nuts are correctly
tightened. After driving approximately 600 miles (1,000 km),
check the wheel nuts again and retighten any nut that
has become loose. !
Tire replacement
The wheels and tires are important and integral parts
of your vehicle’s design; they cannot be changed arbi-
trarily. The tires fitted as standard equipment are opti-
mally matched to the characteristics of the vehicle and
were selected to give the best possible combination of
running performance, ride comfort, and service life. It
is essential for every tire to have a size and construc-
tion matching those shown on the tire placard and to
have a speed symbol and load index matching those
shown on the tire placard.
Using tires of a non-specified size detracts from con-
trollability, ride comfort, braking performance, speed-
ometer accuracy and odometer accuracy. It also cre-
ates incorrect body-to-tire clearances and inappropri-
ately changes the vehicle’s ground clearance.
All four tires must be the same in terms of manufactur-
er, brand (tread pattern), construction, and size. You
are advised to replace the tires with new ones that are
identical to those fitted as standard equipment.
For safe vehicle operation, SUBARU recommends re-
HSB056BA
Page 436 of 491

11 -5 1
Maintenance and service
– CONTINUED –
placing all four tires at the same time.
NOTE
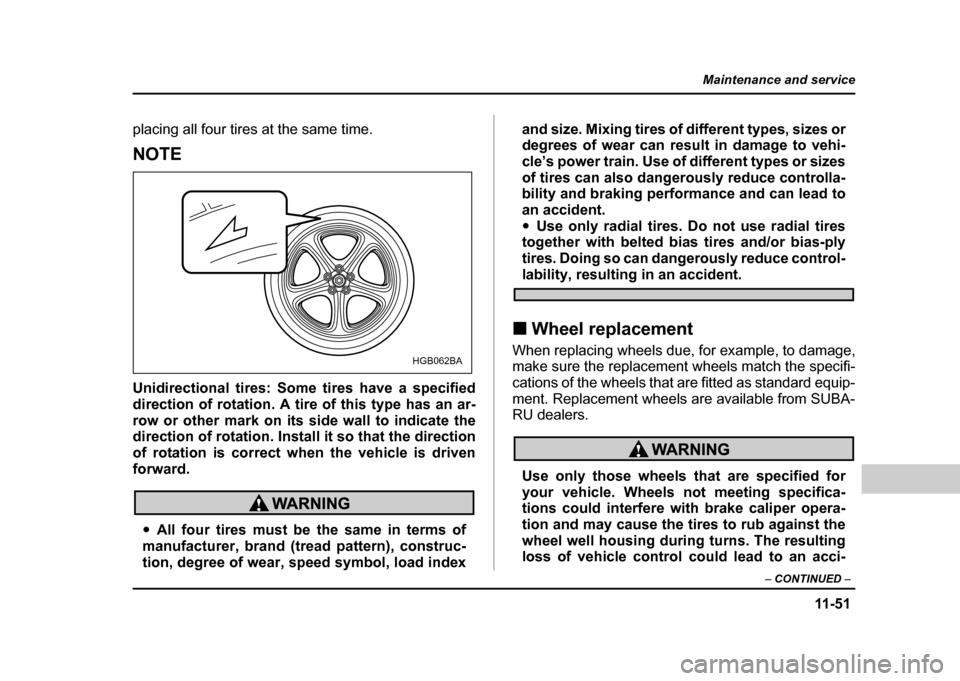
Unidirectional tires: Some tires have a specified
direction of rotation. A tire of this type has an ar-
row or other mark on its side wall to indicate the
direction of rotation. Install it so that the direction
of rotation is correct when the vehicle is drivenforward.
"All four tires must be the same in terms of
manufacturer, brand (tread pattern), construc-
tion, degree of wear, speed symbol, load index and size. Mixing tires of different types, sizes or
degrees of wear can result in damage to vehi-
cle’s power train. Use of different types or sizes
of tires can also dangerously reduce controlla-
bility and braking performance and can lead to
an accident."
Use only radial tires. Do not use radial tires
together with belted bias tires and/or bias-ply
tires. Doing so can dangerously reduce control-
lability, resulting in an accident.
! Wheel replacement
When replacing wheels due, for example, to damage,
make sure the replacement wheels match the specifi-
cations of the wheels that are fitted as standard equip-
ment. Replacement wheels are available from SUBA-
RU dealers.
Use only those wheels that are specified for
your vehicle. Wheels not meeting specifica-
tions could interfere with brake caliper opera-
tion and may cause the tires to rub against the
wheel well housing during turns. The resulting
loss of vehicle control could lead to an acci-
HGB062BA
Page 437 of 491
11 - 5 2
Maintenance and service
dent.
! Wheel covers
! Removing the wheel cover
Insert the wheel cover remover into the notch provid-
ed, and pry the wheel cover off. !
Installing the wheel cover
Align the valve with the valve hole in the cover, then fit
the cover on the wheel by tapping your hand evenly
around the circumference of the cover.
NOTE
When any of the wheels is removed and replaced
for tire rotation or to change a flat tire, always
check the tightness of the wheel nuts after driving
approximately 600 miles (1,000 km). If any nut is
loose, tighten it to the specified torque.UG9506BA
UGB512BA
Page 438 of 491

11 -5 3
Maintenance and service
– CONTINUED –
Aluminum wheels (If equipped)
Aluminum wheels can be scratched and damaged
easily. Handle them carefully to maintain their appear-
ance, performance, and safety. "When any of the wheels is removed and replaced
for tire rotation or to change a flat, always check the
tightness of the wheel nuts after driving approximately
600 miles (1,000 km). If any nut is loose, tighten it to
the specified torque. " Never apply oil to the threaded parts, wheel nuts, or
tapered surface of the wheel. " Never let the wheel rub against sharp protrusions or
curbs." Be sure to fit tire chains on uniformly and completely
around the tire, otherwise the chains may scratch the
wheel. " When wheel nuts, balance weights, or the center
cap is replaced, be sure to replace them with genuine
SUBARU parts designed for aluminum wheels.Intercooler water spray
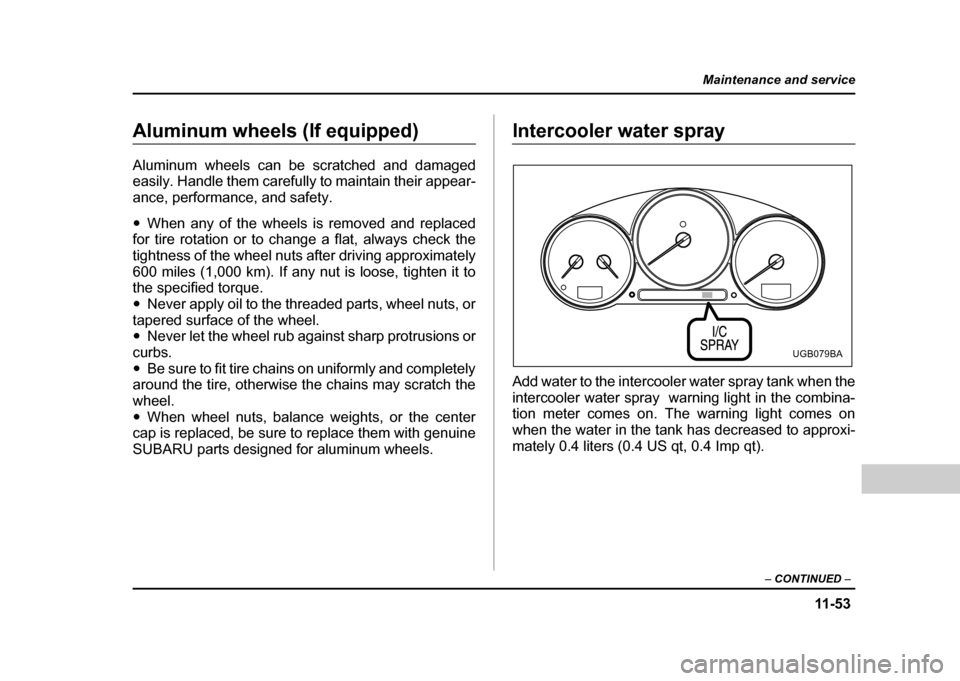
Add water to the intercooler water spray tank when the
intercooler water spray warning light in the combina-
tion meter comes on. The warning light comes on
when the water in the tank has decreased to approxi-
mately 0.4 liters (0.4 US qt, 0.4 Imp qt).
UGB079BA
Page 439 of 491
11 - 5 4
Maintenance and service
The tank is located on the right-hand side of the trunk.
NOTE "
Use only pure water for refilling.
" In cold weather (when you do not use the inter-
cooler water spray), keep the tank half-empty in
case the water freezes. A larger amount of water
could break the tank if it froze.
Windshield washer fluid
Check the level of the washer fluid at each fuel stop. If
the level is low, fill the fluid up to the neck of the reser- voir.
Use windshield washer fluid. If windshield washer fluid
is unavailable use clean water.
In areas where water freezes in winter, use an anti-
freeze type windshield washer fluid. SUBARU Wind-
shield Washer Fluid contains 58.5% methyl alcohol
and 41.5% surfactant, by volume. Its freezing temper-
ature varies according to how much it is diluted, as in-
dicated below.
UGB514BA
HGB056IA
Page 440 of 491

11 -5 5
Maintenance and service
– CONTINUED –
Never use engine coolant as washer fluid be-cause it could cause paint damage. Replacement of windshield wiper
blades
Grease, wax, insects, or other material on the wind-
shield or the wiper blade results in jerky wiper opera-
tion and streaking on the glass. If you cannot remove
the streaks after operating the windshield washer or if
the wiper operation is jerky, clean the outer surface of
the windshield (or rear window) and the wiper blades
using a sponge or soft cloth with a neutral detergent or
mild-abrasive cleaner. After cleaning, rinse the wind-
shield and wiper blades with clean water. The wind-
shield is clean if beads do not form when you rinse the
windshield with water.
Do not clean the wiper blades with gasoline or
a solvent, such as paint thinner or benzene.
This will cause deterioration of the wiper
blades.
If you cannot eliminate the streaking even after follow-
ing this method, replace the wiper blades using the fol-
lowing procedures:
1. Raise the wiper arm off the windshield.
Washer Fluid Concentration Freezing Temperature
30% 10.4 °F (–12 °C)
50% –4 °F (–20 °C)
100% –49 °F (–45 °C)
Page 441 of 491
11 - 5 6
Maintenance and service
1) Stopper
2. Remove the wiper blade assembly by holding its
pivot area and pushing it in the direction shown by the
arrow while depressing the wiper blade stopper. 1) Metal support
3. Grasp the locked end of the blade rubber assembly
and pull it firmly until the stoppers on the rubber are
free of the metal support.
1
HSB058CB
1
HSB059BB
Page 442 of 491
11 -5 7
Maintenance and service
– CONTINUED –
1) Metal spines
4. If the new blade rubber is not provided with two
metal spines, remove the metal spines from the old
blade rubber and install them in the new blade rubber. 5. Align the claws of the metal support with the
grooves in the rubber and slide the blade rubber as-
sembly into the metal support until it locks.
1
HSB060BBHSB061BA