Page 118 of 491

2-15
Keys and doors
– CONTINUED –
breaking glass or forced entry). Note that there are two
alarm levels for shock: warning and alarm. In warning
mode, the alarm detects lower level vibrations and
triggers 2 warning chirps on the horn and two flashes
on the lights as a deterrent to would be vandals. In
alarm mode, higher levels of shock are detected and
the system will go into full alarm. "Ignition switch being turned on while in armed state.
NOTE
With the valet mode selected, the security system
does not operate when the remote transmitter is
used for locking and unlocking. The security sys-
tem indicator light in the combination meter flash-
es twice per second to show that the valet mode is
selected. For details, refer to “Valet mode” in this
section. ! Arming the system
! To arm the system using remote transmitter
1. Close all windows.
2. Remove the key from the ignition switch.
3. Open the doors and get out of the vehicle.
4. Make sure that the engine hood (and the trunk lid)
are locked.
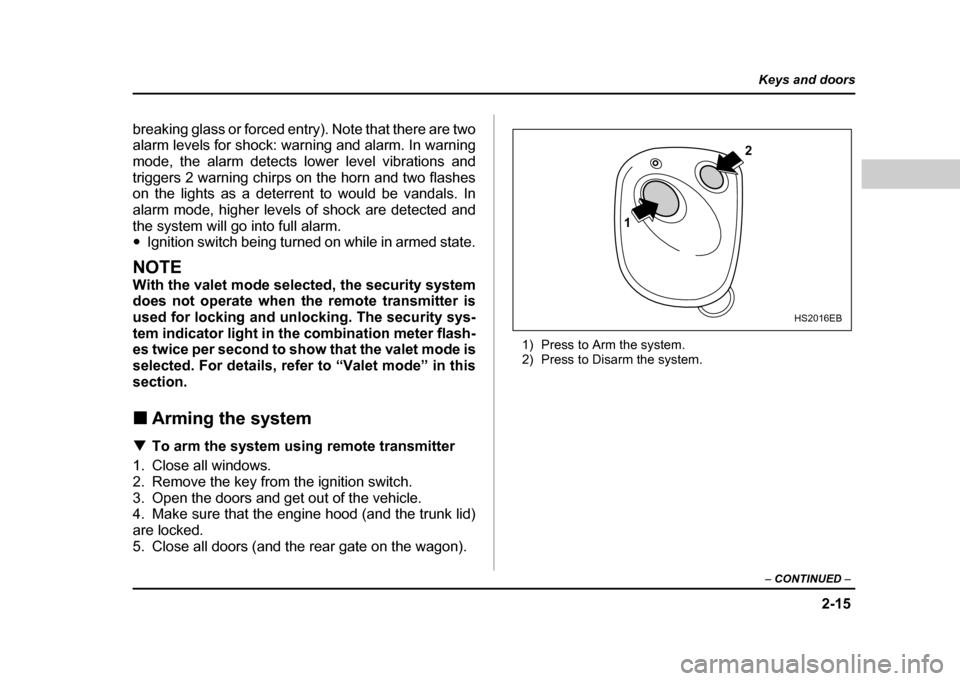
5. Close all doors (and the rear gate on the wagon). 1) Press to Arm the system.
2) Press to Disarm the system.
1
2
HS2016EB
Page 119 of 491

2-16
Keys and doors
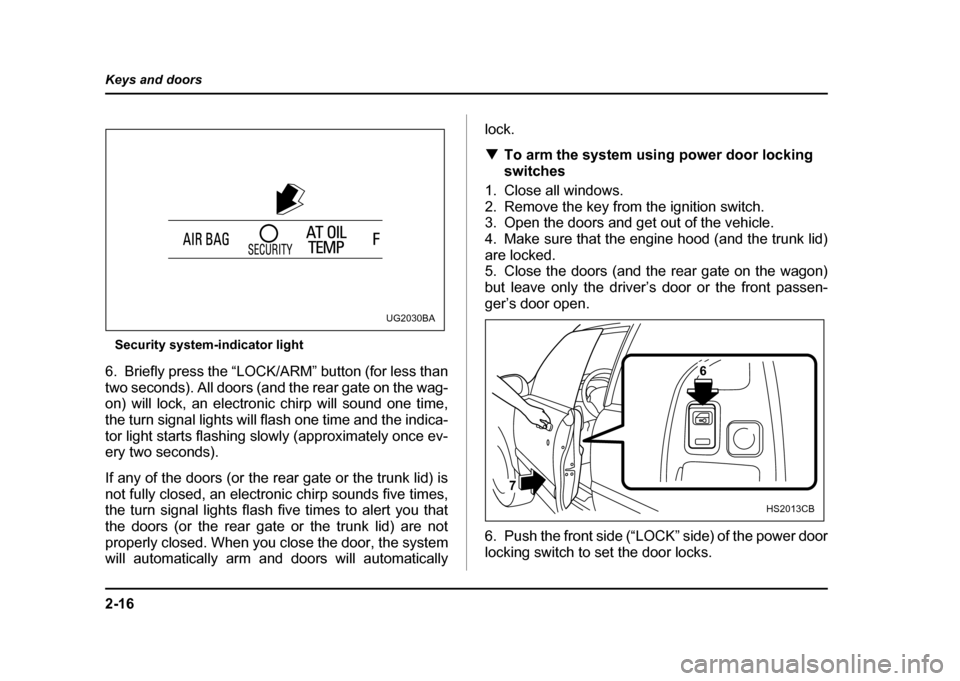
Security system-indicator light
6. Briefly press the “LOCK/ARM” button (for less than
two seconds). All doors (and the rear gate on the wag-
on) will lock, an electronic chirp will sound one time,
the turn signal lights will flash one time and the indica-
tor light starts flashing slowly (approximately once ev-
ery two seconds).
If any of the doors (or the rear gate or the trunk lid) is
not fully closed, an electronic chirp sounds five times,
the turn signal lights flash five times to alert you that
the doors (or the rear gate or the trunk lid) are not
properly closed. When you close the door, the system
will automatically arm and doors will automatically lock. !
To arm the system using power door locking
switches
1. Close all windows.
2. Remove the key from the ignition switch.
3. Open the doors and get out of the vehicle.
4. Make sure that the engine hood (and the trunk lid)
are locked.
5. Close the doors (and the rear gate on the wagon)
but leave only the driver’s door or the front passen-
ger’s door open.
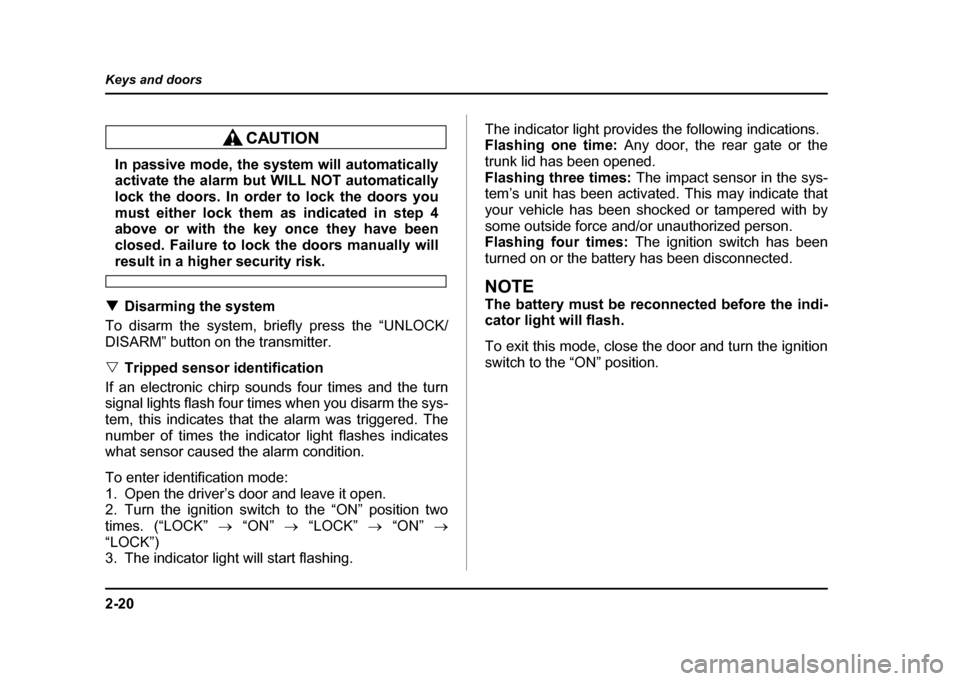
6. Push the front side (“LOCK” side) of the power door
locking switch to set the door locks.
UG2030BA
6
7
HS2013CB
Page 123 of 491

2-20
Keys and doors
In passive mode, the system will automatically
activate the alarm but WILL NOT automatically
lock the doors. In order to lock the doors you
must either lock them as indicated in step 4
above or with the key once they have been
closed. Failure to lock the doors manually will
result in a higher security risk.
! Disarming the system
To disarm the system, briefly press the “UNLOCK/
DISARM” button on the transmitter. " Tripped sensor identification
If an electronic chirp sounds four times and the turn
signal lights flash four times when you disarm the sys-
tem, this indicates that the alarm was triggered. The
number of times the indicator light flashes indicates
what sensor caused the alarm condition.
To enter identification mode:
1. Open the driver’s door and leave it open.
2. Turn the ignition switch to the “ON” position twotimes. (“LOCK” → “ON” → “LOCK” → “ON” →
“LOCK”)
3. The indicator light will start flashing. The indicator light provides the following indications.
Flashing one time:
Any door, the rear gate or the
trunk lid has been opened.
Flashing three times: The impact sensor in the sys-
tem’s unit has been activated. This may indicate that
your vehicle has been shocked or tampered with by
some outside force and/or unauthorized person.
Flashing four times: The ignition switch has been
turned on or the battery has been disconnected.
NOTE
The battery must be reconnected before the indi-
cator light will flash.
To exit this mode, close the door and turn the ignition
switch to the “ON” position.
Page 128 of 491
2-25
Keys and doors
– CONTINUED –
Trunk lid (Sedan)
"To prevent dangerous exhaust gas from en-
tering the vehicle, always keep the trunk lid
closed while driving." Help prevent young children from locking
themselves in the trunk. When leaving the vehi-
cle, either close all windows and lock all doors
or cancel the inside trunk lid release. Also make
certain that the trunk is closed.
On hot or sunny days, the temperature in the
trunk could quickly become high enough to
cause death or serious heat-related injuries in-
cluding brain damage, particularly for small
children. !
To open and close the trunk lid from
outside
To open the trunk lid from outside, insert the key and
turn it clockwise.
To close the trunk lid, lightly press the trunk lid down
until the latch engages.
UG2505BA
Page 129 of 491
2-26
Keys and doors
!
To open the trunk lid from inside
1) Open
Pull the trunk lid release lever upward. !
To cancel the trunk lid release
The inside trunk lid release can be cancelled to help
prevent unauthorized entry into the trunk. To cancel
the trunk lid release, set the lid release cancel lever
(located on the inside of the trunk lid, mounted to the
trunk lid latch) to the “CANCEL” position. When this
lock is in the “CANCEL” position, the trunk can be
opened only with the key. ! Internal trunk lid release handle
The internal trunk lid release handle is a device de-
signed to open the trunk lid from inside the trunk. In the
event children or adults become locked inside the
1
UG2511BBUG2506BA
Page 130 of 491

2-27
Keys and doors
– CONTINUED –
trunk, the handle allows them to open the lid. The han-
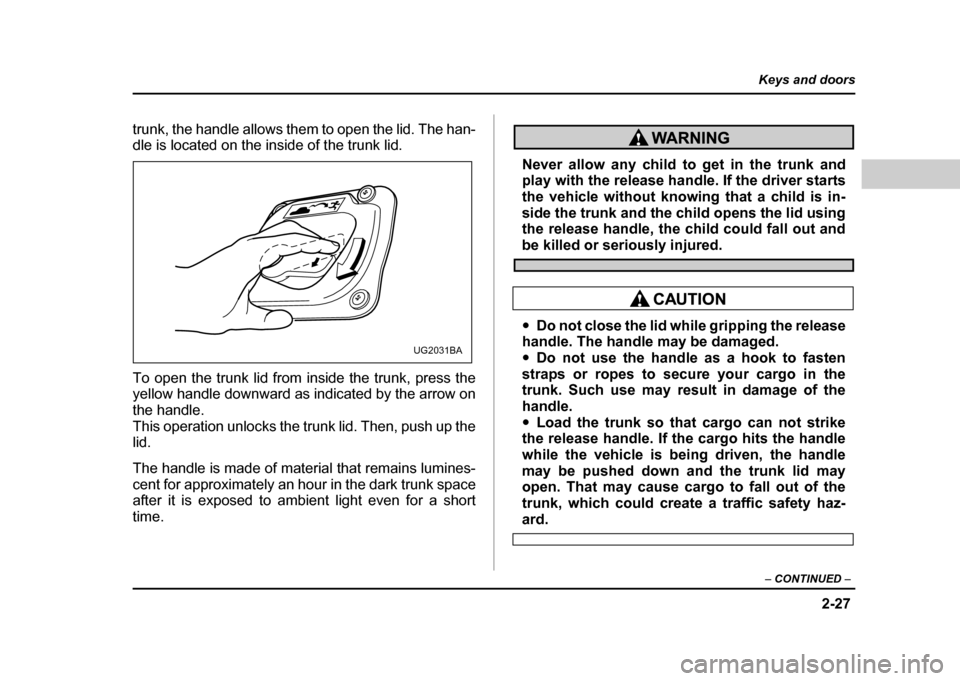
dle is located on the inside of the trunk lid.
To open the trunk lid from inside the trunk, press the
yellow handle downward as indicated by the arrow on
the handle.
This operation unlocks the trunk lid. Then, push up the
lid.
The handle is made of material that remains lumines-
cent for approximately an hour in the dark trunk space
after it is exposed to ambient light even for a short time.
Never allow any child to get in the trunk and
play with the release handle. If the driver starts
the vehicle without knowing that a child is in-
side the trunk and the child opens the lid using
the release handle, the child could fall out and
be killed or seriously injured.
"Do not close the lid while gripping the release
handle. The handle may be damaged. " Do not use the handle as a hook to fasten
straps or ropes to secure your cargo in the
trunk. Such use may result in damage of the
handle. " Load the trunk so that cargo can not strike
the release handle. If the cargo hits the handle
while the vehicle is being driven, the handle
may be pushed down and the trunk lid may
open. That may cause cargo to fall out of the
trunk, which could create a traffic safety haz-
ard.
UG2031BA
Page 131 of 491
2-28
Keys and doors
!
Inspection
Perform the following steps at least twice a year to
check the release handle for correct operation.
1. Open the trunk lid.
2. Use a screwdriver with a thin blade. Slide the
screwdriver blade from the slit aperture of the lock as-
sembly fully to the end until you hear a click. This places the latch in the locked position.
UG2032BA
UG2033BA
UG2034BA
Page 132 of 491
2-29
Keys and doors
– CONTINUED –
3. Move the release handle, from outside the vehicle,
in the direction of the arrow to check if the latch is re-
leased.
If the latch is not released, contact your SUBARU
dealer.
In that case, use the key to release the latch, then
close the trunk lid.
Also, if the movements of the release handle feel re-
stricted or not entirely smooth during operation, or the
handle and/or handle base is cracked, contact your
SUBARU dealer.Rear gate (Wagon)
The rear gate can be locked and unlocked using either
the keyless entry system or the power door lockingswitches.
Refer to the “Power door locking switches” and “Re-
mote keyless entry system” sections in this chapter.
To open the rear gate, first unlock the rear gate lock
then pull the outside handle up.
Then, hold the rear gate and raise it as high as it willgo.
UG2507BA