Page 102 of 491

1-75
Seat, seatbelt and SRS airbags
– CONTINUED –
with SRS side airbags only) "Replacement of seat fabric or leather (for
vehicles with SRS side airbags only) " Installation of additional fabric or leather
on the front seat (for vehicles with SRS side
airbags only)
" Installation of additional electrical/electronic
equipment such as a mobile two-way radio on
or near the SRS airbag system components
and/or wiring is not advisable. This could inter-
fere with proper operation of the SRS airbag
system.
Do not perform any of the following modifica-
tions. Such modifications can interfere with
proper operation of the SRS airbag system." Attachment of any equipment (brush bar,
winches, snow plow, skid plate, etc.) other than
SUBARU genuine accessory parts to the front
end. " Modification of the suspension system or
front end structure. " Installation of a tire of different size and con-
struction from the tires specified on the tire placard attached to the driver’s door jamb. "
Attachment of any equipment (side steps or
side sill protectors, etc.) other than SUBARU
genuine accessory parts to the side body (for
vehicles with side airbags only).
Always consult your SUBARU dealer if you want to in-
stall any accessory parts to your vehicle.
Page 110 of 491

2-7
Keys and doors
– CONTINUED –
tions. Range may be reduced near sources of RF in-
terference such as power plants and radio/television
broadcasting towers.
The remote keyless entry system does not operate
when the key is inserted in the ignition switch to pre-
vent accidental lockout.
"Do not expose the transmitter to severe
shocks, such as those experienced as a result
of dropping or throwing." Do not take the transmitter apart except when
replacing the battery." Do not get the transmitter wet. If it gets wet,
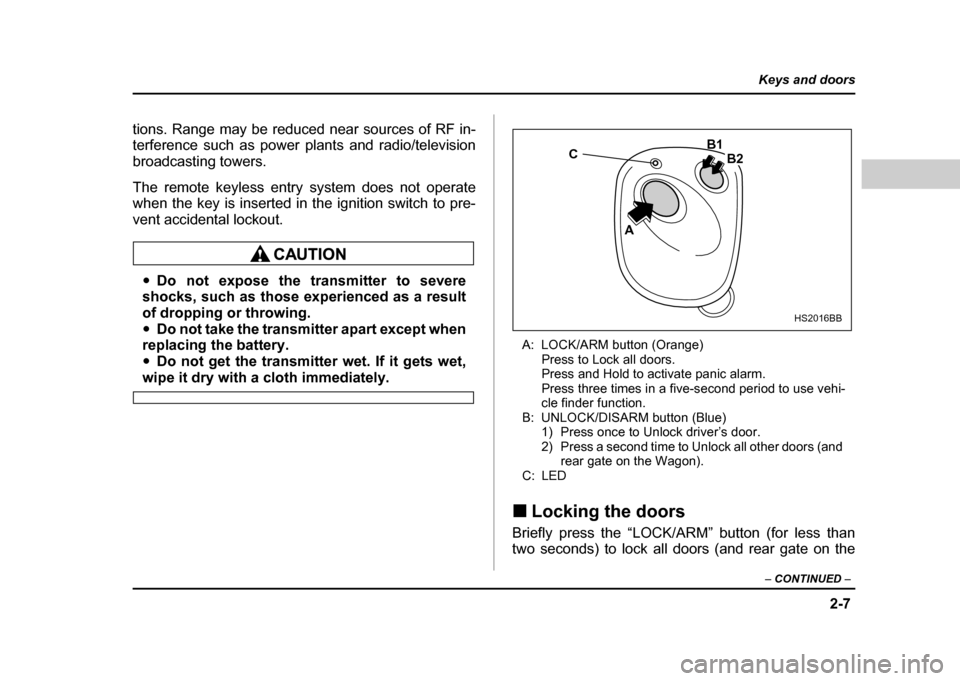
wipe it dry with a cloth immediately. A: LOCK/ARM button (Orange)
Press to Lock all doors.
Press and Hold to activate panic alarm.
Press three times in a five-second period to use vehi-
cle finder function.
B: UNLOCK/DISARM button (Blue) 1) Press once to Unlock driver’s door.
2) Press a second time to Unlock all other doors (and rear gate on the Wagon).
C: LED
! Locking the doors
Briefly press the “LOCK/ARM” button (for less than
two seconds) to lock all doors (and rear gate on the
C
A B1
B2
HS2016BB
Page 141 of 491

3-4
Instruments and controls
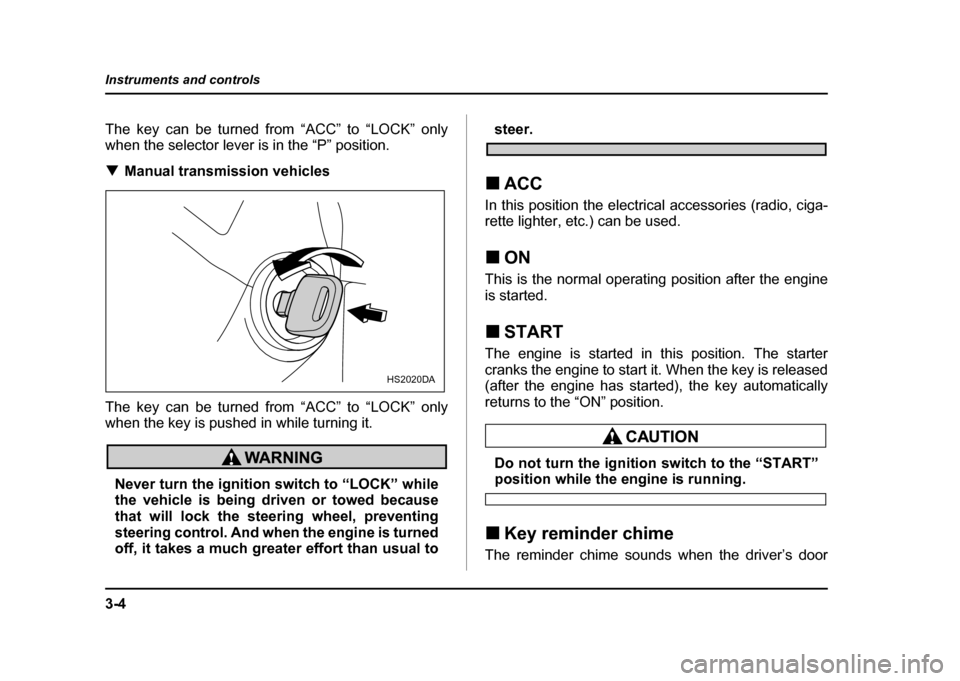
The key can be turned from “ACC” to “LOCK” only
when the selector lever is in the “P” position. !
Manual transmission vehicles
The key can be turned from “ACC” to “LOCK” only
when the key is pushed in while turning it.
Never turn the ignition switch to “LOCK” while
the vehicle is being driven or towed because
that will lock the steering wheel, preventing
steering control. And when the engine is turned
off, it takes a much greater effort than usual to
steer.
! ACC
In this position the electrical accessories (radio, ciga-
rette lighter, etc.) can be used. ! ON
This is the normal operating position after the engine
is started. ! START
The engine is started in this position. The starter
cranks the engine to start it. When the key is released
(after the engine has started), the key automatically
returns to the “ON” position.
Do not turn the ignition switch to the “START”position while the engine is running.
! Key reminder chime
The reminder chime sounds when the driver’s door
HS2020DA
Page 165 of 491
3-28
Instruments and controls
Clock
1) “S” button
2) “H” button
3) “M” button
To set the hour, press the “H” button. To set the min-
utes, press the “M” button. To reset the minutes the
“00” with a radio time signal, push the “S” button.
To ensure safety, do not attempt to set the time
while driving, as an accident from inadequate
attention to the road could result.
1 2
3
UG3506BB
Page 214 of 491

5-1
5
Audio
A nte nna system .. ... ... ... .. ... ... ... ... .. ... ... ... ... .. ... 5-2
P rin ted anten na ........................ .................... ..... 5-2
FM rece ptio n ....... ..................... .................... ..... 5-2
I n stallat ion of access ories ..... ... .. ... ... ... ... .. ... 5-3
A udio set ... ... ... .. ... ... ... ... .. ... ... ... ... .. ... ... ... ... .. ... 5-3
Ty pe A a udio set .. .................... .................... ..... 5-3
Ty pe B a udio set .. .................... .................... ..... 5-4
In -d ash 6 CD a uto cha nger 1 (O ptio nal a udio
u n it – if eq uipp ed) ................. .................... ..... 5-4
T ype A au dio set (if eq uip ped) .... ... ... ... ... .. ... 5-5
Radio o p erati on ....................... .................... ..... 5-5
Co mpact disc player operat ion .................. ..... 5-10
CD c han ger co ntrol (If opti o nal in -d ash CD
cha nger is c onn ecte d) .......... .................... ..... 5-1 2
Type B audio set (if equipped) ..................... 5-16 Radio operation ................................................ 5-16
Cassette player operation ................................ 5-22
Built in CD changer operation ......................... 5-26
In-dash 6 CD auto changer 1 (if equipped) . 5-31 Loading and unloading compact discs .......... 5-31
Precautions to observe when handling a compact disc (CD) .................................. 5-34
Page 216 of 491
5-3
Audio
– CONTINUED –
Installation of accessories
Always consult your SUBARU dealer before installing
a citizen band radio or other transmitting device in
your vehicle. Such devices may cause the electronic
control system to malfunction if they are incorrectly in-
stalled or if they are not suited for the vehicle.Audio set
Your SUBARU may be equipped with one of the fol-
lowing audio sets. See the pages indicated in this sec-
tion for operating details. !Type A audio set
" Radio operation: refer to page 5-5
" Compact disc player operation: refer to page 5-10
" CD changer control: refer to page 5-12
US5504AA
Page 217 of 491
5-4
Audio
!
Type B audio set
" Radio operation: refer to page 5-16
" Cassette player operation: refer to page 5-22
" Built-in CD changer operation: refer to page 5-26 !
In-dash 6 CD auto changer 1 (Optional
audio unit – if equipped)
" Inserting and removing a disc or all discs: refer to
page 5-31
UG5030AA
HG5021AA
Page 218 of 491
5-5
Audio
– CONTINUED –
Type A audio set (if equipped)
The radio will operate only when the ignition switch is in the “ACC” or “ON” position. !Radio operation
(1)
(6) (5)
(2)
(3) (4)
US5510BB
(1) SCAN button
(2) Power switch, Volume control,
Bass/Middle/Treble control and
Fader/Balance control dial
(3) Tuning buttons
(4) FM/AM selection button
(5) Preset buttons
(6) Tone/Balance button