2004 SUBARU IMPREZA ESP
[x] Cancel search: ESPPage 245 of 491
5-32
Audio
"
Do not attempt to insert two or more discs
into the slot at a time. Doing so can cause me-
chanical damage to the CD changer." Use only music CDs identified by
am ark .
" Do not use CDs listed below which could
cause damage to the CD player. "3-inch (8 cm) compact disc.
" Any disc with a peel-off or seal on it.
" Any disc with scratches and/or dust.
" Bent disc.
" Cleaning disc.
" CD accessory. (E.g., 3-inch (8 cm) disc
adapter)
" Do not insert or remove any disc when the
automatic transmission selector lever is in the
park position; the selector lever in that position
can interfere with disc insertion or removal,
causing scratches on the disc surface (for AT
vehicles).
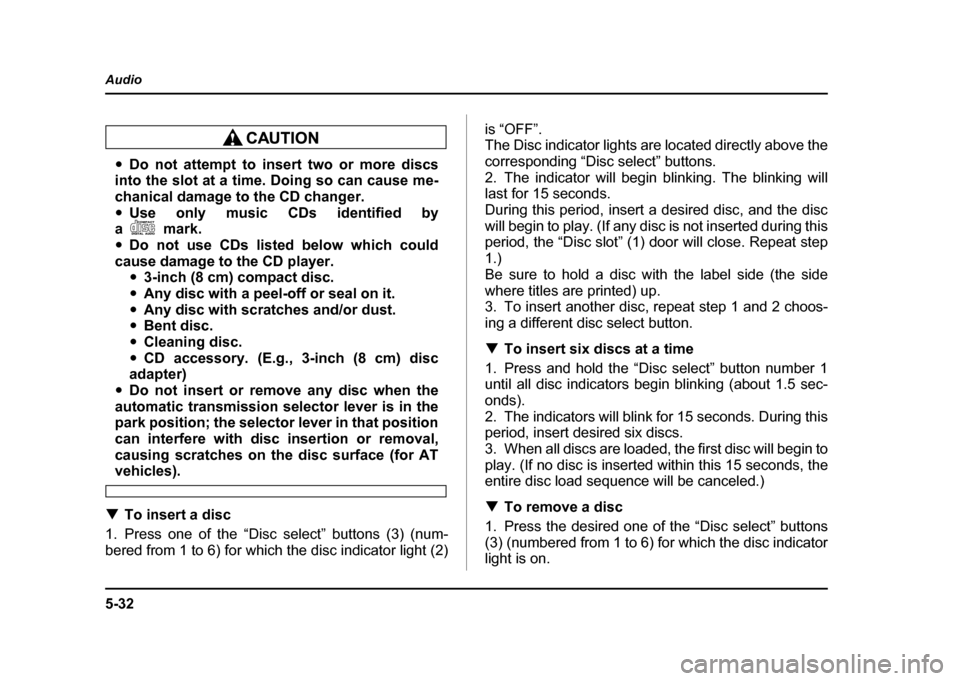
! To insert a disc
1. Press one of the “Disc select” buttons (3) (num-
bered from 1 to 6) for which the disc indicator light (2) is “OFF”.
The Disc indicator lights are located directly above the
corresponding “Disc select” buttons.
2. The indicator will begin blinking. The blinking will last for 15 seconds.
During this period, insert a desired disc, and the disc
will begin to play. (If any disc is not inserted during this
period, the “Disc slot” (1) door will close. Repeat step
1.)
Be sure to hold a disc with the label side (the side
where titles are printed) up.
3. To insert another disc, repeat step 1 and 2 choos-
ing a different disc select button. !
To insert six discs at a time
1. Press and hold the “Disc select” button number 1
until all disc indicators begin blinking (about 1.5 sec-
onds).
2. The indicators will blink for 15 seconds. During this
period, insert desired six discs.
3. When all discs are loaded, the first disc will begin to
play. (If no disc is inserted within this 15 seconds, the
entire disc load sequence will be canceled.) ! To remove a disc
1. Press the desired one of the “Disc select” buttons
(3) (numbered from 1 to 6) for which the disc indicator
light is on.
Page 246 of 491

5-33
Audio
– CONTINUED –
2. Press the “Eject button” (4). The selected disc will
be ejected and the indicator light will begin blinking.
3. To remove another disc, repeat step 1 and 2
choosing a different “Disc select” button.
(To remove discs when the ignition switch is in the
“Lock” position, press the “Eject” button, and the first
disc will be ejected. Press the “Eject” button again,
and the next disc will be ejected and so on. At this
time, the “Disc select” buttons are disabled.) !To remove all discs at one time
1. Press and hold the “Eject” button (4) until all “Disc”
indicators begin blinking (about 1.5 seconds), and the
first disc will be ejected.
2. When the disc is removed, the next one will be
ejected, and so on. ! To replace a playing disc with another
Simply press the desired one of “Disc select” buttons
(3) (numbered from 1 to 6) or press the “DISC select”
button on the radio unit to select the desired disc, and
the disc will begin to play. ! Disc indicators
Lit: when the corresponding storage tray is occupied
by a disc.
Blinking: Disc player is either in loading, eject or
changing mode. OFF: No disc is loaded or the ignition switch is in the
“LOCK” position. "
Open/Closed disc slot indicator
When the disc slot is open, the disc indicators on both
sides of the slot illuminate. ! Function control
Refer to CD changer control operating instructions de-
scribed in the “Type B audio set (if equipped)” section.
Page 258 of 491
6-9
Interior equipment
– CONTINUED –
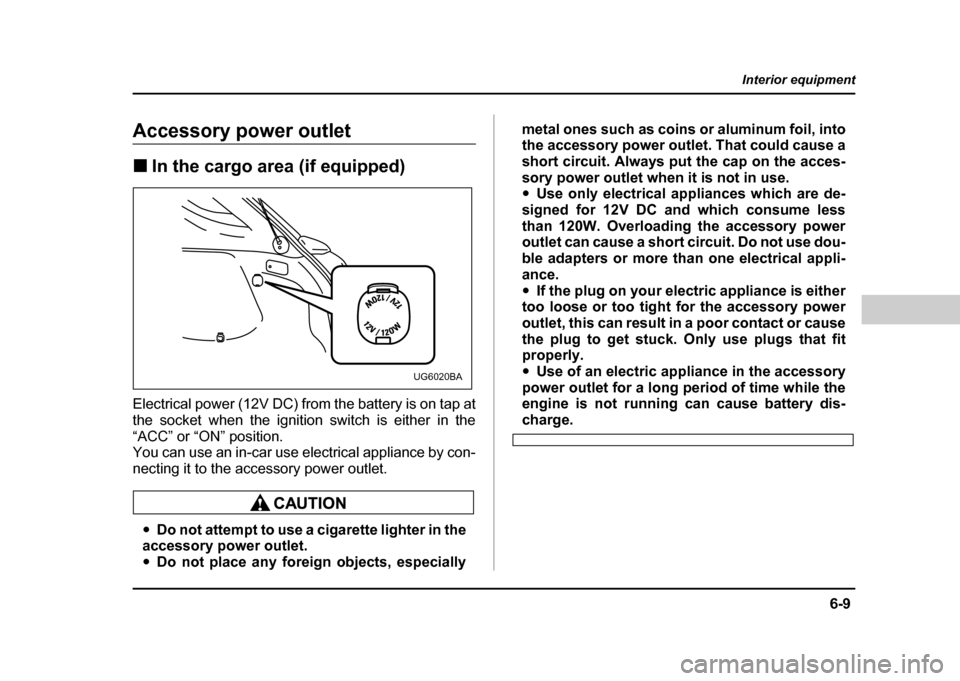
Accessory power outlet !In the cargo area (if equipped)
Electrical power (12V DC) from the battery is on tap at
the socket when the ignition switch is either in the
“ACC” or “ON” position.
You can use an in-car use electrical appliance by con-
necting it to the accessory power outlet.
" Do not attempt to use a cigarette lighter in the
accessory power outlet. " Do not place any foreign objects, especially metal ones such as coins or aluminum foil, into
the accessory power outlet. That could cause a
short circuit. Always put the cap on the acces-
sory power outlet when it is not in use. "
Use only electrical appliances which are de-
signed for 12V DC and which consume less
than 120W. Overloading the accessory power
outlet can cause a short circuit. Do not use dou-
ble adapters or more than one electrical appli-
ance." If the plug on your electric appliance is either
too loose or too tight for the accessory power
outlet, this can result in a poor contact or cause
the plug to get stuck. Only use plugs that fit
properly. " Use of an electric appliance in the accessory
power outlet for a long period of time while the
engine is not running can cause battery dis-
charge.
UG6020BA
Page 259 of 491
6-10
Interior equipment
Cigarette lighter socket
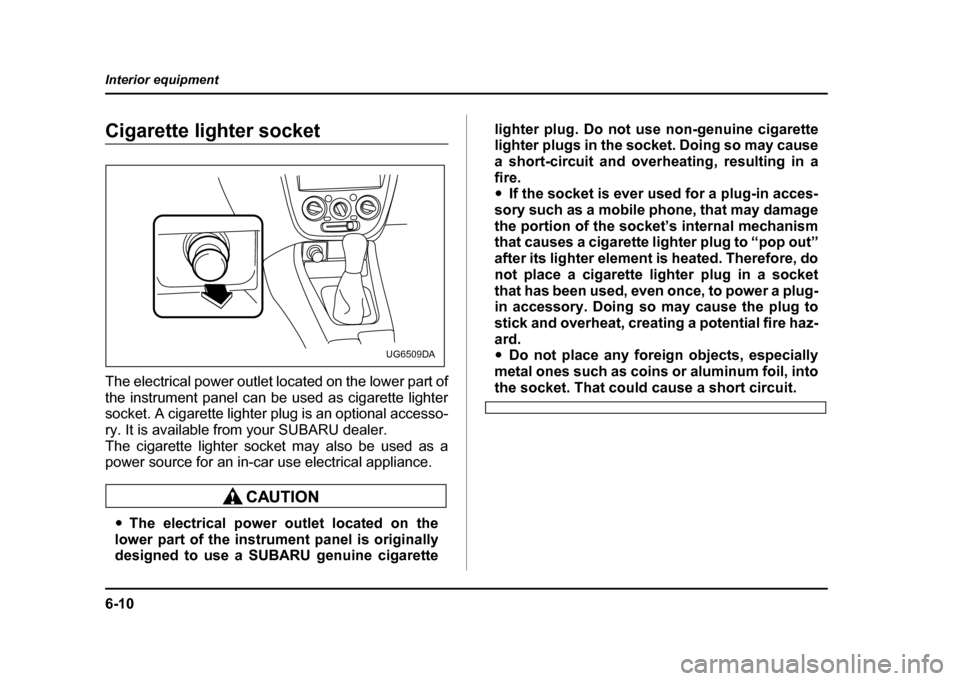
The electrical power outlet located on the lower part of
the instrument panel can be used as cigarette lighter
socket. A cigarette lighter plug is an optional accesso-
ry. It is available from your SUBARU dealer.
The cigarette lighter socket may also be used as a
power source for an in-car use electrical appliance.
"
The electrical power outlet located on the
lower part of the instrument panel is originally
designed to use a SUBARU genuine cigarette lighter plug. Do not use non-genuine cigarette
lighter plugs in the socket. Doing so may cause
a short-circuit and overheating, resulting in afire. "
If the socket is ever used for a plug-in acces-
sory such as a mobile phone, that may damage
the portion of the socket’s internal mechanism
that causes a cigarette lighter plug to “pop out”
after its lighter element is heated. Therefore, do
not place a cigarette lighter plug in a socket
that has been used, even once, to power a plug-
in accessory. Doing so may cause the plug to
stick and overheat, creating a potential fire haz-
ard. " Do not place any foreign objects, especially
metal ones such as coins or aluminum foil, into
the socket. That could cause a short circuit.
UG6509DA
Page 274 of 491
7-5
Starting and operating
– CONTINUED –
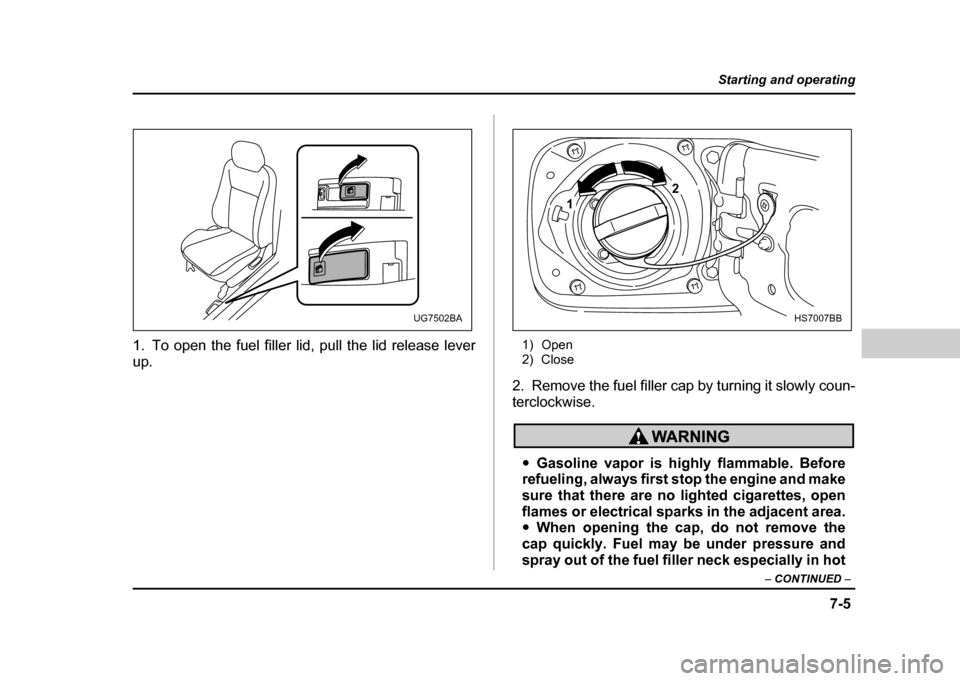
1. To open the fuel filler lid, pull the lid release lever
up. 1) Open
2) Close
2. Remove the fuel filler cap by turning it slowly coun-
terclockwise.
" Gasoline vapor is highly flammable. Before
refueling, always first stop the engine and make
sure that there are no lighted cigarettes, open
flames or electrical sparks in the adjacent area." When opening the cap, do not remove the
cap quickly. Fuel may be under pressure and
spray out of the fuel filler neck especially in hot
UG7502BA
1 2
HS7007BB
Page 276 of 491

7-7
Starting and operating
– CONTINUED –
State emission testing (U.S. only)
At state inspection time, remember to tell your in-
spection or service station in advance not to place
your Subaru AWD vehicle on a two-wheel dyna-
mometer. Otherwise, serious transmission dam-
age will result.
Some states have started using dynamometers in
their state inspection programs in order to meet their
obligation under federal law to implement stricter vehi-
cle emission standards to reduce air pollution from
cars. A dynamometer is a treadmill or roller-like testing
device that allows your car’s wheels to turn while the
car remains in one place. Depending on the severity of
a state’s air pollution problems, the states must adopt
either a “basic” or “enhanced” vehicle emission in-
spection test. Normally, a portion of the basic emission
test consists of an emission inspector inserting an an-
alyzer probe into the exhaust pipe of an idling vehicle
for a short period of time. States with more severe air
pollution problems are required to adopt an enhanced
vehicle emission test. This test simulates actual driv-
ing conditions on a dynamometer and permits more
accurate measurement of tailpipe emitted pollution
than the basic emission test.
The U.S. Environmental Protection Agency (EPA) and states using two-wheel dynamometers in their emis-
sion testing programs have
EXEMPTED Subaru AWD
vehicles from the portion of the testing program that in-
volves a two-wheel dynamometer.
There are some states that use four-wheel dynamom-
eters in their testing programs. When properly used,
that equipment will not damage an AWD Subaru vehi- cle.
Under no circumstances should the rear wheels be
jacked off the ground, nor should the driveshaft be dis-
connected for state emission testing.
Testing of an All-Wheel Drive vehicle must
NEVER be performed on a single two-wheel dy-
namometer. Attempting to do so will result in
uncontrolled vehicle movement and may cause
an accident or injuries to persons nearby.
Resultant vehicle damage due to improper test-
ing is not covered under the SUBARU Limited
Warranty and is the responsibility of the state
Page 320 of 491

8-9
Driving tips
– CONTINUED –
!All AWD models except OUTBACK
SPORT and vehicles with 17 inch tires
Your AWD vehicle is neither a conventional off-road
vehicle nor an all terrain vehicle. It is a passenger car
designed primarily for on-road use. The AWD feature
gives it some limited off-road capabilities in situations
in which driving surfaces are relatively level, obstruc-
tion-free and otherwise similar to on-road driving con-
ditions. Operating it under other than those conditions
could subject the vehicle to excessive stress which
might result in damage not eligible for repair under
warranty. If you do take your SUBARU off road, you
should review the common sense precautions in the
next section (applicable to the OUTBACK SPORT) for
general guidance. But please keep in mind that your
vehicle’s off-road capabilities are more limited than
those of the OUTBACK SPORT.
Never attempt to drive through pools and puddles, or
roads flooded with water. Water entering the engine
air intake or the exhaust pipe or water splashing onto
electrical parts may damage your vehicle and may
cause it to stall. ! OUTBACK SPORT
Your Subaru can be driven on ordinary roads or off-
road. But please keep in mind that an AWD SUBARU is a passenger car and is neither a conventional off-
road vehicle nor an all-terrain vehicle. If you do take
your Subaru off-road, certain common sense precau-
tions such as the following should be taken: "
Make certain that you and all of your passengers
are wearing seat belts. " Carry some emergency equipment, such as a tow-
ing rope or chain, a shovel, wheel blocks, first aid kit
and portable phone or citizens band radio." Drive carefully. Do not take unnecessary risks by
driving in dangerous areas or over rough terrain. " Slow down and employ extra caution at all times.
When driving off-road, you will not have the benefit of
marked traffic lanes, banked curves, traffic signs and
the like. " Do not drive across steep slopes. Instead, drive ei-
ther straight up or straight down the slopes. A vehicle
can much more easily tip over sideways than it can
end over end. Avoid driving straight up or down slopes
that are too steep. " Avoid sharp turning maneuvers, especially at higher
speeds. " Do not grip the inside or spokes of the steering
wheel. A bad bump could jerk the wheel and injure
your hands. Instead drive with your fingers and
thumbs on the outside of the rim. " If driving through water, such as when crossing
Page 325 of 491
8-14
Driving tips
!
Wiper operation when snowing
Before driving in cold weather, make sure the wiper
blades are not frozen to the windshield or rear window.
If the wiper blades are frozen to the windshield or rear
window, use the defroster with the airflow control dial
in the “ ” position and the temperature control dial
set for maximum warmth until the wiper blades are
completely thawed out. If your vehicle is equipped with
a wiper deicer, it is helpful to thaw the windshield wiper
blades. To thaw out the rear wiper blade, use the rear
window defogger.
When driving in snow, if frozen snow starts to stick on
the surface of the windshield despite wiper operation,
use the defroster with the airflow control dial in “ ”
and the temperature control dial set for maximum
warmth. After the windshield gets warmed enough to
melt the frozen snow on it, wash it away using the
windshield washer.
Snow stuck on the wiper arm prevents the wiper from
working effectively. If snow is stuck on the wiper arm,
pull off the road to a safe place, then remove it. If you
stop the car at road side, use the hazard warning
flasher to alert other drivers.
We recommend use of non-freezing type wiper blades
(winter blades) during the seasons you could have snow and sub-zero temperatures. Blades of this type
give superior wiping performance in snowy conditions.
Be sure to use blades that are suitable for your vehi-cle. !
Corrosion protection
Refer to the “Corrosion protection” section (chapter
10). ! Snow tires
! All models except WRX-STi
"When replacing original tires with winter
(snow) tires, make sure you use only the same
size, construction and load range as the origi-
nal tires listed on the tire placard. Using other
sizes and construction may affect speedome-
ter/odometer calibration and clearance be-
tween the body and tires. It also may be danger-
ous and lead to loss of vehicle control. " You must install four winter tires that are of
the same size, construction, brand, and load
range. Mixing other sizes or constructions may
result in severe mechanical damage to the drive