Page 259 of 491

6-10
Interior equipment
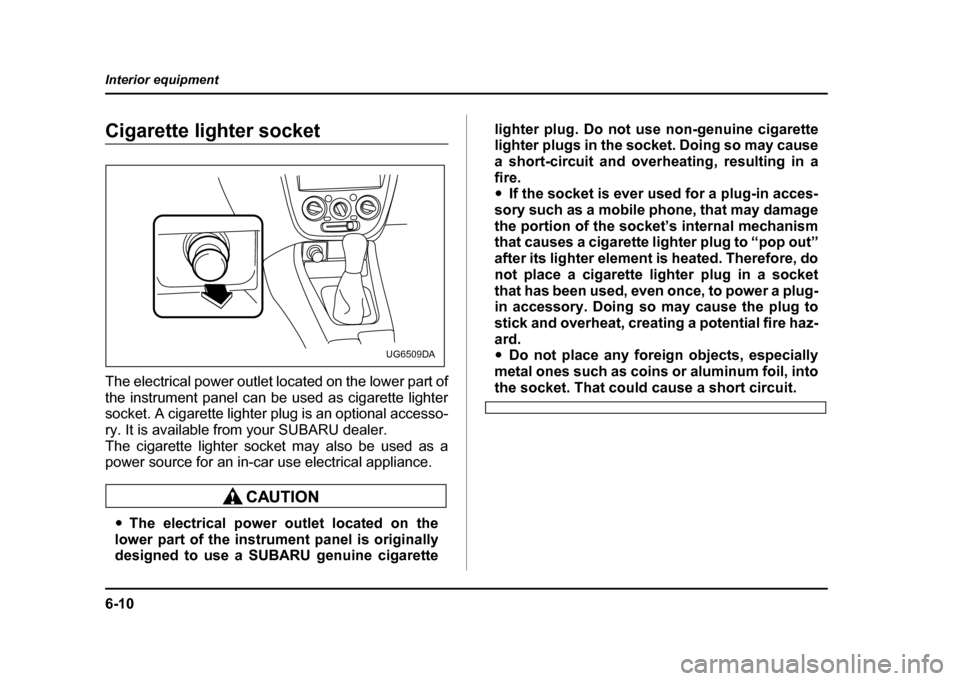
Cigarette lighter socket
The electrical power outlet located on the lower part of
the instrument panel can be used as cigarette lighter
socket. A cigarette lighter plug is an optional accesso-
ry. It is available from your SUBARU dealer.
The cigarette lighter socket may also be used as a
power source for an in-car use electrical appliance.
"
The electrical power outlet located on the
lower part of the instrument panel is originally
designed to use a SUBARU genuine cigarette lighter plug. Do not use non-genuine cigarette
lighter plugs in the socket. Doing so may cause
a short-circuit and overheating, resulting in afire. "
If the socket is ever used for a plug-in acces-
sory such as a mobile phone, that may damage
the portion of the socket’s internal mechanism
that causes a cigarette lighter plug to “pop out”
after its lighter element is heated. Therefore, do
not place a cigarette lighter plug in a socket
that has been used, even once, to power a plug-
in accessory. Doing so may cause the plug to
stick and overheat, creating a potential fire haz-
ard. " Do not place any foreign objects, especially
metal ones such as coins or aluminum foil, into
the socket. That could cause a short circuit.
UG6509DA
Page 260 of 491

6-11
Interior equipment
– CONTINUED –
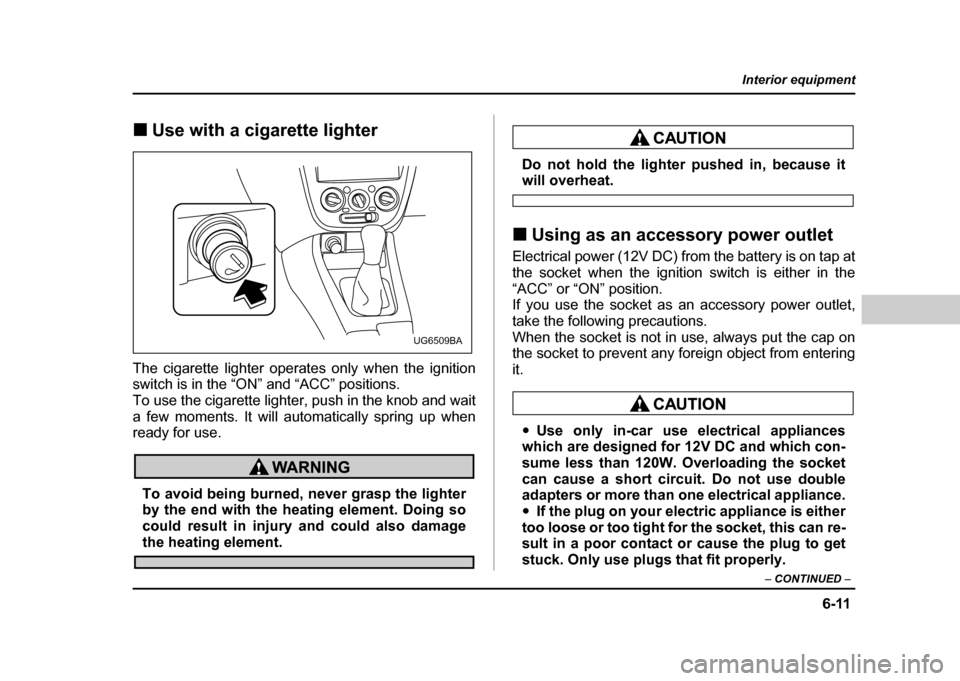
!Use with a cigarette lighter
The cigarette lighter operates only when the ignition
switch is in the “ON” and “ACC” positions.
To use the cigarette lighter, push in the knob and wait
a few moments. It will automatically spring up when
ready for use.
To avoid being burned, never grasp the lighter
by the end with the heating element. Doing so
could result in injury and could also damage
the heating element.
Do not hold the lighter pushed in, because itwill overheat.
! Using as an accessory power outlet
Electrical power (12V DC) from the battery is on tap at
the socket when the ignition switch is either in the
“ACC” or “ON” position.
If you use the socket as an accessory power outlet,
take the following precautions.
When the socket is not in use, always put the cap on
the socket to prevent any foreign object from entering it.
" Use only in-car use electrical appliances
which are designed for 12V DC and which con-
sume less than 120W. Overloading the socket
can cause a short circuit. Do not use double
adapters or more than one electrical appliance. " If the plug on your electric appliance is either
too loose or too tight for the socket, this can re-
sult in a poor contact or cause the plug to get
stuck. Only use plugs that fit properly.
UG6509BA
Page 261 of 491

6-12
Interior equipment
"
Use of an electric appliance in the socket for
a long period of time while the engine is not
running can cause battery discharge." Before driving your vehicle, make sure that
the plug and the cord on your electrical appli-
ance will not interfere with your shifting gears
and operating the accelerator and brake pedals.
If they do, do not use the electrical appliance
while driving.
If the socket has been used for electrical appliances,
damage may have been done to the internal mecha-
nism that causes a cigarette lighter to “pop out” after
its element has been heated. For that reason, a ciga-
rette lighter, even if it is a genuine part, should not be
used in the socket. If you want to use the socket for a
cigarette lighter again, or to protect your purchaser be-
fore you sell your car, have your SUBARU dealer re-
place the socket with a new one.
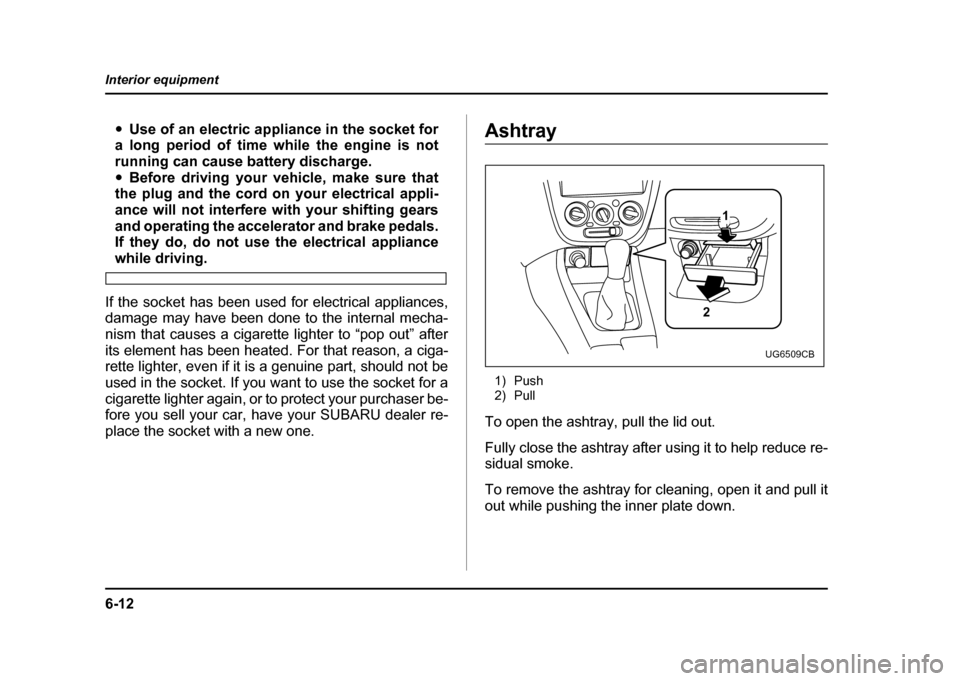
Ashtray
1) Push
2) Pull
To open the ashtray, pull the lid out.
Fully close the ashtray after using it to help reduce re-
sidual smoke.
To remove the ashtray for cleaning, open it and pull it
out while pushing the inner plate down.
2 1
UG6509CB
Page 262 of 491
6-13
Interior equipment
– CONTINUED –
Do not use ashtrays as waste receptacles or
leave a lighted cigarette in an ashtray. This
could cause a fire.
Floor mat (if equipped)
A retaining pin is located on the driver’s side of the ve-
hicle next to the fuel filler door release.
The floor mat is secured using the built-in grommet, by
placing the grommet over the pin and pushing down- ward.
HS6038BA
Page 264 of 491

6-15
Interior equipment
– CONTINUED –
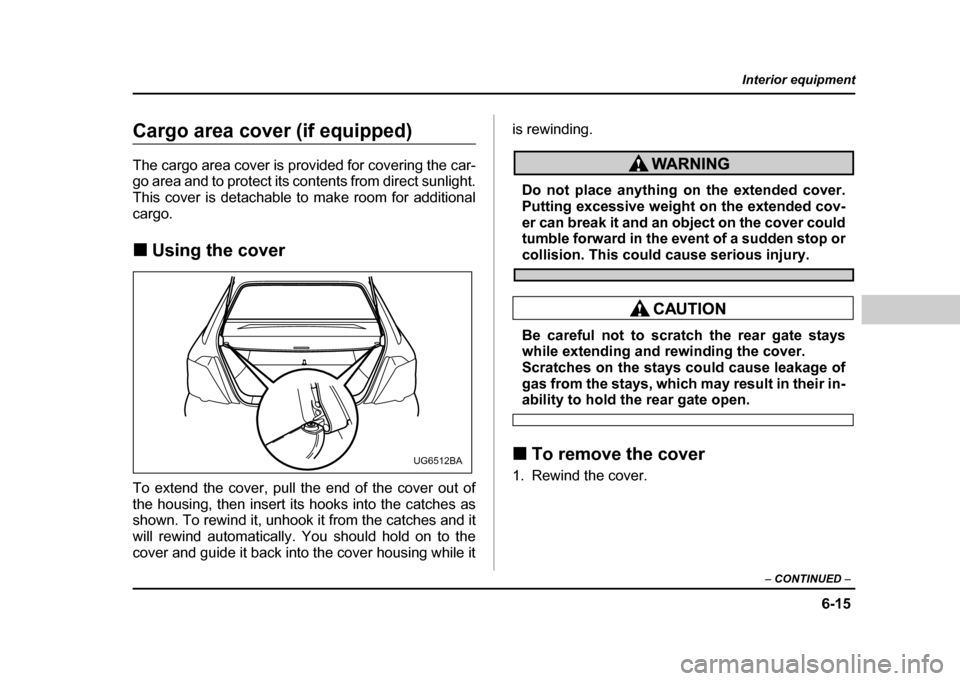
Cargo area cover (if equipped)
The cargo area cover is provided for covering the car-
go area and to protect its contents from direct sunlight.
This cover is detachable to make room for additional
cargo. !Using the cover
To extend the cover, pull the end of the cover out of
the housing, then insert its hooks into the catches as
shown. To rewind it, unhook it from the catches and it
will rewind automatically. You should hold on to the
cover and guide it back into the cover housing while it is rewinding.
Do not place anything on the extended cover.
Putting excessive weight on the extended cov-
er can break it and an object on the cover could
tumble forward in the event of a sudden stop or
collision. This could cause serious injury.
Be careful not to scratch the rear gate stays
while extending and rewinding the cover.
Scratches on the stays could cause leakage of
gas from the stays, which may result in their in-
ability to hold the rear gate open.
! To remove the cover
1. Rewind the cover.
UG6512BA
Page 266 of 491
6-17
Interior equipment
– CONTINUED –
2. Insert the projections located on the both ends of
the sleeve into the recesses of the retainers.
Cargo tie-down hooks (if equipped)
The cargo area is equipped with four tie-down hooks
so that cargo can be secured with a cargo net or
ropes.
When using the tie-down hooks, turn them down out of
the storing recesses. When not in use, put the hooks
up into the storing recesses.
The cargo tie-down hooks are designed only for
securing light cargo. Never try to secure cargo
that exceeds the capacity of the hooks. The
UG6515BA
UG6516BA
Page 383 of 491

10-6
Appearance care
Cleaning the interior
Use a vacuum cleaner to get rid of the dust and dirt.
Wipe the vinyl areas with a clean, damp cloth. !
Seat fabric
Remove loose dirt, dust or debris with a vacuum
cleaner. If the dirt is caked on the fabric or hard to re-
move with a vacuum cleaner, use a soft blush then
vacuum it.
Wipe the fabric surface with a tightly wrung cloth and
dry the seat fabric thoroughly. If the fabric is still dirty,
wipe using a solution of mild soap and lukewarm water
then dry thoroughly.
If the stain does not come out, try a commercially-
available fabric cleaner. Use the cleaner on a hidden
place and make sure it does not affect the fabric ad-
versely. Use the cleaner according to its instructions. ! Leather seat materials
The leather used by SUBARU is a high quality natural
product which will retain its distinctive appearance and
feel for many years with proper care.
Allowing dust or road dirt to build up on the surface can
cause the material to become brittle and to wear pre- maturely. Regular cleaning with a soft, moist, natural
fiber cloth should be performed monthly, taking care
not to soak the leather or allow water to penetrate the
stitched seams.
A mild detergent suitable for cleaning woolen fabrics
may be used to remove difficult dirt spots, rubbing with
a soft, dry cloth afterwards to restore the luster. If your
SUBARU is to be parked for a long time in bright sun-
light, it is recommended that the seats and headrests
be covered, or the windows shaded, to prevent fading
or shrinkage.
Minor surface blemishes or bald patches may be treat-
ed with a commercial leather spray lacquer. You willdiscover that each leather seat section will develop
soft folds or wrinkles, which is characteristic of genu-
ine leather. !
Synthetic leather upholstery
The synthetic leather material used on the SUBARU
may be cleaned using mild soap or detergent and wa-
ter, after first vacuuming or brushing away loose dirt.
Allow the soap to soak in for a few minutes and wipe
off with a clean, damp cloth. Commercial foam-type
cleaners suitable for synthetic leather materials may
be used when necessary.
Page 473 of 491
12-8
Specifications
!
Fuse panel located in the engine com-
partment
A) FWD socket (AT models except Turbo)
B) Main fuse
A 12
3 B
4
5 6
78
91011
12
HSC002BB
Fuse panelFuse ratingCircuit
120A"
Radiator cooling fan
(Main)
220A"Radiator cooling fan
(Sub)
330A"ABS motor
420A"Rear window defogger
515A"Hazard warning flasher
" Horn
615A"Turn signal lights
710A"Automatic transmis- sion control unit
810A"Alternator
915A"Headlight (right side)
1015A"Headlight (left side)
1120A"Lighting switch
1215A"Clock
" Interior light