2004 NISSAN XTERRA tire pressure
[x] Cancel search: tire pressurePage 245 of 296

Tire and loading information label (for
US)
s1Seating capacity: The maximum number of
occupants that should be seated in the ve-
hicle.
s2Vehicle load limit: See loading information in
the Technical and consumer information
section.
s3Original tire size: The size of the tires origi-
nally installed on the vehicle at the factory.
s4Recommended cold tire inflation pressure:
Inflate the tires to this pressure when the
tires are cold. Tires are considered COLD
after the vehicle has been parked for 3 or
more hours, or driven less than 1 mile (1.6
km) at moderate speeds. The recommended
cold tire inflation is set by the manufacturer
to provide the best tire wear and vehicle
handling characteristics based on the ve-
hicles GVWR.
s5Tire size – refer to “Tire labeling” later in this
section.
s6ands7Spare tire size or compact spare tire
size (if so equipped) .
type a
LDI0392
Maintenance and do-it-yourself8-41
ZREVIEW COPY:Ð2004 Xterra(xtr)
Owners Manual(owners)ÐUSA English(nna)
11/06/03Ðcathy
X
Page 246 of 296

Tire and loading information label (for
US)
s1Original tire size: The size of the tires origi-
nally installed on the vehicle at the factory.
s2Recommended cold tire inflation pressure:
Inflate the tires to this pressure when the
tires are cold. Tires are considered COLD
after the vehicle has been parked for 3 or
more hours, or driven less than 1 mile (1.6
km) at moderate speeds. The recommended
cold tire inflation is set by the manufacturer
to provide the best tire wear and vehicle
handling characteristics based on the ve-
hicles GVWR.
s3Spare tire size or compact spare tire size (if
so equipped) .
Checking tire pressure
1. Remove the valve stem cap from the tire.
2. Press the pressure gauge squarely onto the
valve stem. Do not press too hard or force
the valve stem sideways, or air will escape. If
the hissing of air escaping from the tire is
heard while checking the pressure, reposi-
tion the gauge to eliminate this leakage.
3. Remove the gauge.
4. Read the tire pressure on the gauge stem
and compare to the specification shown on
the Tire and Loading Information label.
type b
LDI0421LDI0393
8-42Maintenance and do-it-yourself
ZREVIEW COPY:Ð2004 Xterra(xtr)
Owners Manual(owners)ÐUSA English(nna)
11/06/03Ðcathy
X
Page 247 of 296

5. Add air to the tire as needed. If too much air
is added, press the core of the valve stem
briefly with the tip of the gauge stem to
release pressure. Recheck the pressure and
add or release air as needed.
6. Install the valve stem cap.
7. Check the pressure of all other tires, includ-
ing the spare.
Size Cold Tire Infla-
tion Pressure
Front
Original TireP265/70R15
P265/70R16
P265/65R17210 kPa, 30 PSI
Rear
Original TireP265/70R15
P265/70R16
P265/65R17210 kPa, 30 PSI
Spare Tire P265/70R15
P265/70R16
P265/65R17210 kPa, 30 PSI
TIRE LABELING
Federal law requires tire manufacturers to place
standardized information on the sidewall of all
tires. This information identifies and describes
the fundamental characteristics of the tire and
also provides the tire identification number (TIN)
for safety standard certification. The TIN can be
used to identify the tire in case of a recall.
WDI0394
Maintenance and do-it-yourself8-43
ZREVIEW COPY:Ð2004 Xterra(xtr)
Owners Manual(owners)ÐUSA English(nna)
10/23/03Ðdebbie
X
Page 249 of 296

(2) TIN (Tire Identification Number) for a new tire
(example: DOT XX XX XXX XXXX)
1. DOT: Abbreviation for the9Department Of
Transportation.9The symbol can be placed
above, below or to the left or right of Tire
Identification Number.
2. Two-digit code: Manufacturer’s identifica-
tion mark
3. Two-digit code: Tire size
4. Three-digit code: Tire type code (Optional)
5. Three-digit code: Date of Manufacture6. Four numbers represent the week and year
the tire was built. For example, the numbers
3103 means the 31st week of 2003.
(3) Tire ply composition and material
The number of layers or plies of rubber-coated
fabric in the tire. Tire manufacturers also must
indicate the materials in the tire, which include
steel, nylon, polyester, and others.
(4) Maximum permissible inflation pressure
This number is the greatest amount of air pres-
sure that should be put in the tire. Do not exceed
the maximum permissible inflation pressure.
(5) Maximum load ratingThis number indicates the maximum load in kilo-
grams and pounds that can be carried by the tire.
When replacing the tires on the vehicle, always
use a tire that has the same load rating as the
factory installed tire.
(6) Term of ”tubeless” or ”tube type”
Indicates whether the tire requires an inner tube
(“tube type”) or not (“tubeless”) .
(7) The word ”radial”
The word9radial9is shown if the tire has radial
structure.
(8) Manufacturer or brand name
Manufacturer or brand name is shown.
Other Tire-related Terminology
In addition to the many terms that are defined
throughout this section, Intended Outboard
Sidewall is (1) the sidewall that contains a white-
wall, bears white lettering or bears manufacturer,
brand, and/or model name molding that is higher
or deeper than the same molding on the other
sidewall of the tire, or (2) the outward facing
sidewall of an asymmetrical tire that has a par-
ticular side that must always face outward when
mounted on a vehicle.
WDI0396
Maintenance and do-it-yourself8-45
ZREVIEW COPY:Ð2004 Xterra(xtr)
Owners Manual(owners)ÐUSA English(nna)
10/23/03Ðdebbie
X
Page 251 of 296

Tire chains must be installed only on the
rear wheels and not on the front wheels.
Never install tire chains on a TEMPORARY USE
ONLY spare tire.
Do not use tire chains on dry roads. Driving with
chains in such conditions can cause damage to
the various mechanisms of the vehicle due to
some overstress.
Use only the 2WD range when driving on clear
paved roads.
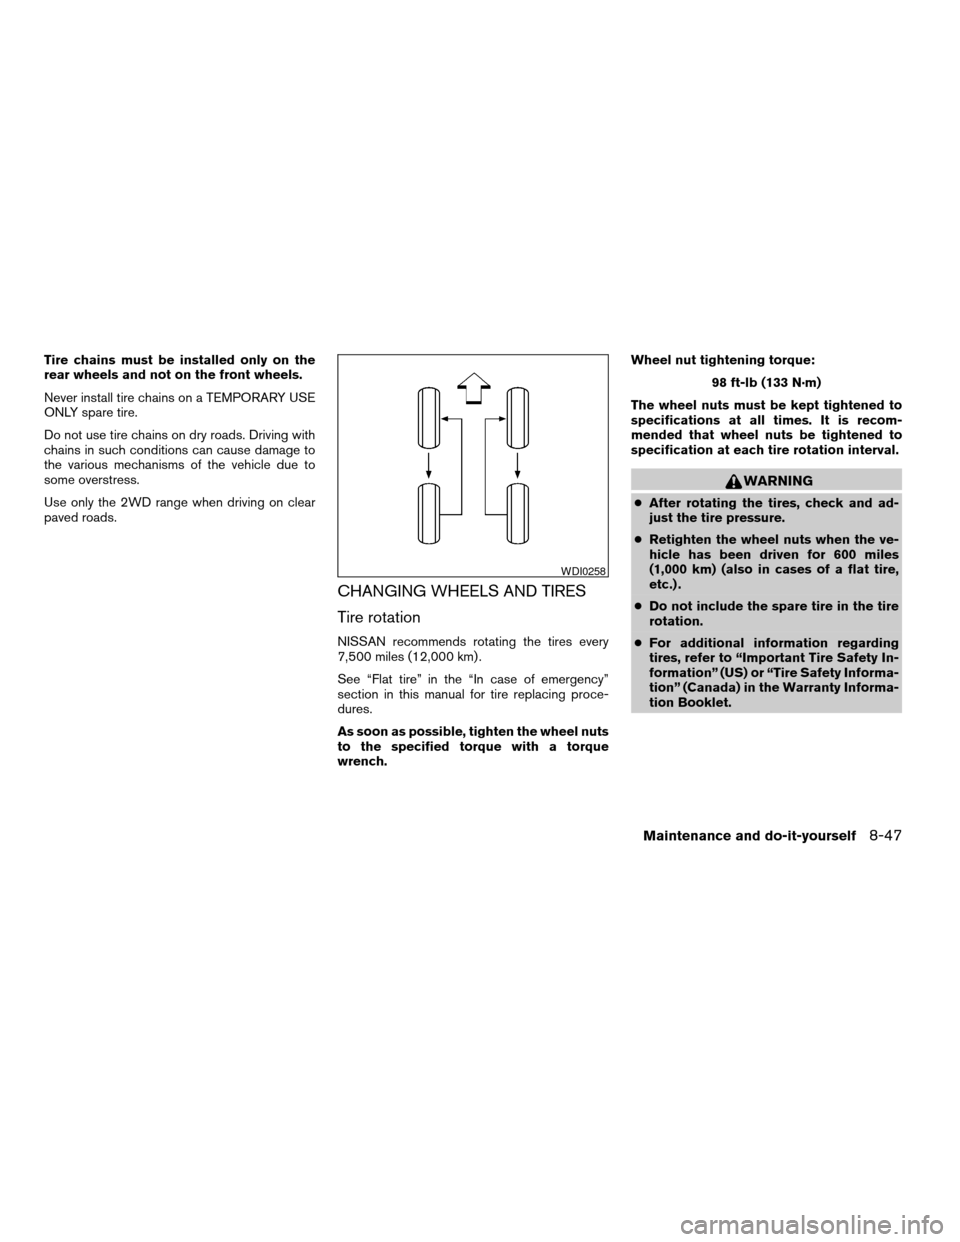
CHANGING WHEELS AND TIRES
Tire rotation
NISSAN recommends rotating the tires every
7,500 miles (12,000 km) .
See “Flat tire” in the “In case of emergency”
section in this manual for tire replacing proce-
dures.
As soon as possible, tighten the wheel nuts
to the specified torque with a torque
wrench.Wheel nut tightening torque:
98 ft-lb (133 N·m)
The wheel nuts must be kept tightened to
specifications at all times. It is recom-
mended that wheel nuts be tightened to
specification at each tire rotation interval.
WARNING
cAfter rotating the tires, check and ad-
just the tire pressure.
cRetighten the wheel nuts when the ve-
hicle has been driven for 600 miles
(1,000 km) (also in cases of a flat tire,
etc.) .
cDo not include the spare tire in the tire
rotation.
cFor additional information regarding
tires, refer to “Important Tire Safety In-
formation” (US) or “Tire Safety Informa-
tion” (Canada) in the Warranty Informa-
tion Booklet.
WDI0258
Maintenance and do-it-yourself8-47
ZREVIEW COPY:Ð2004 Xterra(xtr)
Owners Manual(owners)ÐUSA English(nna)
10/23/03Ðdebbie
X
Page 253 of 296

cWhen a spare tire is mounted or a wheel
is replaced, the low tire pressure warn-
ing system will not function. Contact
your NISSAN dealer as soon as pos-
sible for tire replacement and/or sys-
tem resetting (for models with the low
tire pressure warning system) .
cDo not install a deformed wheel or tire
even if it has been repaired. Such
wheels or tires could have structural
damage and could fail without warning.
cThe use of retread tires is not
recommended.
cFor additional information regarding
tires, refer to “Important Tire Safety In-
formation” (US) or “Tire Safety Informa-
tion” (Canada) in the Warranty Informa-
tion Booklet.Four-wheel drive models
CAUTION
Always use tires of the same type, size,
brand, construction (bias, bias-belted or
radial) , and tread pattern on all four
wheels. Failure to do so may result in a
circumference difference between tires
on the front and rear axles which will
cause excessive tire wear and may dam-
age the transmission, transfer case and
differential gears.
If excessive tire wear is found, it is recommended
that all four tires be replaced with tires of the
same size, brand, construction and tread pattern.
The tire pressure and wheel alignment should
also be checked and corrected as necessary.
Contact a NISSAN dealer.
Wheel balance
Unbalanced wheels may affect vehicle handling
and tire life. Even with regular use, wheels can get
out of balance. Therefore, they should be bal-
anced as required.
Wheel balance service should be per-
formed with the wheels off the vehicle.
Spin balancing the wheels on the vehicle
could lead to mechanical damage.cFor additional information regarding
tires, refer to “Important Tire Safety
Information” (US) or “Tire Safety Infor-
mation” (Canada) in the Warranty In-
formation Booklet .
Care of wheels
cWash the wheels when washing the vehicle
to maintain their appearance.
cClean the inner side of the wheels when the
wheel is changed or the underside of the
vehicle is washed.
cDo not use abrasive cleaners when washing
the wheels.
cInspect wheel rims regularly for dents or
corrosion. Such damage may cause loss of
pressure or poor seal at the tire bead.
cNISSAN recommends waxing the road
wheels to protect against road salt in areas
where it is used during winter.
Maintenance and do-it-yourself8-49
ZREVIEW COPY:Ð2004 Xterra(xtr)
Owners Manual(owners)ÐUSA English(nna)
10/23/03Ðdebbie
X
Page 265 of 296

EMISSION CONTROL
INFORMATION LABEL
The emission control information label is at-
tached as shown.
TIRE PLACARD
The cold tire pressure is shown on the tire plac-
ard. The tire placard is located as shown.
AIR CONDITIONER SPECIFICATION
LABEL
The air conditioner specification label is affixed as
shown.
WTI0059WTI0060WTI0061
Technical and consumer information9-11
ZREVIEW COPY:Ð2004 Xterra(xtr)
Owners Manual(owners)ÐUSA English(nna)
10/23/03Ðdebbie
X
Page 268 of 296

WARNING
cProperly secure all cargo with ropes or
straps to help prevent it from sliding or
shifting. Do not place cargo higher than
the seatbacks. In a sudden stop or col-
lision, unsecured cargo could cause
personal injury.cDo not load your vehicle any heavier
than the GVWR or the maximum front
and rear GAWRs. If you do, parts of your
vehicle can break, tire damage could
occur, or it can change the way your
vehicle handles. This could result in
loss of control and cause personal
injury.
LOADING TIPS
cThe GVW must not exceed GVWR or
GAWR as specified on the F.M.V.S.S. Cer-
tification Label.
cDo not load the front and rear axle to the
GAWR. Doing so will exceed the GVWR.
cLoads should be spread out, and cargo
should be properly secured. Large or heavy
objects should be placed toward the front of
the cargo area to help prevent shifting.
WARNING
Overloading not only can shorten the life
of your vehicle and the tire, but can also
cause unsafe vehicle handling and longer
braking distances. This may cause a pre-
mature tire failure which could result in a
serious accident and personal injury. Fail-
ures caused by overloading are not cov-
ered by the vehicle’s warranty.
VEHICLE LOAD WEIGHT CAPACITY
The vehicle load weight capacity shown on fol-
lowing charts indicate the maximum total weight
of passengers, optional equipment (air condition-
ing, trailer hitch, etc) and cargo that your vehicle
is designed to carry.
Before driving a loaded vehicle, confirm that you
do not exceed the Gross Vehicle Weight Rating
(GVWR) or the Gross Axle Weight Rating
(GAWR) for your vehicle. See ’’Vehicle Loading
Information’’ earlier in this section for details.
Also check tires for proper inflation pressures.
See the tire placard.
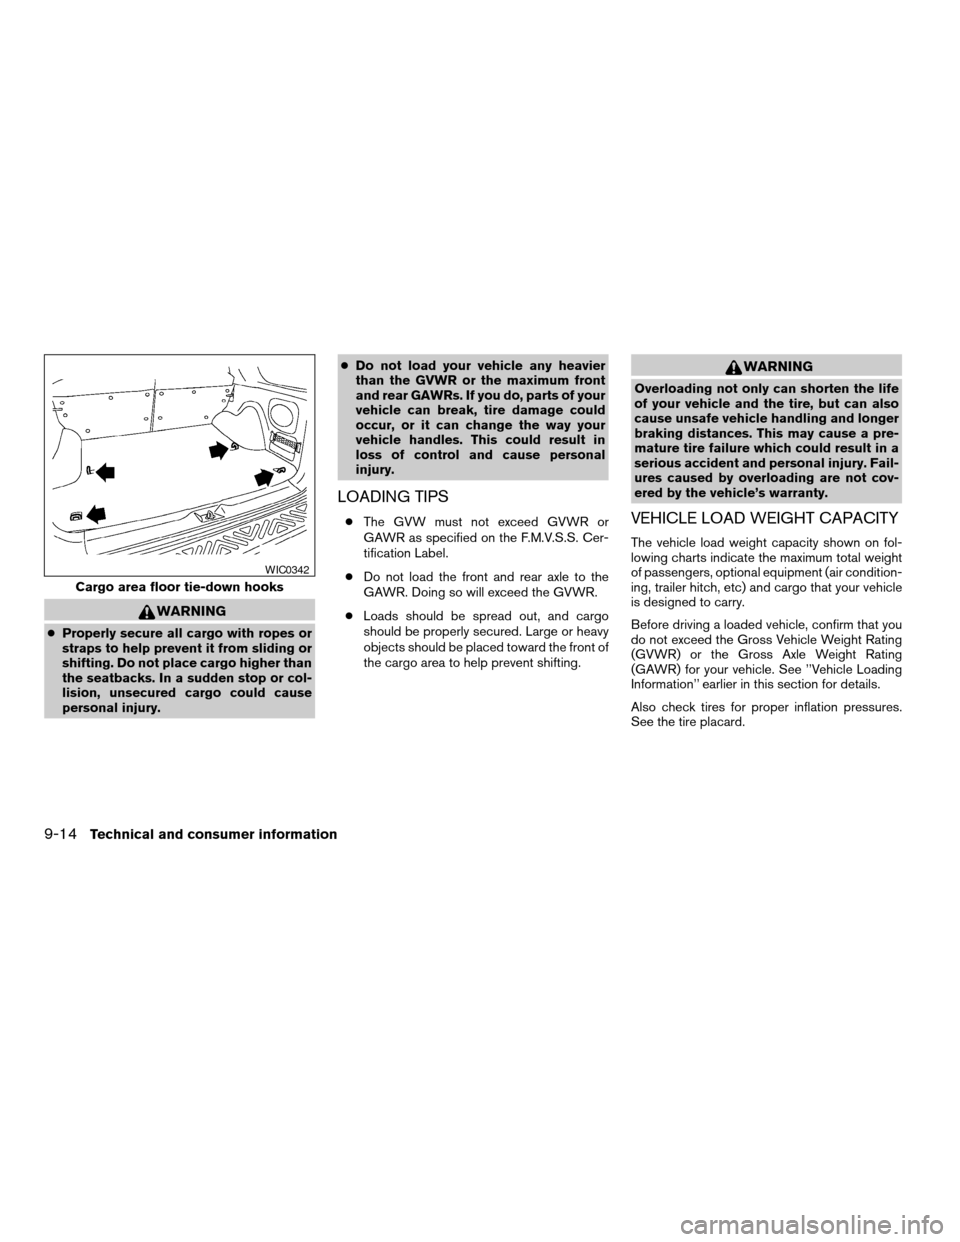
Cargo area floor tie-down hooks
WIC0342
9-14Technical and consumer information
ZREVIEW COPY:Ð2004 Xterra(xtr)
Owners Manual(owners)ÐUSA English(nna)
10/23/03Ðdebbie
X