Page 93 of 296
STORAGE TRAYS (if so equipped)ROOF HEADLINER NET (if so
equipped)
The roof headliner net can be used to store paper
or small, lightweight objects that do not have
sharp edges.
WARNING
cThe cargo restrained by the roof head-
liner net must not exceed 8 oz (230 g) or
the net may not stay secured.
Automatic transmission model
LIC0635
Manual transmission model
LIC0636LIC0371
Instruments and controls2-27
ZREVIEW COPY:Ð2004 Xterra(xtr)
Owners Manual(owners)ÐUSA English(nna)
10/23/03Ðdebbie
X
Page 94 of 296
cDo not place sharp objects in the roof
headliner net. Such objects may be-
come dangerous projectiles and cause
injury when the vehicle is moving or if
the vehicle is involved in a collision.
MAP POCKET
Map pockets are located on the side and back of
the passenger seat. They are also located on the
driver and front passenger doors.The map pocket
can be used to store maps.
WIC0335LIC0633
2-28Instruments and controls
ZREVIEW COPY:Ð2004 Xterra(xtr)
Owners Manual(owners)ÐUSA English(nna)
10/23/03Ðdebbie
X
Page 99 of 296
cProperly secure all cargo with ropes or
straps to help prevent it from sliding or
shifting. Do not place cargo higher than
the seatbacks. In a sudden stop or col-
lision, unsecured cargo could cause
personal injury.
cThe child restraint top tether strap may
be damaged by contact with the ton-
neau cover or items in the cargo area.
Remove the tonneau cover from the ve-
hicle or secure it and any cargo. Your
child could be seriously injured or killed
in a collision if the top tether strap is
damaged.
1. Adjustable crossbar
2. Tubular roof rack
3. Removable gear basketTUBULAR ROOF RACK WITH GEAR
BASKET
Always evenly distribute the cargo on the tubular
roof rack.The maximum total load is 125 lb
(57 kg) evenly distributed, including gear
basket.Be careful that your vehicle does not
WPD0162
Instruments and controls2-33
ZREVIEW COPY:Ð2004 Xterra(xtr)
Owners Manual(owners)ÐUSA English(nna)
10/23/03Ðdebbie
X
Page 100 of 296

exceed the Gross Vehicle Weight Rating
(GVWR) or the Gross Axle Weight Ratings
(GAWR front and rear) . The GVWR and GAWR
are located on the Safety Compliance Certifica-
tion Label (located on the driver’s side door jamb
pillar) . For more information regarding GVWR
and GAWR, refer to the “Technical and con-
sumer information” section of this manual.
WARNING
Properly secure all cargo with ropes or
straps to help prevent it from sliding or
shifting. In a sudden stop or collision, un-
secured cargo could cause personal
injury.
CAUTION
Use care when placing or removing items
from the tubular roof rack or gear basket.
If you cannot comfortably lift the items
onto the tubular roof rack or gear basket
from the ground, use a ladder or stool.
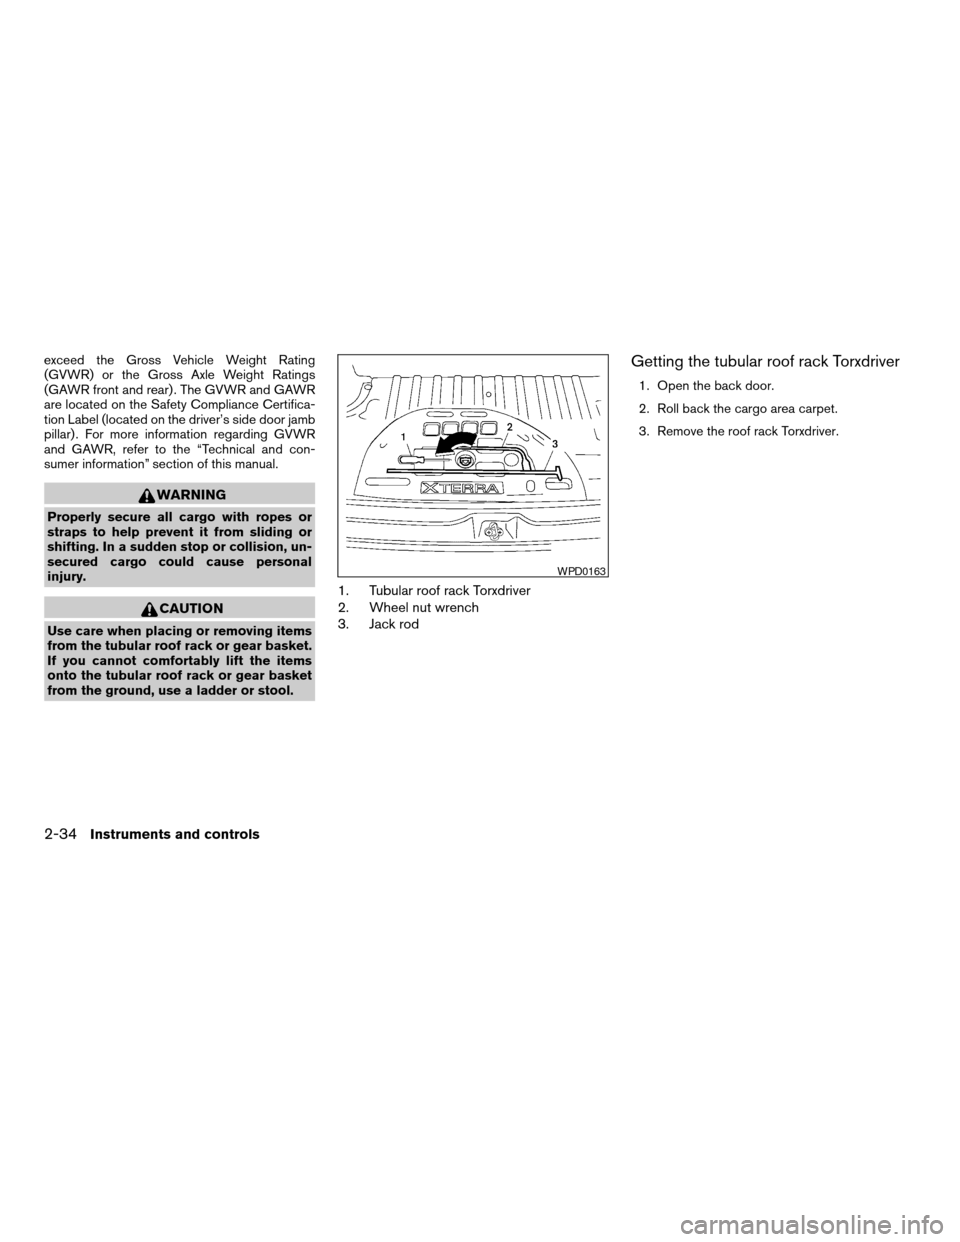
1. Tubular roof rack Torxdriver
2. Wheel nut wrench
3. Jack rod
Getting the tubular roof rack Torxdriver
1. Open the back door.
2. Roll back the cargo area carpet.
3. Remove the roof rack Torxdriver.
WPD0163
2-34Instruments and controls
ZREVIEW COPY:Ð2004 Xterra(xtr)
Owners Manual(owners)ÐUSA English(nna)
10/23/03Ðdebbie
X
Page 101 of 296

Tubular roof rack crossbar adjustment
The front and rear crossbars can be adjusted
forward, backward, or be removed. Use the
Torxdriver located in the tool kit to loosen both
crossbar adjusting screws.To adjust:
a. Loosen the adjusting screws with the
Torxdriver by turning counterclockwise.b. When the clamp is loosened, move the cross-
bars so the cargo can be positioned on the
crossbars.
c. Tighten the crossbar adjusting screws with
the Torxdriver by turning clockwise.
d. Secure the cargo with rope.
e. Always check the tightness of the crossbar
adjusting screws.
To remove:
a. Loosen the adjusting screws with the
Torxdriver by turning counterclockwise.
b. Rotate the clamps.
c. Remove the crossbars.
d. Reverse to install.
e. Always check the tightness of the crossbar
adjusting screws.
If you hear wind noise coming from the roof rack
while driving, adjust the roof rack crossbars to the
most rearward position.
AIC1146
Instruments and controls2-35
ZREVIEW COPY:Ð2004 Xterra(xtr)
Owners Manual(owners)ÐUSA English(nna)
10/23/03Ðdebbie
X
Page 102 of 296
The roof rack is equipped with a removable gear
basket.The maximum gear basket load is 30
lb (13.6 kg) evenly distributed.To remove the gear basket:
a. Unscrew the 4 hold down bolts by turning
them counterclockwise.
b. Lift up the rear of the basket.
c. Lift out the gear basket by moving it toward
the rear of the vehicle.
POWER WINDOWS (if so equipped)
WARNING
cMake sure that all passengers have
their hands, etc. inside the vehicle while
it is in motion and before closing the
windows. Use the window lock switch
to prevent unexpected use of the power
windows.
cDo not leave children unattended inside
the vehicle. They could unknowingly ac-
tivate switches or controls and become
trapped in a window. Unattended chil-
dren could become involved in serious
accidents.
APD1092
WINDOWS
2-36Instruments and controls
ZREVIEW COPY:Ð2004 Xterra(xtr)
Owners Manual(owners)ÐUSA English(nna)
10/23/03Ðdebbie
X
Page 105 of 296

MANUAL SUNROOF
Tilting the sunroof
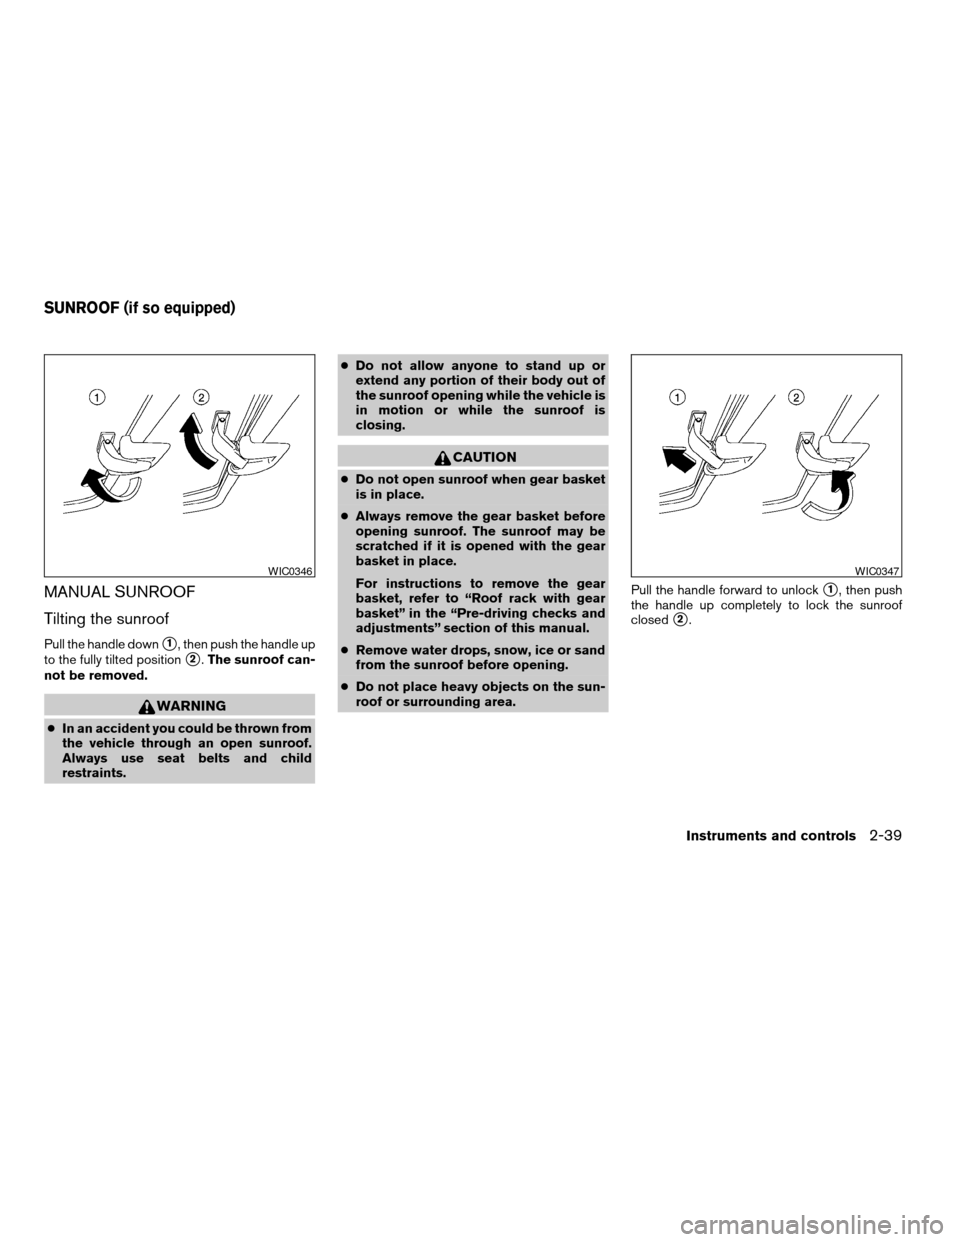
Pull the handle downs1, then push the handle up
to the fully tilted position
s2.The sunroof can-
not be removed.
WARNING
cIn an accident you could be thrown from
the vehicle through an open sunroof.
Always use seat belts and child
restraints.cDo not allow anyone to stand up or
extend any portion of their body out of
the sunroof opening while the vehicle is
in motion or while the sunroof is
closing.
CAUTION
cDo not open sunroof when gear basket
is in place.
cAlways remove the gear basket before
opening sunroof. The sunroof may be
scratched if it is opened with the gear
basket in place.
For instructions to remove the gear
basket, refer to “Roof rack with gear
basket” in the “Pre-driving checks and
adjustments” section of this manual.
cRemove water drops, snow, ice or sand
from the sunroof before opening.
cDo not place heavy objects on the sun-
roof or surrounding area.Pull the handle forward to unlock
s1, then push
the handle up completely to lock the sunroof
closed
s2.
WIC0346WIC0347
SUNROOF (if so equipped)
Instruments and controls2-39
ZREVIEW COPY:Ð2004 Xterra(xtr)
Owners Manual(owners)ÐUSA English(nna)
10/23/03Ðdebbie
X
Page 106 of 296

REMOVING/INSTALLING
WARNING
Do not remove or install the sun shade
while driving so full attention may be
given to vehicle operation.
Removing the sun shade
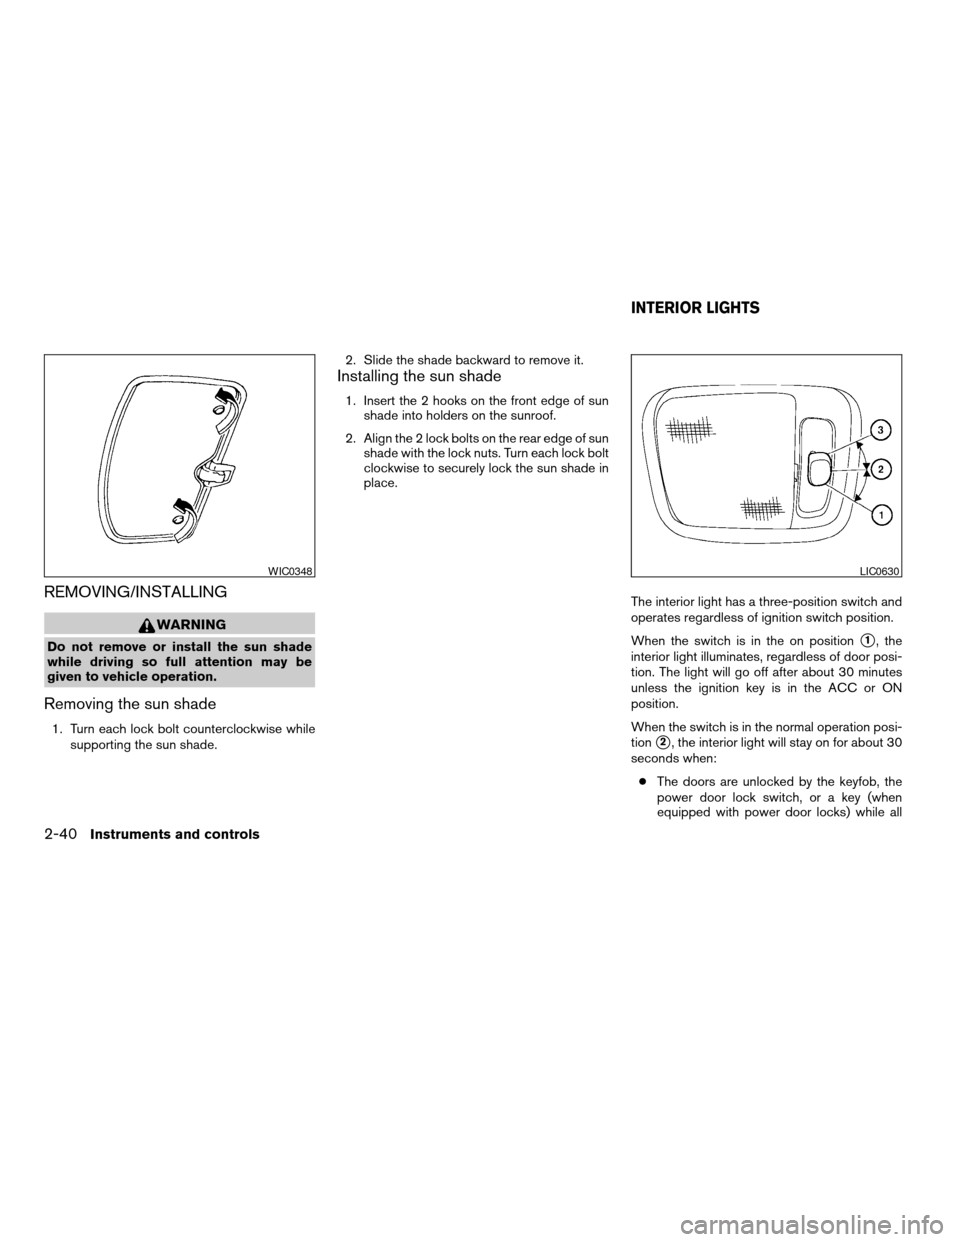
1. Turn each lock bolt counterclockwise while
supporting the sun shade.2. Slide the shade backward to remove it.
Installing the sun shade
1. Insert the 2 hooks on the front edge of sun
shade into holders on the sunroof.
2. Align the 2 lock bolts on the rear edge of sun
shade with the lock nuts. Turn each lock bolt
clockwise to securely lock the sun shade in
place.
The interior light has a three-position switch and
operates regardless of ignition switch position.
When the switch is in the on position
s1, the
interior light illuminates, regardless of door posi-
tion. The light will go off after about 30 minutes
unless the ignition key is in the ACC or ON
position.
When the switch is in the normal operation posi-
tion
s2, the interior light will stay on for about 30
seconds when:
cThe doors are unlocked by the keyfob, the
power door lock switch, or a key (when
equipped with power door locks) while all
WIC0348LIC0630
INTERIOR LIGHTS
2-40Instruments and controls
ZREVIEW COPY:Ð2004 Xterra(xtr)
Owners Manual(owners)ÐUSA English(nna)
10/23/03Ðdebbie
X