2004 NISSAN XTERRA remove seats
[x] Cancel search: remove seatsPage 57 of 296
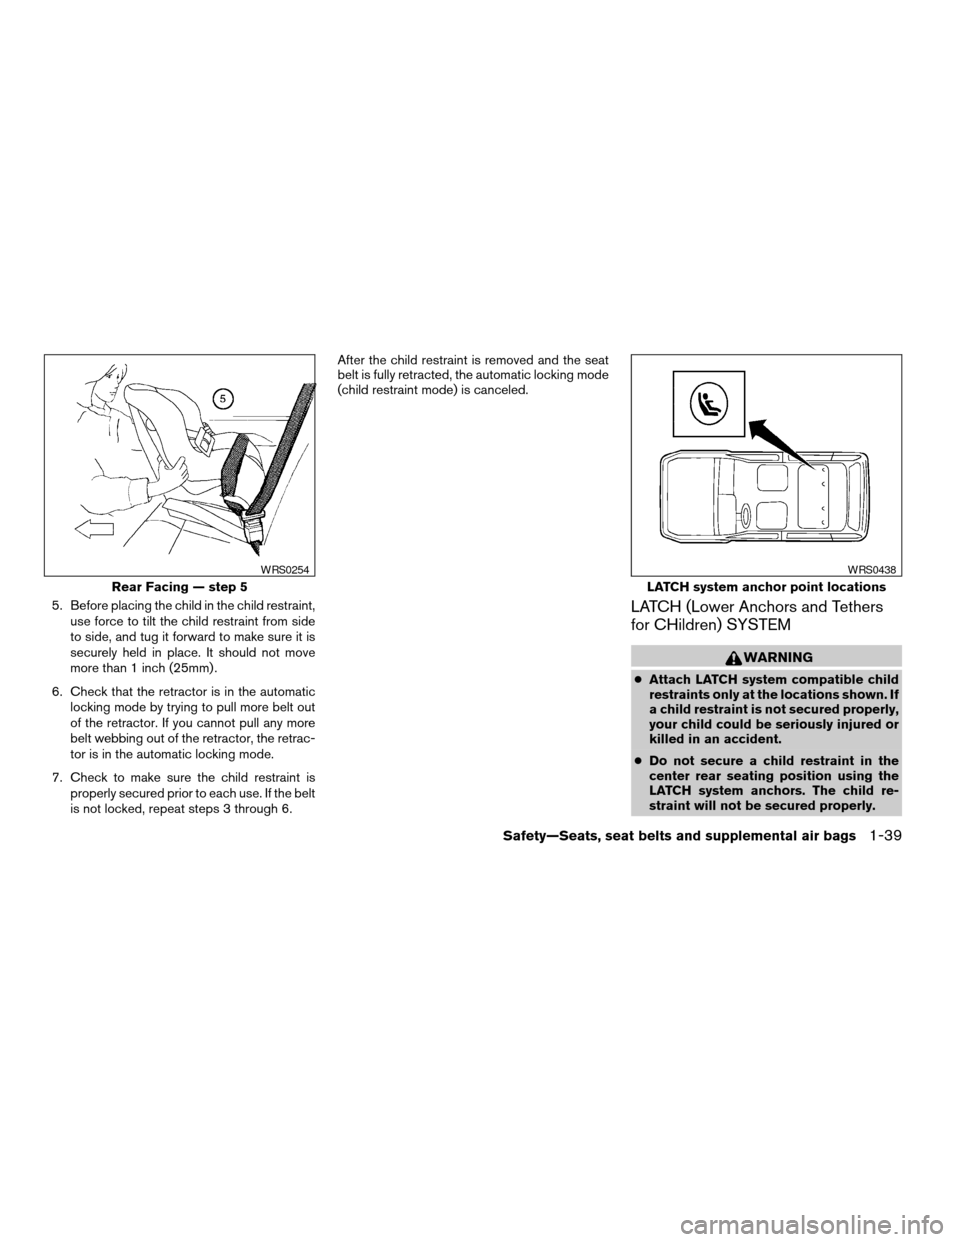
5. Before placing the child in the child restraint,
use force to tilt the child restraint from side
to side, and tug it forward to make sure it is
securely held in place. It should not move
more than 1 inch (25mm) .
6. Check that the retractor is in the automatic
locking mode by trying to pull more belt out
of the retractor. If you cannot pull any more
belt webbing out of the retractor, the retrac-
tor is in the automatic locking mode.
7. Check to make sure the child restraint is
properly secured prior to each use. If the belt
is not locked, repeat steps 3 through 6.After the child restraint is removed and the seat
belt is fully retracted, the automatic locking mode
(child restraint mode) is canceled.LATCH (Lower Anchors and Tethers
for CHildren) SYSTEM
WARNING
cAttach LATCH system compatible child
restraints only at the locations shown. If
a child restraint is not secured properly,
your child could be seriously injured or
killed in an accident.
cDo not secure a child restraint in the
center rear seating position using the
LATCH system anchors. The child re-
straint will not be secured properly.
Rear Facing — step 5
WRS0254
LATCH system anchor point locations
WRS0438
Safety—Seats, seat belts and supplemental air bags1-39
ZREVIEW COPY:Ð2004 Xterra(xtr)
Owners Manual(owners)ÐUSA English(nna)
10/23/03Ðdebbie
X
Page 59 of 296
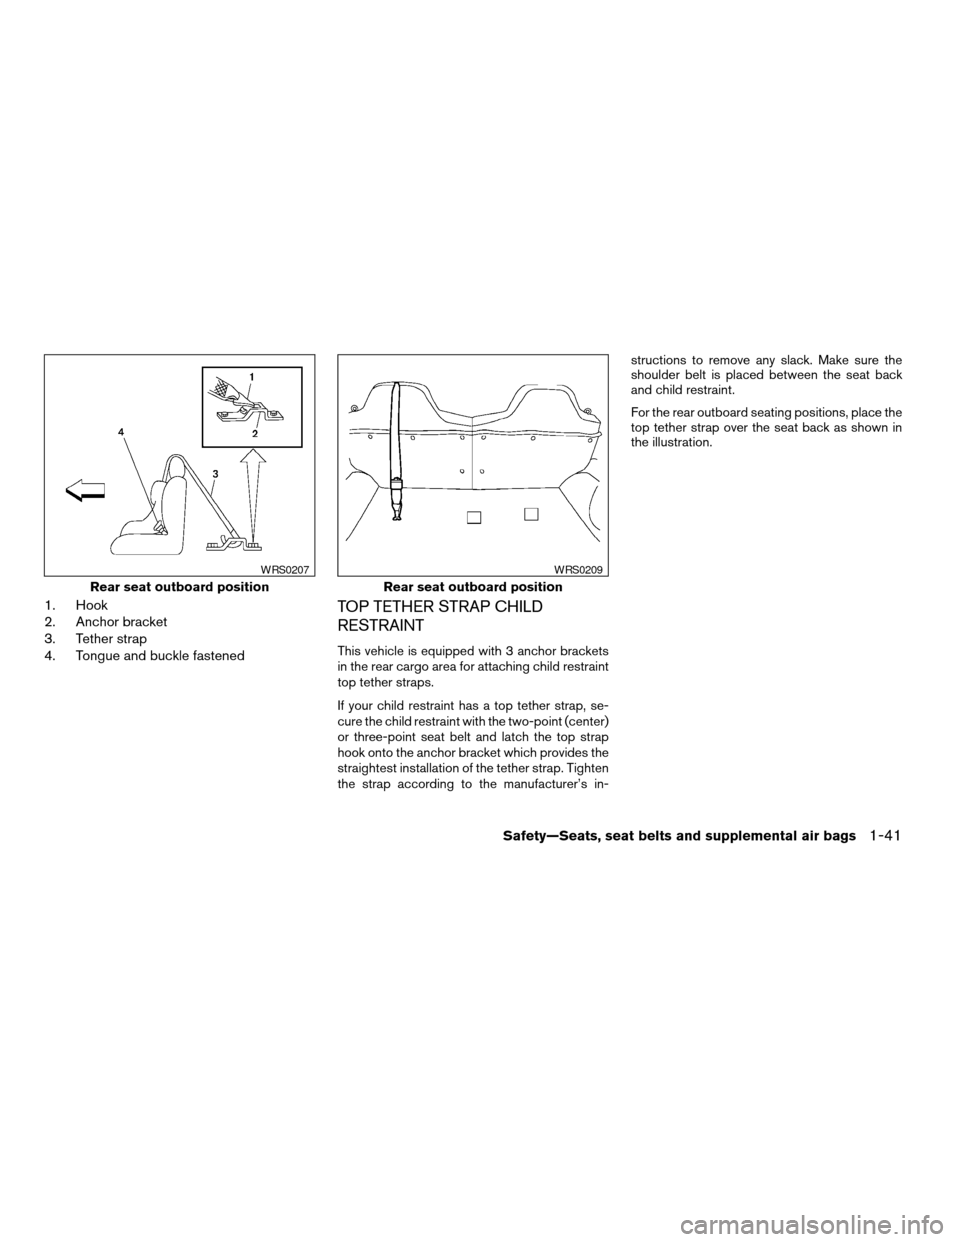
1. Hook
2. Anchor bracket
3. Tether strap
4. Tongue and buckle fastenedTOP TETHER STRAP CHILD
RESTRAINT
This vehicle is equipped with 3 anchor brackets
in the rear cargo area for attaching child restraint
top tether straps.
If your child restraint has a top tether strap, se-
cure the child restraint with the two-point (center)
or three-point seat belt and latch the top strap
hook onto the anchor bracket which provides the
straightest installation of the tether strap. Tighten
the strap according to the manufacturer’s in-structions to remove any slack. Make sure the
shoulder belt is placed between the seat back
and child restraint.
For the rear outboard seating positions, place the
top tether strap over the seat back as shown in
the illustration.
Rear seat outboard position
WRS0207
Rear seat outboard position
WRS0209
Safety—Seats, seat belts and supplemental air bags1-41
ZREVIEW COPY:Ð2004 Xterra(xtr)
Owners Manual(owners)ÐUSA English(nna)
10/23/03Ðdebbie
X
Page 60 of 296
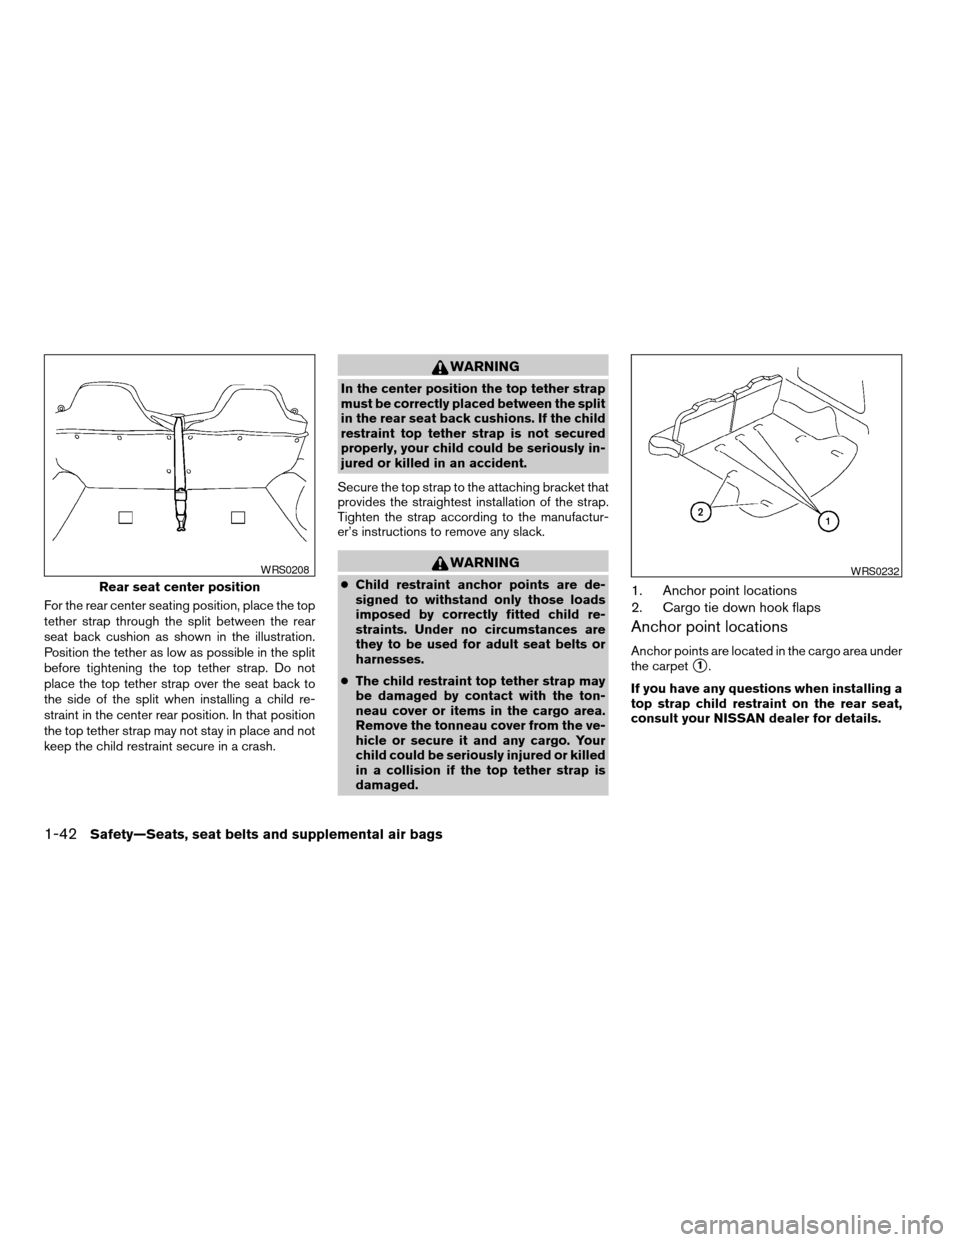
For the rear center seating position, place the top
tether strap through the split between the rear
seat back cushion as shown in the illustration.
Position the tether as low as possible in the split
before tightening the top tether strap. Do not
place the top tether strap over the seat back to
the side of the split when installing a child re-
straint in the center rear position. In that position
the top tether strap may not stay in place and not
keep the child restraint secure in a crash.
WARNING
In the center position the top tether strap
must be correctly placed between the split
in the rear seat back cushions. If the child
restraint top tether strap is not secured
properly, your child could be seriously in-
jured or killed in an accident.
Secure the top strap to the attaching bracket that
provides the straightest installation of the strap.
Tighten the strap according to the manufactur-
er’s instructions to remove any slack.
WARNING
cChild restraint anchor points are de-
signed to withstand only those loads
imposed by correctly fitted child re-
straints. Under no circumstances are
they to be used for adult seat belts or
harnesses.
cThe child restraint top tether strap may
be damaged by contact with the ton-
neau cover or items in the cargo area.
Remove the tonneau cover from the ve-
hicle or secure it and any cargo. Your
child could be seriously injured or killed
in a collision if the top tether strap is
damaged.1. Anchor point locations
2. Cargo tie down hook flaps
Anchor point locations
Anchor points are located in the cargo area under
the carpet
s1.
If you have any questions when installing a
top strap child restraint on the rear seat,
consult your NISSAN dealer for details.
Rear seat center position
WRS0208WRS0232
1-42Safety—Seats, seat belts and supplemental air bags
ZREVIEW COPY:Ð2004 Xterra(xtr)
Owners Manual(owners)ÐUSA English(nna)
10/23/03Ðdebbie
X
Page 63 of 296

3. Pull on the shoulder belt until all of the belt is
fully extended. At this time, the seat belt
retractor is in the automatic locking mode
(child restraint mode) . It reverts to emer-
gency locking mode when the seat belt is
fully retracted.4. Allow the seat belt to retract slightly. Pull up
on the shoulder belt to remove any slack in
the belt.
If necessary to ensure the child restraint is
secure, pull the shoulder belt through the
seat belt tongue beyond the stitching in the
belt.
After the seat belt is fully retracted and the child
restraint is removed from the seat, the stitching
on the shoulder belt can be pulled back through
the seat belt tongue. This stitching locates the
seat belt tongue near the top of the seat back for
easy access for passengers.5. Before placing the child in the child restraint,
use force to tilt the child restraint from side
to side, and tug it forward to make sure that
it is securely held in place. It should not move
more than 1 inch.
6. Check that the retractor is in the automatic
locking mode by trying to pull more seat belt
out of the retractor. If you cannot pull any
more belt webbing out of the retractor, the
retractor is in the automatic locking mode.
Front Facing — step 3
WRS0160
Front Facing — step 4
WRS0161
Front Facing — step 5
WRS0380
Safety—Seats, seat belts and supplemental air bags1-45
ZREVIEW COPY:Ð2004 Xterra(xtr)
Owners Manual(owners)ÐUSA English(nna)
10/23/03Ðdebbie
X
Page 64 of 296

7. Check to make sure the child restraint is
properly secured prior to each use. If the
seat belt is not locked, repeat steps 3
through 6.
After the child restraint is removed and the seat
belt is fully retracted, the automatic locking mode
(child restraint mode) is canceled.
1-46Safety—Seats, seat belts and supplemental air bags
ZREVIEW COPY:Ð2004 Xterra(xtr)
Owners Manual(owners)ÐUSA English(nna)
10/23/03Ðdebbie
X
Page 97 of 296
3. Remove the access hole cover.
4. Install the rubber mat.
5. Route the phone cord through the access
hole and plug into the power outlet.
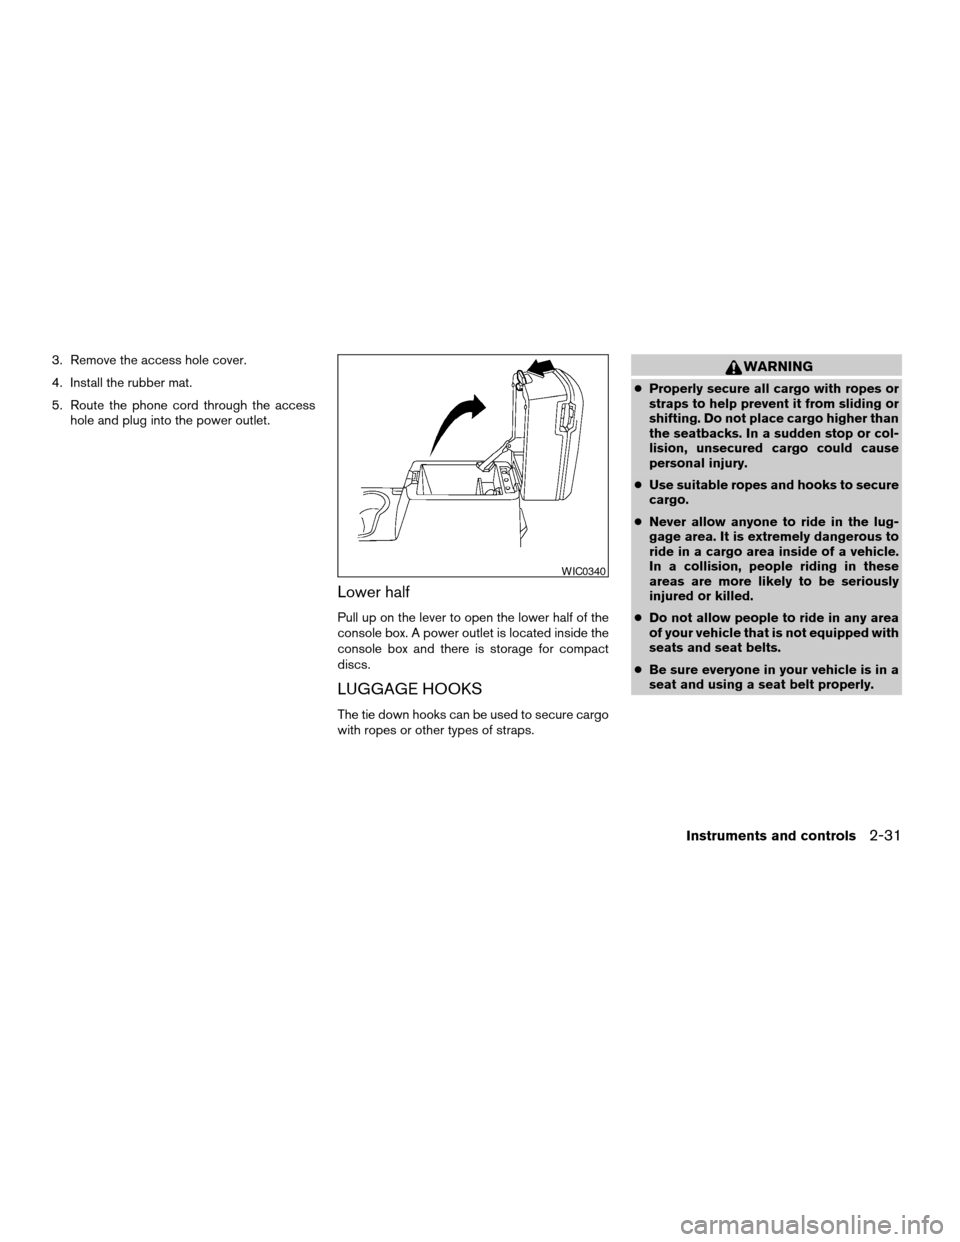
Lower half
Pull up on the lever to open the lower half of the
console box. A power outlet is located inside the
console box and there is storage for compact
discs.
LUGGAGE HOOKS
The tie down hooks can be used to secure cargo
with ropes or other types of straps.
WARNING
cProperly secure all cargo with ropes or
straps to help prevent it from sliding or
shifting. Do not place cargo higher than
the seatbacks. In a sudden stop or col-
lision, unsecured cargo could cause
personal injury.
cUse suitable ropes and hooks to secure
cargo.
cNever allow anyone to ride in the lug-
gage area. It is extremely dangerous to
ride in a cargo area inside of a vehicle.
In a collision, people riding in these
areas are more likely to be seriously
injured or killed.
cDo not allow people to ride in any area
of your vehicle that is not equipped with
seats and seat belts.
cBe sure everyone in your vehicle is in a
seat and using a seat belt properly.
WIC0340
Instruments and controls2-31
ZREVIEW COPY:Ð2004 Xterra(xtr)
Owners Manual(owners)ÐUSA English(nna)
10/23/03Ðdebbie
X
Page 201 of 296
UNDERBODY
In areas where road salt is used in winter, it is
necessary to clean the underbody regularly in
order to prevent dirt and salt from building up and
causing the acceleration of corrosion on the un-
derbody and suspension. Before the winter pe-
riod and again in the spring, the underseal must
be checked and, if necessary, retreated.
GLASS
Use glass cleaner to remove smoke and dust film
from the glass surfaces. It is normal for glass to
become coated with a film after the vehicle is
parked in the hot sun. Glass cleaner and a soft
cloth will easily remove this film.
CAUTION
When cleaning the inside of the windows,
do not use sharp-edged tools, abrasive
cleaners or chlorine-based disinfectant
cleaners. They could damage the electri-
cal conductors, radio antenna elements or
rear window defroster elements.
ALUMINUM ALLOY WHEELS
Wash the wheels regularly, especially during win-
ter months in areas where road salt is used. If not
removed, road salt could discolor the wheels.
CHROME PARTS
Clean all chrome parts regularly with a non-
abrasive chrome polish to maintain the finish.Occasionally remove loose dust from the interior
trim, plastic parts and seats using a vacuum
cleaner or soft brush. Wipe the vinyl and leather
surfaces with a clean, soft cloth dampened in
mild soap solution, then wipe clean with a dry,
soft cloth. Before using any fabric protector, read
the manufacturer’s recommendations. Some fab-
ric protectors contain chemicals that may stain or
bleach the seat material.
Use a cloth dampened only with water to clean
the meter and gauge lens.
CAUTION
cNever use benzine, thinner or any simi-
lar material.
cSmall dirt particles can be abrasive and
damaging to leather surfaces and
should be removed promptly. Do not
use saddle soap, polishes, oils, clean-
ing fluids, solvents, detergents or
ammonia-based cleaners as they may
damage the leather’s natural finish.
cNever use fabric protectors unless rec-
ommended by the manufacturer.
cDo not use glass or plastic cleaner on
meter or gauge lens covers. It may dam-
age the lens cover.
CLEANING INTERIOR
Appearance and care7-3
ZREVIEW COPY:Ð2004 Xterra(xtr)
Owners Manual(owners)ÐUSA English(nna)
10/23/03Ðdebbie
X
Page 266 of 296
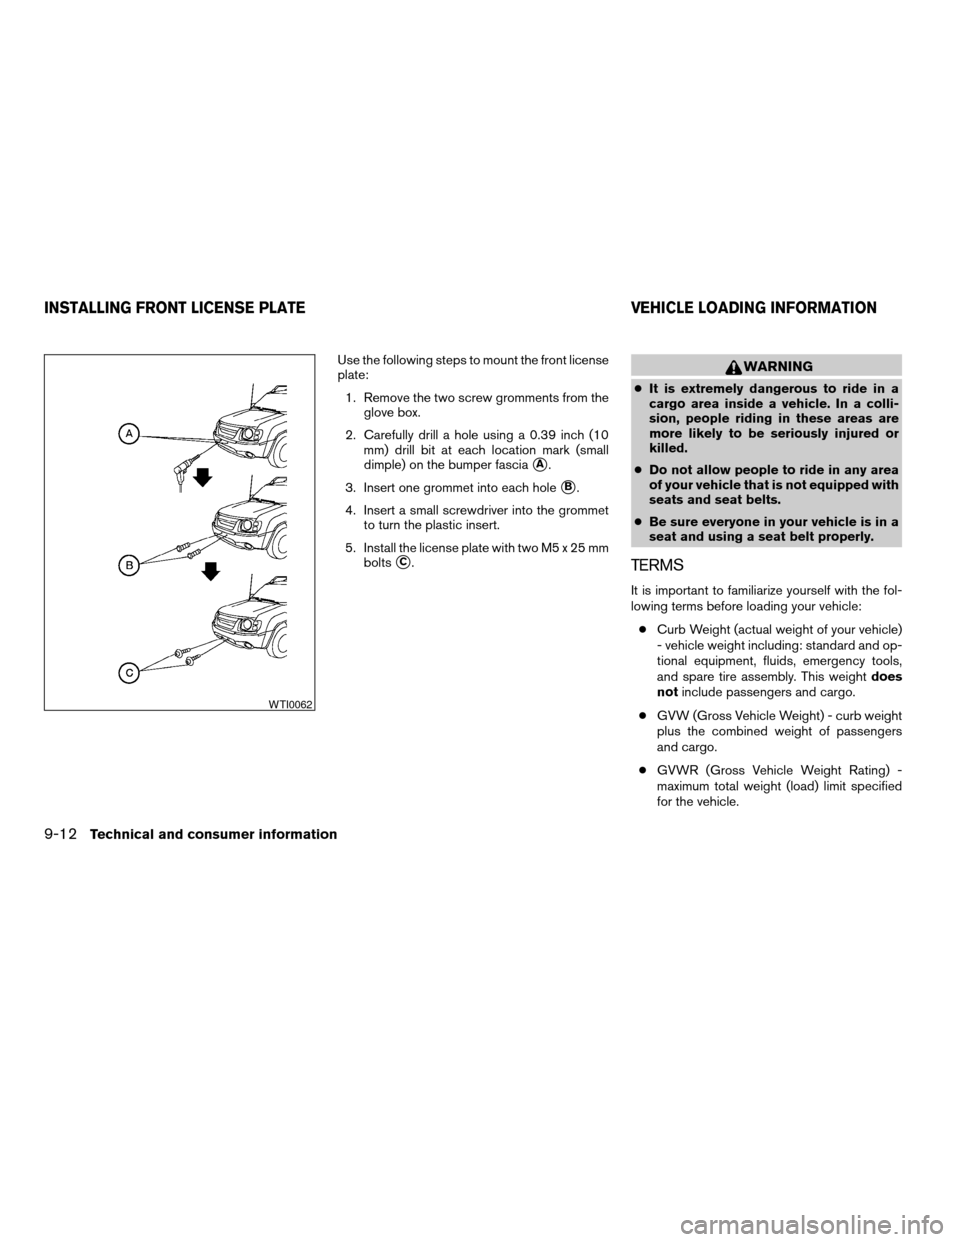
Use the following steps to mount the front license
plate:
1. Remove the two screw gromments from the
glove box.
2. Carefully drill a hole using a 0.39 inch (10
mm) drill bit at each location mark (small
dimple) on the bumper fascia
sA.
3. Insert one grommet into each hole
sB.
4. Insert a small screwdriver into the grommet
to turn the plastic insert.
5. Install the license plate with two M5 x 25 mm
bolts
sC.
WARNING
cIt is extremely dangerous to ride in a
cargo area inside a vehicle. In a colli-
sion, people riding in these areas are
more likely to be seriously injured or
killed.
cDo not allow people to ride in any area
of your vehicle that is not equipped with
seats and seat belts.
cBe sure everyone in your vehicle is in a
seat and using a seat belt properly.
TERMS
It is important to familiarize yourself with the fol-
lowing terms before loading your vehicle:
cCurb Weight (actual weight of your vehicle)
- vehicle weight including: standard and op-
tional equipment, fluids, emergency tools,
and spare tire assembly. This weightdoes
notinclude passengers and cargo.
cGVW (Gross Vehicle Weight) - curb weight
plus the combined weight of passengers
and cargo.
cGVWR (Gross Vehicle Weight Rating) -
maximum total weight (load) limit specified
for the vehicle.
WTI0062
INSTALLING FRONT LICENSE PLATE VEHICLE LOADING INFORMATION
9-12Technical and consumer information
ZREVIEW COPY:Ð2004 Xterra(xtr)
Owners Manual(owners)ÐUSA English(nna)
10/23/03Ðdebbie
X