Page 66 of 296

2 Instruments and controls
Instrument panel...................................2-2
Meters and gauges................................2-3
Speedometer and odometer.....................2-3
Tachometer....................................2-5
Engine coolant temperature gauge...............2-5
Fuel gauge....................................2-6
Compass and outside temperature display
(if so equipped)...................................2-6
Outside temperature display.....................2-7
Compass display...............................2-7
Warning/indicator lights and audible reminders.......2-9
Checking bulbs................................2-9
Warning lights................................2-10
Indicator lights................................2-13
Audible reminders.............................2-15
Security system (if so equipped)...................2-15
Vehicle security system.........................2-15
Windshield wiper and washer switch...............2-18
Switch operation..............................2-18
Rear window wiper and washer switch..............2-19
Rear window defroster switch......................2-20
Headlight and turn signal switch....................2-20
Headlight control switch........................2-20Daytime running light system (Canada only)......2-21
Instrument brightness control...................2-22
Turn signal switch.............................2-22
Fog light switch (if so equipped)................2-22
Hazard warning flasher switch.....................2-23
Horn............................................2-23
Vehicle dynamic control (VDC) off switch
(if so equipped)..................................2-24
Power outlet.....................................2-24
Dual 12 volt power outlets (if so equipped)..........2-26
Storage.........................................2-26
Storage compartment..........................2-26
Storage trays (if so equipped)...................2-27
Roof headliner net (if so equipped)..............2-27
Map pocket...................................2-28
Cup holders..................................2-29
Glove box....................................2-30
Console box (if so equipped)...................2-30
Luggage hooks................................2-31
Tonneau cover (if so equipped)..................2-32
Tubular roof rack with gear basket...............2-33
Windows........................................2-36
Power windows (if so equipped)................2-36
ZREVIEW COPY:Ð2004 Xterra(xtr)
Owners Manual(owners)ÐUSA English(nna)
10/23/03Ðdebbie
X
Page 68 of 296

1. Headlight/turn signal switch (P. 2-20)
2. Meters and gauges (P. 2-3)
3. Windshield wiper/washer switch (P.
2-18) and rear window wiper/washer
switch (if so equipped) (P. 2-19)
4. Power outlet (P. 2-24)
5. Heater and air conditioner (P. 4-2)
6. Front passenger supplemental air bag
(P. 1-8)
7. Glove box (P. 2-30)
8. Audio system (P. 4-10)
9.
Hazard warning flasher switch (P. 2-23)
10. Automatic/manual selector lever
(P. 5-10)
11. Transfer case shift lever (if so
equipped) (P. 5-19)
12. Parking brake release lever (P. 5-16)
13. Cruise control main/set switch (if so
equipped) (P. 5-16)
14. Driver supplemental air bag/horn
(P. 1-8, P. 2-23)
15. Steering wheel switch for audio
controls (if so equipped) (P. 4-28)
16. Vehicle dynamic control (VDC) off
switch (if so equipped) (P. 2-24)
17. Instrument brightness control (P. 2-22)
18. Rear window wiper and washer switch
(if so equipped)(P. 2-19)
WIC0641
INSTRUMENT PANEL
2-2Instruments and controls
ZREVIEW COPY:Ð2004 Xterra(xtr)
Owners Manual(owners)ÐUSA English(nna)
10/23/03Ðdebbie
X
Page 86 of 296

cDo not operate the washer if the reser-
voir tank is empty.
WARNING
In freezing temperatures the washer solu-
tion may freeze on the window and ob-
scure your vision. Warm the rear window
with the defroster before you wash the
rear window.
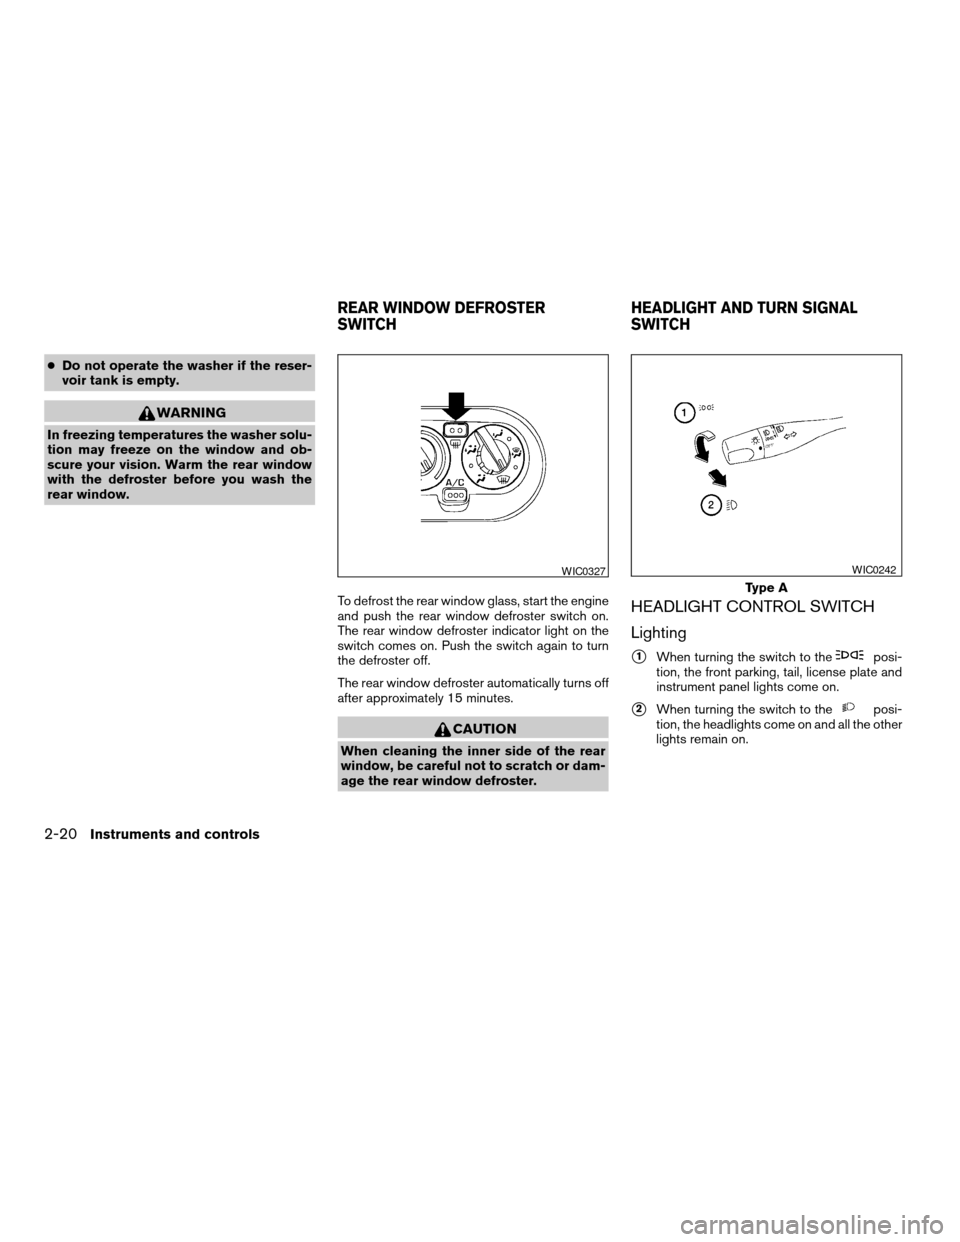
To defrost the rear window glass, start the engine
and push the rear window defroster switch on.
The rear window defroster indicator light on the
switch comes on. Push the switch again to turn
the defroster off.
The rear window defroster automatically turns off
after approximately 15 minutes.
CAUTION
When cleaning the inner side of the rear
window, be careful not to scratch or dam-
age the rear window defroster.
HEADLIGHT CONTROL SWITCH
Lighting
s1When turning the switch to theposi-
tion, the front parking, tail, license plate and
instrument panel lights come on.
s2When turning the switch to theposi-
tion, the headlights come on and all the other
lights remain on.
WIC0327
Type A
WIC0242
REAR WINDOW DEFROSTER
SWITCHHEADLIGHT AND TURN SIGNAL
SWITCH
2-20Instruments and controls
ZREVIEW COPY:Ð2004 Xterra(xtr)
Owners Manual(owners)ÐUSA English(nna)
10/23/03Ðdebbie
X
Page 88 of 296

INSTRUMENT BRIGHTNESS
CONTROL
The instrument brightness control operates when
the headlight switch is in theorposition.
Turn the control to adjust the brightness of instru-
ment panel lights.
TURN SIGNAL SWITCH
Turn signal
s1Move the lever up or down to signal the
turning direction. When the turn is com-
pleted, the turn signals cancel automatically.
Lane change signal
s2To signal a lane change, move the lever up or
down to the point where the indicator light
begins to flash, but the lever does not latch.
FOG LIGHT SWITCH (if so equipped)
To turn the front fog lights on, rotate the switch to
theposition.
To turn them off, rotate the switch to the OFF
position.
The headlight switch must be in the
posi-
tion (low beam headlights on) for the fog lights to
operate. The fog lights automatically turn off
whenever the highbeam headlight function is se-
lected.
WIC0328WIC0245WIC0247
2-22Instruments and controls
ZREVIEW COPY:Ð2004 Xterra(xtr)
Owners Manual(owners)ÐUSA English(nna)
10/23/03Ðdebbie
X
Page 92 of 296
The dual 12 volt power outlets can be used to
power optional add-on electrical devices.
To access the dual 12 volt power outlets, push in
the tab
s1and remove the covers2.
The outlets are rated at 12 volt, 240W (20A)
maximum.
CAUTION
cDo not use with accessories that ex-
ceed a 12 volt, 240W (20A) power draw.
Do not use double adapters or more
than one electrical accessory.cUse this power outlet with the engine
running. (If the engine is stopped, this
could result in a discharged battery.)
cAvoid using when the air conditioner,
headlights or rear window defroster is
on.
STORAGE COMPARTMENT
A storage compartment is located in the center
bottom of the instrument panel.
LIC0598WIC0334
DUAL 12 VOLT POWER OUTLETS (if
so equipped)STORAGE
2-26Instruments and controls
ZREVIEW COPY:Ð2004 Xterra(xtr)
Owners Manual(owners)ÐUSA English(nna)
10/23/03Ðdebbie
X
Page 103 of 296

1. Door lock/unlock button
2. Window lock button
3. Front passenger side
4. Right rear passenger side
5. Left rear passenger side
6. Driver side automatic switch
Driver’s side power window switch
The driver’s side control panel is equipped with
switches to open or close all of the windows.
The power windows operate when the ignition
switch is in the ON position, or for about 45
seconds after the ignition switch is turned to the
OFF position. If the driver’s or passenger’s dooris opened during this period of about 45 sec-
onds, power to the windows is canceled. To open
a window, push the switch and hold it down. To
close a window, pull the switch up. To stop the
opening or closing function at any time, simply
release the switch.
Front passenger power window switch
The passenger window switch operates only the
corresponding passenger window. To open the
window, push the switch and hold it down
s1.To
close the window, pull the switch up
s2.
WIC0376WIC0343
Instruments and controls2-37
ZREVIEW COPY:Ð2004 Xterra(xtr)
Owners Manual(owners)ÐUSA English(nna)
10/23/03Ðdebbie
X
Page 117 of 296
WARNING
cMake sure the hood is completely
closed and latched before driving. Fail-
ure to do so could cause the hood to fly
open and result in an accident.
cIf you see steam or smoke coming from
the engine compartment, to avoid injury
do not open the hood.1. Pull the hood lock release handle
sAlocated
below the driver side instrument panel; the
hood springs up slightly.
2. Lift the lever
sBat the front of the hood with
your fingertips and raise the hood.
3. Remove the support rod from the clamp.
4. Insert the support rod
sCinto the slot in the
front edge of the hood.
5. When closing the hood, return the support
rod to its original position, lower the hood to
approximately 12 inches above the latch and
release it. This allows proper engagement of
the hood latch.
WPD0179
HOOD
Pre-driving checks and adjustments3-9
ZREVIEW COPY:Ð2004 Xterra(xtr)
Owners Manual(owners)ÐUSA English(nna)
10/23/03Ðdebbie
X
Page 168 of 296

OFF: For driving up and down long
slopes where engine braking is nec-
essary push the Overdrive switch
once. The O/D OFF indicator light
in the instrument panel comes on at
this time.
When cruising at a low speed or climbing a
gentle slope, you may feel uncomfortable shift
shocks as the transmission shifts into and out of
Overdrive repeatedly. In this case, depress the
Overdrive switch to turn the Overdrive off. The
O/D OFF indicator light in the instrument panel
comes on at this time.
When driving conditions change, depress the
Overdrive switch to turn the Overdrive on.
Remember not to drive at high speeds for ex-
tended periods of time with the Overdrive off.
This reduces fuel economy.
MANUAL TRANSMISSION
WARNING
cDo not downshift abruptly on slippery
roads. This may cause a loss of control.
cDo not over-rev the engine when shift-
ing to a lower gear. This may cause a
loss of control or engine damage.
CAUTION
cDo not rest your foot on the clutch pedal
while driving. This may cause clutch
damage.
cFully depress the clutch pedal before
shifting to help prevent transmission
damage.
cStop your vehicle completely before
shifting into R (Reverse) .
cWhen the vehicle is stopped with the
engine running (for example, at a stop
light) , shift to N (Neutral) and release
the clutch pedal with the foot brake
applied.
Shifting
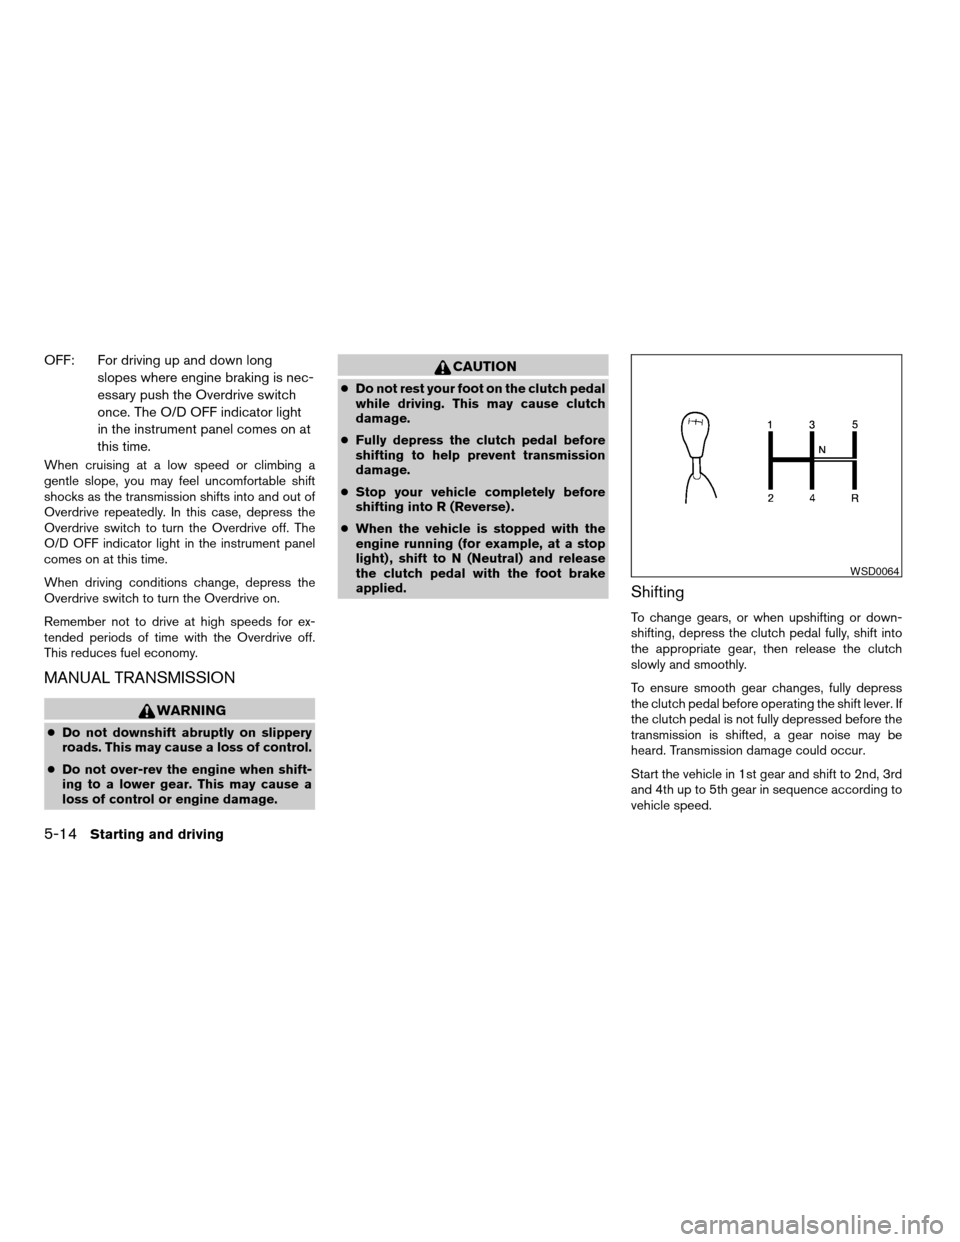
To change gears, or when upshifting or down-
shifting, depress the clutch pedal fully, shift into
the appropriate gear, then release the clutch
slowly and smoothly.
To ensure smooth gear changes, fully depress
the clutch pedal before operating the shift lever. If
the clutch pedal is not fully depressed before the
transmission is shifted, a gear noise may be
heard. Transmission damage could occur.
Start the vehicle in 1st gear and shift to 2nd, 3rd
and 4th up to 5th gear in sequence according to
vehicle speed.
WSD0064
5-14Starting and driving
ZREVIEW COPY:Ð2004 Xterra(xtr)
Owners Manual(owners)ÐUSA English(nna)
10/23/03Ðdebbie
X