2004 NISSAN XTERRA child seat
[x] Cancel search: child seatPage 42 of 296
WARNING
Infants and children need special protec-
tion. The vehicle’s seat belts may not fit
them properly. The shoulder belt may
come too close to the face or neck. The
lap belt may not fit over their small hip
bones. In an accident, an improperly fit-
ting seat belt could cause serious or fatal
injury. Always use appropriate child
restraints.
All U.S. states and Canadian provinces or terri-
tories require the use of approved child restraints
for infants and small children. See “Child Re-
straints” later in this section.
In addition, there are many types of child re-
straints available for larger children which should
be used for maximum protection.
NISSAN recommends that all pre-teens
and children be restrained in the rear seat.
According to accident statistics, children
are safer when properly restrained in the
rear seat than in the front seat. This is
especially important because your vehicle
has a supplemental restraint system (Air
bag system) for the front passenger. See
“Supplemental restraint system” earlier in
this section.
Infants and small children
NISSAN recommends that infants and small chil-
dren be placed in child restraints that comply with
Federal Motor Vehicle Safety Standards or Ca-
nadian Motor Vehicle Safety Standards. You
should choose a child restraint that fits your ve-
hicle and always follow the manufacturer’s in-
structions for installation and use.
Larger children
Children who are too large for child restraints
should be seated and restrained by the seat belts
which are provided.
If the child’s seating position has a shoulder belt
that fits close to the face or neck, the use of a
booster seat (commercially available) may help
overcome this. The booster seat should raise the
child so that the shoulder belt is properly posi-
tioned across the top, middle portion of the
shoulder and the lap belt is low on the hips. The
booster seat should fit the vehicle seat and have
a label certifying that it complies with Federal
Motor Vehicle Safety Standards or Canadian Mo-
tor Vehicle Safety Standards. Once the child has
grown so the shoulder belt is no longer on or near
the face and neck, use the shoulder belt without
the booster seat.
WARNING
Never let a child stand or kneel on any
seat and do not allow a child in the cargo
areas while the vehicle is moving. The
child could be seriously injured or killed in
an accident or sudden stop.
PREGNANT WOMEN
NISSAN recommends that pregnant women use
seat belts. The seat belt should be worn snug,
and always position the lap belt as low as pos-
sible around the hips, not the waist. Place the
shoulder belt over your shoulder and across your
chest. Never run the lap/shoulder belt over your
abdominal area. Contact your doctor for specific
recommendations.
INJURED PERSONS
NISSAN recommends that injured persons use
seat belts. Check with your doctor for specific
recommendations.
1-24Safety—Seats, seat belts and supplemental air bags
ZREVIEW COPY:Ð2004 Xterra(xtr)
Owners Manual(owners)ÐUSA English(nna)
10/23/03Ðdebbie
X
Page 44 of 296
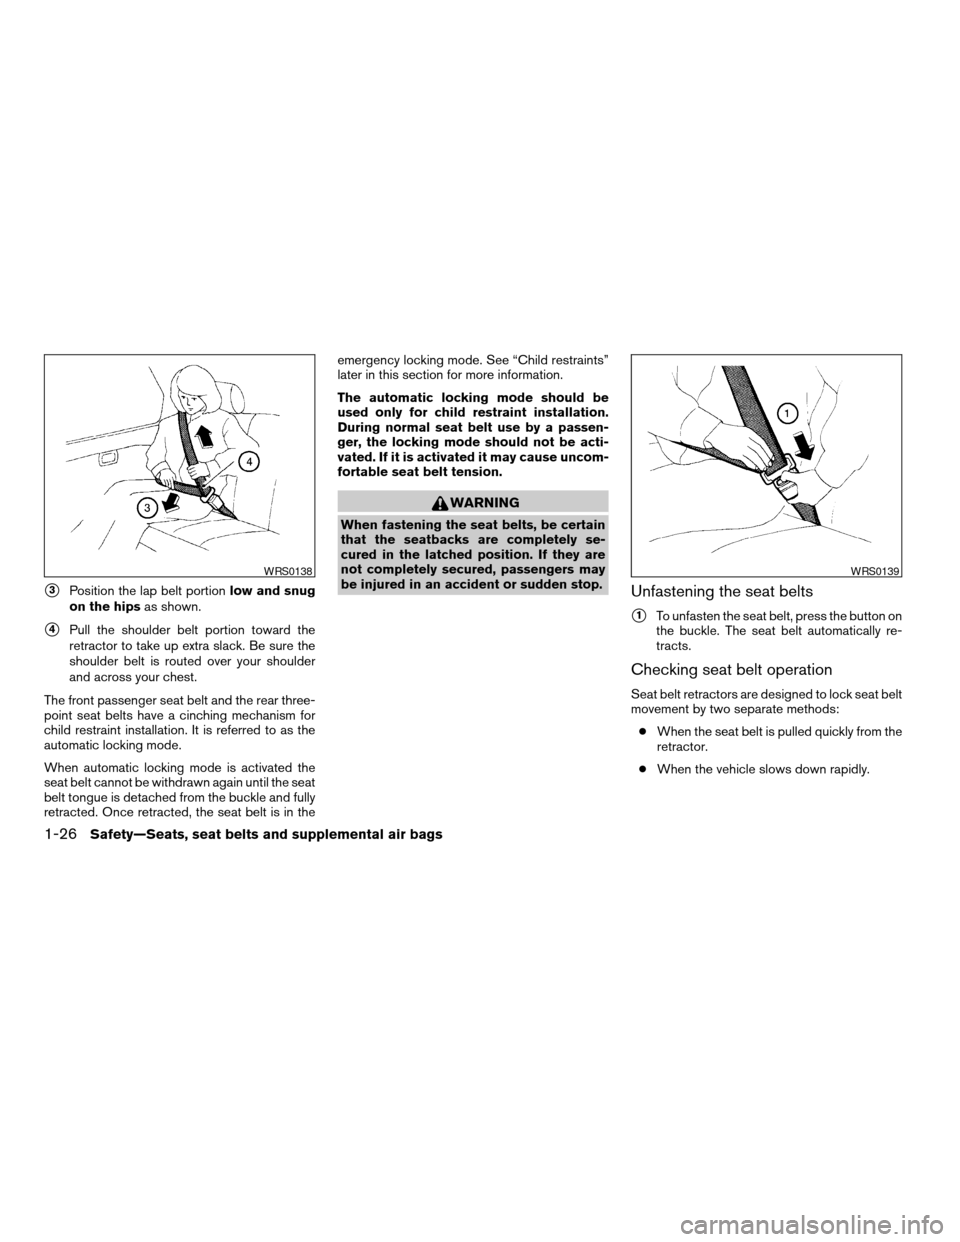
s3Position the lap belt portionlow and snug
on the hipsas shown.
s4Pull the shoulder belt portion toward the
retractor to take up extra slack. Be sure the
shoulder belt is routed over your shoulder
and across your chest.
The front passenger seat belt and the rear three-
point seat belts have a cinching mechanism for
child restraint installation. It is referred to as the
automatic locking mode.
When automatic locking mode is activated the
seat belt cannot be withdrawn again until the seat
belt tongue is detached from the buckle and fully
retracted. Once retracted, the seat belt is in theemergency locking mode. See “Child restraints”
later in this section for more information.
The automatic locking mode should be
used only for child restraint installation.
During normal seat belt use by a passen-
ger, the locking mode should not be acti-
vated. If it is activated it may cause uncom-
fortable seat belt tension.
WARNING
When fastening the seat belts, be certain
that the seatbacks are completely se-
cured in the latched position. If they are
not completely secured, passengers may
be injured in an accident or sudden stop.
Unfastening the seat belts
s1To unfasten the seat belt, press the button on
the buckle. The seat belt automatically re-
tracts.
Checking seat belt operation
Seat belt retractors are designed to lock seat belt
movement by two separate methods:
cWhen the seat belt is pulled quickly from the
retractor.
cWhen the vehicle slows down rapidly.
WRS0138WRS0139
1-26Safety—Seats, seat belts and supplemental air bags
ZREVIEW COPY:Ð2004 Xterra(xtr)
Owners Manual(owners)ÐUSA English(nna)
10/23/03Ðdebbie
X
Page 48 of 296
WARNING
cOnly NISSAN seat belt extenders, made
by the same company which made the
original equipment seat belts, should
be used with NISSAN seat belts.
cAdults and children who can use the
standard seat belt should not use an
extender. Such unnecessary use could
result in serious personal injury in the
event of an accident.
cNever use seat belt extenders to install
child restraints. If the child restraint is
not secured properly, the child could be
seriously injured in a collision or a sud-
den stop.
SEAT BELT MAINTENANCE
cTo clean the seat belt webbing,apply a
mild soap solution or any solution recom-
mended for cleaning upholstery or carpet.
Then wipe with a cloth and allow the seat
belts to dry in the shade. Do not allow the
seat belts to retract until they are completely
dry.
cIf dirt builds up in the shoulder belt
guideof the seat belt anchors, the seat
belts may retract slowly. Wipe the shoulder
belt guide with a clean, dry cloth.cPeriodically check to see that the seat
belt and the metal components,such as
buckles, tongues, retractors, flexible wires
and anchors, work properly. If loose parts,
deterioration, cuts or other damage on the
webbing is found, the entire seat belt as-
sembly should be replaced.
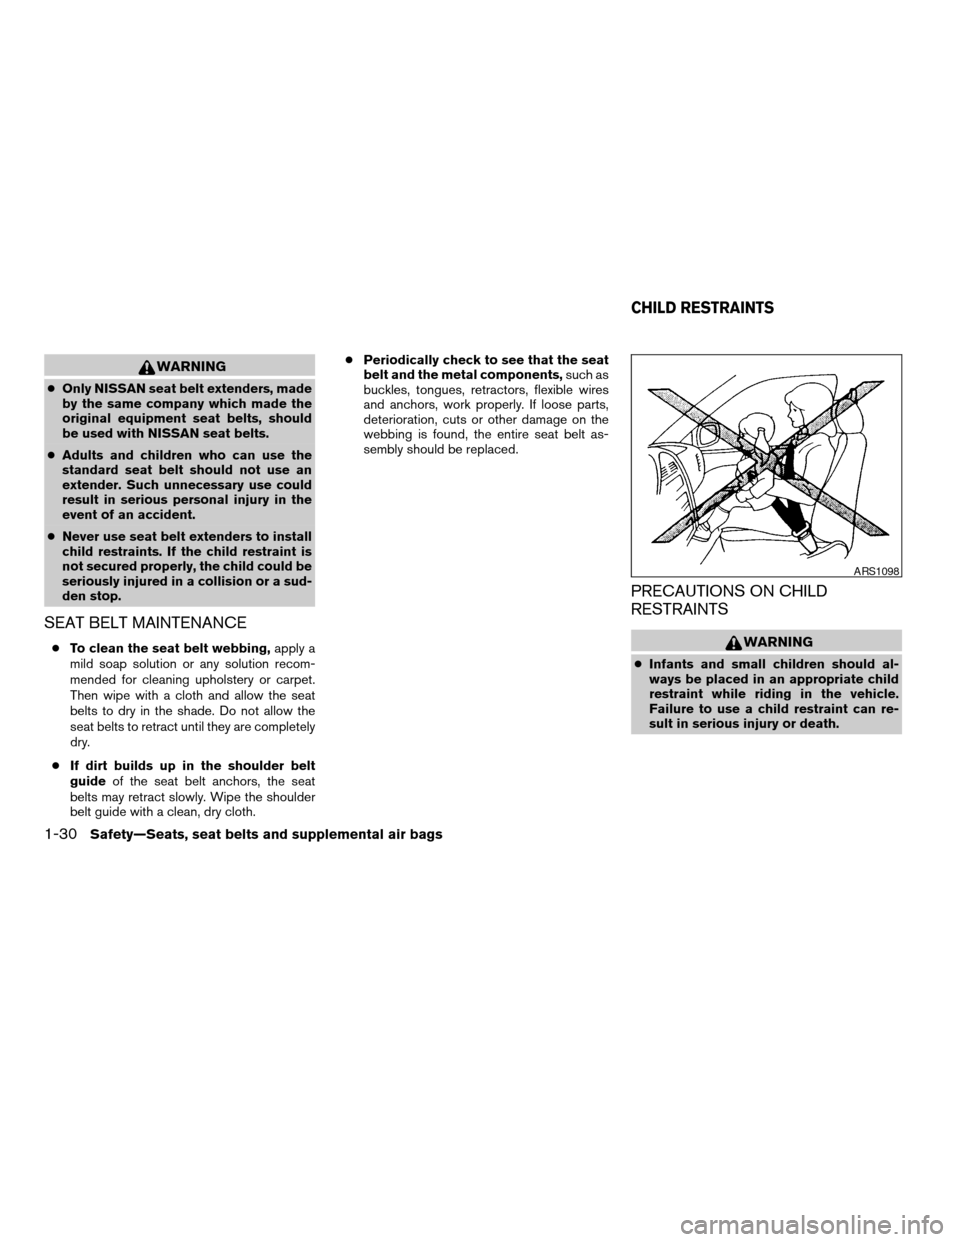
PRECAUTIONS ON CHILD
RESTRAINTS
WARNING
cInfants and small children should al-
ways be placed in an appropriate child
restraint while riding in the vehicle.
Failure to use a child restraint can re-
sult in serious injury or death.
ARS1098
CHILD RESTRAINTS
1-30Safety—Seats, seat belts and supplemental air bags
ZREVIEW COPY:Ð2004 Xterra(xtr)
Owners Manual(owners)ÐUSA English(nna)
10/23/03Ðdebbie
X
Page 49 of 296
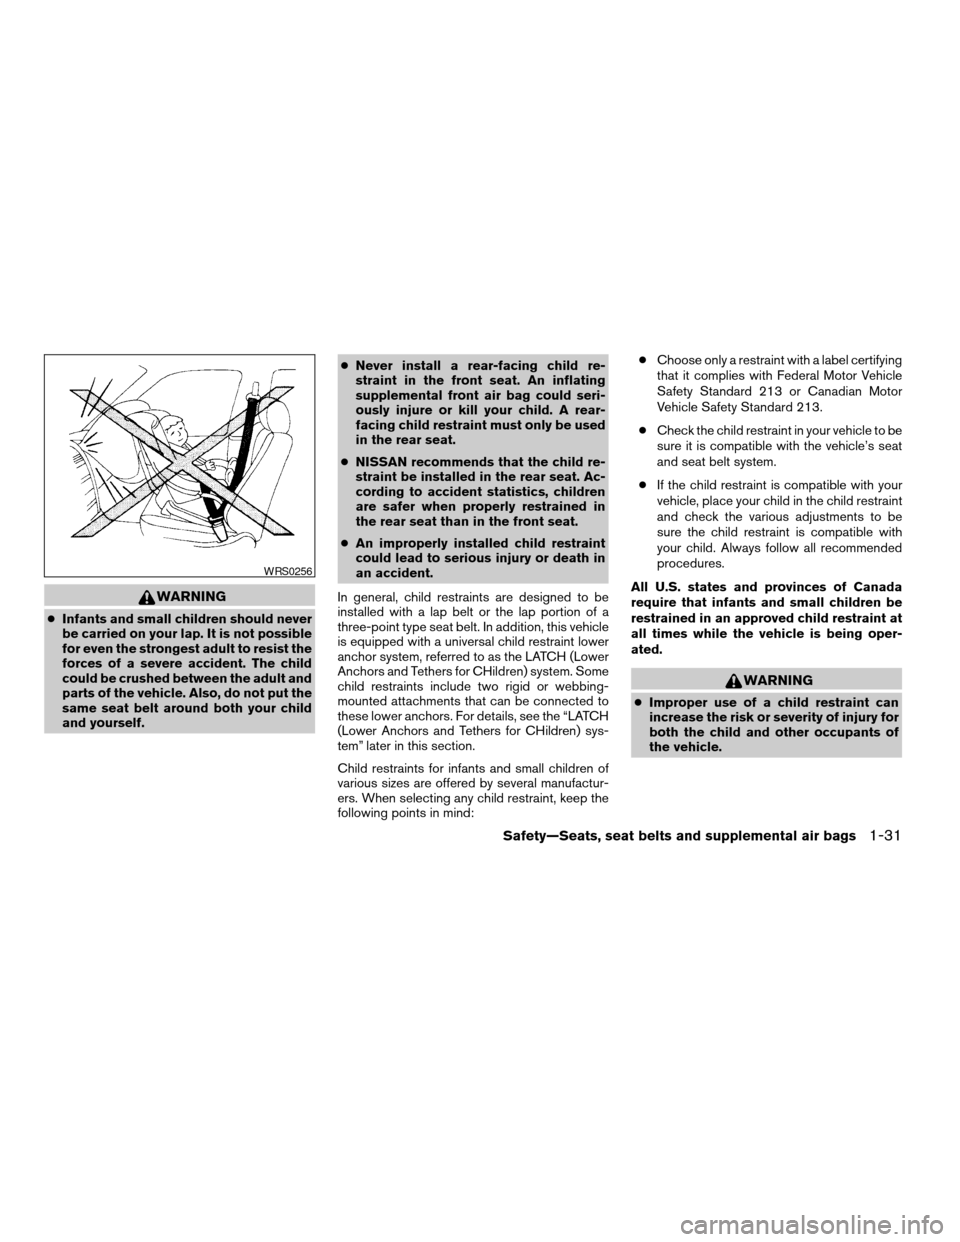
WARNING
cInfants and small children should never
be carried on your lap. It is not possible
for even the strongest adult to resist the
forces of a severe accident. The child
could be crushed between the adult and
parts of the vehicle. Also, do not put the
same seat belt around both your child
and yourself.cNever install a rear-facing child re-
straint in the front seat. An inflating
supplemental front air bag could seri-
ously injure or kill your child. A rear-
facing child restraint must only be used
in the rear seat.
cNISSAN recommends that the child re-
straint be installed in the rear seat. Ac-
cording to accident statistics, children
are safer when properly restrained in
the rear seat than in the front seat.
cAn improperly installed child restraint
could lead to serious injury or death in
an accident.
In general, child restraints are designed to be
installed with a lap belt or the lap portion of a
three-point type seat belt. In addition, this vehicle
is equipped with a universal child restraint lower
anchor system, referred to as the LATCH (Lower
Anchors and Tethers for CHildren) system. Some
child restraints include two rigid or webbing-
mounted attachments that can be connected to
these lower anchors. For details, see the “LATCH
(Lower Anchors and Tethers for CHildren) sys-
tem” later in this section.
Child restraints for infants and small children of
various sizes are offered by several manufactur-
ers. When selecting any child restraint, keep the
following points in mind:cChoose only a restraint with a label certifying
that it complies with Federal Motor Vehicle
Safety Standard 213 or Canadian Motor
Vehicle Safety Standard 213.
cCheck the child restraint in your vehicle to be
sure it is compatible with the vehicle’s seat
and seat belt system.
cIf the child restraint is compatible with your
vehicle, place your child in the child restraint
and check the various adjustments to be
sure the child restraint is compatible with
your child. Always follow all recommended
procedures.
All U.S. states and provinces of Canada
require that infants and small children be
restrained in an approved child restraint at
all times while the vehicle is being oper-
ated.
WARNING
cImproper use of a child restraint can
increase the risk or severity of injury for
both the child and other occupants of
the vehicle.
WRS0256
Safety—Seats, seat belts and supplemental air bags1-31
ZREVIEW COPY:Ð2004 Xterra(xtr)
Owners Manual(owners)ÐUSA English(nna)
10/23/03Ðdebbie
X
Page 50 of 296
cFollow all of the child restraint manu-
facturer’s instructions for installation
and use. When purchasing a child re-
straint, be sure to select one which will
fit your child and vehicle. It may not be
possible to properly install some types
of child restraints in your vehicle.
cIf the child restraint is not anchored
properly, the risk of a child being in-
jured in a collision or a sudden stop
greatly increases.
cAdjustable seatbacks should be posi-
tioned to fit the child restraint, but as
upright as possible.
cAfter attaching the child restraint, test it
before you place the child in it. Tilt it
from side to side. Try to tug it forward
and check to see if the belt holds the
restraint in place. The child restraint
should not move more than 1 inch. If the
restraint is not secure, tighten the belt
as necessary, or put the restraint in an-
other seat and test it again.cFor a front-facing child restraint, if the
seat position where it is installed has a
three-point type lap/shoulder belt,
check to make sure the shoulder belt
does not go in front of the child’s face or
neck. If it does, put the shoulder belt
behind the child restraint. If you must
install a front facing child restraint in
the front seat, see “Installation on front
passenger seat” later in this section.
cWhen your child restraint is not in use,
keep it secured with a seat belt to pre-
vent it from being thrown around in
case of a sudden stop or accident.
CAUTION
Remember that a child restraint left in a
closed vehicle can become very hot.
Check the seating surface and buckles
before placing your child in the child
restraint.
INSTALLATION ON REAR SEAT
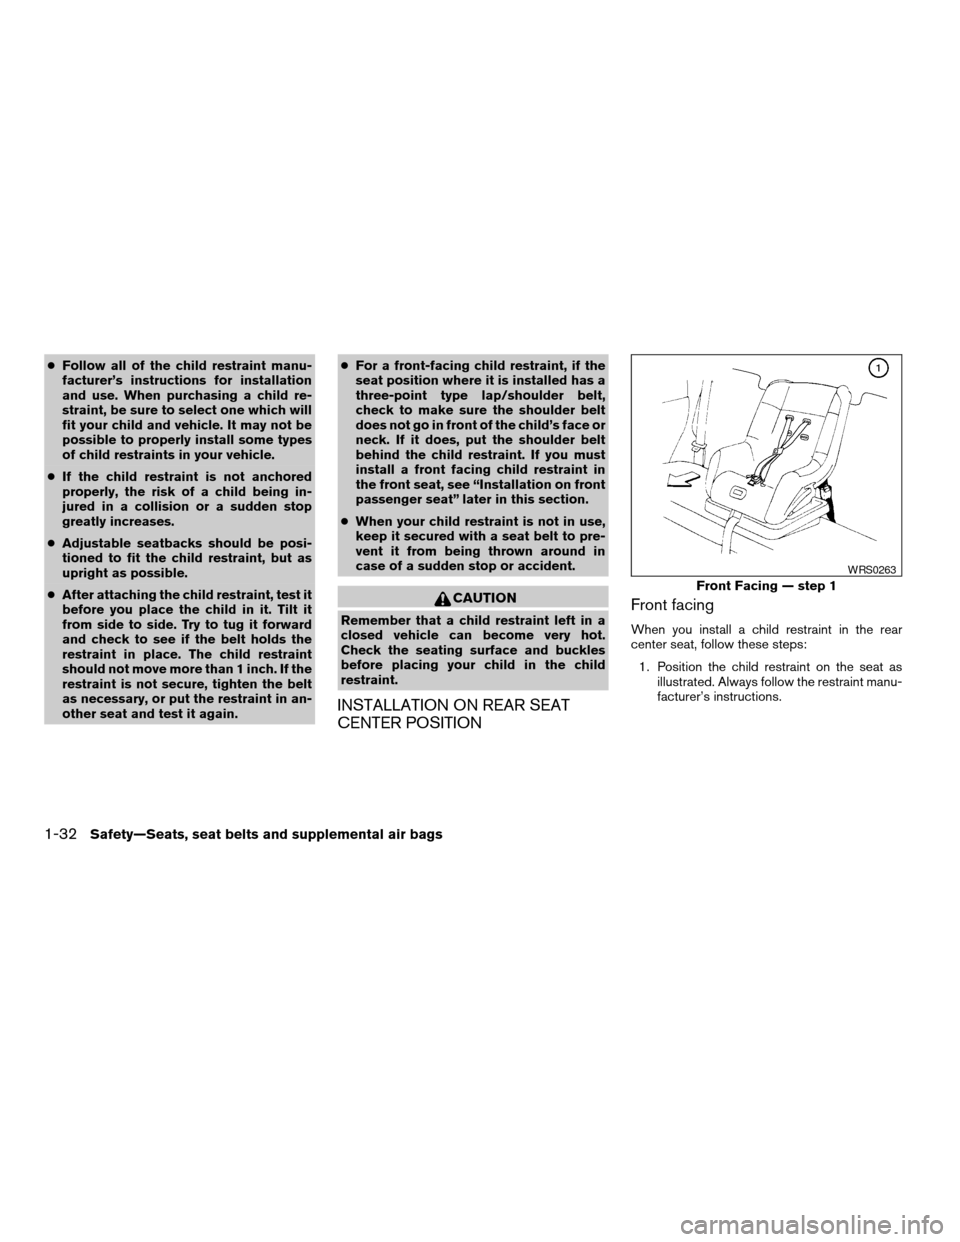
CENTER POSITIONFront facing
When you install a child restraint in the rear
center seat, follow these steps:
1. Position the child restraint on the seat as
illustrated. Always follow the restraint manu-
facturer’s instructions.
Front Facing — step 1
WRS0263
1-32Safety—Seats, seat belts and supplemental air bags
ZREVIEW COPY:Ð2004 Xterra(xtr)
Owners Manual(owners)ÐUSA English(nna)
10/23/03Ðdebbie
X
Page 51 of 296

2. Route the seat belt tongue through the child
restraint and insert it into the buckle until you
hear and feel the latch engage.
Be sure to follow the child restraint manu-
facturer’s instructions for belt routing.3. Remove all slack in the lap belt for a very
tight fit by pulling forcefully on the lap belt
adjustment.4. Before placing the child in the child restraint,
use force to tilt the child restraint from side
to side, and tug it forward to make sure it is
securely in place. It should not move more
than 1 inch (25mm) .
5. If it is not secure, try to tighten the belt again,
or put the restraint in another seat.
6. Check to make sure the child restraint is
properly secured prior to each use.
Front Facing — step 2
WRS0250
Front Facing — step 3
WRS0264
Front Facing — step 4
WRS0265
Safety—Seats, seat belts and supplemental air bags1-33
ZREVIEW COPY:Ð2004 Xterra(xtr)
Owners Manual(owners)ÐUSA English(nna)
10/23/03Ðdebbie
X
Page 52 of 296
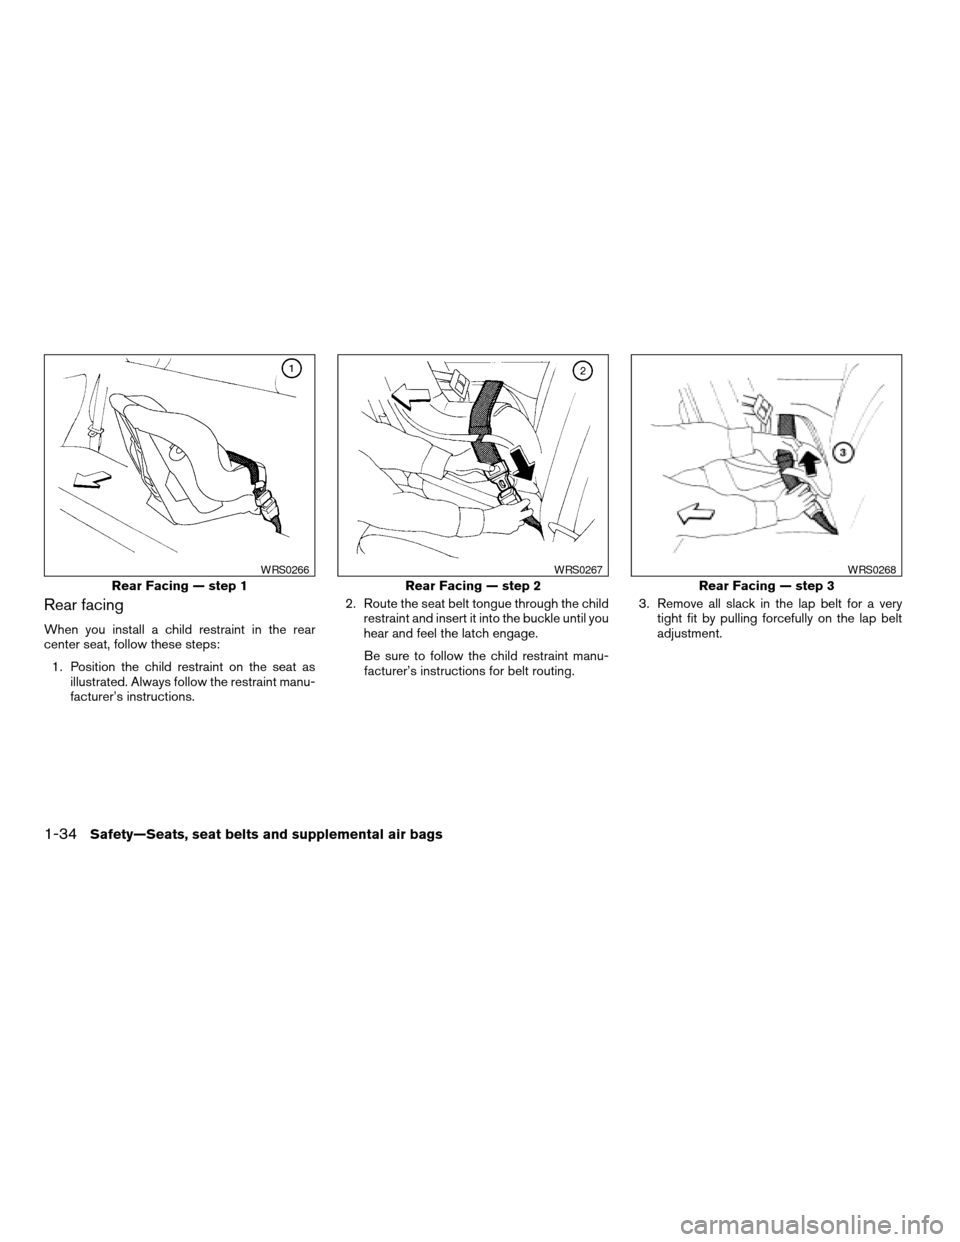
Rear facing
When you install a child restraint in the rear
center seat, follow these steps:
1. Position the child restraint on the seat as
illustrated. Always follow the restraint manu-
facturer’s instructions.2. Route the seat belt tongue through the child
restraint and insert it into the buckle until you
hear and feel the latch engage.
Be sure to follow the child restraint manu-
facturer’s instructions for belt routing.3. Remove all slack in the lap belt for a very
tight fit by pulling forcefully on the lap belt
adjustment.
Rear Facing — step 1
WRS0266
Rear Facing — step 2
WRS0267
Rear Facing — step 3
WRS0268
1-34Safety—Seats, seat belts and supplemental air bags
ZREVIEW COPY:Ð2004 Xterra(xtr)
Owners Manual(owners)ÐUSA English(nna)
10/23/03Ðdebbie
X
Page 53 of 296
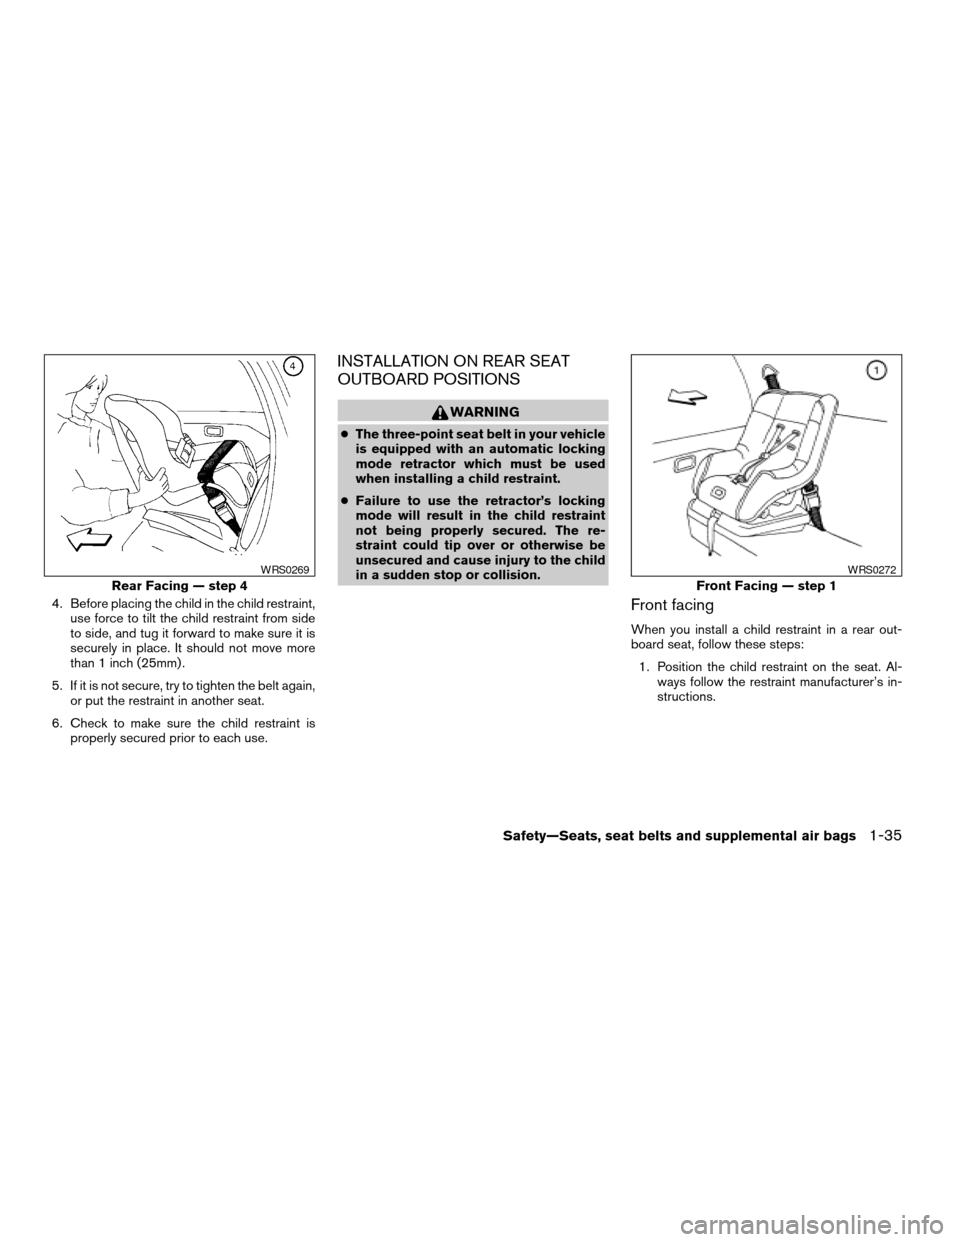
4. Before placing the child in the child restraint,
use force to tilt the child restraint from side
to side, and tug it forward to make sure it is
securely in place. It should not move more
than 1 inch (25mm) .
5. If it is not secure, try to tighten the belt again,
or put the restraint in another seat.
6. Check to make sure the child restraint is
properly secured prior to each use.
INSTALLATION ON REAR SEAT
OUTBOARD POSITIONS
WARNING
cThe three-point seat belt in your vehicle
is equipped with an automatic locking
mode retractor which must be used
when installing a child restraint.
cFailure to use the retractor’s locking
mode will result in the child restraint
not being properly secured. The re-
straint could tip over or otherwise be
unsecured and cause injury to the child
in a sudden stop or collision.
Front facing
When you install a child restraint in a rear out-
board seat, follow these steps:
1. Position the child restraint on the seat. Al-
ways follow the restraint manufacturer’s in-
structions.
Rear Facing — step 4
WRS0269
Front Facing — step 1
WRS0272
Safety—Seats, seat belts and supplemental air bags1-35
ZREVIEW COPY:Ð2004 Xterra(xtr)
Owners Manual(owners)ÐUSA English(nna)
10/23/03Ðdebbie
X