Page 63 of 296

3. Pull on the shoulder belt until all of the belt is
fully extended. At this time, the seat belt
retractor is in the automatic locking mode
(child restraint mode) . It reverts to emer-
gency locking mode when the seat belt is
fully retracted.4. Allow the seat belt to retract slightly. Pull up
on the shoulder belt to remove any slack in
the belt.
If necessary to ensure the child restraint is
secure, pull the shoulder belt through the
seat belt tongue beyond the stitching in the
belt.
After the seat belt is fully retracted and the child
restraint is removed from the seat, the stitching
on the shoulder belt can be pulled back through
the seat belt tongue. This stitching locates the
seat belt tongue near the top of the seat back for
easy access for passengers.5. Before placing the child in the child restraint,
use force to tilt the child restraint from side
to side, and tug it forward to make sure that
it is securely held in place. It should not move
more than 1 inch.
6. Check that the retractor is in the automatic
locking mode by trying to pull more seat belt
out of the retractor. If you cannot pull any
more belt webbing out of the retractor, the
retractor is in the automatic locking mode.
Front Facing — step 3
WRS0160
Front Facing — step 4
WRS0161
Front Facing — step 5
WRS0380
Safety—Seats, seat belts and supplemental air bags1-45
ZREVIEW COPY:Ð2004 Xterra(xtr)
Owners Manual(owners)ÐUSA English(nna)
10/23/03Ðdebbie
X
Page 64 of 296
7. Check to make sure the child restraint is
properly secured prior to each use. If the
seat belt is not locked, repeat steps 3
through 6.
After the child restraint is removed and the seat
belt is fully retracted, the automatic locking mode
(child restraint mode) is canceled.
1-46Safety—Seats, seat belts and supplemental air bags
ZREVIEW COPY:Ð2004 Xterra(xtr)
Owners Manual(owners)ÐUSA English(nna)
10/23/03Ðdebbie
X
Page 102 of 296
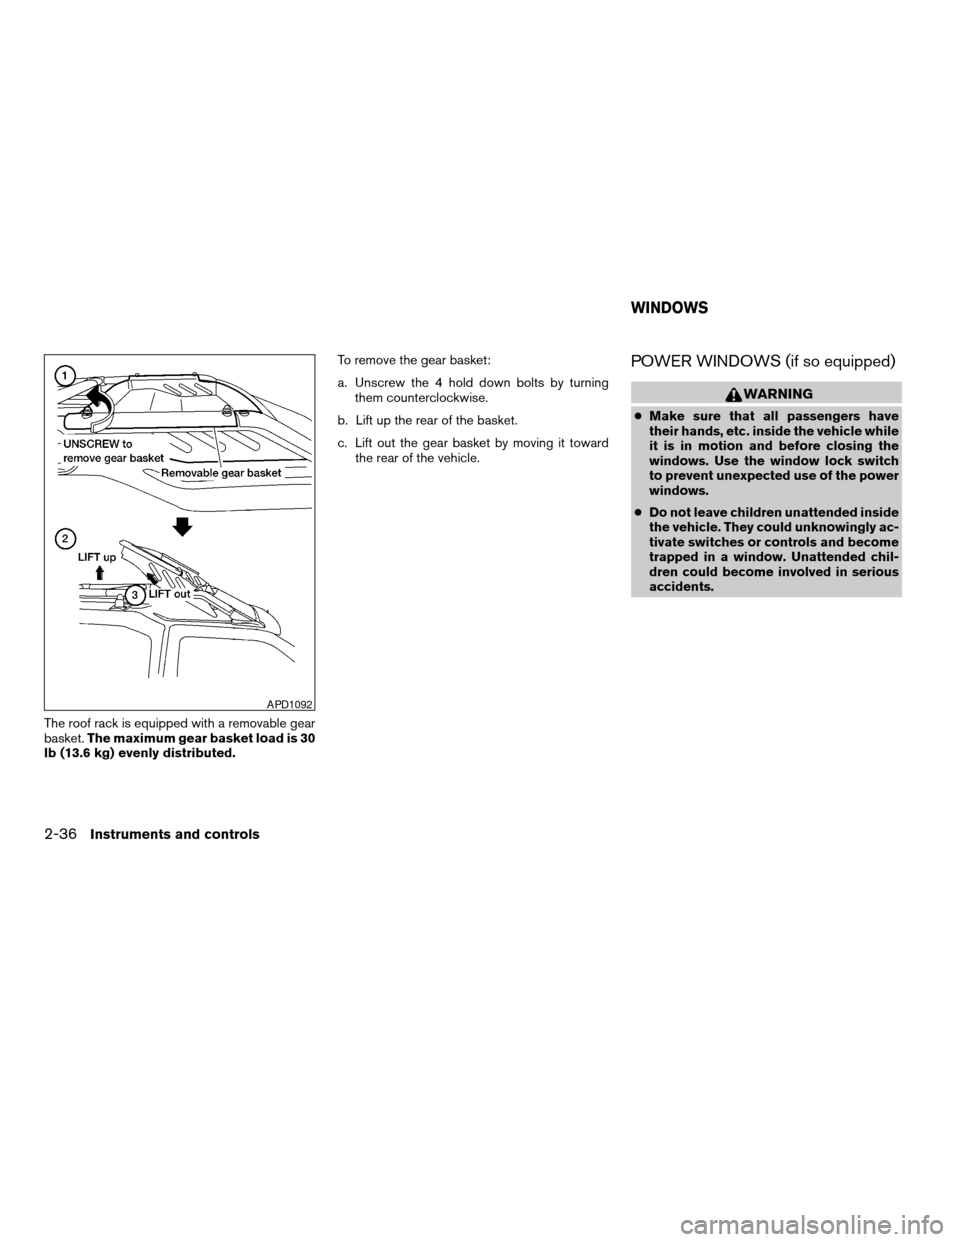
The roof rack is equipped with a removable gear
basket.The maximum gear basket load is 30
lb (13.6 kg) evenly distributed.To remove the gear basket:
a. Unscrew the 4 hold down bolts by turning
them counterclockwise.
b. Lift up the rear of the basket.
c. Lift out the gear basket by moving it toward
the rear of the vehicle.
POWER WINDOWS (if so equipped)
WARNING
cMake sure that all passengers have
their hands, etc. inside the vehicle while
it is in motion and before closing the
windows. Use the window lock switch
to prevent unexpected use of the power
windows.
cDo not leave children unattended inside
the vehicle. They could unknowingly ac-
tivate switches or controls and become
trapped in a window. Unattended chil-
dren could become involved in serious
accidents.
APD1092
WINDOWS
2-36Instruments and controls
ZREVIEW COPY:Ð2004 Xterra(xtr)
Owners Manual(owners)ÐUSA English(nna)
10/23/03Ðdebbie
X
Page 105 of 296
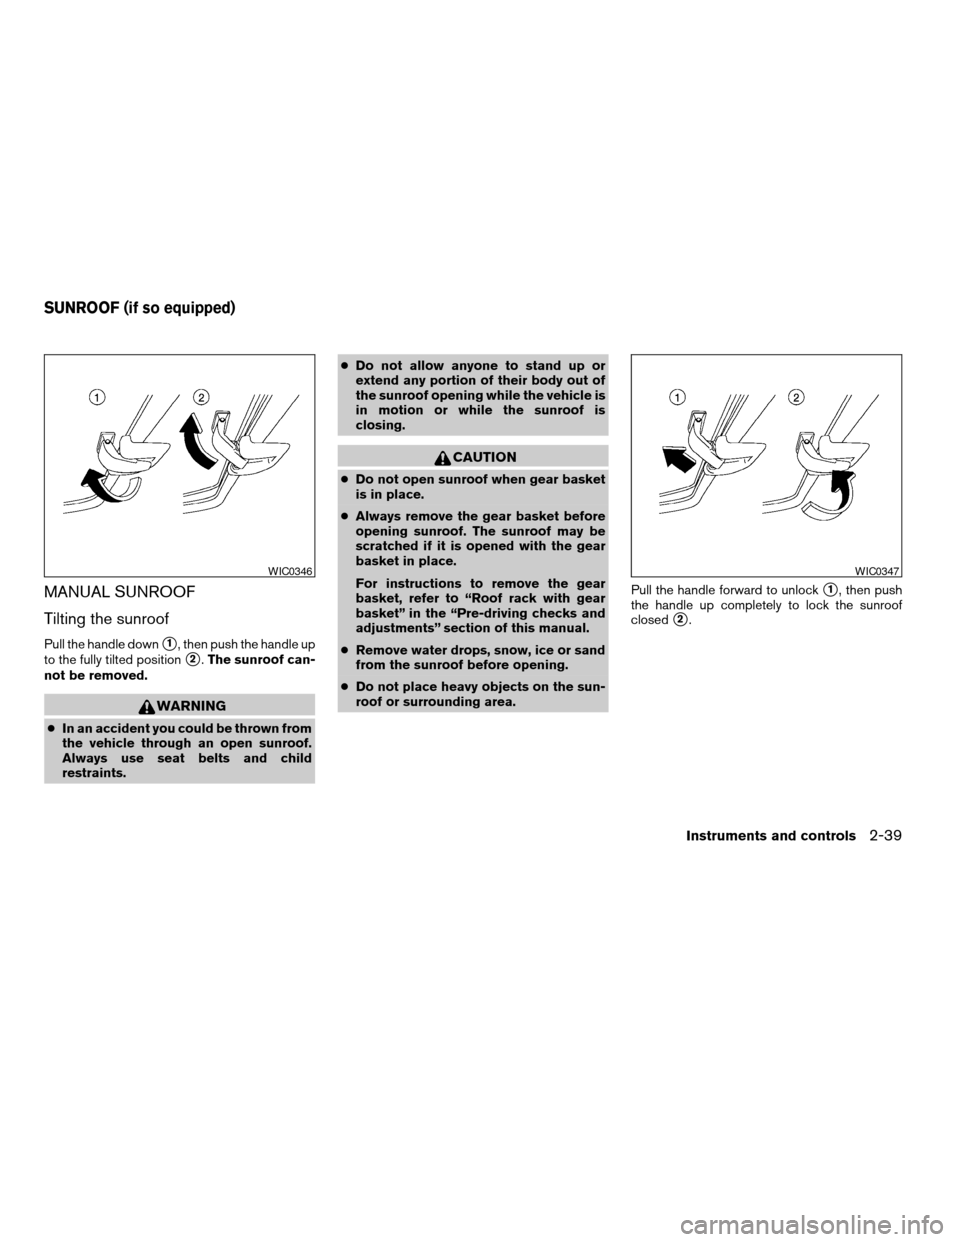
MANUAL SUNROOF
Tilting the sunroof
Pull the handle downs1, then push the handle up
to the fully tilted position
s2.The sunroof can-
not be removed.
WARNING
cIn an accident you could be thrown from
the vehicle through an open sunroof.
Always use seat belts and child
restraints.cDo not allow anyone to stand up or
extend any portion of their body out of
the sunroof opening while the vehicle is
in motion or while the sunroof is
closing.
CAUTION
cDo not open sunroof when gear basket
is in place.
cAlways remove the gear basket before
opening sunroof. The sunroof may be
scratched if it is opened with the gear
basket in place.
For instructions to remove the gear
basket, refer to “Roof rack with gear
basket” in the “Pre-driving checks and
adjustments” section of this manual.
cRemove water drops, snow, ice or sand
from the sunroof before opening.
cDo not place heavy objects on the sun-
roof or surrounding area.Pull the handle forward to unlock
s1, then push
the handle up completely to lock the sunroof
closed
s2.
WIC0346WIC0347
SUNROOF (if so equipped)
Instruments and controls2-39
ZREVIEW COPY:Ð2004 Xterra(xtr)
Owners Manual(owners)ÐUSA English(nna)
10/23/03Ðdebbie
X
Page 109 of 296

3 Pre-driving checks and adjustments
Keys .............................................3-2
Doors............................................3-2
Locking with key................................3-2
Locking with inside lock knob....................3-3
Locking with power door lock switch
(if so equipped)................................3-3
Child safety rear door lock.......................3-4
Remote keyless entry system (if so equipped).........3-4
How to use remote keyless entry system..........3-5
Battery replacement............................3-8
Hood............................................3-9
Back door.......................................3-10Tubular step rail (if so equipped)...................3-11
Fuel filler lid......................................3-11
Fuel filler cap..................................3-11
Steering wheel...................................3-13
Tilt operation (if so equipped)...................3-13
Sun visors.......................................3-13
Vanity mirror (if so equipped)....................3-13
Mirrors..........................................3-13
Inside mirror..................................3-13
Outside mirrors...............................3-14
Outside mirror remote control
(if so equipped)...............................3-15
ZREVIEW COPY:Ð2004 Xterra(xtr)
Owners Manual(owners)ÐUSA English(nna)
10/23/03Ðdebbie
X
Page 110 of 296
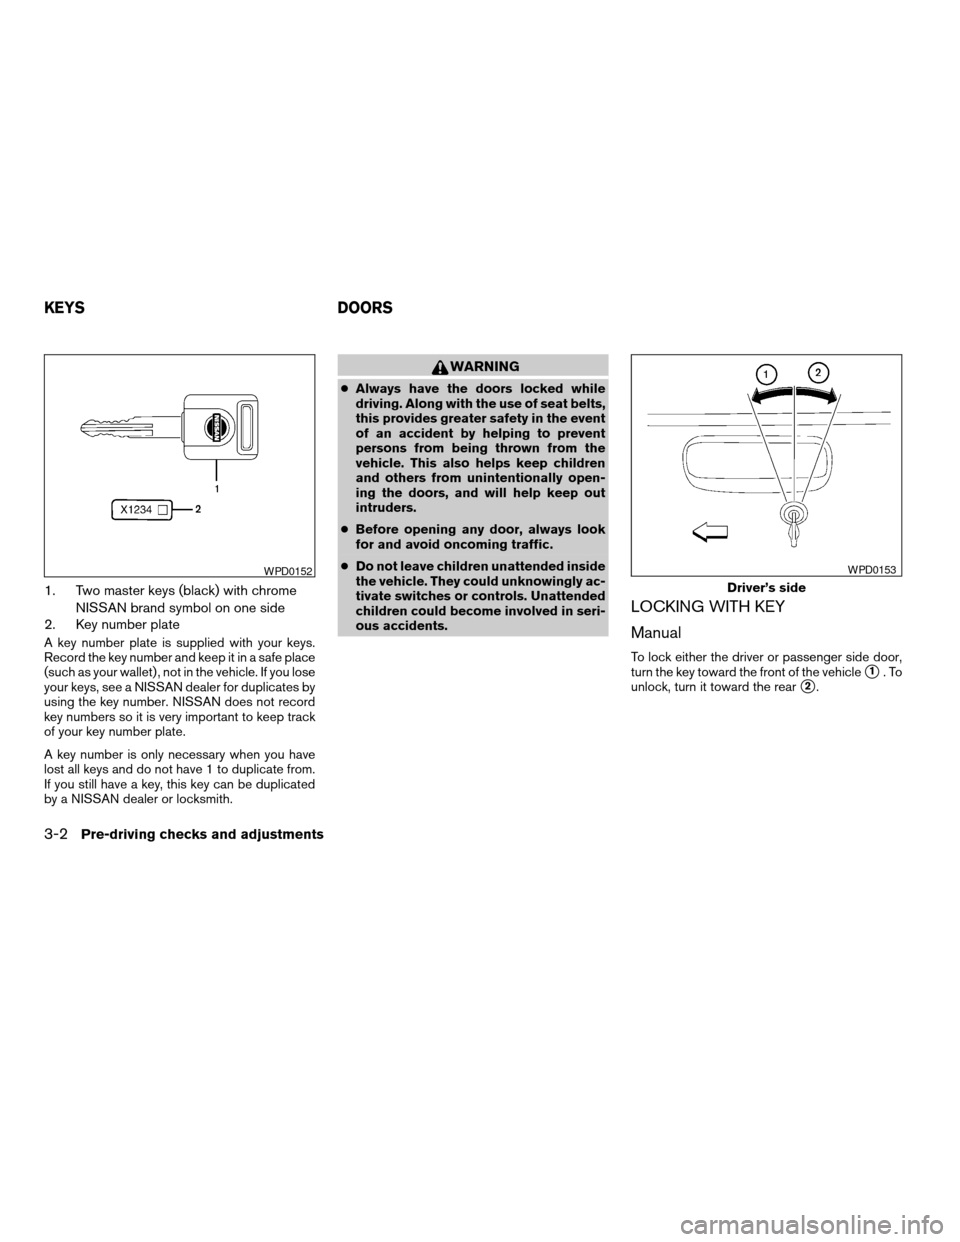
1. Two master keys (black) with chrome
NISSAN brand symbol on one side
2. Key number plate
A key number plate is supplied with your keys.
Record the key number and keep it in a safe place
(such as your wallet) , not in the vehicle. If you lose
your keys, see a NISSAN dealer for duplicates by
using the key number. NISSAN does not record
key numbers so it is very important to keep track
of your key number plate.
A key number is only necessary when you have
lost all keys and do not have 1 to duplicate from.
If you still have a key, this key can be duplicated
by a NISSAN dealer or locksmith.
WARNING
cAlways have the doors locked while
driving. Along with the use of seat belts,
this provides greater safety in the event
of an accident by helping to prevent
persons from being thrown from the
vehicle. This also helps keep children
and others from unintentionally open-
ing the doors, and will help keep out
intruders.
cBefore opening any door, always look
for and avoid oncoming traffic.
cDo not leave children unattended inside
the vehicle. They could unknowingly ac-
tivate switches or controls. Unattended
children could become involved in seri-
ous accidents.
LOCKING WITH KEY
Manual
To lock either the driver or passenger side door,
turn the key toward the front of the vehicle
s1.To
unlock, turn it toward the rear
s2.
WPD0152
Driver’s side
WPD0153
KEYS DOORS
3-2Pre-driving checks and adjustments
ZREVIEW COPY:Ð2004 Xterra(xtr)
Owners Manual(owners)ÐUSA English(nna)
10/23/03Ðdebbie
X
Page 112 of 296

Lockout protection
When the power door lock switch (driver or front
passenger) is moved to the lock position with the
key in the ignition and any door open, all doors
will lock and unlock automatically. This helps to
prevent the keys from being accidently locked
inside the vehicle.
CHILD SAFETY REAR DOOR LOCK
Child safety locks help prevent the rear doors
from being opened accidentally, especially when
small children are in the vehicle.
The child safety lock levers are located on the
edge of the rear doors.
When the lever is in the lock position, the
door can be opened only from the outside.It is possible to lock/unlock all doors, turn the
interior light on, and activate the panic alarm by
using the keyfob from outside the vehicle.
Be sure to remove the key from the vehicle
before locking the doors.
The keyfob can operate at a distance of approxi-
mately 33 ft (10 m) from the vehicle. The effective
distance depends on the conditions around the
vehicle.
As many as 4 keyfobs can be used with one
vehicle. For information concerning the purchase
and use of additional keyfobs, contact a NISSAN
dealer.
The keyfob will not function when:
cthe battery is discharged
cthe distance between the vehicle and the
keyfob is over 33 ft (10 m)
APD1078
REMOTE KEYLESS ENTRY SYSTEM
(if so equipped)
3-4Pre-driving checks and adjustments
ZREVIEW COPY:Ð2004 Xterra(xtr)
Owners Manual(owners)ÐUSA English(nna)
10/23/03Ðdebbie
X
Page 216 of 296
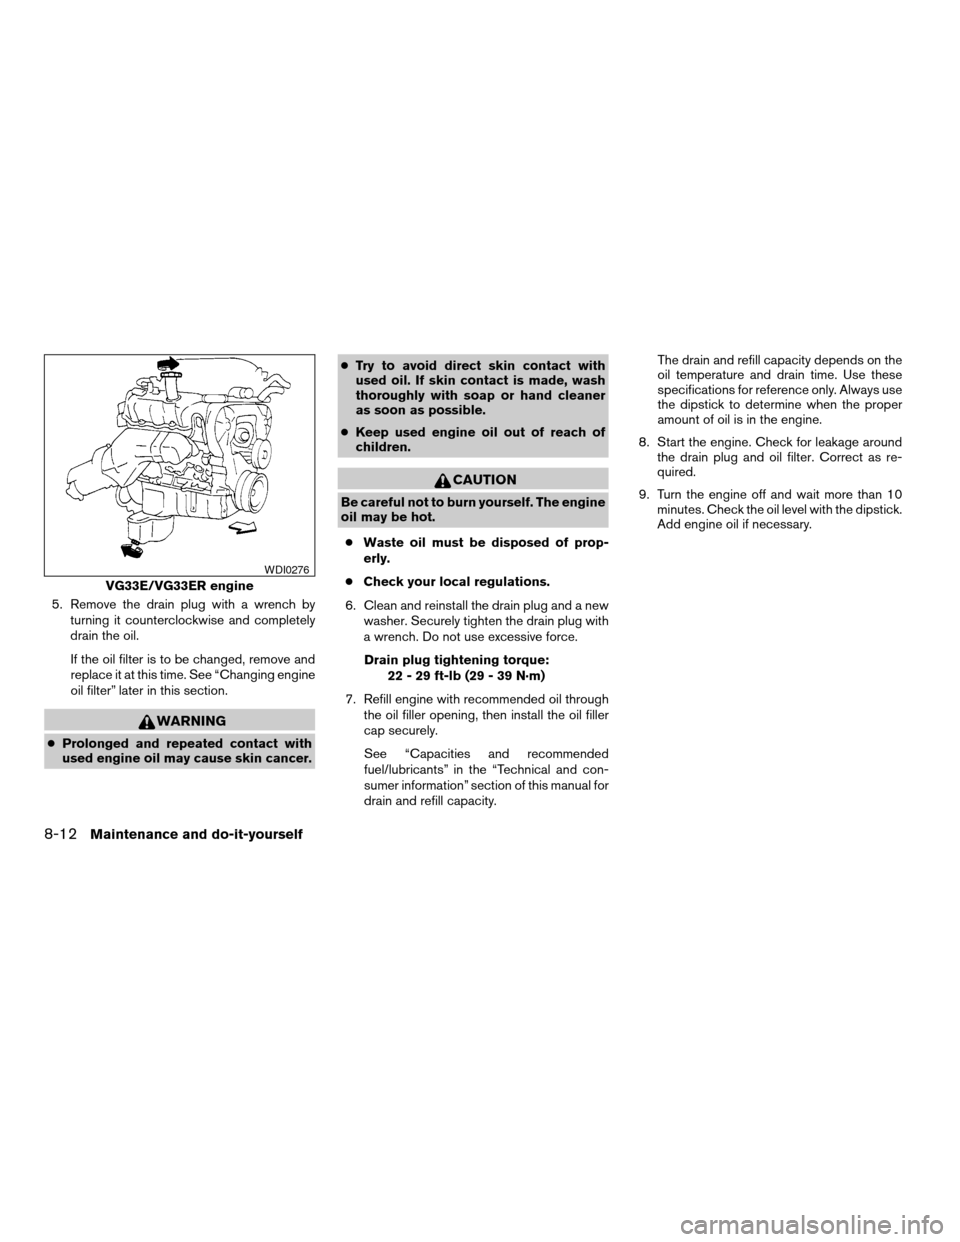
5. Remove the drain plug with a wrench by
turning it counterclockwise and completely
drain the oil.
If the oil filter is to be changed, remove and
replace it at this time. See “Changing engine
oil filter” later in this section.
WARNING
cProlonged and repeated contact with
used engine oil may cause skin cancer.cTry to avoid direct skin contact with
used oil. If skin contact is made, wash
thoroughly with soap or hand cleaner
as soon as possible.
cKeep used engine oil out of reach of
children.
CAUTION
Be careful not to burn yourself. The engine
oil may be hot.
cWaste oil must be disposed of prop-
erly.
cCheck your local regulations.
6. Clean and reinstall the drain plug and a new
washer. Securely tighten the drain plug with
a wrench. Do not use excessive force.
Drain plug tightening torque:
22 - 29 ft-lb (29 - 39 N·m)
7. Refill engine with recommended oil through
the oil filler opening, then install the oil filler
cap securely.
See “Capacities and recommended
fuel/lubricants” in the “Technical and con-
sumer information” section of this manual for
drain and refill capacity.The drain and refill capacity depends on the
oil temperature and drain time. Use these
specifications for reference only. Always use
the dipstick to determine when the proper
amount of oil is in the engine.
8. Start the engine. Check for leakage around
the drain plug and oil filter. Correct as re-
quired.
9. Turn the engine off and wait more than 10
minutes. Check the oil level with the dipstick.
Add engine oil if necessary.
VG33E/VG33ER engine
WDI0276
8-12Maintenance and do-it-yourself
ZREVIEW COPY:Ð2004 Xterra(xtr)
Owners Manual(owners)ÐUSA English(nna)
10/23/03Ðdebbie
X