2004 NISSAN TITAN tires
[x] Cancel search: tiresPage 214 of 328
The transfer case 4WD shift switch is used to
select either 2WD or 4WD depending on the
driving conditions. There are three types of drive
modes available, 2WD, 4H and 4LO.
The 4WD shift switch electronically controls the
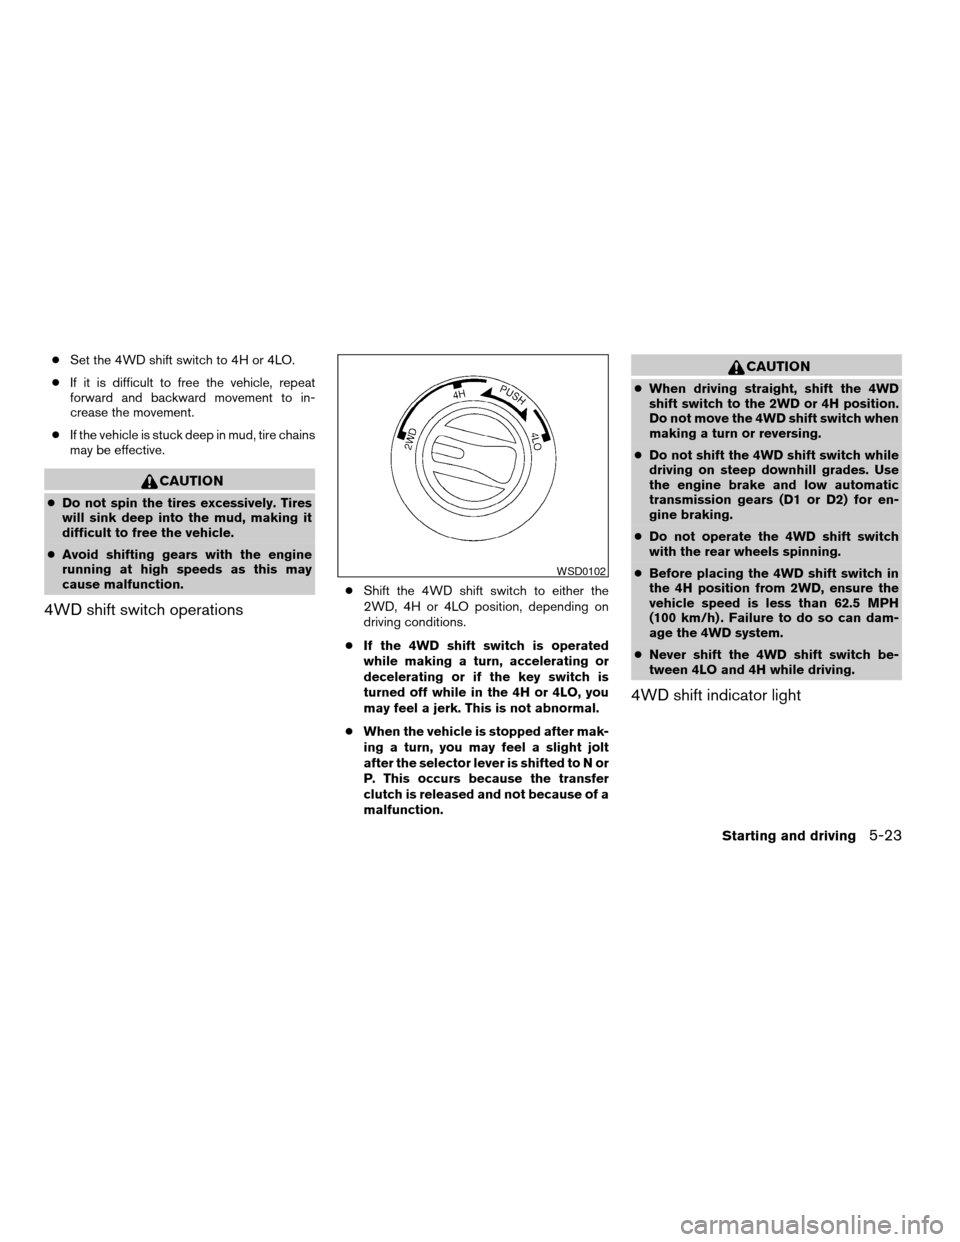
transfer case operation. Rotate the switch to
move between each mode, 2WD, 4H and 4LO.
You must push the switch in to select 4LO,
and the vehicle MUST be stationary and the
automatic transmission selector lever in
the N position when changing into or out of
4LO.
WARNING
When parking, apply the parking brake
before stopping the engine and make sure
that the 4WD shift indicator light is on and
the ATP warning light goes off. Otherwise,
the vehicle could unexpectedly move even
if the automatic transmission is in the P
position.
CAUTION
cNever shift the 4WD shift switch be-
tween 4LO and 4H while driving.cThe 4H position provides greater trac-
tion. Avoid excessive speed, as it will
cause increased fuel consumption and
higher oil temperatures, and could
damage drivetrain components.
Speeds over 62.5 MPH (100 km/h) in 4H
is not recommend.
cThe 4LO position provides maximum
power and traction. Avoid raising ve-
hicle speed excessively, as the maxi-
mum speed is approximately 31 MPH
(50 km/h) .
cWhen driving straight, shift the 4WD
shift switch to the 2WD or 4H position.
Do not move the 4WD shift switch when
making a turn or reversing.
cDo not shift the 4WD shift switch (be-
tween 2WD and 4H) while driving on
steep downhill grades. Use the engine
brake and low automatic transmission
gears (D1 or D2) for engine braking.
cDo not operate the 4WD shift switch
(between 2WD and 4H) with the rear
wheels spinning.cDo not drive on dry hard surface roads
in the 4H or 4LO position. Driving on dry
hard surfaces in 4H or 4LO may cause
unnecessary noise and tire wear.
NISSAN recommends driving in the
2WD position under these conditions.
cVehicles equipped with a limited slip
differential (LSD) have improved driving
performance on rough roads. They have
increased traction performance, so
when making a turn on paved roads,
vibration and tire squealing may occur.
cThe 4WD transfer case may not be
shifted between 4H and 4LO at low am-
bient temperatures and the transfer
4LO position indicator light may blink
even when the 4WD shift switch is
shifted. After driving for a while you can
change the 4WD transfer case between
4H and 4LO.
When driving on rough roads,
cSet the 4WD shift switch to 4H or 4LO.
cDrive carefully according to the road surface
conditions.
When the vehicle is stuck,
cPlace stones or wooden blocks under the
tires to free the vehicle.
5-22Starting and driving
ZREVIEW COPY:Ð2004 Titan(tzw)
Owners Manual(owners)ÐUSA English(nna)
02/23/04Ðdebbie
X
Page 215 of 328
cSet the 4WD shift switch to 4H or 4LO.
cIf it is difficult to free the vehicle, repeat
forward and backward movement to in-
crease the movement.
cIf the vehicle is stuck deep in mud, tire chains
may be effective.
CAUTION
cDo not spin the tires excessively. Tires
will sink deep into the mud, making it
difficult to free the vehicle.
cAvoid shifting gears with the engine
running at high speeds as this may
cause malfunction.
4WD shift switch operations
cShift the 4WD shift switch to either the
2WD, 4H or 4LO position, depending on
driving conditions.
cIf the 4WD shift switch is operated
while making a turn, accelerating or
decelerating or if the key switch is
turned off while in the 4H or 4LO, you
may feel a jerk. This is not abnormal.
cWhen the vehicle is stopped after mak-
ing a turn, you may feel a slight jolt
after the selector lever is shifted to N or
P. This occurs because the transfer
clutch is released and not because of a
malfunction.
CAUTION
cWhen driving straight, shift the 4WD
shift switch to the 2WD or 4H position.
Do not move the 4WD shift switch when
making a turn or reversing.
cDo not shift the 4WD shift switch while
driving on steep downhill grades. Use
the engine brake and low automatic
transmission gears (D1 or D2) for en-
gine braking.
cDo not operate the 4WD shift switch
with the rear wheels spinning.
cBefore placing the 4WD shift switch in
the 4H position from 2WD, ensure the
vehicle speed is less than 62.5 MPH
(100 km/h) . Failure to do so can dam-
age the 4WD system.
cNever shift the 4WD shift switch be-
tween 4LO and 4H while driving.
4WD shift indicator light
WSD0102
Starting and driving5-23
ZREVIEW COPY:Ð2004 Titan(tzw)
Owners Manual(owners)ÐUSA English(nna)
02/23/04Ðdebbie
X
Page 221 of 328
cTire type and condition of tires may also
affect braking effectiveness.
cWhen replacing tires, install the speci-
fied size of tires on all four wheels.
cWhen installing a spare tire, make sure
it is the proper size and type as speci-
fied on the Tire and Loading Informa-
tion label. For tire placard location in-
formation, refer to “Tire and Loading
Information label” in the “Technical and
consumer information” section of this
manual.
cRefer to “Wheels and tires” in the
“Maintenance and do-it-yourself” sec-
tion of this manual.When accelerating or driving on slippery sur-
faces, the tires may spin or slide. With the Vehicle
Dynamic Control (VDC) system, sensors detect
these movements and control the braking and
engine output to help improve vehicle stability.
cWhen the vehicle dynamic control (VDC)
system is operating, the slip indicator in the
instrument panel blinks.
cWhen only the traction control system (TCS)
portion of the vehicle dynamic control sys-
tem is operating, the slip indicator will also
blink.
cIf the slip indicator blinks, the road condi-
tions are slippery. Be sure to adjust your
speed and driving to these conditions. See
“Slip indicator light”, and “Vehicle dynamic
control off indicator light” in the “Instruments
and controls” section.
cIndicator light
If malfunction occurs in the system,
the
andindicator lights come
on in the instrument panel.
As long as these warning lights are on, the
traction control function is canceled.
The VDC system uses an Active Brake Limited
Slip (ABLS) system to improve vehicle traction.
The ABLS system works when one of the driving
wheels is spinning on a slippery surface. TheABLS system brakes the spinning wheel which
distributes the driving power to the other drive
wheel. If the vehicle is operated with the vehicle
dynamic control system off using the VDC OFF
switch, all VDC and TCS functions will be turned
off. The ABLS system and ABS will still operate
with the VDC system OFF. If the ABLS system is
activated, the slip indicator light will blink and you
may hear a clunk noise and/or feel a pulsation in
the brake pedal. This is normal.
While the VDC system is operating, you may feel
a pulsation in the brake pedal and hear a noise or
vibration from under the hood. This is normal and
indicates that the VDC system is working prop-
erly.
The computer has a built in diagnostic feature
that tests the system each time you start the
engine and move the vehicle forward or in reverse
at a slow speed. When the self-test occurs, you
may hear a clunk noise and/or feel a pulsation in
the brake pedal. This is normal and is not an
indication of a malfunction.
VEHICLE DYNAMIC CONTROL (VDC)
SYSTEM (if so equipped)
Starting and driving5-29
ZREVIEW COPY:Ð2004 Titan(tzw)
Owners Manual(owners)ÐUSA English(nna)
02/23/04Ðdebbie
X
Page 222 of 328
WARNING
cThe vehicle dynamic control system is
designed to help improve driving stabil-
ity but does not prevent accidents due
to abrupt steering operation at high
speeds or by careless or dangerous
driving techniques. Reduce vehicle
speed and be especially careful when
driving and cornering on slippery sur-
faces and always drive carefully.
cIf brake related parts such as brake
pads, rotors and calipers are not stan-
dard equipment or are extremely dete-
riorated, the vehicle dynamic control
system may not operate properly and
the vehicle dynamic control off indica-
tor light may come on.
cDo not modify the vehicle’s suspension.
If suspension parts such as shock ab-
sorbers, struts, springs, stabilizer bars
and bushings are not NISSAN approved
for your vehicle or are extremely dete-
riorated the vehicle dynamic control
system may not operate properly. This
could adversely affect vehicle handling
performance, and the vehicle dynamic
control off indicator light may come on.cWhen driving on extremely inclined sur-
faces such as higher banked corners,
the vehicle dynamic control system may
not operate properly and the vehicle
dynamic control off indicator light may
come on. Do not drive on these types of
roads.
cIf wheels or tires other than the recom-
mended ones are used, the vehicle dy-
namic control system may not operate
properly and the vehicle dynamic con-
trol off indicator light may come on.
cThe vehicle dynamic control system is
not a substitute for winter tires or tire
chains on a snow covered road.
WARNING
cAlways turn and look back before back-
ing. The RSS is not a substitute for
proper backing procedures.
cRead and understand the limitations of
the rear sonar system as contained in
this section. Inclement weather may af-
fect the function of the RSS; this may
include reduced performance or a false
activation.
cThis system is not designed to prevent
contact with small or moving objects.
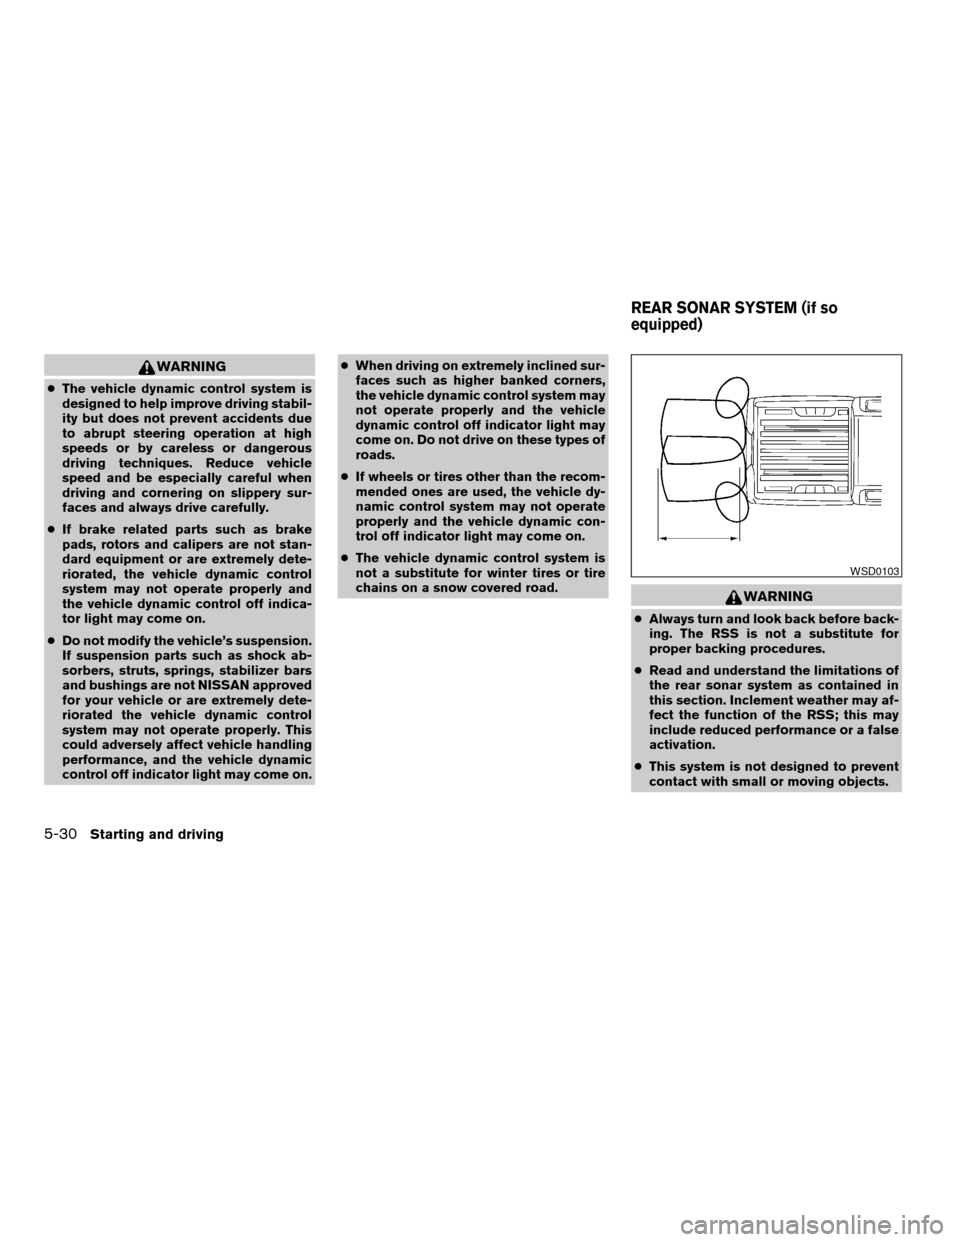
WSD0103
REAR SONAR SYSTEM (if so
equipped)
5-30Starting and driving
ZREVIEW COPY:Ð2004 Titan(tzw)
Owners Manual(owners)ÐUSA English(nna)
02/23/04Ðdebbie
X
Page 224 of 328
For details, see ‘‘Changing engine coolant’’ in the
‘‘Maintenance and do-it-yourself’’ section of this
manual.
TIRE EQUIPMENT
1. SUMMER tires have a tread designed to
provide superior performance on dry pave-
ment. However, the performance of these
tires will be substantially reduced in snowy
and icy conditions. If you operate your ve-
hicle on snowy or icy roads, NISSAN recom-
mends the use of MUD & SNOW or ALL
SEASON TIRES on all four wheels. Please
consult a NISSAN dealer for the tire type,
size, speed rating and availability informa-
tion.
2. For additional traction on icy roads, studded
tires may be used. However, some U.S.
states and Canadian provinces prohibit their
use. Check local, state and provincial laws
before installing studded tires.
Skid and traction capabilities of studded
snow tires on wet or dry surfaces may be
poorer than that of non-studded snow tires.
3. Tire chains may be used.
Use of tire chains may be prohibited accord-
ing to location. Check the local laws before
installing tire chains. When installing tire
chains, make sure they are of proper size forthe tires on your vehicle and are installed
according to the chain manufacturer’s sug-
gestions.Use only SAE Class “S”
chains.Class “S” chains are used on ve-
hicles with restricted tire to vehicle clear-
ance. Vehicles that can use Class “S” chains
are designed to meet the minimum clear-
ances between the tire and the closest ve-
hicle suspension or body component re-
quired to accommodate the use of a winter
traction device (tire chains or cables) . The
minimum clearances are determined using
the factory equipped tire size. Other types
may damage your vehicle. Use chain ten-
sioners when recommended by the tire
chain manufacturer to ensure a tight fit.
Loose end links of the tire chain must be
secured or removed to prevent the possibil-
ity of whipping action damage to the fenders
or underbody. If possible, avoid fully loading
your vehicle when using tire chains. In addi-
tion, drive at a reduced speed. Otherwise,
your vehicle may be damaged and/or vehicle
handling and performance may be adversely
affected.
Never install tire chains on spare tires. Do
not use tire chains on dry roads.
SPECIAL WINTER EQUIPMENT
It is recommended that the following items be
carried in the vehicle during winter:
cA scraper and stiff-bristled brush to remove
ice and snow from the windows and wiper
blades.
cA sturdy, flat board to be placed under the
jack to give it firm support.
cA shovel to dig the vehicle out of snowdrifts.
cExtra window washer fluid to refill the reser-
voir tank.
DRIVING ON SNOW OR ICE
WARNING
cWet ice (32°F, 0°C and freezing rain) ,
very cold snow or ice can be slick and
very hard to drive on. The vehicle will
have much less traction or “grip” under
these conditions. Try to avoid driving on
wet ice until the road is salted or
sanded.
cWhatever the condition, drive with cau-
tion. Accelerate and slow down with
care. If accelerating or downshifting too
fast, the drive wheels will lose even
more traction.
5-32Starting and driving
ZREVIEW COPY:Ð2004 Titan(tzw)
Owners Manual(owners)ÐUSA English(nna)
02/23/04Ðdebbie
X
Page 228 of 328
LOW TIRE PRESSURE WARNING
SYSTEM
This vehicle is equipped with the low tire pres-
sure warning system. It monitors tire pressure of
all tires except the spare. When the tire pressure
monitoring system warning light is lit, one or more
of your tires is significantly underinflated. If
equipped, the system also displays pressure of
all tires (except the spare tire) on the display
screen by sending a signal from a sensor that is
installed in each wheel. If the vehicle is being
driven with low tire pressure (lower than 28 psi,
193 kPa) , the low tire pressure warning system
will activate and warn you of it by the low tire
pressure warning light. This system will activate
only when the vehicle is driven at speeds above
20 MPH (32 km/h) . For more details, please refer
to “Warning/indicator lights and audible remind-
ers” in the “Instruments and controls” section,
“Tire pressure information” in the “Display screen,
heater, air conditioner and audio systems” sec-
tion and “Low tire pressure warning system” in
the “Starting and driving” section.
WARNING
cIf the low tire pressure warning light
flashes while driving, avoid sudden
steering maneuvers or abrupt braking,
reduce vehicle speed, pull off the road
to a safe location and stop the vehicle
as soon as possible. Serious vehicle
damage could occur and may lead to an
accident and could result in serious
personal injury. Check the tire pressure
for all four tires. Adjust the tire pressure
to the recommended COLD tire pres-
sure shown on the Tire and Loading
Information label to turn the low tire
pressure warning light OFF. If you have
a flat tire, replace it with a spare tire as
soon as possible.
cWhen a spare tire is mounted or a wheel
is replaced, tire pressure will not be
indicated and the low tire pressure
warning system will not function. Con-
tact your NISSAN dealer as soon as
possible for tire replacement and/or
system resetting.
cDo not inject any tire liquid or aerosol
tire sealant into the tires, as this may
cause a malfunction of the tire pressure
sensors.
CHANGING A FLAT TIRE
If you have a flat tire, follow the instructions be-
low.
Stopping the vehicle
1. Safely move the vehicle off the road and
away from traffic.
2. Turn on the hazard warning flashers.
3. Park on a level surface and apply the parking
brake. Shift the transmission into P (Park) .
4. Turn off the engine.
5. Raise the hood to warn other traffic and to
signal professional road assistance person-
nel that you need assistance.
6. Have all passengers get out of the vehicle
and stand in a safe place, away from traffic
and clear of the vehicle.
WARNING
cMake sure the parking brake is securely
applied and the automatic transmission
is shifted into P (Park) .
cNever change tires when the vehicle is
on a slope, ice or slippery areas. This is
hazardous.
FLAT TIRE
6-2In case of emergency
ZREVIEW COPY:Ð2004 Titan(tzw)
Owners Manual(owners)ÐUSA English(nna)
02/23/04Ðdebbie
X
Page 229 of 328
cNever change tires if oncoming traffic is
close to your vehicle. Wait for profes-
sional road assistance.
cWhen a spare tire is mounted or a wheel
is replaced, tire pressure will not be
indicated and the low tire pressure
warning system will not function. Con-
tact your NISSAN dealer as soon as
possible for tire replacement and/or
system resetting.
Blocking wheels
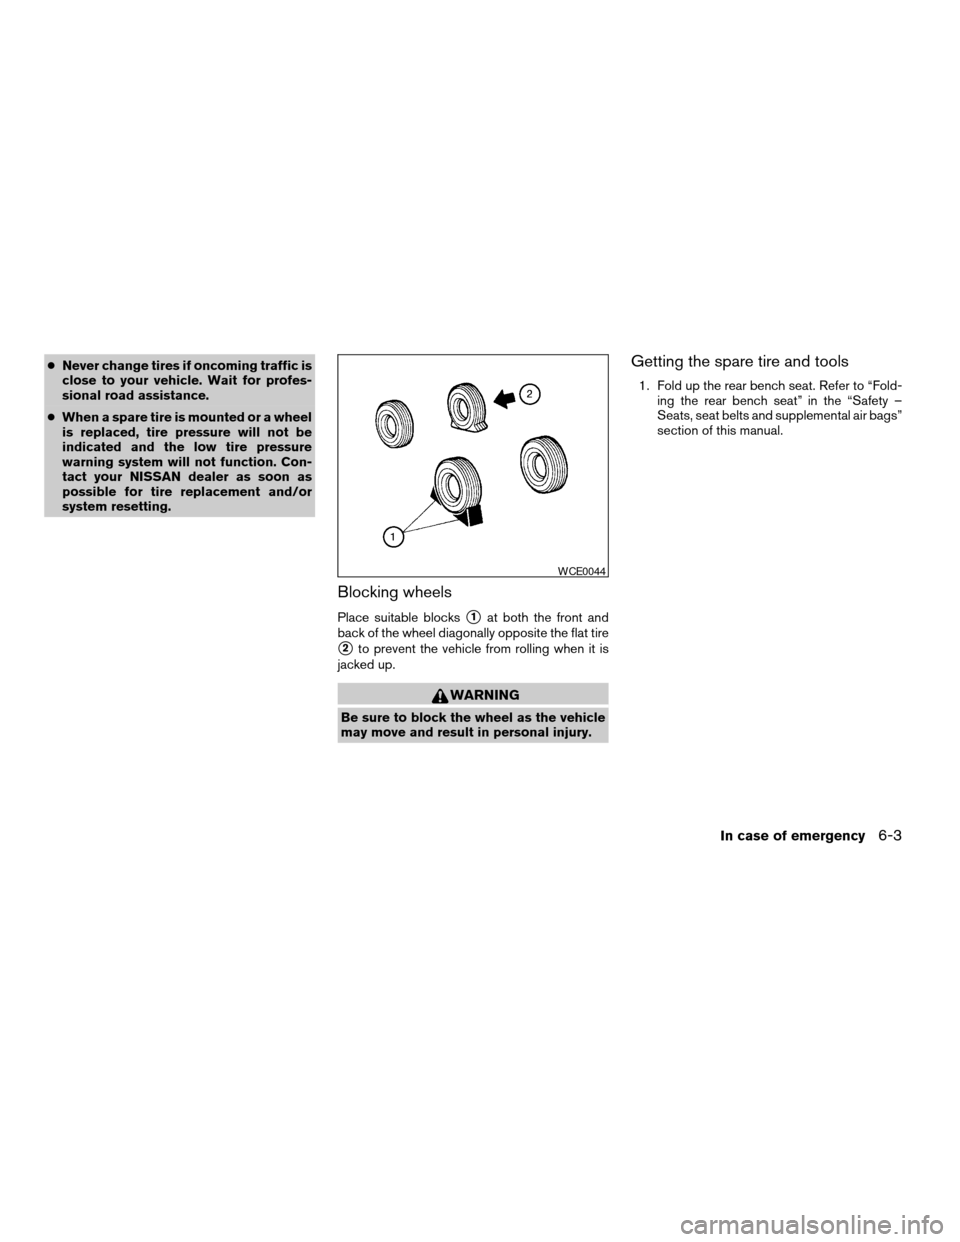
Place suitable blockss1at both the front and
back of the wheel diagonally opposite the flat tire
s2to prevent the vehicle from rolling when it is
jacked up.
WARNING
Be sure to block the wheel as the vehicle
may move and result in personal injury.
Getting the spare tire and tools
1. Fold up the rear bench seat. Refer to “Fold-
ing the rear bench seat” in the “Safety –
Seats, seat belts and supplemental air bags”
section of this manual.
WCE0044
In case of emergency6-3
ZREVIEW COPY:Ð2004 Titan(tzw)
Owners Manual(owners)ÐUSA English(nna)
02/23/04Ðdebbie
X
Page 233 of 328
Installing the spare tire
The spare tire is designed for emergency
use. See specific instructions under the
heading “Wheels and tires” in the “Mainte-
nance and do-it-yourself” section of this
manual.
1. Clean any mud or dirt from the surface be-
tween the wheel and hub.
2. Carefully put the spare tire on and tighten
the wheel nuts finger tight.
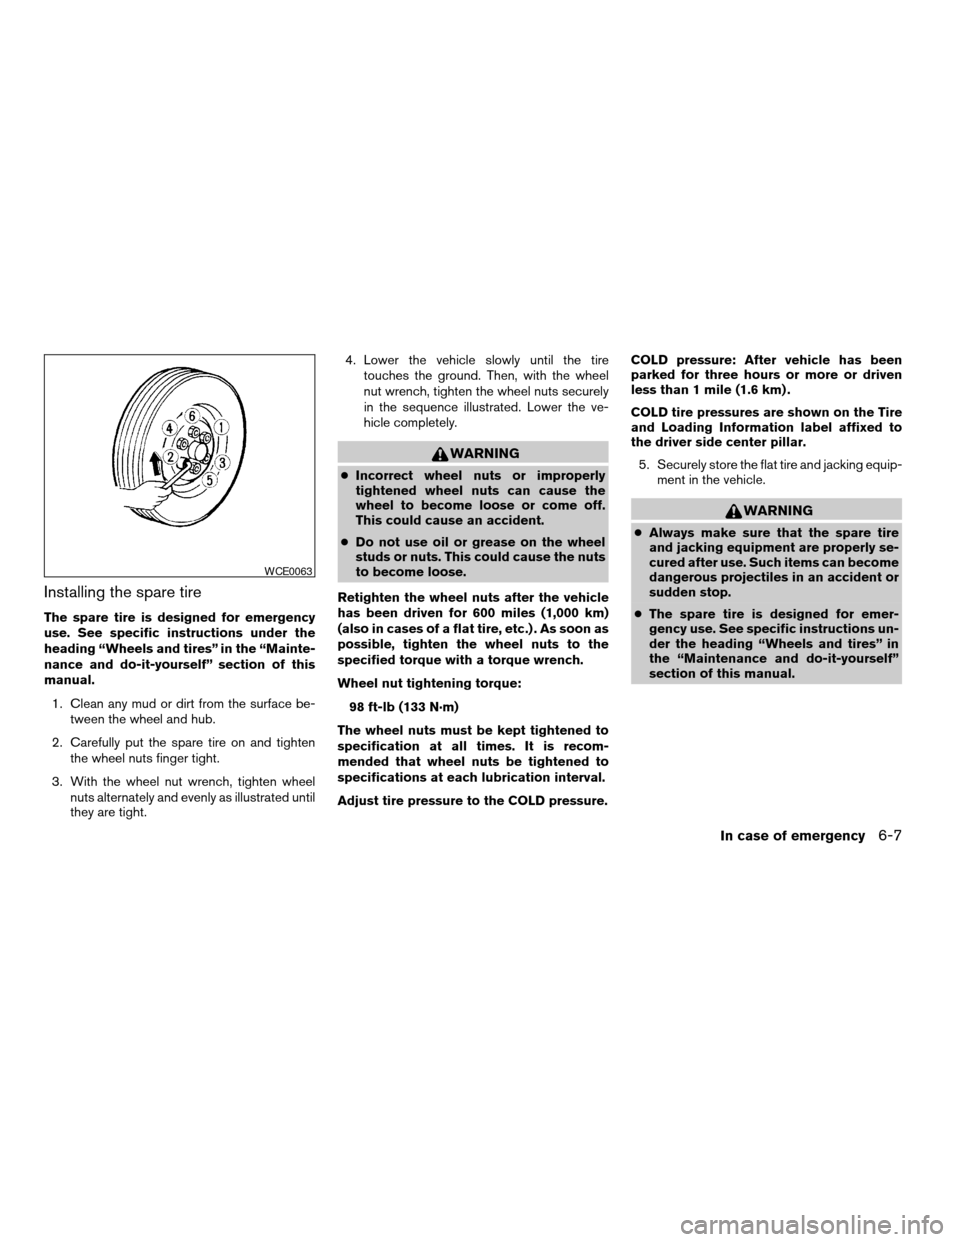
3. With the wheel nut wrench, tighten wheel
nuts alternately and evenly as illustrated until
they are tight.4. Lower the vehicle slowly until the tire
touches the ground. Then, with the wheel
nut wrench, tighten the wheel nuts securely
in the sequence illustrated. Lower the ve-
hicle completely.
WARNING
cIncorrect wheel nuts or improperly
tightened wheel nuts can cause the
wheel to become loose or come off.
This could cause an accident.
cDo not use oil or grease on the wheel
studs or nuts. This could cause the nuts
to become loose.
Retighten the wheel nuts after the vehicle
has been driven for 600 miles (1,000 km)
(also in cases of a flat tire, etc.) . As soon as
possible, tighten the wheel nuts to the
specified torque with a torque wrench.
Wheel nut tightening torque:
98 ft-lb (133 N·m)
The wheel nuts must be kept tightened to
specification at all times. It is recom-
mended that wheel nuts be tightened to
specifications at each lubrication interval.
Adjust tire pressure to the COLD pressure.COLD pressure: After vehicle has been
parked for three hours or more or driven
less than 1 mile (1.6 km) .
COLD tire pressures are shown on the Tire
and Loading Information label affixed to
the driver side center pillar.
5. Securely store the flat tire and jacking equip-
ment in the vehicle.
WARNING
cAlways make sure that the spare tire
and jacking equipment are properly se-
cured after use. Such items can become
dangerous projectiles in an accident or
sudden stop.
cThe spare tire is designed for emer-
gency use. See specific instructions un-
der the heading “Wheels and tires” in
the “Maintenance and do-it-yourself”
section of this manual.
WCE0063
In case of emergency6-7
ZREVIEW COPY:Ð2004 Titan(tzw)
Owners Manual(owners)ÐUSA English(nna)
02/23/04Ðdebbie
X