2004 NISSAN QUEST stop start
[x] Cancel search: stop startPage 31 of 320
WARNING
cWhen the vehicle is being used to carry
cargo, properly secure all cargo to help
prevent it from sliding or shifting. Do
not place cargo higher than the seat-
backs. In a sudden stop or collision,
unsecured cargo could cause personal
injury.
cWhen returning the seatbacks to the
upright position, be certain they are
completely secured in the latched posi-
tion. If they are not completely secured,
passengers may be injured in an acci-
dent or sudden stop.
cHead restraints should be adjusted
properly as they may provide significant
protection against injury in an accident.
Always replace and adjust them prop-
erly if they have been removed for any
reason.
cNever allow anyone to ride in the cargo
area or on the rear seat when it is in the
fold-down position. Use of these areas
by passengers without proper restraints
could result in serious injury in an acci-
dent or sudden stop.
PRECAUTIONS ON
SUPPLEMENTAL RESTRAINT
SYSTEM
This Supplemental Restraint System (SRS) sec-
tion contains important information concerning
the driver and passenger supplemental front air
bags (NISSAN Advanced Air Bag System) ,
supplemental side air bags, curtain side-impact
air bags and pre-tensioner seat belts.
Supplemental front impact air bag system:
The NISSAN advanced air bag system can help
cushion the impact force to the head and chest of
the driver and front passenger in certain frontal
collisions.
Supplemental side-impact air bag system
(if so equipped):This system can help cushion
the impact force to the chest area of the driver
and front passenger in certain side impact colli-
sions. The supplemental side air bag is designed
to inflate on the side where the vehicle is im-
pacted.
Supplemental curtain side-impact air bag
system:This system can help cushion the im-
pact force to the head of occupants in front and
rear outboard seating positions in certain side
impact collisions. The curtain side-impact air
bags are designed to inflate on the side where
the vehicle is impacted.These supplemental restraint systems are de-
signed tosupplementthe crash protection pro-
vided by the seat belts and arenot a substitute
for them. Seat belts should always be correctly
worn and the occupant seated a suitable dis-
tance away from the steering wheel, instrument
panel and door finishers. See “Seat belts” later in
this section for instructions and precautions on
seat belt usage.
The supplemental air bags operate only
when the ignition switch is in the ON or
START position.
After turning the ignition key to the ON
position, the supplemental air bag warning
light illuminates. The supplemental air bag
warning light will turn off after about 7
seconds if the system is operational.
SUPPLEMENTAL RESTRAINT
SYSTEM
Safety—Seats, seat belts and supplemental air bags1-15
ZREVIEW COPY:Ð2004 Quest(van)
Owners Manual(owners)ÐUSA English(nna)
10/08/03Ðtbrooks
X
Page 83 of 320
Turn off the engine, and start it again by
slowly turning the ignition key (quickly do-
ing so may cause the ABS light to stay on
when there is nothing wrong) . If the light
stays on, have the system checked by a
NISSAN dealer.
If an abnormality occurs in the system, the anti-
lock function ceases, but the regular braking
system continues to operate.
If the light comes on while you are driving,
contact a NISSAN dealer for repair.
orBrake warning light
This light functions for both the parking brake and
the foot brake systems.
When the ignition key is in the ON position, the
light comes on when the parking brake is applied,
and also warns of a low brake fluid level. If the
light comes on while the engine is running with
the parking brake not applied, stop the vehicle
and perform the following:
1. Check the brake fluid level. Add brake fluid
as necessary. See “Brake fluid” in the “Main-
tenance and do-it-yourself” section of this
manual.2. If the brake fluid level is correct, have the
brake system checked by a NISSAN dealer.
WARNING
cYour vehicle is equipped with an auto-
matic engine cooling fan. It may come
on at any time without warning, even if
the ignition key is in the OFF position
and the engine is not running. To avoid
injury, always disconnect the negative
battery cable before working near the
fan.
cPressing the brake pedal with the en-
gine stopped and/or a low brake fluid
level may increase your stopping dis-
tance and braking will require greater
pedal effort as well as pedal travel.
cIf the brake fluid level is below the
MINIMUM or MIN mark on the brake
fluid reservoir, do not drive until the
brake system has been checked at a
NISSAN dealer.
Charge warning light
If this light comes on while the engine is running,
it may indicate the charging system is not func-
tioning properly. Turn the engine off and checkthe generator belt. If the belt is loose, broken,
missing, or if the light remains on, see a NISSAN
dealer immediately.
CAUTION
Do not continue driving if the generator
belt is loose, broken or missing.
Door open warning light
This light comes on when any of the doors are not
closed securely while the ignition key is in the ON
position.
Engine oil pressure warning
light
This light warns of low engine oil pressure. If the
light flickers or comes on during normal driving,
pull off the road in a safe area, stop the engine
immediatelyand call a NISSAN dealer or other
authorized repair shop.
The engine oil pressure warning light is not
designed to indicate a low oil level.Use the
dipstick to check the oil level. See “Engine oil” in
the “Maintenance and do-it-yourself” section of
this manual.
Instruments and controls2-7
ZREVIEW COPY:Ð2004 Quest(van)
Owners Manual(owners)ÐUSA English(nna)
10/08/03Ðtbrooks
X
Page 84 of 320
CAUTION
Running the engine with the engine oil
pressure warning light on could cause se-
rious damage to the engine almost imme-
diately. Such damage is not covered by
warranty. Turn off the engine as soon as it
is safe to do so.
Low fuel warning light
This light comes on when the fuel level in the fuel
tank is getting low. Refuel as soon as it is conve-
nient, preferably before the fuel gauge reaches E
(Empty) .There will be a small reserve of fuel
in the tank when the fuel gauge needle
reaches E (Empty) .
Low tire pressure warning
light
This light warns of low tire pressure.
NISSAN’s low tire pressure warning system is a
tire pressure monitoring system. It monitors tire
pressure of all tires except the spare. When the
tire pressure monitoring system warning light is
lit, one or more of your tires is significantly under-
inflated. You should stop and check your tires as
soon as possible, and inflate them to the proper
pressure as indicated on the vehicle’s tire infor-
mation placard. Driving on a significantly under-inflated tire causes the tire to overheat and can
lead to tire failure. Under-inflation also reduces
fuel efficiency and tire tread life, and may affect
the vehicle’s handling and stopping ability. Each
tire, including the spare, should be checked
monthly when cold and set to the recommended
inflation pressure as specified in the vehicle plac-
ard and owner’s manual.
The recommended inflation pressure may also be
found on the Tire and Loading Information Label.
Low tire pressure warning:
If the vehicle is being driven with very low tire
pressure (lower than 28 psi, 193 kPa) , the light
will illuminate and the chime will sound for about
10 seconds.
For additional information, see “Low tire pressure
warning system” in the “Starting and driving”
section and “Low tire pressure warning system”
in the “In case of emergency” section.
WARNING
cIf the light does not come on with the
key switch turned ON, have the vehicle
checked by a NISSAN dealer as soon as
possible.cIf the light comes on while driving,
avoid sudden steering maneuvers or
abrupt braking, reduce vehicle speed,
pull off the road to a safe location and
stop the vehicle as soon as possible.
Serious vehicle damage could occur
and may lead to an accident and could
result in serious personal injury. Check
the tire pressure for all four tires. Adjust
the tire pressure to the recommended
COLD tire pressure shown on the Tire
and Loading Information label to turn
the low tire pressure warning light OFF.
If the light still comes on while driving
after adjusting the tire pressure, a tire
may be flat. If you have a flat tire, re-
place it with a spare tire as soon as
possible.
cWhen a spare tire is mounted or a wheel
is replaced, tire pressure will not be
indicated and the low tire pressure
warning system will not function. Con-
tact your NISSAN dealer as soon as
possible for tire replacement and/or
system resetting.
2-8Instruments and controls
ZREVIEW COPY:Ð2004 Quest(van)
Owners Manual(owners)ÐUSA English(nna)
10/08/03Ðtbrooks
X
Page 86 of 320
Cruise set switch indicator
light
The light comes on while the vehicle speed is
controlled by the cruise control system. If the light
blinks while the engine is running, it may indicate
the cruise control system is not functioning prop-
erly. Have the system checked by a NISSAN
dealer.
High beam indicator light
(Blue)
This blue light comes on when the headlight high
beams are on and goes out when the low beams
are selected.
The high beam indicator light also comes on
when the passing signal is activated.
Malfunction indicator lamp
(MIL)
If this indicator lamp comes on steady or blinks
while the engine is running, it may indicate a
potential emission control malfunction.
The malfunction indicator lamp may also come on
steady if the fuel filler cap is loose or missing, or if
the vehicle runs out of fuel. Check to make sure
the fuel filler cap is installed and closed tightly,
and that the vehicle has at least 3 gallons of fuel
in the fuel tank.After a few driving trips, the
lamp should
turn off if no other potential emission control
system malfunction exists.
Operation
The malfunction indicator lamp will come on in
one of two ways:
cMalfunction indicator lamp on steady — An
emission control system malfunction has
been detected. Check the fuel filler cap. If
the fuel filler cap is loose or missing, tighten
or install the cap and continue to drive the
vehicle. The
lamp should turn off after
a few driving trips. If thelamp does
not turn off after a few driving trips, have the
vehicle inspected by a NISSAN dealer. You
do not need to have your vehicle towed to
the dealer.
cMalfunction indicator lamp blinking — An
engine misfire has been detected which may
damage the emission control system. To re-
duce or avoid emission control system dam-
age:
– do not drive at speeds above 45 MPH
(72 km/h) .
– avoid hard acceleration or deceleration.
– avoid steep uphill grades.– if possible, reduce the amount of cargo
being hauled or towed.
The malfunction indicator lamp may stop blinking
and come on steady. Have the vehicle inspected by
a NISSAN dealer. You do not need to have your
vehicle towed to the dealer.
CAUTION
Continued vehicle operation without hav-
ing the emission control system checked
and repaired as necessary could lead to
poor driveability, reduced fuel economy,
and possible damage to the emission con-
trol system.
Overdrive off indicator light
This light comes on when the overdrive function
is OFF.
The automatic transmission overdrive function is
controlled by the overdrive switch.
See “Driving the vehicle” in the “Starting and
driving” section of this manual.
orFront passenger
air bag status light
The front passenger air bag status light (or) will be lit and the passenger front air
bag will be OFF depending on how the front
passenger seat is being used.
2-10Instruments and controls
ZREVIEW COPY:Ð2004 Quest(van)
Owners Manual(owners)ÐUSA English(nna)
10/08/03Ðtbrooks
X
Page 99 of 320
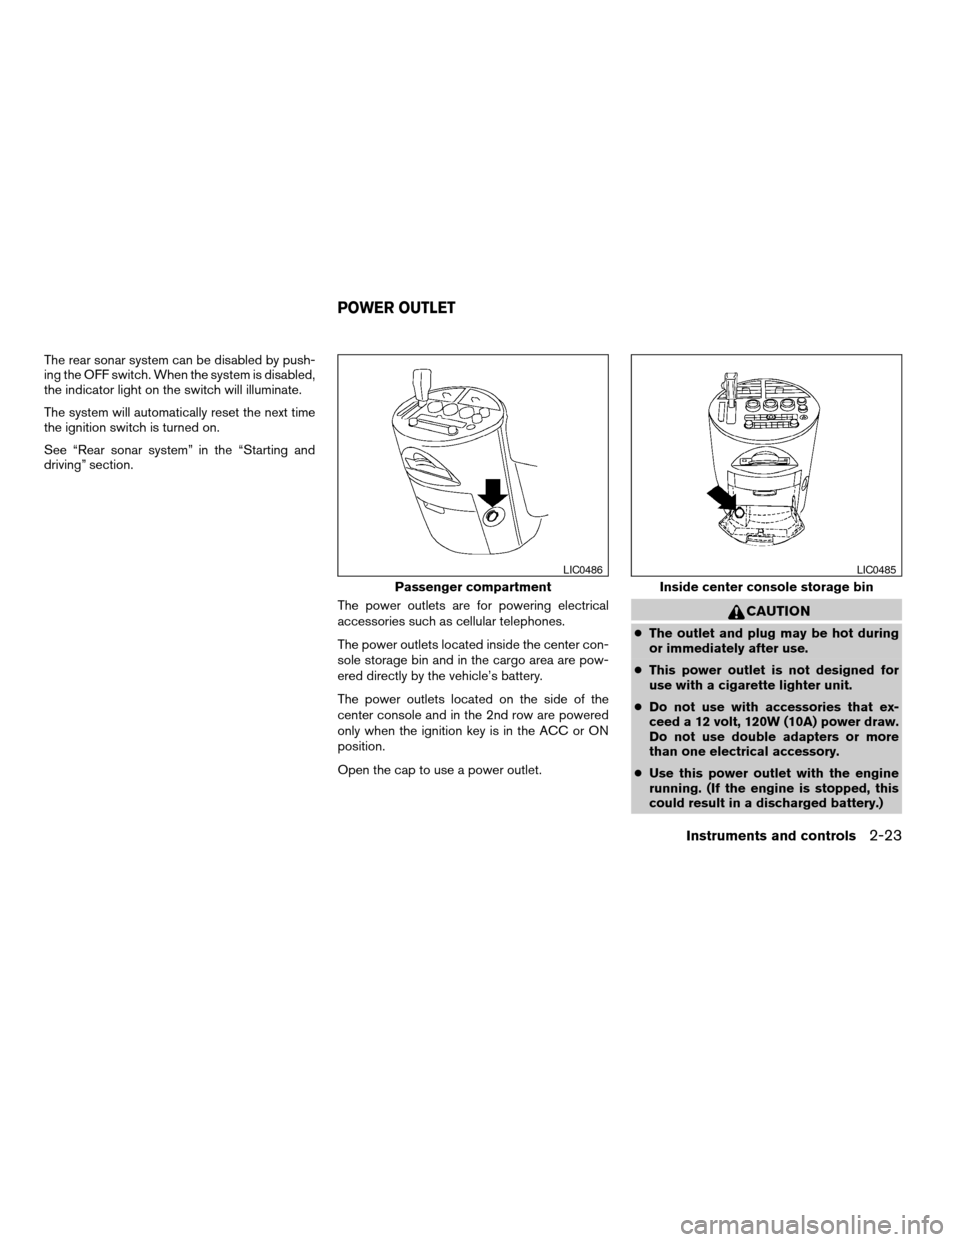
The rear sonar system can be disabled by push-
ing the OFF switch. When the system is disabled,
the indicator light on the switch will illuminate.
The system will automatically reset the next time
the ignition switch is turned on.
See “Rear sonar system” in the “Starting and
driving” section.
The power outlets are for powering electrical
accessories such as cellular telephones.
The power outlets located inside the center con-
sole storage bin and in the cargo area are pow-
ered directly by the vehicle’s battery.
The power outlets located on the side of the
center console and in the 2nd row are powered
only when the ignition key is in the ACC or ON
position.
Open the cap to use a power outlet.
CAUTION
cThe outlet and plug may be hot during
or immediately after use.
cThis power outlet is not designed for
use with a cigarette lighter unit.
cDo not use with accessories that ex-
ceed a 12 volt, 120W (10A) power draw.
Do not use double adapters or more
than one electrical accessory.
cUse this power outlet with the engine
running. (If the engine is stopped, this
could result in a discharged battery.)
Passenger compartment
LIC0486
Inside center console storage bin
LIC0485
POWER OUTLET
Instruments and controls2-23
ZREVIEW COPY:Ð2004 Quest(van)
Owners Manual(owners)ÐUSA English(nna)
10/08/03Ðtbrooks
X
Page 130 of 320
Power Close:
The door automatically moves from the fully open
position to the secondary position. When the
sliding door reaches the secondary position, the
cinching motor engages and pulls the door to its
primary latch position. Power close takes ap-
proximately 5 seconds. The power close feature
can be activated by the switches on the keyfob,
the overhead console and the door pillar.
cIf the inside or outside handle is activated
while the cinching motor is engaged, the
cinching motor will disengage and release
the latch.
cThe keyfob button must be held for 0.5 sec-
ond before the door closes.
cThe switch on the door pillar can only be
used to close the door if the main ON/OFF
switch is ON.
Reverse:
The door will reverse direction immediately dur-
ing power open or power close if the keyfob,
overhead console or door pillar switch is
pressed. A chime will sound to announce the
reversal.
Auto Reverse:
If an obstacle is detected during power open or
power close, a warning chime will sound and the
door will reverse direction and return to the fullopen or full close position. If a second obstacle is
detected, the door motion will stop and the clutch
mode will be engaged.
WARNING
There are some small distances immedi-
ately before the closed position which
cannot be detected. Make sure that all
passengers have their hands, etc., inside
the vehicle before closing the door.
Clutch Mode:
To help prevent unexpected slams due to gravity,
the clutch mode is engaged intermittently for up
to 6 seconds when power open or close is inter-
rupted due to multiple obstacles, low battery
voltage or the main ON/OFF switch turned to
OFF. The door must then be opened or closed
manually.
Restarting the power sliding door
Some power sliding door functions will become
disabled after the battery terminal is discon-
nected and/or the electrical supply is interrupted.
The following procedure must be used to restart
the power sliding door so that all functions are
enabled.
1. Turn the main on/off switch to ON.2. If the power sliding door is open, press and
hold the power sliding door switch on the
overhead console until the door closes.
3. Release the switch.
4. Press and hold the power sliding door
switch on the overhead console until the
door opens as far as it can.
5. Release the switch.
6. Press and hold the power sliding door
switch on the overhead console until the
door closes.
7. Release the switch.
The power sliding door should now work prop-
erly.
NOTE:
The restarting procedure must be com-
pleted for both the left-hand and right-
hand power sliding doors (if so equipped) .
3-8Pre-driving checks and adjustments
ZREVIEW COPY:Ð2004 Quest(van)
Owners Manual(owners)ÐUSA English(nna)
10/08/03Ðtbrooks
X
Page 134 of 320

Operating the power sliding door (if so
equipped)
Push and hold the button on the keyfob for about
0.5 second to open or close the power sliding
door.
The door will reverse direction immediately dur-
ing power open or power close if the keyfob
button is pressed. A chime will sound to an-
nounce the reversal.
For more information, see “Operating the power
sliding door” earlier in this section.
Operating the power back door (if so
equipped)
Push and hold the button on the keyfob for about
0.5 second to open or close the back door. The
hazard warning lights flash and a chime sounds
to indicate the power open or power close se-
quence has started.
The door will reverse direction immediately dur-
ing power open or power close if the keyfob
button is pressed. A chime will sound to an-
nounce the reversal.
For more information, see “Back door” later in this
section.
Using the panic alarm
If you are near your vehicle and feel threatened,
you may activate the panic alarm to call attention
by pushing and holding the
button on the
keyfob forlonger than 0.5 second.
The panic alarm and headlights will stay on for 25
seconds.
The panic alarm stops when:
cit has run for 25 seconds, or
cany button is pushed on the keyfob.
LPD0212LPD0213LPD0211
3-12Pre-driving checks and adjustments
ZREVIEW COPY:Ð2004 Quest(van)
Owners Manual(owners)ÐUSA English(nna)
10/08/03Ðtbrooks
X
Page 139 of 320

NOTE:
To open, close or reverse the power back
door, the shift selector lever must be in P
(Park) . Also, the power back door will not
operate if battery voltage is low.
Power Open:
The power back door automatically moves from
the fully closed position to the fully open position
in approximately 6 seconds. The power open
feature can be activated by the switch on the
keyfob and the overhead console and by the
outside opener handle. The hazard lights flashand a chime sounds to indicate the power open
sequence has been started.
cThe back door can be opened by the over-
head console switch and the keyfob even if
the vehicle is locked. The door will individu-
ally unlock and open. Once the back door is
closed, its lock will align to the vehicle’s lock
or unlock status.
cThe keyfob button must be held for 0.5 sec-
ond before the door opens.
cThe back door must be unlocked to open it
with the outside opener handle.
cThe switch on the rear pillar cannot be used
to open the back door.
A warning chime will sound if the shift selector
lever is moved out of P (Park) during a power
open operation.
Power Close:
The power back door automatically moves from
the fully open position to the secondary position.
When the door reaches the secondary position,
the cinching motor engages and pulls the door to
its primary latch position. Power close takes ap-
proximately 8 seconds. The power close feature
can be activated by the switch on the keyfob, the
overhead console and the rear pillar. The hazard
lights flash and a chime sounds to indicate the
power close sequence has been started.cIf the outside opener handle is activated
while the cinching motor is engaged, the
cinching motor will disengage and release
the latch.
cThe keyfob button must be held for 0.5 sec-
ond before the door closes.
cThe switch on the rear pillar can only be used
to close the back door if the main ON/OFF
switch is ON.
Reverse:
The power back door will reverse direction imme-
diately during power open or power close if the
keyfob, overhead console or rear pillar switch is
pressed. A chime will sound to announce the
reversal.
Auto Reverse:
If an obstacle is detected during power open or
power close, a warning chime will sound and the
door will reverse direction and return to the full
open or full close position. If a second obstacle is
detected, the door motion will stop and the drive
motor will disengage. The back door will enter
manual mode.
A pinch strip is mounted on each side of the back
door. If an obstacle is detected by a pinch strip
during power close, the door will reverse direc-
tion and return to the full open position.
Overhead console switch
LPD0223
Pre-driving checks and adjustments3-17
ZREVIEW COPY:Ð2004 Quest(van)
Owners Manual(owners)ÐUSA English(nna)
10/08/03Ðtbrooks
X