2004 NISSAN FRONTIER remove seats
[x] Cancel search: remove seatsPage 23 of 296

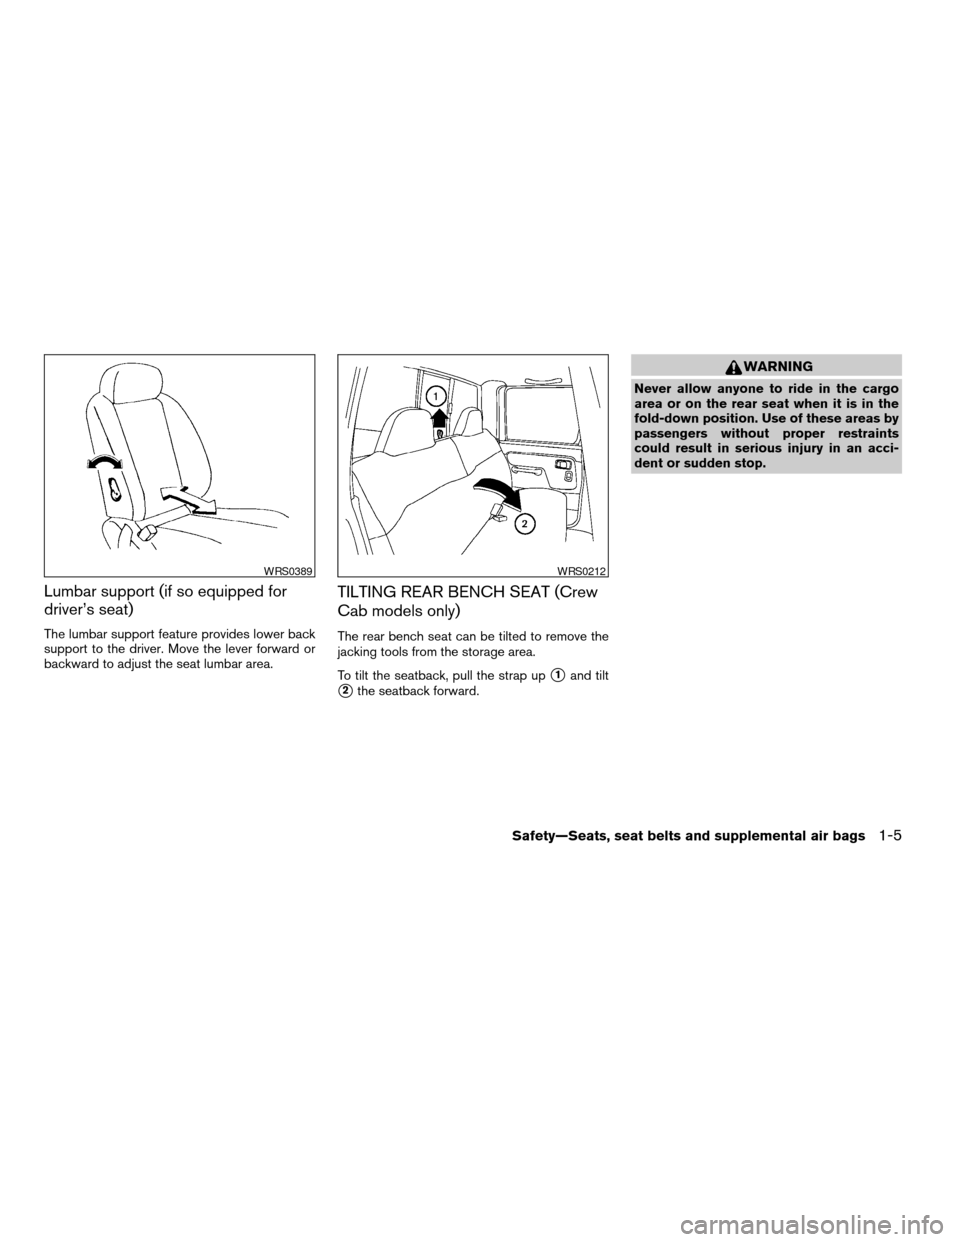
Lumbar support (if so equipped for
driver’s seat)
The lumbar support feature provides lower back
support to the driver. Move the lever forward or
backward to adjust the seat lumbar area.
TILTING REAR BENCH SEAT (Crew
Cab models only)
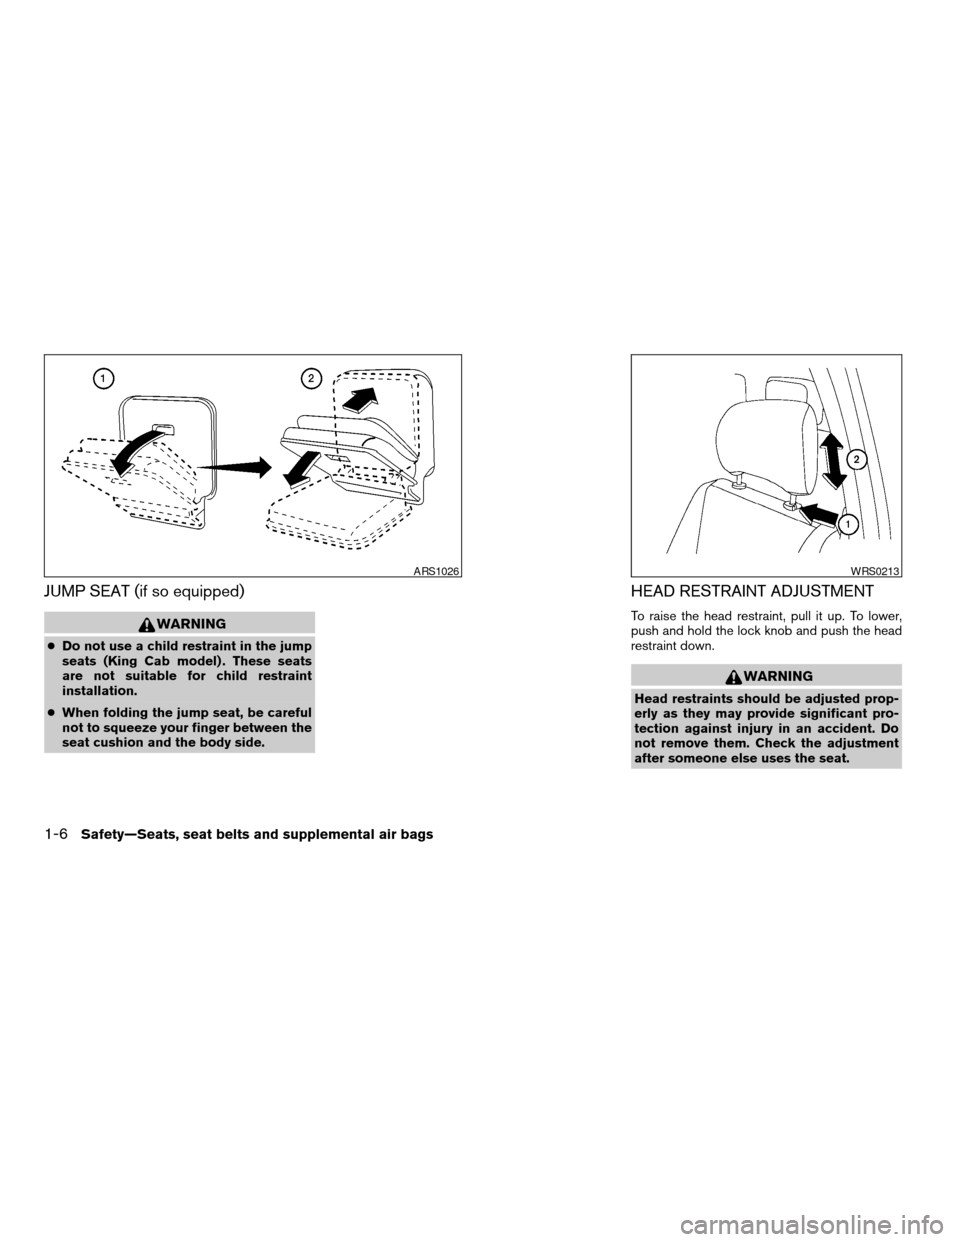
The rear bench seat can be tilted to remove the
jacking tools from the storage area.
To tilt the seatback, pull the strap up
s1and tilt
s2the seatback forward.
WARNING
Never allow anyone to ride in the cargo
area or on the rear seat when it is in the
fold-down position. Use of these areas by
passengers without proper restraints
could result in serious injury in an acci-
dent or sudden stop.
WRS0389WRS0212
Safety—Seats, seat belts and supplemental air bags1-5
ZREVIEW COPY:Ð2004 Truck/Frontier(d22)
Owners Manual(owners)ÐUSA English(nna)
11/21/03Ðdebbie
X
Page 24 of 296

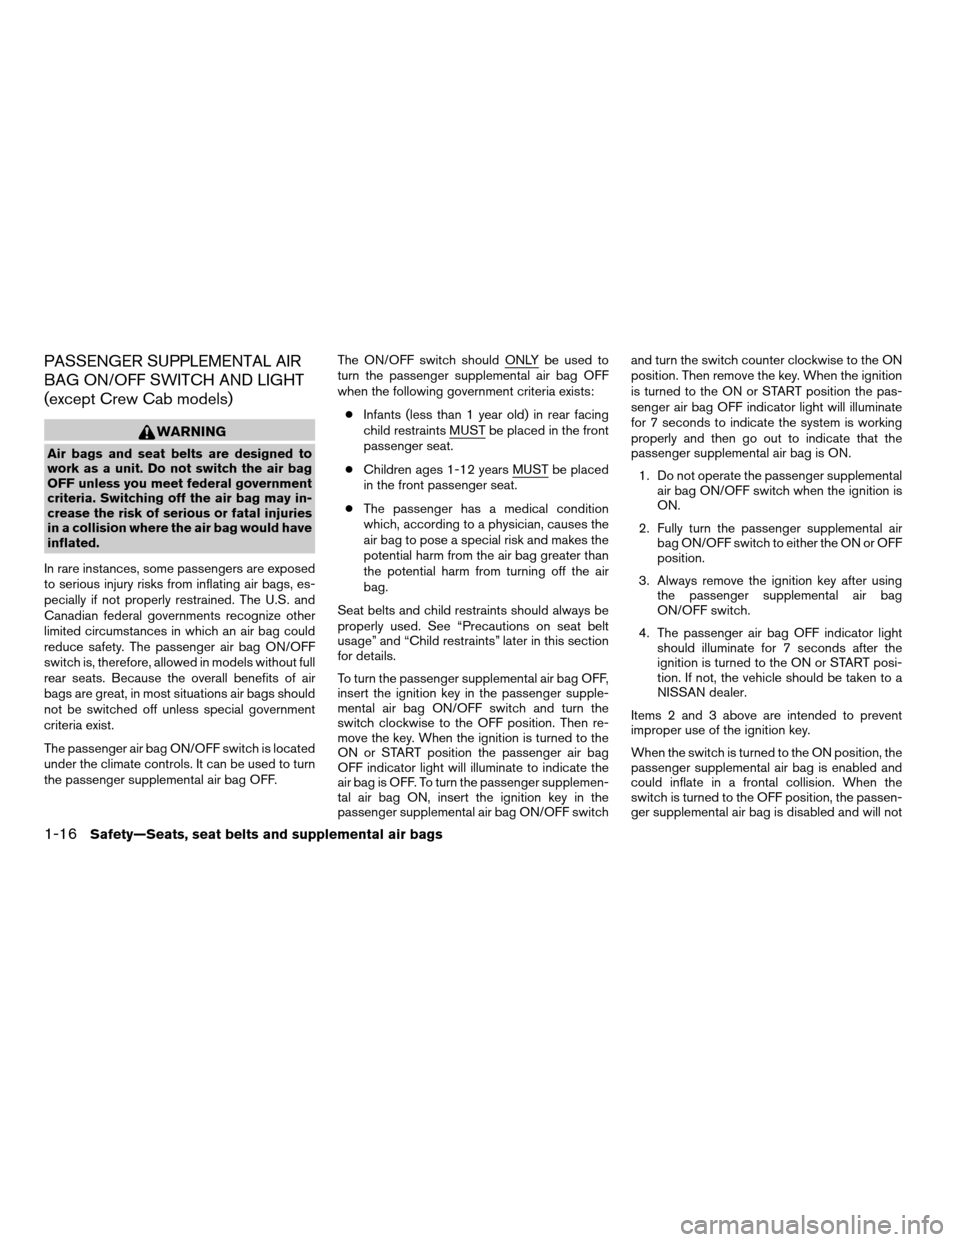
JUMP SEAT (if so equipped)
WARNING
cDo not use a child restraint in the jump
seats (King Cab model) . These seats
are not suitable for child restraint
installation.
cWhen folding the jump seat, be careful
not to squeeze your finger between the
seat cushion and the body side.
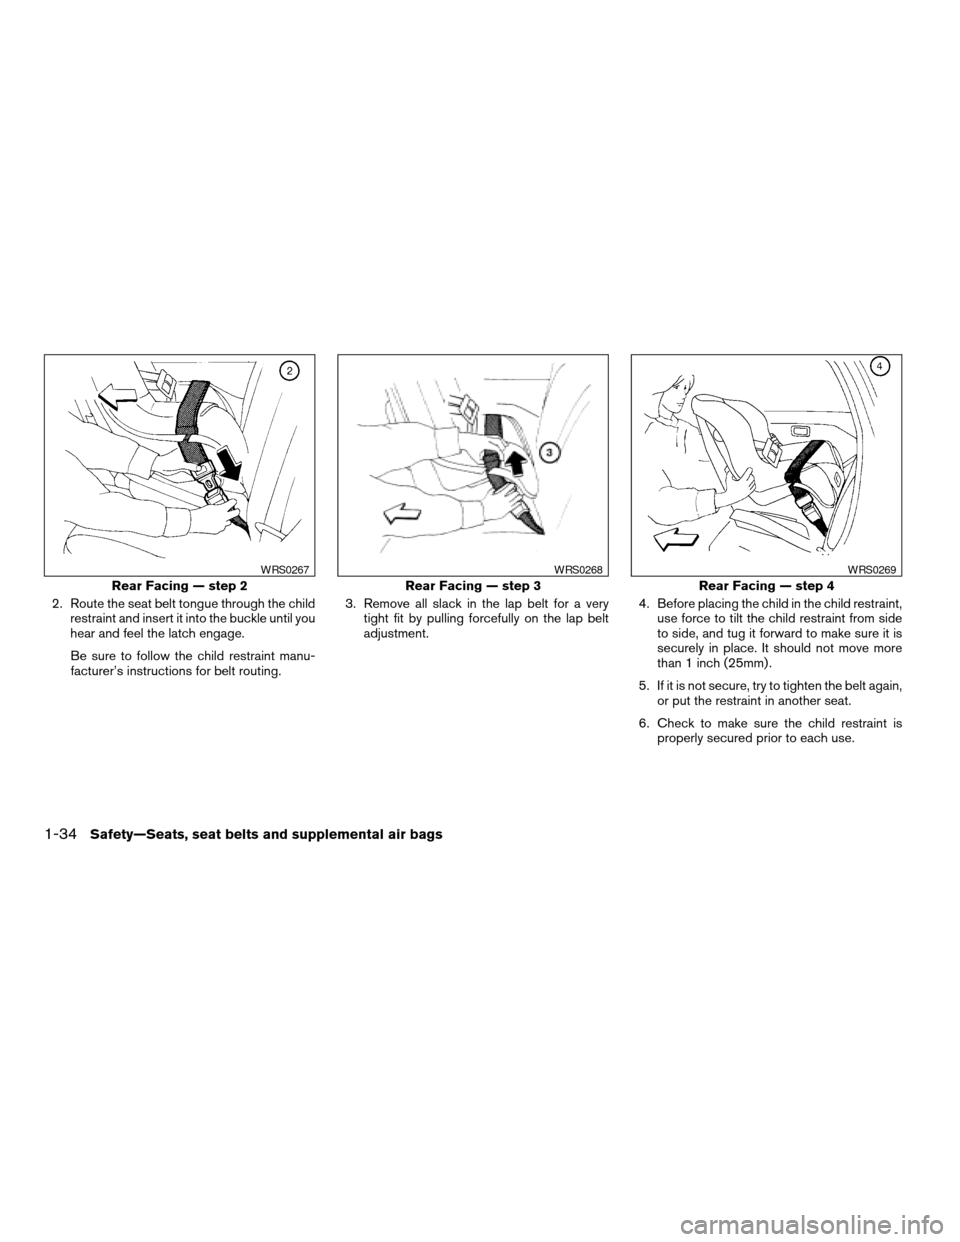
HEAD RESTRAINT ADJUSTMENT
To raise the head restraint, pull it up. To lower,
push and hold the lock knob and push the head
restraint down.
WARNING
Head restraints should be adjusted prop-
erly as they may provide significant pro-
tection against injury in an accident. Do
not remove them. Check the adjustment
after someone else uses the seat.
ARS1026WRS0213
1-6Safety—Seats, seat belts and supplemental air bags
ZREVIEW COPY:Ð2004 Truck/Frontier(d22)
Owners Manual(owners)ÐUSA English(nna)
11/21/03Ðdebbie
X
Page 34 of 296

PASSENGER SUPPLEMENTAL AIR
BAG ON/OFF SWITCH AND LIGHT
(except Crew Cab models)
WARNING
Air bags and seat belts are designed to
work as a unit. Do not switch the air bag
OFF unless you meet federal government
criteria. Switching off the air bag may in-
crease the risk of serious or fatal injuries
in a collision where the air bag would have
inflated.
In rare instances, some passengers are exposed
to serious injury risks from inflating air bags, es-
pecially if not properly restrained. The U.S. and
Canadian federal governments recognize other
limited circumstances in which an air bag could
reduce safety. The passenger air bag ON/OFF
switch is, therefore, allowed in models without full
rear seats. Because the overall benefits of air
bags are great, in most situations air bags should
not be switched off unless special government
criteria exist.
The passenger air bag ON/OFF switch is located
under the climate controls. It can be used to turn
the passenger supplemental air bag OFF.The ON/OFF switch should ONLY be used to
turn the passenger supplemental air bag OFF
when the following government criteria exists:
cInfants (less than 1 year old) in rear facing
child restraints MUST be placed in the front
passenger seat.
cChildren ages 1-12 years MUST be placed
in the front passenger seat.
cThe passenger has a medical condition
which, according to a physician, causes the
air bag to pose a special risk and makes the
potential harm from the air bag greater than
the potential harm from turning off the air
bag.
Seat belts and child restraints should always be
properly used. See “Precautions on seat belt
usage” and “Child restraints” later in this section
for details.
To turn the passenger supplemental air bag OFF,
insert the ignition key in the passenger supple-
mental air bag ON/OFF switch and turn the
switch clockwise to the OFF position. Then re-
move the key. When the ignition is turned to the
ON or START position the passenger air bag
OFF indicator light will illuminate to indicate the
air bag is OFF. To turn the passenger supplemen-
tal air bag ON, insert the ignition key in the
passenger supplemental air bag ON/OFF switchand turn the switch counter clockwise to the ON
position. Then remove the key. When the ignition
is turned to the ON or START position the pas-
senger air bag OFF indicator light will illuminate
for 7 seconds to indicate the system is working
properly and then go out to indicate that the
passenger supplemental air bag is ON.
1. Do not operate the passenger supplemental
air bag ON/OFF switch when the ignition is
ON.
2. Fully turn the passenger supplemental air
bag ON/OFF switch to either the ON or OFF
position.
3. Always remove the ignition key after using
the passenger supplemental air bag
ON/OFF switch.
4. The passenger air bag OFF indicator light
should illuminate for 7 seconds after the
ignition is turned to the ON or START posi-
tion. If not, the vehicle should be taken to a
NISSAN dealer.
Items 2 and 3 above are intended to prevent
improper use of the ignition key.
When the switch is turned to the ON position, the
passenger supplemental air bag is enabled and
could inflate in a frontal collision. When the
switch is turned to the OFF position, the passen-
ger supplemental air bag is disabled and will not
1-16Safety—Seats, seat belts and supplemental air bags
ZREVIEW COPY:Ð2004 Truck/Frontier(d22)
Owners Manual(owners)ÐUSA English(nna)
11/21/03Ðdebbie
X
Page 51 of 296

3. Remove all slack in the lap belt for a very
tight fit by pulling forcefully on the lap belt
adjustment.4. Before placing the child in the child restraint,
use force to tilt the child restraint from side
to side, and tug it forward to make sure it is
securely in place. It should not move more
than 1 inch (25mm) .
5. If it is not secure, try to tighten the belt again,
or put the restraint in another seat.
6. Check to make sure the child restraint is
properly secured prior to each use.Rear facing
When you install a child restraint in the rear
center seat, follow these steps:
1. Position the child restraint on the seat as
illustrated. Always follow the restraint manu-
facturer’s instructions.
Front Facing — step 3
WRS0264
Front Facing — step 4
WRS0265
Rear Facing – step 1
WRS0266
Safety—Seats, seat belts and supplemental air bags1-33
ZREVIEW COPY:Ð2004 Truck/Frontier(d22)
Owners Manual(owners)ÐUSA English(nna)
11/21/03Ðdebbie
X
Page 52 of 296

2. Route the seat belt tongue through the child
restraint and insert it into the buckle until you
hear and feel the latch engage.
Be sure to follow the child restraint manu-
facturer’s instructions for belt routing.3. Remove all slack in the lap belt for a very
tight fit by pulling forcefully on the lap belt
adjustment.4. Before placing the child in the child restraint,
use force to tilt the child restraint from side
to side, and tug it forward to make sure it is
securely in place. It should not move more
than 1 inch (25mm) .
5. If it is not secure, try to tighten the belt again,
or put the restraint in another seat.
6. Check to make sure the child restraint is
properly secured prior to each use.
Rear Facing — step 2
WRS0267
Rear Facing — step 3
WRS0268
Rear Facing — step 4
WRS0269
1-34Safety—Seats, seat belts and supplemental air bags
ZREVIEW COPY:Ð2004 Truck/Frontier(d22)
Owners Manual(owners)ÐUSA English(nna)
11/21/03Ðdebbie
X
Page 54 of 296

3. Pull on the shoulder belt until all of the belt is
fully extended. At this time, the belt retractor
is in the automatic locking mode (child re-
straint mode) . It reverts back to emergency
locking mode when the belt is fully retracted.4. Allow the belt to retract. Pull up on the
shoulder belt to remove any slack in the belt.
If necessary to ensure the child restraint is
secure, pull the shoulder belt through the
seat belt tongue beyond the stitching in the
belt.
After the seat belt is fully retracted and the child
restraint is removed from the seat, the stitching
on the shoulder belt can be pulled back through
the seat belt tongue. The stitching locates the
seat belt tongue near the top of the seat back for
easy access for rear seat passengers.5. Before placing the child in the child restraint,
use force to tilt the child restraint from side
to side, and tug it forward to make sure it is
securely held in place. It should not move
more than 1 inch (25mm) .
6. Check that the retractor is in the automatic
locking mode by trying to pull more belt out
of the retractor. If you cannot pull any more
belt webbing out of the retractor, the retrac-
tor is in the automatic locking mode.
7. Check to make sure the child restraint is
properly secured prior to each use. If the belt
is not locked, repeat steps 3 through 6.
Front Facing — step 3
WRS0251
Front Facing — step 4
WRS0146
Front Facing — step 5
WRS0252
1-36Safety—Seats, seat belts and supplemental air bags
ZREVIEW COPY:Ð2004 Truck/Frontier(d22)
Owners Manual(owners)ÐUSA English(nna)
11/21/03Ðdebbie
X
Page 55 of 296

After the child restraint is removed and the seat
belt is fully retracted, the automatic locking mode
(child restraint mode) is canceled.
Rear facing
When you install a child restraint in a rear out-
board seat, follow these steps:
1. Position the child restraint on the seat. Al-
ways follow the restraint manufacturer’s in-
structions.2. Route the seat belt tongue through the child
restraint and insert it into the buckle until you
hear and feel it engage.
Be sure to follow the child restraint manu-
facturer’s instructions for belt routing.
Rear Facing — step 1
WRS0273
Rear Facing — step 2
WRS0309
Safety—Seats, seat belts and supplemental air bags1-37
ZREVIEW COPY:Ð2004 Truck/Frontier(d22)
Owners Manual(owners)ÐUSA English(nna)
11/21/03Ðdebbie
X
Page 56 of 296

3. Pull on the shoulder belt until all of the belt is
fully extended. At this time, the belt retractor
is in the automatic locking mode (child re-
straint mode) . It reverts back to emergency
locking mode when the seat belt is fully
retracted.4. Allow the belt to retract. Pull up on the
shoulder belt to remove any slack in the belt.
If necessary to ensure the child restraint is
secure, pull the shoulder belt through the
seat belt tongue beyond the stitching in the
belt.
After the seat belt is fully retracted and the child
restraint is removed from the seat, the stitching
on the shoulder belt can be pulled back through
the seat belt tongue. This stitching locates the
seat belt tongue near the top of the seat back for
easy access for rear seat passengers.5. Before placing the child in the child restraint,
use force to tilt the child restraint from side
to side, and tug it forward to make sure it is
securely held in place. It should not move
more than 1 inch (25mm) .
6. Check that the retractor is in the automatic
locking mode by trying to pull more belt out
of the retractor. If you cannot pull any more
belt webbing out of the retractor, the retrac-
tor is in the automatic locking mode.
7. Check to make sure the child restraint is
properly secured prior to each use. If the belt
is not locked, repeat steps 3 through 6.
Rear Facing — step 3
WRS0260
Rear Facing — step 4
WRS0253
Rear Facing — step 5
WRS0254
1-38Safety—Seats, seat belts and supplemental air bags
ZREVIEW COPY:Ð2004 Truck/Frontier(d22)
Owners Manual(owners)ÐUSA English(nna)
11/21/03Ðdebbie
X