2004 NISSAN FRONTIER ESP
[x] Cancel search: ESPPage 41 of 296
facing child restraints. Front facing child re-
straints are available for children who outgrow
rear facing child restraints.
WARNING
cBe sure to turn the passenger supple-
mental air bag ON/OFF switch OFF
when using a rear facing child restraint
in the front passenger seat in models so
equipped. If it is not OFF, the air bag
may inflate in a collision. The force of
the rapidly inflating air bag could cause
serious injury or kill the child in the
child restraint. See “Passenger supple-
mental air bag ON/OFF switch and
light” earlier in this section.
cIn Crew Cab models, never install a rear
facing child restraint in the front pas-
senger seat. An inflating supplemental
air bag could seriously injure or kill your
child. A rear facing child restraint must
only be used in the rear seat.
cDo not install a child restraint in the
jump seats (King Cab model) . These
seats are not suitable for child restraint
installation.cInfants and children need special pro-
tection. The vehicle’s seat belts may not
fit them properly. The shoulder belt may
come too close to the face or neck. The
lap belt may not fit over their small hip
bones. In an accident, an improperly
fitting seat belt could cause serious or
fatal injury. Always use appropriate
child restraints.
All U.S. states and Canadian provinces or terri-
tories require the use of approved child restraints
for infants and small children. See “Child Re-
straints” later in this section.
In addition, there are many types of child re-
straints available for larger children which should
be used for maximum protection.
NISSAN recommends that all pre-teens
and children be restrained in the rear seat if
available (Crew Cab models) . According to
accident statistics, children are safer when
properly restrained in the rear seat than in
the front seat. This is especially important
because your vehicle has a supplemental
restraint system (Air bag system) for the
front passenger. See “Supplemental re-
straint system” earlier in this section. Also,
see “Passenger air bag ON/OFF switch and
light” earlier in this section.
Infants and small children
NISSAN recommends that infants and small chil-
dren be placed in child restraints that comply with
Federal Motor Vehicle Safety Standards or Ca-
nadian Motor Vehicle Safety Standards. You
should choose a child restraint that fits your ve-
hicle and always follow the manufacturer’s in-
structions for installation and use.
Larger children
Children who are too large for child restraints
should be seated and restrained by the seat belts
which are provided.
If the child’s seating position has a shoulder belt
that fits close to the face or neck, the use of a
booster seat (commercially available) may help
overcome this. The booster seat should raise the
child so that the shoulder belt is properly posi-
tioned across the top, middle portion of the
shoulder and the lap belt is low on the hips. The
booster seat should fit the vehicle seat and have
a label certifying that it complies with Federal
Motor Vehicle Safety Standards or Canadian Mo-
tor Vehicle Safety Standards. Once the child has
grown so the shoulder belt is no longer on or near
the face and neck, use the shoulder belt without
the booster seat.
Safety—Seats, seat belts and supplemental air bags1-23
ZREVIEW COPY:Ð2004 Truck/Frontier(d22)
Owners Manual(owners)ÐUSA English(nna)
11/21/03Ðdebbie
X
Page 101 of 296

Front passenger power window switch
The passenger window switch operates only the
corresponding passenger window. To open the
window, push the switch and hold it down
s1.To
close the window, pull the switch up
s2.
Rear power window switch (Crew
Cab models only)
The rear power window switches open or close
only the corresponding window. To open the
window, push the switch and hold it down
s1.To
close the window, push the switch up
s2.
Locking passengers’ windows
When the window lock button is depressed, only
the driver side window can be opened or closed.
Push it again to cancel the window lock function.
Automatic operation
To fully open the driver window, press the driver
window switch down to the second detent and
release it; it need not be held. The window auto-
matically opens all the way. To stop the window,
lift the switch up while the window is opening.
WIC0343WIC0357WIC0345
Instruments and controls2-33
ZREVIEW COPY:Ð2004 Truck/Frontier(d22)
Owners Manual(owners)ÐUSA English(nna)
11/21/03Ðdebbie
X
Page 108 of 296
Lockout protection
When the power door lock switch (driver or front
passenger) is moved to the lock position with the
key in the ignition and any door open, all doors
will lock and unlock automatically. This helps to
prevent the keys from being accidently locked
inside the vehicle.
CHILD SAFETY REAR DOOR LOCK
(Crew Cab models only)
Child safety locks help prevent the rear doors
from being opened accidentally, especially when
small children are in the vehicle.
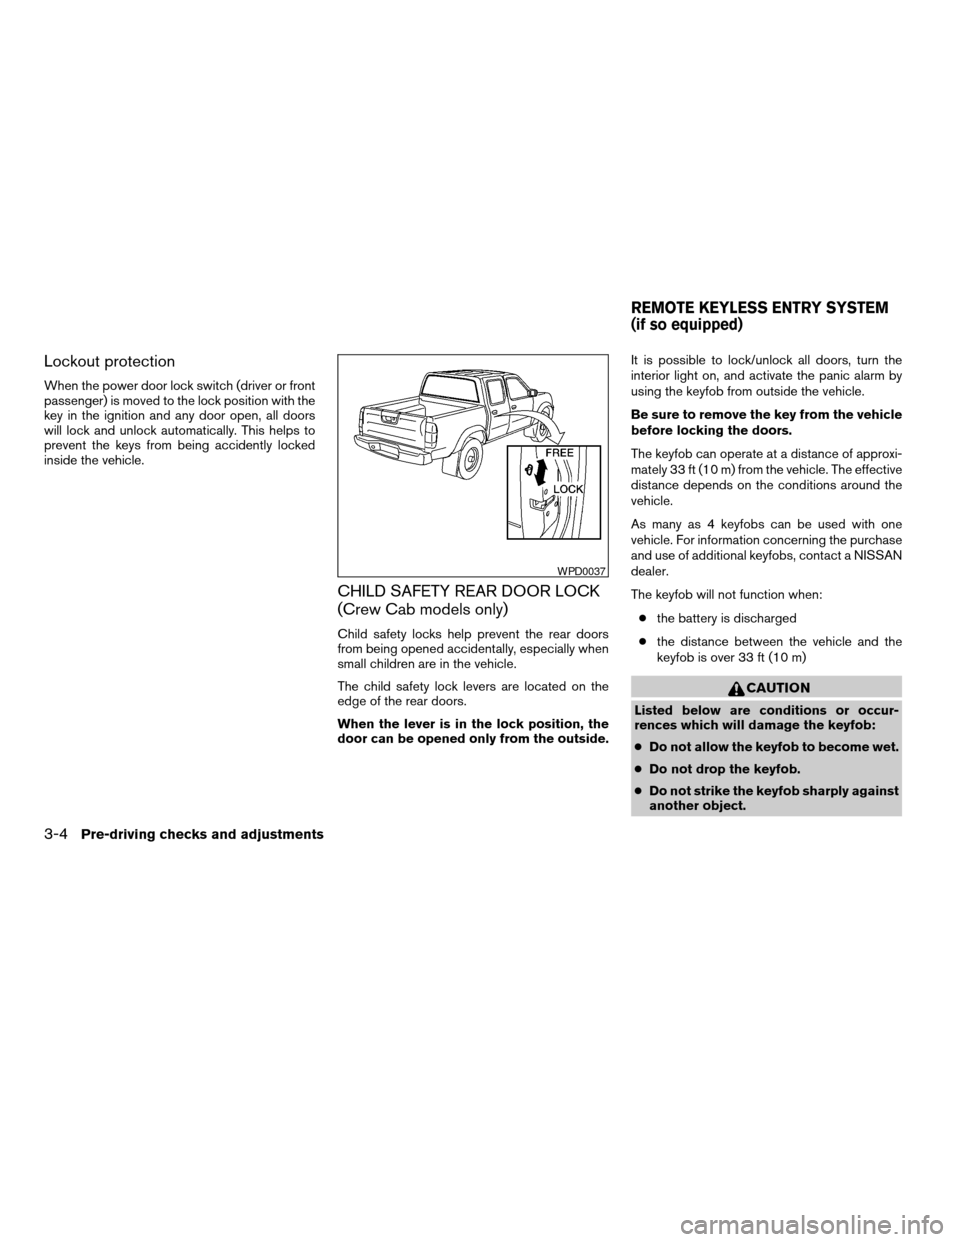
The child safety lock levers are located on the
edge of the rear doors.
When the lever is in the lock position, the
door can be opened only from the outside.It is possible to lock/unlock all doors, turn the
interior light on, and activate the panic alarm by
using the keyfob from outside the vehicle.
Be sure to remove the key from the vehicle
before locking the doors.
The keyfob can operate at a distance of approxi-
mately 33 ft (10 m) from the vehicle. The effective
distance depends on the conditions around the
vehicle.
As many as 4 keyfobs can be used with one
vehicle. For information concerning the purchase
and use of additional keyfobs, contact a NISSAN
dealer.
The keyfob will not function when:
cthe battery is discharged
cthe distance between the vehicle and the
keyfob is over 33 ft (10 m)
CAUTION
Listed below are conditions or occur-
rences which will damage the keyfob:
cDo not allow the keyfob to become wet.
cDo not drop the keyfob.
cDo not strike the keyfob sharply against
another object.
WPD0037
REMOTE KEYLESS ENTRY SYSTEM
(if so equipped)
3-4Pre-driving checks and adjustments
ZREVIEW COPY:Ð2004 Truck/Frontier(d22)
Owners Manual(owners)ÐUSA English(nna)
11/21/03Ðdebbie
X
Page 132 of 296

RADIO
Turn the ignition key to the ACC or ON position
and press the PWR (power)/VOL (volume) knob
to turn the radio on. If you listen to the radio with
the engine not running, the key should be turned
to the ACC position.
Radio reception is affected by station signal
strength, distance from radio transmitter, build-
ings, bridges, mountains and other external influ-
ences. Intermittent changes in reception quality
normally are caused by these external influences.
Using a cellular phone in or near the ve-
hicle may influence radio reception quality.
Radio reception
Your NISSAN radio system is equipped with
state-of-the-art electronic circuits to enhance ra-
dio reception. These circuits are designed to
extend reception range, and to enhance the qual-
ity of that reception.
However there are some general characteristics
of both FM and AM radio signals that can affect
radio reception quality in a moving vehicle, even
when the finest equipment is used. These char-
acteristics are completely normal in a given re-
ception area, and do not indicate any malfunction
in your NISSAN radio system.Reception conditions will constantly change be-
cause of vehicle movement. Buildings, terrain,
signal distance and interference from other ve-
hicles can work against ideal reception. De-
scribed below are some of the factors that can
affect your radio reception.
FM RADIO RECEPTION
Range: FM range is normally limited to 25 - 30
miles (40 - 48 km) , with monaural (single chan-
nel) FM having slightly more range than stereo
FM. External influences may sometimes interfere
with FM station reception even if the FM station is
within 25 miles (40 km) . The strength of the FM
signal is directly related to the distance between
the transmitter and receiver. FM signals follow a
line-of-sight path, exhibiting many of the same
characteristics as light. For example they will
reflect off objects.
Fade and drift: As your vehicle moves away from
a station transmitter, the signals will tend to fade
and/or drift.
Static and flutter: During signal interference from
buildings, large hills or due to antenna position
(usually in conjunction with increased distance
from the station transmitter) static or flutter can
be heard. This can be reduced by adjusting the
treble control to reduce treble response.Multipath reception: Because of the reflective
characteristics of FM signals, direct and reflected
signals reach the receiver at the same time. The
signals may cancel each other, resulting in mo-
mentary flutter or loss of sound.
AM RADIO RECEPTION
AM signals, because of their low frequency, can
bend around objects and skip along the ground.
In addition, the signals can be bounced off the
ionosphere and bent back to earth. Because of
these characteristics, AM signals are also sub-
ject to interference as they travel from transmitter
to receiver.
Fading: Occurs while the vehicle is passing
through freeway underpasses or in areas with
many tall buildings. It can also occur for several
seconds during ionospheric turbulence even in
areas where no obstacles exist.
Static: Caused by thunderstorms, electrical
power lines, electric signs and even traffic lights.
AUDIO SYSTEM
4-10Heater, air conditioner and audio systems
ZREVIEW COPY:Ð2004 Truck/Frontier(d22)
Owners Manual(owners)ÐUSA English(nna)
11/21/03Ðdebbie
X
Page 162 of 296
4. Allow the engine to idle for at least 30 sec-
onds after starting. Do not race the engine
while warming it up. Drive at moderate
speed for a short distance first, especially in
cold weather.
In cold weather, keep the engine running for
a minimum of 2–3 minutes before shutting it
off. Starting and stopping the engine over a
short period of time may make the vehicle
more difficult to start.AUTOMATIC TRANSMISSION (if so
equipped)
WARNING
cDo not depress the accelerator pedal
while shifting from P (Park) or N (Neu-
tral) to R (Reverse) , D (Drive) , 2 or 1.
Always depress the brake pedal until
shifting is completed. Failure to do so
could cause you to lose control and
have an accident.
cCold engine idle speed is high, so use
caution when shifting into a forward or
reverse gear before the engine has
warmed up.
cNever shift to P (Park) or R (Reverse)
while the vehicle is moving. This could
cause an accident.
CAUTION
cWhen stopping the vehicle on an uphill
grade, do not hold the vehicle by de-
pressing the accelerator pedal. The foot
brake should be used for this purpose.
cOn slippery roads, do not downshift.
This may cause a loss of control.The automatic transmission in your vehicle is
electronically controlled to produce maximum
power and smooth operation.
The recommended operating procedures for this
transmission are shown on the following pages.
Follow these procedures for maximum vehicle
performance and driving enjoyment.
Starting the vehicle
1. After starting the engine, fully depress the
foot brake pedal before attempting to move
the shift selector lever out of the P (Park)
position.
2. Keep the foot brake pedal depressed and
move the shift selector lever into a driving
gear.
3. Release the foot brake, then gradually start
the vehicle in motion.
The automatic transmission is designed so
the foot brake pedal MUST be depressed
before shifting from P (Park) to any drive
position while the ignition switch is in the
ON position.
The shift selector lever cannot be moved
out of P (Park) and into any of the other
gear positions if the ignition key is turned
to the LOCK position or if the key is re-
moved.
DRIVING THE VEHICLE
5-10Starting and driving
ZREVIEW COPY:Ð2004 Truck/Frontier(d22)
Owners Manual(owners)ÐUSA English(nna)
11/21/03Ðdebbie
X
Page 179 of 296
1. Firmly apply the parking brake.
2.Manual transmission models:
Place the shift lever in the R (Reverse) posi-
tion. When parking on an uphill grade, place
the shift lever in 1st gear.
Automatic transmission models:
Move the shift selector lever to the P (Park)
position.
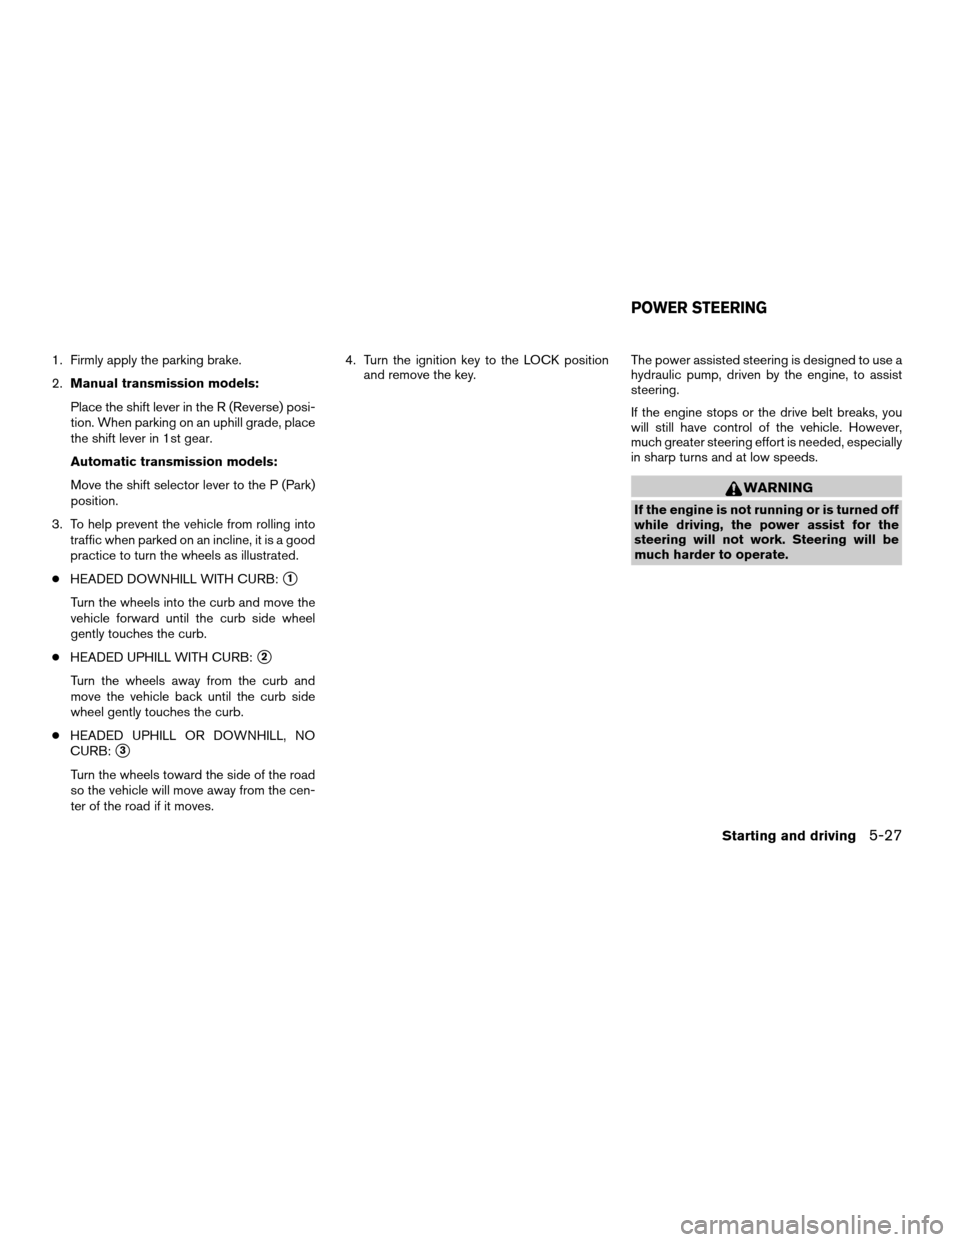
3. To help prevent the vehicle from rolling into
traffic when parked on an incline, it is a good
practice to turn the wheels as illustrated.
cHEADED DOWNHILL WITH CURB:
s1
Turn the wheels into the curb and move the
vehicle forward until the curb side wheel
gently touches the curb.
cHEADED UPHILL WITH CURB:
s2
Turn the wheels away from the curb and
move the vehicle back until the curb side
wheel gently touches the curb.
cHEADED UPHILL OR DOWNHILL, NO
CURB:
s3
Turn the wheels toward the side of the road
so the vehicle will move away from the cen-
ter of the road if it moves.4. Turn the ignition key to the LOCK position
and remove the key.The power assisted steering is designed to use a
hydraulic pump, driven by the engine, to assist
steering.
If the engine stops or the drive belt breaks, you
will still have control of the vehicle. However,
much greater steering effort is needed, especially
in sharp turns and at low speeds.
WARNING
If the engine is not running or is turned off
while driving, the power assist for the
steering will not work. Steering will be
much harder to operate.
POWER STEERING
Starting and driving5-27
ZREVIEW COPY:Ð2004 Truck/Frontier(d22)
Owners Manual(owners)ÐUSA English(nna)
11/21/03Ðdebbie
X
Page 182 of 296
When accelerating or driving on slippery sur-
faces, the tires may spin or slide. With the Vehicle
Dynamic Control (VDC) system, sensors detect
these movements and control the braking and
engine output to help improve vehicle stability.
cWhen the vehicle dynamic control (VDC)
system is operating, the slip indicator in the
instrument panel blinks.
cWhen only the traction control system (TCS)
portion of the vehicle dynamic control sys-
tem is operating, the slip indicator will also
blink.
cIf the slip indicator blinks, the road condi-
tions are slippery. Be sure to adjust your
speed and driving to these conditions. See
“Slip indicator light”, and “Vehicle dynamic
control off indicator light” in the “Instruments
and controls” section.
cIndicator light
If malfunction occurs in the system,
the
andindicator lights come
on in the instrument panel.
As long as these warning lights are on, the
traction control function is canceled.
The VDC system uses an Active Brake Limited
Slip (ABLS) system to improve vehicle traction.
The ABLS system works when one of the driving
wheels is spinning on a slippery surface. TheABLS system brakes the spinning wheel which
distributes the driving power to the other drive
wheel. If the vehicle is operated with the vehicle
dynamic control system off using the VDC OFF
switch, all VDC and TCS functions will be turned
off. The ABLS system and ABS will still operate
with the VDC system OFF. If the ABLS system is
activated, the slip indicator light will blink and you
may hear a clunk noise and/or feel a pulsation in
the brake pedal. This is normal.
While the VDC system is operating, you may feel
a pulsation in the brake pedal and hear a noise or
vibration from under the hood. This is normal and
indicates that the VDC system is working prop-
erly.
The computer has a built in diagnostic feature
that tests the system each time you start the
engine and move the vehicle forward or in reverse
at a slow speed. When the self-test occurs, you
may hear a clunk noise and/or feel a pulsation in
the brake pedal. This is normal and is not an
indication of a malfunction.
WARNING
cThe vehicle dynamic control system is
designed to help improve driving stabil-
ity but does not prevent accidents due
to abrupt steering operation at high
speeds or by careless or dangerous
driving techniques. Reduce vehicle
speed and be especially careful when
driving and cornering on slippery sur-
faces and always drive carefully.
cIf brake related parts such as brake
pads, rotors and calipers are not stan-
dard equipment or are extremely dete-
riorated, the vehicle dynamic control
system may not operate properly and
the vehicle dynamic control off indica-
tor light may come on.
cDo not modify the vehicle’s suspension.
If suspension parts such as shock ab-
sorbers, struts, springs, stabilizer bars
and bushings are not NISSAN approved
for your vehicle or are extremely dete-
riorated the vehicle dynamic control
system may not operate properly. This
could adversely affect vehicle handling
performance, and the vehicle dynamic
control off indicator light may come on.
VEHICLE DYNAMIC CONTROL (VDC)
SYSTEM (if so equipped)
5-30Starting and driving
ZREVIEW COPY:Ð2004 Truck/Frontier(d22)
Owners Manual(owners)ÐUSA English(nna)
11/21/03Ðdebbie
X
Page 192 of 296
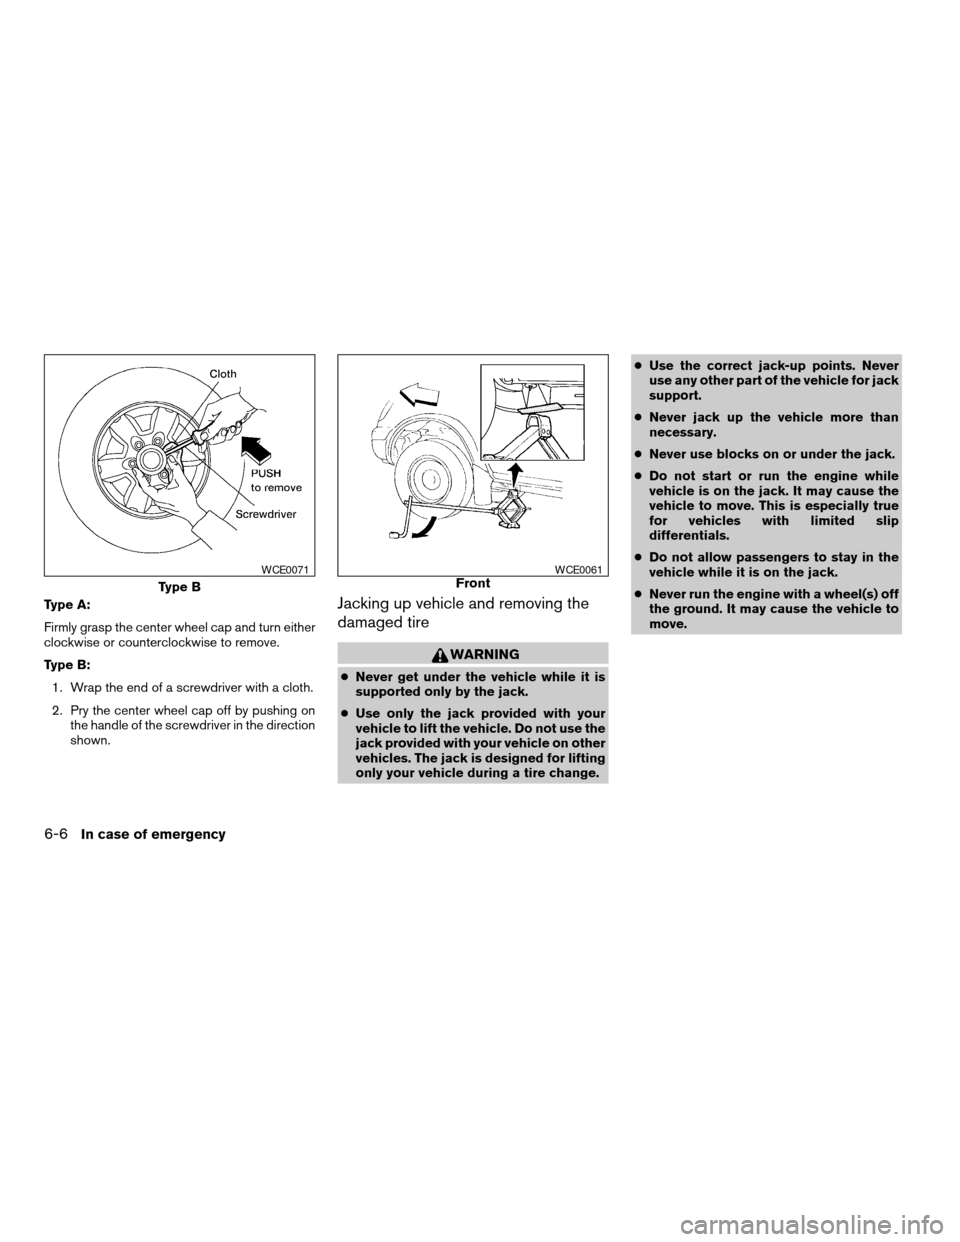
Type A:
Firmly grasp the center wheel cap and turn either
clockwise or counterclockwise to remove.
Type B:
1. Wrap the end of a screwdriver with a cloth.
2. Pry the center wheel cap off by pushing on
the handle of the screwdriver in the direction
shown.Jacking up vehicle and removing the
damaged tire
WARNING
cNever get under the vehicle while it is
supported only by the jack.
cUse only the jack provided with your
vehicle to lift the vehicle. Do not use the
jack provided with your vehicle on other
vehicles. The jack is designed for lifting
only your vehicle during a tire change.cUse the correct jack-up points. Never
use any other part of the vehicle for jack
support.
cNever jack up the vehicle more than
necessary.
cNever use blocks on or under the jack.
cDo not start or run the engine while
vehicle is on the jack. It may cause the
vehicle to move. This is especially true
for vehicles with limited slip
differentials.
cDo not allow passengers to stay in the
vehicle while it is on the jack.
cNever run the engine with a wheel(s) off
the ground. It may cause the vehicle to
move.
Type B
WCE0071FrontWCE0061
6-6In case of emergency
ZREVIEW COPY:Ð2004 Truck/Frontier(d22)
Owners Manual(owners)ÐUSA English(nna)
11/21/03Ðdebbie
X