2004 NISSAN ALTIMA belt
[x] Cancel search: beltPage 45 of 264
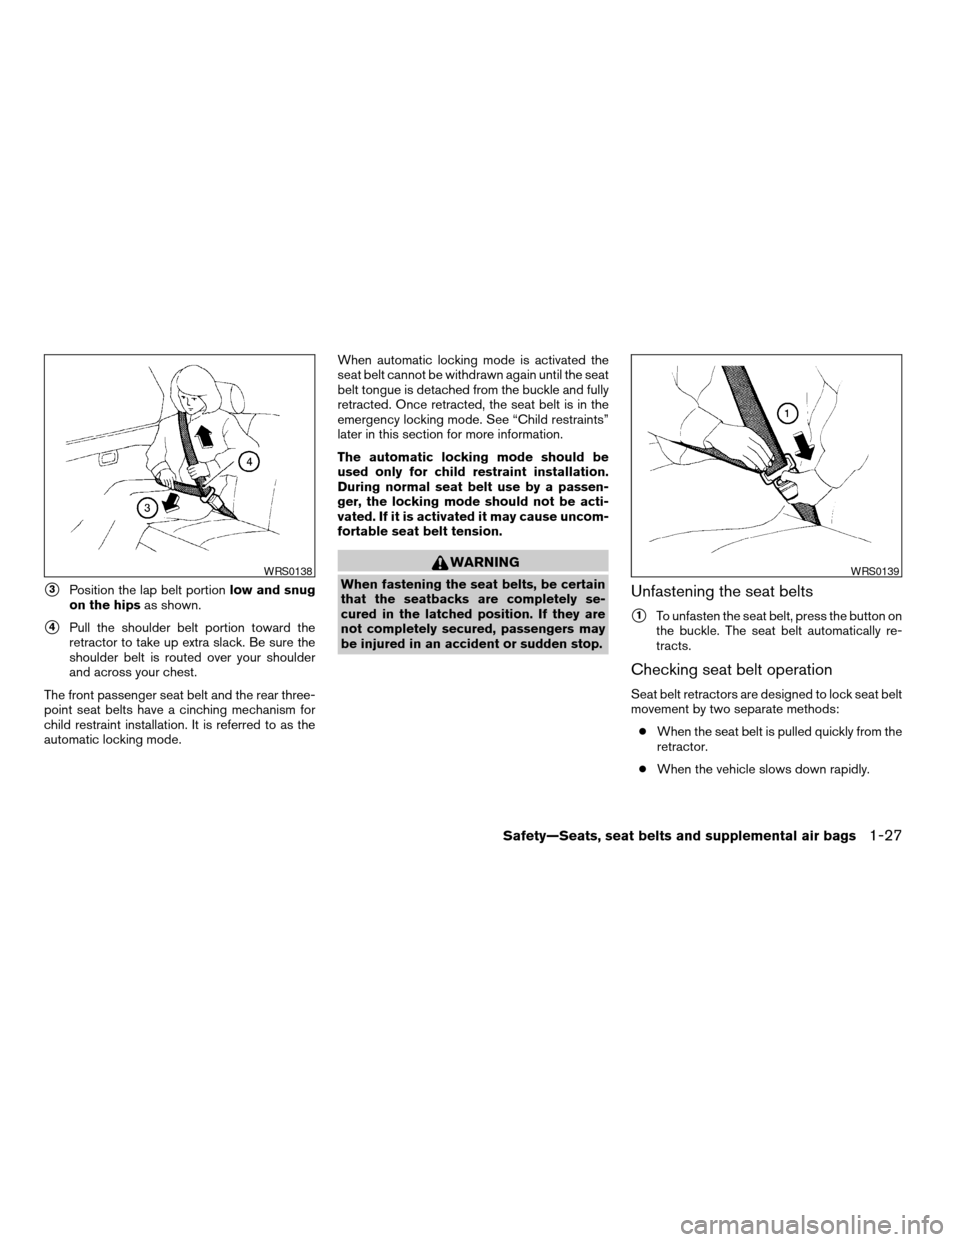
s3Position the lap belt portionlow and snug
on the hipsas shown.
s4Pull the shoulder belt portion toward the
retractor to take up extra slack. Be sure the
shoulder belt is routed over your shoulder
and across your chest.
The front passenger seat belt and the rear three-
point seat belts have a cinching mechanism for
child restraint installation. It is referred to as the
automatic locking mode.When automatic locking mode is activated the
seat belt cannot be withdrawn again until the seat
belt tongue is detached from the buckle and fully
retracted. Once retracted, the seat belt is in the
emergency locking mode. See “Child restraints”
later in this section for more information.
The automatic locking mode should be
used only for child restraint installation.
During normal seat belt use by a passen-
ger, the locking mode should not be acti-
vated. If it is activated it may cause uncom-
fortable seat belt tension.
WARNING
When fastening the seat belts, be certain
that the seatbacks are completely se-
cured in the latched position. If they are
not completely secured, passengers may
be injured in an accident or sudden stop.Unfastening the seat belts
s1To unfasten the seat belt, press the button on
the buckle. The seat belt automatically re-
tracts.
Checking seat belt operation
Seat belt retractors are designed to lock seat belt
movement by two separate methods:
cWhen the seat belt is pulled quickly from the
retractor.
cWhen the vehicle slows down rapidly.
WRS0138WRS0139
Safety—Seats, seat belts and supplemental air bags1-27
ZREVIEW COPY:Ð2004 Altima(l30)
Owners Manual(owners)ÐUSA English(nna)
10/10/03Ðtbrooks
X
Page 46 of 264

To increase your confidence in the seat belts,
check the operation as follows.
cGrasp the shoulder belt and pull forward
quickly. The retractor should lock and re-
strict further belt movement.
If the retractor does not lock during this check or
if you have any questions about seat belt opera-
tion, see a NISSAN dealer.
Center of rear seat
Selecting correct set of seat belts:
The center seat belt buckle is identified by the
CENTER mark. The center seat belt tongue can
be fastenedonlyinto the center seat belt buckle.
Shoulder belt height adjustment (For
front seats)
The shoulder belt anchor height should be ad-
justed to the position best for you. (See “Precau-
tions on seat belt usage” earlier in this section.)
The belt should be away from your face and neck,
but not falling off your shoulder. Release the
adjustment button to lock the shoulder belt an-
chor into position.
To adjust the shoulder belt anchor height:
s1Push in the adjustment button.
LRS0391WRS0171
1-28Safety—Seats, seat belts and supplemental air bags
ZREVIEW COPY:Ð2004 Altima(l30)
Owners Manual(owners)ÐUSA English(nna)
10/10/03Ðtbrooks
X
Page 47 of 264
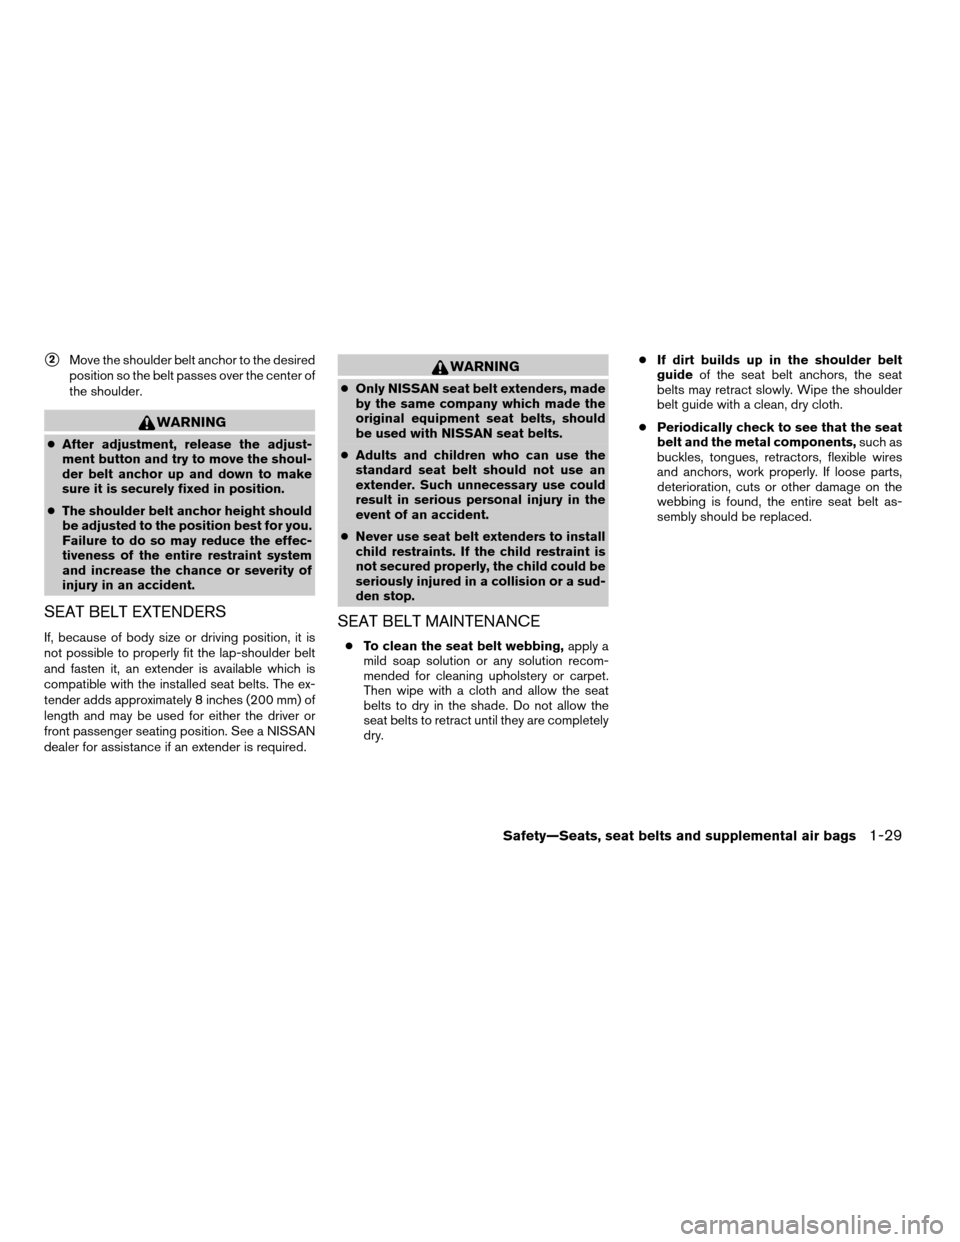
s2Move the shoulder belt anchor to the desired
position so the belt passes over the center of
the shoulder.
WARNING
cAfter adjustment, release the adjust-
ment button and try to move the shoul-
der belt anchor up and down to make
sure it is securely fixed in position.
cThe shoulder belt anchor height should
be adjusted to the position best for you.
Failure to do so may reduce the effec-
tiveness of the entire restraint system
and increase the chance or severity of
injury in an accident.
SEAT BELT EXTENDERS
If, because of body size or driving position, it is
not possible to properly fit the lap-shoulder belt
and fasten it, an extender is available which is
compatible with the installed seat belts. The ex-
tender adds approximately 8 inches (200 mm) of
length and may be used for either the driver or
front passenger seating position. See a NISSAN
dealer for assistance if an extender is required.
WARNING
cOnly NISSAN seat belt extenders, made
by the same company which made the
original equipment seat belts, should
be used with NISSAN seat belts.
cAdults and children who can use the
standard seat belt should not use an
extender. Such unnecessary use could
result in serious personal injury in the
event of an accident.
cNever use seat belt extenders to install
child restraints. If the child restraint is
not secured properly, the child could be
seriously injured in a collision or a sud-
den stop.
SEAT BELT MAINTENANCE
cTo clean the seat belt webbing,apply a
mild soap solution or any solution recom-
mended for cleaning upholstery or carpet.
Then wipe with a cloth and allow the seat
belts to dry in the shade. Do not allow the
seat belts to retract until they are completely
dry.cIf dirt builds up in the shoulder belt
guideof the seat belt anchors, the seat
belts may retract slowly. Wipe the shoulder
belt guide with a clean, dry cloth.
cPeriodically check to see that the seat
belt and the metal components,such as
buckles, tongues, retractors, flexible wires
and anchors, work properly. If loose parts,
deterioration, cuts or other damage on the
webbing is found, the entire seat belt as-
sembly should be replaced.
Safety—Seats, seat belts and supplemental air bags1-29
ZREVIEW COPY:Ð2004 Altima(l30)
Owners Manual(owners)ÐUSA English(nna)
10/10/03Ðtbrooks
X
Page 48 of 264
PRECAUTIONS ON CHILD
RESTRAINTS
WARNING
cInfants and small children should al-
ways be placed in an appropriate child
restraint while riding in the vehicle.
Failure to use a child restraint can re-
sult in serious injury or death.
WARNING
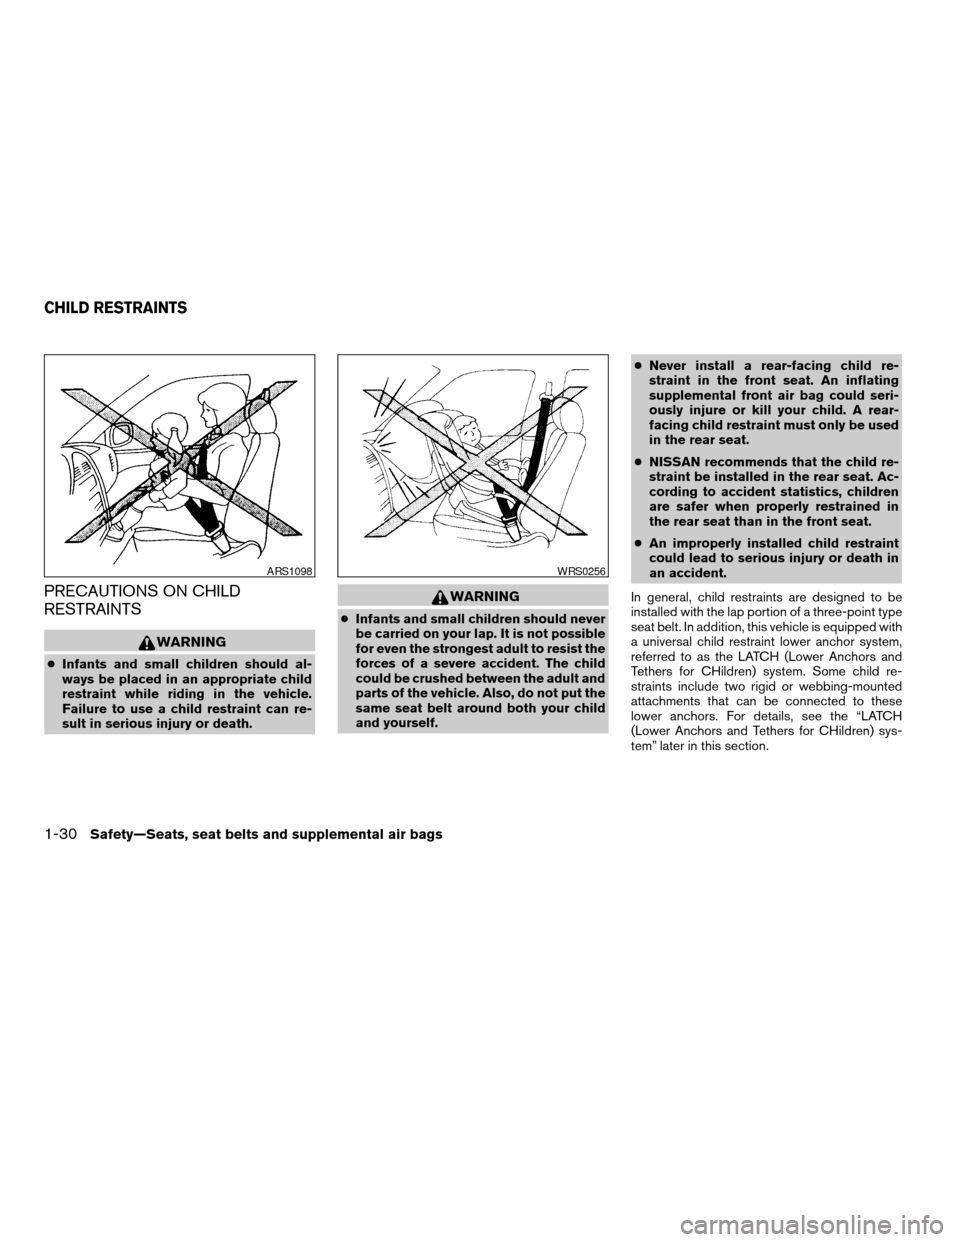
cInfants and small children should never
be carried on your lap. It is not possible
for even the strongest adult to resist the
forces of a severe accident. The child
could be crushed between the adult and
parts of the vehicle. Also, do not put the
same seat belt around both your child
and yourself.cNever install a rear-facing child re-
straint in the front seat. An inflating
supplemental front air bag could seri-
ously injure or kill your child. A rear-
facing child restraint must only be used
in the rear seat.
cNISSAN recommends that the child re-
straint be installed in the rear seat. Ac-
cording to accident statistics, children
are safer when properly restrained in
the rear seat than in the front seat.
cAn improperly installed child restraint
could lead to serious injury or death in
an accident.
In general, child restraints are designed to be
installed with the lap portion of a three-point type
seat belt. In addition, this vehicle is equipped with
a universal child restraint lower anchor system,
referred to as the LATCH (Lower Anchors and
Tethers for CHildren) system. Some child re-
straints include two rigid or webbing-mounted
attachments that can be connected to these
lower anchors. For details, see the “LATCH
(Lower Anchors and Tethers for CHildren) sys-
tem” later in this section.
ARS1098WRS0256
CHILD RESTRAINTS
1-30Safety—Seats, seat belts and supplemental air bags
ZREVIEW COPY:Ð2004 Altima(l30)
Owners Manual(owners)ÐUSA English(nna)
10/10/03Ðtbrooks
X
Page 49 of 264
Child restraints for infants and small children of
various sizes are offered by several manufactur-
ers. When selecting any child restraint, keep the
following points in mind:
cChoose only a restraint with a label certifying
that it complies with Federal Motor Vehicle
Safety Standard 213 or Canadian Motor
Vehicle Safety Standard 213.
cCheck the child restraint in your vehicle to be
sure it is compatible with the vehicle’s seat
and seat belt system.
cIf the child restraint is compatible with your
vehicle, place your child in the child restraint
and check the various adjustments to be
sure the child restraint is compatible with
your child. Always follow all recommended
procedures.
All U.S. states and provinces of Canada
require that infants and small children be
restrained in an approved child restraint at
all times while the vehicle is being oper-
ated.WARNING
cImproper use of a child restraint can
increase the risk or severity of injury for
both the child and other occupants of
the vehicle.
cFollow all of the child restraint manu-
facturer’s instructions for installation
and use. When purchasing a child re-
straint, be sure to select one which will
fit your child and vehicle. It may not be
possible to properly install some types
of child restraints in your vehicle.
cIf the child restraint is not anchored
properly, the risk of a child being in-
jured in a collision or a sudden stop
greatly increases.
cAdjustable seatbacks should be posi-
tioned to fit the child restraint, but as
upright as possible.
cAfter attaching the child restraint, test it
before you place the child in it. Tilt it
from side to side. Try to tug it forward
and check to see if the belt holds the
restraint in place. The child restraint
should not move more than 1 inch. If the
restraint is not secure, tighten the belt
as necessary, or put the restraint in an-
other seat and test it again.cFor a front-facing child restraint, check
to make sure the shoulder belt does not
go in front of the child’s face or neck. If
it does, put the shoulder belt behind the
child restraint. If you must install a front
facing child restraint in the front seat,
see “Installation on front passenger
seat” later in this section.
cWhen your child restraint is not in use,
keep it secured with a seat belt to pre-
vent it from being thrown around in
case of a sudden stop or accident.
CAUTION
Remember that a child restraint left in a
closed vehicle can become very hot.
Check the seating surface and buckles
before placing your child in the child
restraint.
Safety—Seats, seat belts and supplemental air bags1-31
ZREVIEW COPY:Ð2004 Altima(l30)
Owners Manual(owners)ÐUSA English(nna)
10/10/03Ðtbrooks
X
Page 50 of 264
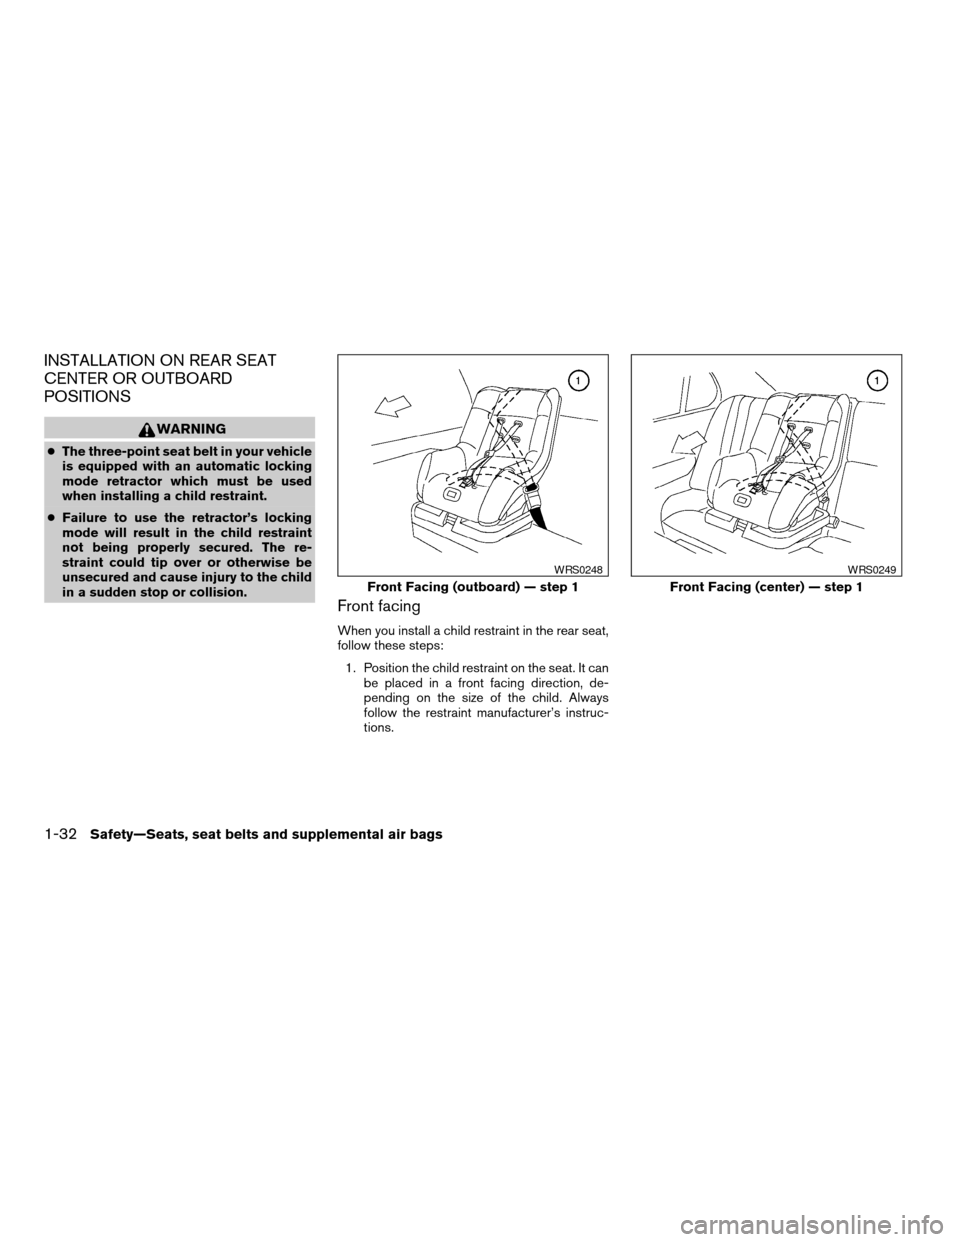
INSTALLATION ON REAR SEAT
CENTER OR OUTBOARD
POSITIONS
WARNING
cThe three-point seat belt in your vehicle
is equipped with an automatic locking
mode retractor which must be used
when installing a child restraint.
cFailure to use the retractor’s locking
mode will result in the child restraint
not being properly secured. The re-
straint could tip over or otherwise be
unsecured and cause injury to the child
in a sudden stop or collision.
Front facing
When you install a child restraint in the rear seat,
follow these steps:
1. Position the child restraint on the seat. It can
be placed in a front facing direction, de-
pending on the size of the child. Always
follow the restraint manufacturer’s instruc-
tions.
Front Facing (outboard) — step 1
WRS0248
Front Facing (center) — step 1
WRS0249
1-32Safety—Seats, seat belts and supplemental air bags
ZREVIEW COPY:Ð2004 Altima(l30)
Owners Manual(owners)ÐUSA English(nna)
10/10/03Ðtbrooks
X
Page 51 of 264

2. Route the seat belt tongue through the child
restraint and insert it into the buckle until you
hear and feel the latch engage.
Be sure to follow the child restraint manu-
facturer’s instructions for belt routing.3. Pull on the shoulder belt until all of the belt is
fully extended. At this time, the seat belt
retractor is in the automatic locking mode
(child restraint mode) . It reverts back to
emergency locking mode when the seat belt
is fully retracted.4. Allow the seat belt to retract. Pull up on the
shoulder belt to remove any slack in the belt.
Front Facing — step 2
WRS0250
Front Facing — step 3
WRS0251
Front Facing — step 4
WRS0146
Safety—Seats, seat belts and supplemental air bags1-33
ZREVIEW COPY:Ð2004 Altima(l30)
Owners Manual(owners)ÐUSA English(nna)
10/10/03Ðtbrooks
X
Page 52 of 264

5. Before placing the child in the child restraint,
use force to tilt the child restraint from side
to side, and tug it forward to make sure that
it is securely held in place. It should not move
more than 1 inch (25mm) .
6. Check that the retractor is in the automatic
locking mode by trying to pull more seat belt
out of the retractor. If you cannot pull any
more belt webbing out of the retractor, the
retractor is in the automatic locking mode.7. Check to make sure that the child restraint is
properly secured prior to each use. If the belt
is not locked, repeat steps 3 through 6.
After the child restraint is removed and the seat
belt is fully retracted, the automatic locking mode
(child restraint mode) is canceled.Rear facing
When you install a child restraint in the rear seat,
follow these steps:
1. Position the child restraint on the seat. The
direction of the child restraint depends on
the type of the child restraint and the size of
the child. Always follow the restraint manu-
facturer’s instructions.
Front Facing — step 5
WRS0252
Rear Facing (outboard) — step 1
WRS0261
1-34Safety—Seats, seat belts and supplemental air bags
ZREVIEW COPY:Ð2004 Altima(l30)
Owners Manual(owners)ÐUSA English(nna)
10/10/03Ðtbrooks
X