2004 NISSAN ALTIMA reset
[x] Cancel search: resetPage 142 of 264
1. PRESET ABC button
2. LOAD button
3. CD select button
4. Display
5. FM band select button
6. AM band select button
7. CD eject button
8. TRAVEL button
9. TUNE FF-REV button
10. MENU/CLOCK button
11. MIX/PTY button
12. AUDIO button
13. SCAN button
14. Station preset buttons
15. POWER/VOL control knob
16. CD insert slot
17. SEEK/TRACK button
FM-AM RADIO WITH COMPACT
DISC (CD) CHANGER (if so
equipped)
PWR/VOL control knob
Turn the ignition key to the ACC or ON position,
then push the PWR/VOL control knob. If you
listen to the radio with the engine not running,
turn the key to the ACC position. The mode (radio
or CD) that was playing immediately before the
system was turned off resumes playing.When no CD is loaded, the radio comes on.
Pushing the PWR/VOL control knob again turns
the system off.
Turn the PWR/VOL control knob to the right to
increase volume or to the left to decrease volume.
Adjusting tone quality and speaker balance
Press the AUDIO button to enter the audio adjust
mode:
Bass!Treb!Fade!Bal
Press the TUNE/FF-REV (
or)or
SEEK/TRACK (or) to adjust to the
desired levels. The display will return to the regu-
lar radio display after 7 seconds, or you may
press the AUDIO button again to return to the
regular radio display.
Clock operation
Pressing the MENU button displays the clock
with the radio on or off. Press the MENU button
again to turn off the clock display.
Clock set
1. Press and hold the MENU button until it
beeps (>2 seconds) .
2. The hours will start flashing. Press
TUNE/FF-REV (
or)or
SEEK/TRACK (or) to adjust
the hours.3. Press the MENU button to switch to the
minute adjustment.
4. Press TUNE/FF-REV (
or)or
SEEK/TRACK (or) to adjust
the minutes.
5. Press the MENU button again to exit the
clock set mode.
The display will return to the regular clock display
after 7 seconds, or you may press the MENU
button again to return to the regular clock display.
FM-AM radio operation
FM-AM band select
Push the AM or the FM button to change from AM
to FM reception.
The FM stereo indicator, ST, illuminates during
FM stereo reception. When the stereo broadcast
signal is weak, the radio automatically changes
from stereo to monaural reception.
TUNE/FF—REV
WARNING
The radio should not be tuned while driv-
ing so full attention may be given to ve-
hicle operation.
4-22Heater, air conditioner and audio systems
ZREVIEW COPY:Ð2004 Altima(l30)
Owners Manual(owners)ÐUSA English(nna)
10/13/03Ðtbrooks
X
Page 143 of 264

Use theandbuttons for manual
tuning. To move quickly through the channels,
hold the tuning buttons down.
SEEK tuning
Push SEEK/TRACK (
or) . SEEK
tuning begins from low to high frequencies or
high to low frequencies, depending on which
button is pressed, and stops at the next broad-
casting station. If using the up button, once the
highest broadcasting station is reached, the ra-
dio continues in the SEEK mode at the lowest
broadcasting station. If using the down button,
once the lowest broadcasting station is reached,
the radio continues in the SEEK mode at the
highest broadcasting station.
SCAN tuning
Push the SCAN button. SCAN illuminates in the
display window. SCAN tuning begins from low to
high frequencies. SCAN tuning stops for 5 sec-
onds at each broadcasting station that has suffi-
cient signal strength. When scanning, SCAN
blinks in the display. Pushing the SCAN button
again during this 5 second period stops SCAN
tuning and the radio remains tuned to that station.Station memory operation — Travel Preset
is OFF
Each preset mode (A, B or C) has 6 presets,
capable of storing any combination of AM, FM
and FM RDS stations.
Press the PRESET ABC button to change be-
tween the presets:
A!B!C
The radio displays icon A, B or C to indicate
which set of presets is active.
To store a radio station in a preset:
1. Select the desired preset by pressing PRE-
SET ABC.
2. Tune to the desired station.
3. Press the desired station select button (>2
seconds) .
4. A beep will sound indicating memorization is
complete.
5. Other station select buttons can be set in
the same manner.
If the battery cable is disconnected, or if the radio
fuse opens, the radio memory is canceled. In that
case, reset the desired stations.Turning ON Travel Preset
1. Press the TRAVEL preset button (<1.5 sec-
onds) . The TRAVEL icon shows in the dis-
play.
2. The radio selects the strongest stations in
the area and stores them in Travel Presets A,
B and C. 12 FM stations and 6 AM stations
are the default settings. To change the de-
fault settings, see “Editing Travel Preset”
later in this section.
3. When finished storing radio stations, the
radio tunes to the first stored preset of Travel
Preset A.
4. If the radio cannot find any stations, the radio
displays“NO STATION”and mutes the au-
dio.
5. If the radio cannot fill all the presets, the
remaining presets are stored with 87.9 for
FM and 600 for AM.
The TUNE, SCAN, SEEK and preset memory
functions are available while Travel Preset mode
is on.
Heater, air conditioner and audio systems4-23
ZREVIEW COPY:Ð2004 Altima(l30)
Owners Manual(owners)ÐUSA English(nna)
10/13/03Ðtbrooks
X
Page 144 of 264

Canceling Travel Preset
Press the TRAVEL preset button (<1.5 seconds)
to clear the Travel Preset memory. This turns off
the Travel icon. The radio returns to the last used
preset of A, B or C in the permanent preset
memory.
Editing travel preset
1. Press and hold the TRAVEL preset button
(>3 seconds) until the radio beeps to start
the editing mode. The Travel icon will flash
while in TRAVEL PRESET EDIT mode.
2. The radio displays“TRAVEL EDIT”for 2
seconds and then changes to“SET A-*”.
3. Press TUNE/FF-REV (
or)to
select a mode.
4. Press the TRAVEL PRESET button to save
the mode.
5. Display is changed to“SET B-*”, repeat
steps 3 and 4.
6. Display is changed to“SET C-*”, repeat
step 3.
7. Press the TRAVEL PRESET button to exit
the edit mode and return to normal mode.
*: AM, FM, FM RDS, Rock, Classic Rock, Soft
Rock, Top 40, Country, Jazz, Classical, Oldies,
News, Sports, Talk.Storing Travel Preset stations in permanent
memory
1. While in Travel Preset mode, press and hold
the TRAVEL preset button until it beeps (>3
seconds) .
2. The presets are transferred from Travel Pre-
set memory to the permanent preset
memory for A, B, and C.“PRESETS
LOADED”is displayed.
3. The TRAVEL preset indicator turns off.
RDS (radio data system)
RDS stands for Radio Data System, and is a data
information service transmitted by some radio
stations on the FM band (not AM band) encoded
within a regular radio broadcast. Currently, most
RDS stations are in large cities, but many stations
are now considering broadcasting RDS data.
RDS can display:
cStation call sign, such as “WHFR 98.3”.
cStation name, such as “The Groove”.
cMusic or programming type, such as “Clas-
sical”, “Country”, or “Rock”.
cTraffic reports about delays or construction.
If the station broadcasts RDS information the
RDS icon is displayed. The RDS information willbe displayed according to the option chosen in
the RDS setup mode. (FM & RDS is the default.)
Press the RDS button again to display the fre-
quency for 3 seconds. The radio will then return
to the normal display. If the station does not
broadcast RDS information, the RDS icon will not
be displayed.
Setting RDS mode
Press and hold the MENU button (>2 seconds)
until the radio beeps to start the editing mode.
Press the MENU button until the display shows
“RDS TRAFFIC”. This display will last 2 sec-
onds and then change to“TRAFFIC-OFF”.
Press TUNE/FF-REV (or) to toggle
the RDS traffic mode from “OFF” to “ON”. Press
the RDS button again to set your RDS mode
selection.
The display changes to“RDS DISPLAY”. This
display will last 2 seconds and then change to
“SHOW”. Press TUNE/FF-REV (
or) to switch between the following RDS
display modes:
c“FM & RDS”: the radio display will show the
station’s broadcast frequency and the sta-
tion’s name.
c“RDS ONLY”: the radio display will show the
station’s name only.
4-24Heater, air conditioner and audio systems
ZREVIEW COPY:Ð2004 Altima(l30)
Owners Manual(owners)ÐUSA English(nna)
10/13/03Ðtbrooks
X
Page 145 of 264
c“RDS TEMP”: the radio display will show the
station’s name for 5 seconds and then dis-
play only the radio station’s broadcast fre-
quency.
PTY (program type)
PTY can be used to search for a certain program
type. Certain areas have a limited number of
stations that transmit RDS. Many stations trans-
mit call letters and frequencies only. Searching or
scanning by program type may yield a limited
number of selections.
1. Press the MIX·PTY button. The display
changes from“RDS PTY SEARCH”to
“SELECT BY TUNE”.
2. Press TUNE/FF-REV (
or)
up/down button to choose a specific pro-
gram type:
ROCK, CLASSIC ROCK, SOFT ROCK,
TOP 40, COUNTRY, JAZZ, CLASSICAL,
OLDIES, NEWS, SPORTS, TALK, ANY
3. Press the SEEK (
or) or SCAN
button to search for the next station with the
selected PTY. The SCAN icon flashes when
the SCAN button is pressed. If SCAN is
selected, push the PTY or SCAN button to
stop on a station.If SEEK is selected, the radio automatically
stops on the next radio station matching the
selected program type.
4. Press the PTY button again to cancel the
PTY mode.
Speed Sensitive Control Volume (SCV)
Your vehicle has Speed Sensitive Control Vol-
ume (SCV) for audio. The audio volume changes
as the driving speed changes.
Press and hold the MENU button (>2 seconds)
until the radio beeps to start the editing mode.
Press the MENU button until the display shows
“Speed comp vol”.This display will last 2 sec-
onds and then change to“SCV-off”. Press
TUNE/FF-REV (
or) to change be-
tween:
Off!Low!Mid!High
Compact disc (CD) player operation
Turn the ignition key to the ACC or ON position.
CAUTION
cDo not force a compact disc into the CD
insert slot. This could damage the CD
and/or CD changer/player.cTrying to load a CD with the CD door
closed could damage the CD and/or CD
changer.
CD6 button
When the CD6 button is pressed with a compact
disc loaded and the radio playing, the radio turns
off and the last used compact disc starts to play.
CD loading
Press the LOAD button to start CD loading
mode.
The following sequence will occur:
1. If other discs are already loaded, thegreen
indicator on the lowest available disc select
button will start blinking. (Same as preset
memory button.) The display shows
“Please Wait”.
2. The display changes to“Insert Disc”for a
maximum of 15 seconds.
3. During the 15 second interval, insert the
disc. The display changes to“Loading
Disc”.
4. The CD will play after the disc is set to a play
position.
Heater, air conditioner and audio systems4-25
ZREVIEW COPY:Ð2004 Altima(l30)
Owners Manual(owners)ÐUSA English(nna)
10/13/03Ðtbrooks
X
Page 146 of 264

5. The indicator changes fromblinking green
tosolid greenand the display changes to
show the Disc number icon, Disc number,
Track number and Elapsed time.
All disc loading
1. Press and hold the LOAD button until the
radio beeps (>1.5 seconds) .
2. Thegreenindicator on the lowest available
disc select button will start blinking. (Same
as preset memory button.) The display
shows“Please Wait”.
3. The display changes to“Insert Disc”for a
maximum of 15 seconds.
4. During the 15 second interval, insert the
disc. The display changes to“Loading
Disc”.
5. The indicator changes fromblinking green
tosolid green.
6. The disc number icon is turned on.7. Repeat steps 2–5 until all discs are loaded,
then the last loaded disc will begin to play.
The display shows the Disc number, Track
number and Elapsed Time.
Selected disc loading
1. Press an available disc select button whose
indicator is off. The display shows“Please
Wait”.
2. Thegreenindicator starts blinking and the
display shows“Insert Disc”for 15 sec-
onds.
3. Insert the CD. The display shows“Loading
Disc”.
4. The CD will play after the disc is set to a play
position.
5. The indicator color changes fromblinking
greentosolid greenand the display
shows the Disc icon, Disc number, Track
number and Elapsed Time.
If a disc is not inserted within 15 seconds or if the
load button is pressed during load sequence, the
entire disc load sequence will be canceled.
Disc play
Press the CD button. If a CD is loaded and the
radio is playing, the radio turns off and the last
loaded disc starts to play.Selected disc play
1. Press the disc select button whose disc icon
is displayed.
2. The indicator blinksgreenduring the
change and the display shows“Changing
Disc”.
3. The CD plays after the disc is set to a play
position.
4. The indicator changes fromblinking green
tosolid greenand the display shows the
Disc number, Track number and Elapsed
Time.
FF (fast forward) REW
(rewind) buttons
When the TUNE/FF-REV (
or) but-
ton is pressed while the compact disc is playing,
the compact disc plays at an increased speed
while fast forwarding or rewinding. When the
button is released, the CD returns to normal play
speed.
SEEK/TRACK buttons
When
is pressed while the compact disc
is playing, the selection following the present one
starts to play from the beginning. Press
several times to skip several selections. Each
time the button is pressed, the CD advances 1
4-26Heater, air conditioner and audio systems
ZREVIEW COPY:Ð2004 Altima(l30)
Owners Manual(owners)ÐUSA English(nna)
10/13/03Ðtbrooks
X
Page 149 of 264
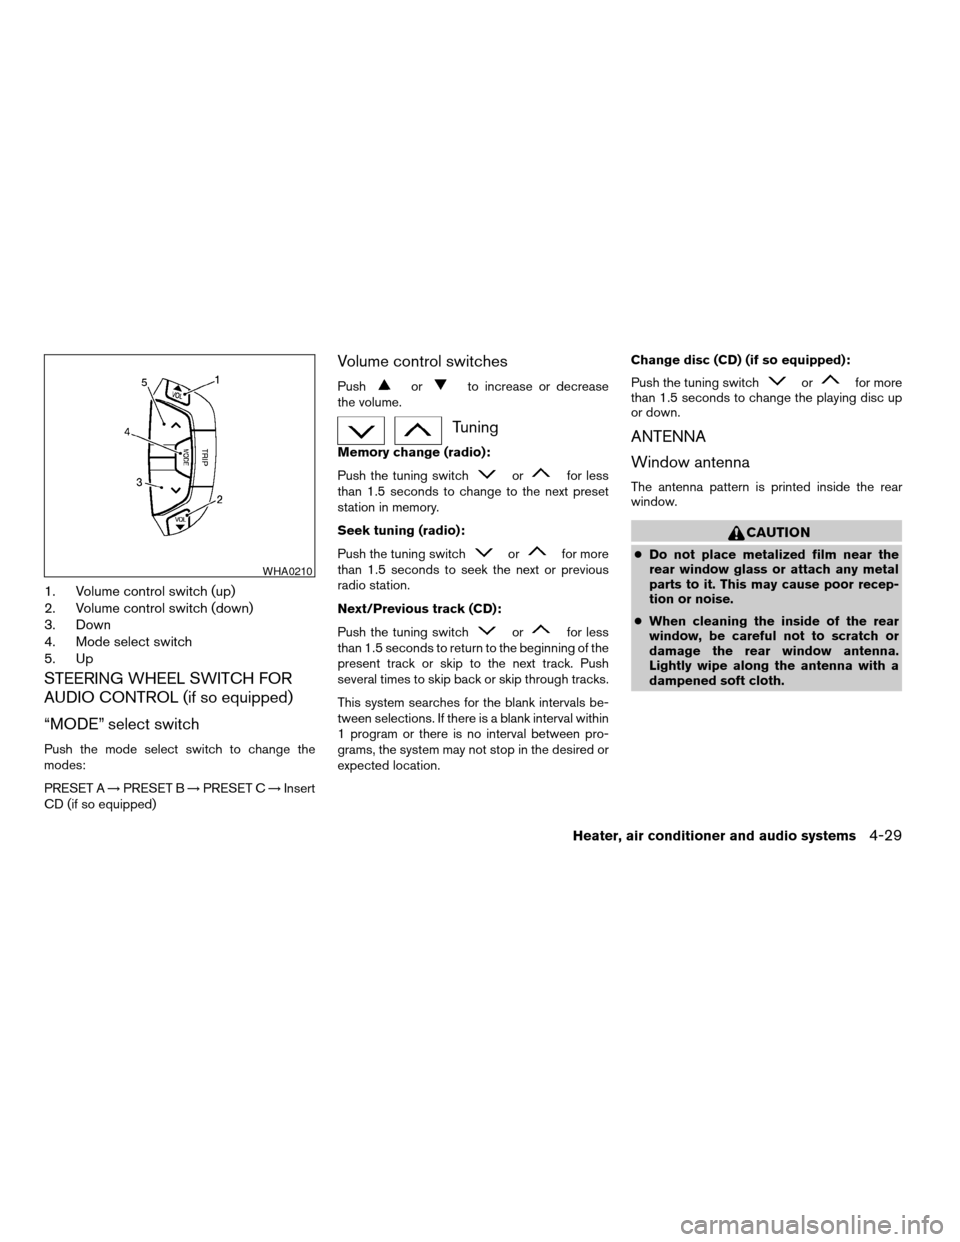
1. Volume control switch (up)
2. Volume control switch (down)
3. Down
4. Mode select switch
5. Up
STEERING WHEEL SWITCH FOR
AUDIO CONTROL (if so equipped)
“MODE” select switch
Push the mode select switch to change the
modes:
PRESET A!PRESET B!PRESET C!Insert
CD (if so equipped)
Volume control switches
Pushorto increase or decrease
the volume.
Tuning
Memory change (radio):
Push the tuning switch
orfor less
than 1.5 seconds to change to the next preset
station in memory.
Seek tuning (radio):
Push the tuning switch
orfor more
than 1.5 seconds to seek the next or previous
radio station.
Next/Previous track (CD):
Push the tuning switch
orfor less
than 1.5 seconds to return to the beginning of the
present track or skip to the next track. Push
several times to skip back or skip through tracks.
This system searches for the blank intervals be-
tween selections. If there is a blank interval within
1 program or there is no interval between pro-
grams, the system may not stop in the desired or
expected location.Change disc (CD) (if so equipped):
Push the tuning switch
orfor more
than 1.5 seconds to change the playing disc up
or down.
ANTENNA
Window antenna
The antenna pattern is printed inside the rear
window.
CAUTION
cDo not place metalized film near the
rear window glass or attach any metal
parts to it. This may cause poor recep-
tion or noise.
cWhen cleaning the inside of the rear
window, be careful not to scratch or
damage the rear window antenna.
Lightly wipe along the antenna with a
dampened soft cloth.
WHA0210
Heater, air conditioner and audio systems4-29
ZREVIEW COPY:Ð2004 Altima(l30)
Owners Manual(owners)ÐUSA English(nna)
10/13/03Ðtbrooks
X
Page 163 of 264
cThe SET indicator light may blink when the
cruise control main switch is turned ON
while pushing the RES/ACCEL,
COAST/SET, or CANCEL switch (located
on the steering wheel) . To properly set the
cruise control system, use the following pro-
cedures.
WARNING
Do not use the cruise control when driving
under the following conditions:
cWhen it is not possible to keep the
vehicle at a set speed.
cIn heavy traffic or in traffic that varies in
speed.
cOn winding or hilly roads.
cOn slippery roads (rain, snow, ice, etc.) .
cIn very windy areas.
Doing so could cause a loss of vehicle
control and result in an accident.
CAUTION
On manual transmission models, do not
shift into N (Neutral) without depressing the
clutch pedal when the cruise control is set.
Should this occur, depress the clutch pedal
and turn the main switch off immediately.
Failure to do so may cause engine damage.
CRUISE CONTROL OPERATIONS
The cruise control allows driving at a speed be-
tween 30 - 90 MPH (48 - 144 km/h) without
keeping your foot on the accelerator pedal.
To turn on the cruise control,push the main
switch. The CRUISE indicator light in the instru-
ment panel comes on.
To set cruising speed,accelerate the vehicle to
the desired speed, push the COAST/SET switch
and release it. The SET indicator light in the
instrument panel comes on. Take your foot off the
accelerator pedal. Your vehicle maintains the set
speed.
cTo pass another vehicle,depress the ac-
celerator pedal. When you release the
pedal, the vehicle returns to the previously
set speed.
cThe vehicle may not maintain the set speed
when going up or down steep hills. If this
happens, drive without the cruise control.To cancel the preset speed,use one of the
following three methods.
cPush the CANCEL button; the SET indicator
light in the instrument panel goes out.
cTap the brake pedal; the SET indicator light
goes out.
cTurn the main switch off. Both the CRUISE
indicator light and SET indicator light in the
instrument panel go out.
The cruise control is automatically canceled and
the SET light in the instrument panel goes out if:
cyou depress the brake or clutch pedal while
pushing the ACCEL/RES or SET/COAST
switch. The preset speed is deleted from
memory.
cthe vehicle slows down more than 8 MPH
(13 km/h) below the set speed.
cyou depress the clutch pedal (manual trans-
mission) , or move the shift selector lever to N
(Neutral) (automatic transmission) .
To reset at a faster cruising speed,use one
of the following three methods.
cDepress the accelerator pedal. When the
vehicle attains the desired speed, push and
release the COAST/SET switch.
Starting and driving5-13
ZREVIEW COPY:Ð2004 Altima(l30)
Owners Manual(owners)ÐUSA English(nna)
10/13/03Ðtbrooks
X
Page 164 of 264
cPush and hold the RES/ACCEL switch.
When the vehicle attains the speed you de-
sire, release the switch.
cPush and release the RES/ACCEL switch.
Each time you do this, the set speed in-
creases by about 1 MPH (1.6 km/h) .
To reset at a slower cruising speed,use one
of the following three methods.
cLightly tap the brake pedal. When the ve-
hicle attains the desired speed, push the
COAST/SET switch and release it.
cPush and hold the COAST/SET switch. Re-
lease the switch when the vehicle slows to
the desired speed.
cPush and release the COAST/SET switch.
Each time you do this, the set speed de-
creases by about 1 MPH (1.6 km/h) .
To resume the preset speed,push and re-
lease the RES/ACCEL switch. The vehicle re-
turns to the last set cruising speed when the
vehicle speed is over 30 MPH (48 km/h) .CAUTION
During the first 1,200 miles (2,000 km) ,
follow these recommendations to obtain
maximum engine performance and en-
sure the future reliability and economy of
your new vehicle. Failure to follow these
recommendations may result in short-
ened engine life and reduced engine
performance.
cAvoid driving for long periods at constant
speed, either fast or slow, and do not run the
engine over 4,000 rpm.
cDo not accelerate at full throttle in any gear.
cAvoid quick starts.
cAvoid hard braking as much as possible.
cDo not tow a trailer for the first 500 miles
(800 km) . Your engine, axle or other parts
could be damaged.cAccelerate slowly and smoothly. Maintain
cruising speeds with a constant accelerator
position.
cDrive at moderate speeds on the highway.
Driving at high speed lowers fuel economy.
cAvoid unnecessary stopping and braking.
Maintain a safe distance behind other ve-
hicles.
cUse a proper gear range which suits road
conditions. On level roads, shift into high
gear as soon as possible.
cAvoid unnecessary engine idling.
cKeep your engine tuned up.
cFollow the recommended periodic mainte-
nance schedule.
cKeep the tires inflated to the correct pres-
sure. Low tire pressure increases tire wear
and lowers fuel economy.
cKeep the wheels in correct alignment. Im-
proper alignment increases tire wear and
lowers fuel economy.
cAir conditioner operation lowers fuel
economy. Use the air conditioner only when
necessary.
BREAK-IN SCHEDULE INCREASING FUEL ECONOMY
5-14Starting and driving
ZREVIEW COPY:Ð2004 Altima(l30)
Owners Manual(owners)ÐUSA English(nna)
10/13/03Ðtbrooks
X