Page 134 of 314

134 Controls in detailRetractable hardtop
Locking the retractable hardtop after
raising/lowering
If the retractable hardtop is not properly
locked, lock it as described below.Problems when operating the retract-
able hardtop
Unlocked status noticed when stopped
�
Switch on the ignition.
�
To lock the retractable hardtop in its
fully closed position, push the retract-
able hardtop switch forward.
Unlocked status noticed while driving
�
Stop the vehicle.
�
Leave the ignition switched on
�
To lock the retractable hardtop in its
fully closed position, push the retract-
able hardtop switch forward.
!If the indicator lamp in the retractable
hardtop switch flashes slowly, a mal-
function has occurred in the system.
If the indicator lamp in the retractable
hardtop switch flashes rapidly, the
trunk lid and/or the luggage cover may
be open, and need to be closed.Warning!
G
To prevent possible accidents, drive the ve-
hicle only with the retractable hardtop either
completely closed and locked, or fully low-
ered into its storage compartment.
Warning!
G
The retractable hardtop is not fully closed
and locked:�
if the indicator lamp in the retractable
hardtop switch remains lit (key in steer-
ing lock position2).
�
if the indicator lamp flashes, and a warn-
ing sounds for ten seconds when start-
ing to drive.
Warning!
G
Stop the vehicle and lock the retractable
hardtop before continuing to drive. You
could otherwise endanger yourself and oth-
ers.
Page 135 of 314
135 Controls in detail
Retractable hardtop
Wind screen
Installing
1Storage bag
2Pin
3Snap button
4Coat hook
�
Remove wind screen from its storage
bag1 and unfold.
The storage bag is located on the wall
behind the seat backrests.
�
Attach straps to pins2.
�
Close snap buttons3.
�
Pull wind screen on molding over roll
bars.Removing
�
Pull wind screen on molding back over
roll bars.
�
Open snap buttons3.
�
Loosen straps from pins2.
�
Fold wind screen and put it back into
storage bag1.
Warning!
G
The wind screen can restrict the driver’s
vision to the rear of the vehicle. To prevent
a possible accident when visibility is limited
(e. g. in darkness), the upper part of the wind
screen should be folded back.iYou can hang clothing on coat
hooks4 between the seat backrests.
iPull on snap button head to open the
snap button.
Page 136 of 314

136 Controls in detailDriving systems
�Driving systemsThe driving system of your vehicle is
described on the following pages:�
Cruise control, with which the vehicle
can maintain a preset speed
The BAS, ABS and ESP driving systems are
described in the “Safety and Security” sec-
tion (�page 66).
Cruise control
Cruise control automatically maintains the
speed you set for your vehicle.
Use of cruise control is recommended for
driving at a constant speed for extended
periods of time. You can set or resume
cruise control at any speed over 20 mph
(30 km/h).
The cruise control function is operated by
means of the cruise control lever.
The cruise control lever is the uppermost
lever found on the left-hand side of the
steering column (
�page 18).
Warning!
G
Cruise control is a convenience system de-
signed to assist the driver during vehicle op-
eration. The driver is and must always
remain responsible for the vehicle speed
and for safe brake operation.
Only use cruise control if the road, traffic
and weather conditions make it advisable to
travel at a steady speed.�
The use of cruise control can be danger-
ous on winding roads or in heavy traffic
because conditions do not allow safe
driving at a steady speed.
�
The use of cruise control can be danger-
ous on slippery roads. Rapid changes in
tire traction can result in wheel spin and
loss of control.
�
Deactivate cruise control when driving
in fog.
The “Resume” function should only be oper-
ated if the driver is fully aware of the previ-
ously set speed and wishes to resume this
particular preset speed.
Page 138 of 314

138 Controls in detailDriving systemsSetting a higher speed�
Lift the cruise control lever to
position1 and hold it up until the de-
sired speed is reached.
�
Release the cruise control lever.
The new speed is set.
Setting a lower speed
�
Depress the cruise control lever to
position2 and hold it down until the
desired speed is reached.
�
Release the cruise control lever.
The new speed is set.Fine adjustment in 1 mph (Canada:
1 km/h) increments
Faster
�
Briefly tip the cruise control lever in the
direction of arrow1.
Slower
�
Briefly tip the cruise control lever in the
direction of arrow2.Setting to last stored speed
(“Resume” function)
�
Briefly push the cruise control lever to
position4.
Cruise control will resume the last pre-
viously set speed.
�
Remove your foot from the accelerator
pedal.
iDepressing the accelerator pedal does
not deactivate cruise control. After
brief acceleration (e.g. for passing),
cruise control will resume the last
speed set.
iVehicles with automatic transmission:
When you use the cruise control lever
to decelerate, the transmission will au-
tomatically downshift if the engine’s
braking power does not brake the vehi-
cle sufficiently.
Warning!
G
The speed stored in memory should only be
set again if prevailing road conditions per-
mit. Possible acceleration or deceleration
differences arising from returning to preset
speed could endanger yourself and others.
Page 139 of 314

139 Controls in detail
Useful features
�Useful features
Interior storage spaces Glove box
1Glove box lid release
2Glove box
Opening the glove box
�
Pull lid release1.
The glove box lid opens downward.
Closing the glove box
�
Push lid up to close.Locking the glove box
�
Insert key into the glove box lock and
turn it to position1. Remove key from
the lock while in position1.
Unlocking the glove box
�
Turn key in the glove box lock to
position2. Remove key from the lock
while in position2.
Warning!
G
To help avoid personal injury during a colli-
sion or sudden maneuver, exercise care
when stowing objects in the vehicle. Put lug-
gage or cargo in the cargo compartment if
possible. Do not pile luggage or cargo higher
than the seat backs. Do not place anything
on shelf behind the roll bars.
Parcel nets cannot secure hard or heavy ob-
jects.
Keep compartment lids closed. This will help
to prevent stored objects from being thrown
about and injuring vehicle occupants during
an accident.
Page 140 of 314
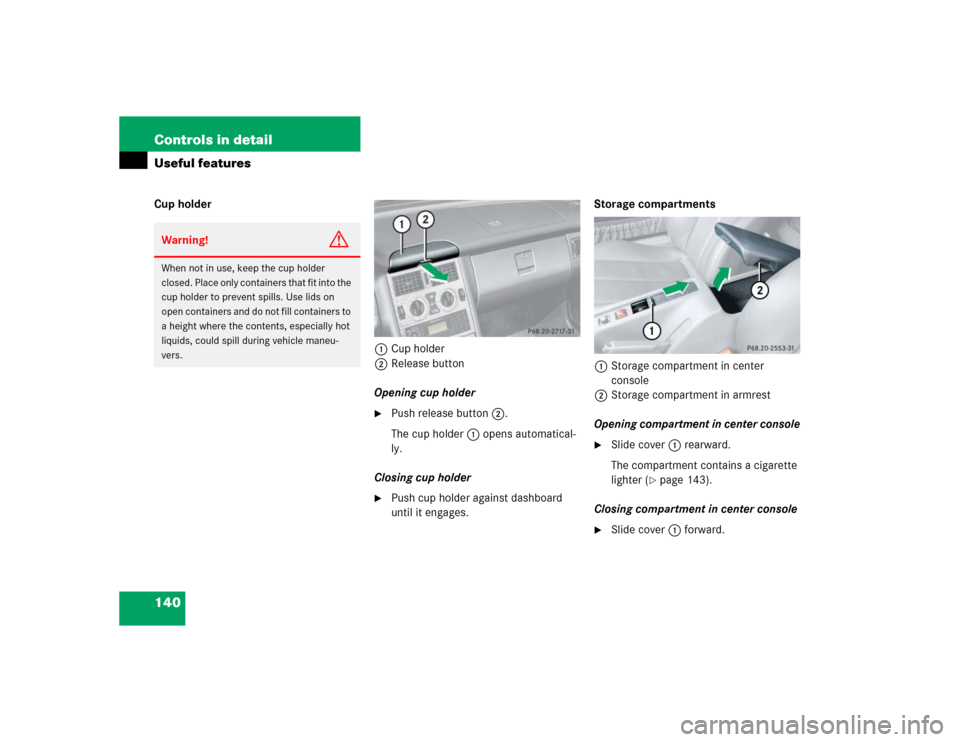
140 Controls in detailUseful featuresCup holder
1Cup holder
2Release button
Opening cup holder
�
Push release button2.
The cup holder1 opens automatical-
ly.
Closing cup holder
�
Push cup holder against dashboard
until it engages.Storage compartments
1Storage compartment in center
console
2Storage compartment in armrest
Opening compartment in center console
�
Slide cover1 rearward.
The compartment contains a cigarette
lighter (
�page 143).
Closing compartment in center console
�
Slide cover1 forward.
Warning!
G
When not in use, keep the cup holder
closed. Place only containers that fit into the
cup holder to prevent spills. Use lids on
open containers and do not fill containers to
a height where the contents, especially hot
liquids, could spill during vehicle maneu-
vers.
Page 141 of 314

141 Controls in detail
Useful features
Opening compartment in armrest�
Lift lid with handle2.
Closing compartment in armrest
�
Lower lid until it engages in lock.Parcel net in front passenger footwell
A small convenience parcel net is located
in the front passenger footwell. It is for
small and light items, such as road maps,
mail, etc.Shelf behind roll barsiThe storage compartment in the arm-
rest can be locked with the remote con-
trol (
�page 74).
The storage compartment cannot be
locked with the central locking switch
(
�page 79).
There are additional storage pockets
behind the seats and in the door
panels.
Warning!
G
Do not place heavy or fragile objects, or ob-
jects having sharp edges, in the parcel net.
In an accident, during hard braking or sud-
den maneuvers, they could be thrown
around inside the vehicle, and cause injury
to vehicle occupants.
Warning!
G
The shelf behind the roll bars should not be
used to carry objects. This will prevent such
objects from being thrown around and injur-
ing vehicle occupants during an accident or
sudden maneuver.
The trunk is the preferred place to carry ob-
jects.
Page 142 of 314
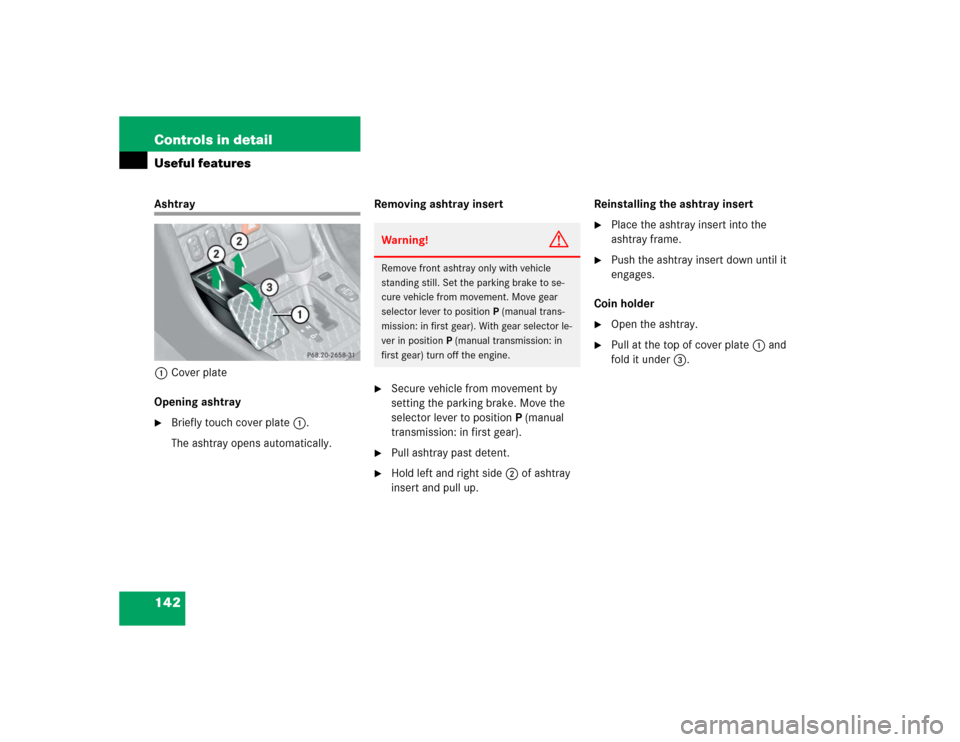
142 Controls in detailUseful featuresAshtray
1Cover plate
Opening ashtray�
Briefly touch cover plate1.
The ashtray opens automatically.Removing ashtray insert
�
Secure vehicle from movement by
setting the parking brake. Move the
selector lever to positionP (manual
transmission: in first gear).
�
Pull ashtray past detent.
�
Hold left and right side2 of ashtray
insert and pull up.Reinstalling the ashtray insert
�
Place the ashtray insert into the
ashtray frame.
�
Push the ashtray insert down until it
engages.
Coin holder
�
Open the ashtray.
�
Pull at the top of cover plate1 and
fold it under3.
Warning!
G
Remove front ashtray only with vehicle
standing still. Set the parking brake to se-
cure vehicle from movement. Move gear
selector lever to positionP (manual trans-
mission: in first gear). With gear selector le-
ver in positionP (manual transmission: in
first gear) turn off the engine.