Page 127 of 434
126 Controls in detailInstrument clusterOutside temperature indicator
The outside temperature is displayed in
the right multifunction display
(�page 22). For information on how to se-
lect the unit of the displayed temperature,
i.e. degrees Celsius (°C) or degrees Fahr-
enheit (°F), see “Selecting temperature
display mode” (
�page 140).The temperature sensor is located in the
front bumper area. Due to its location, the
sensor can be affected by road or engine
heat during idling or slow driving. There-
fore, the accuracy of the displayed temper-
ature can only be verified by comparison to
a thermometer placed next the sensor, not
by comparison to external displays, e.g.
bank signs, etc.
When moving the vehicle into colder ambi-
ent temperatures (e.g. when leaving your
garage), you will notice a delay before the
lower temperature is displayed.
A delay also occurs when ambient temper-
atures rise. This prevents inaccurate tem-
perature indications caused by heat
radiated from the engine during idling or
slow driving.
Warning!
G
The outside temperature indicator is not de-
signed to serve as an Ice-Warning Device
and is therefore unsuitable for that purpose.
Indicated temperatures just above the freez-
ing point do not guarantee that the road sur-
face is free of ice. The road may still be icy,
especially in wooded areas or on bridges.
Page 128 of 434
127 Controls in detail
Control system
�Control system
The control system is activated as soon as
the SmartKey in the starter switch is
turned to position1 or as soon as the
KEYLESS-GO start/stop button is in posi-
tion 1. The control system enables you to�
call up information about your vehicle
�
change vehicle settings
For example, you can use the control sys-
tem to find out when your vehicle is next
due for service, to set the language for
messages in the instrument cluster dis-
play, and much more.
The control system relays information to
the multifunction display.
Multifunction display
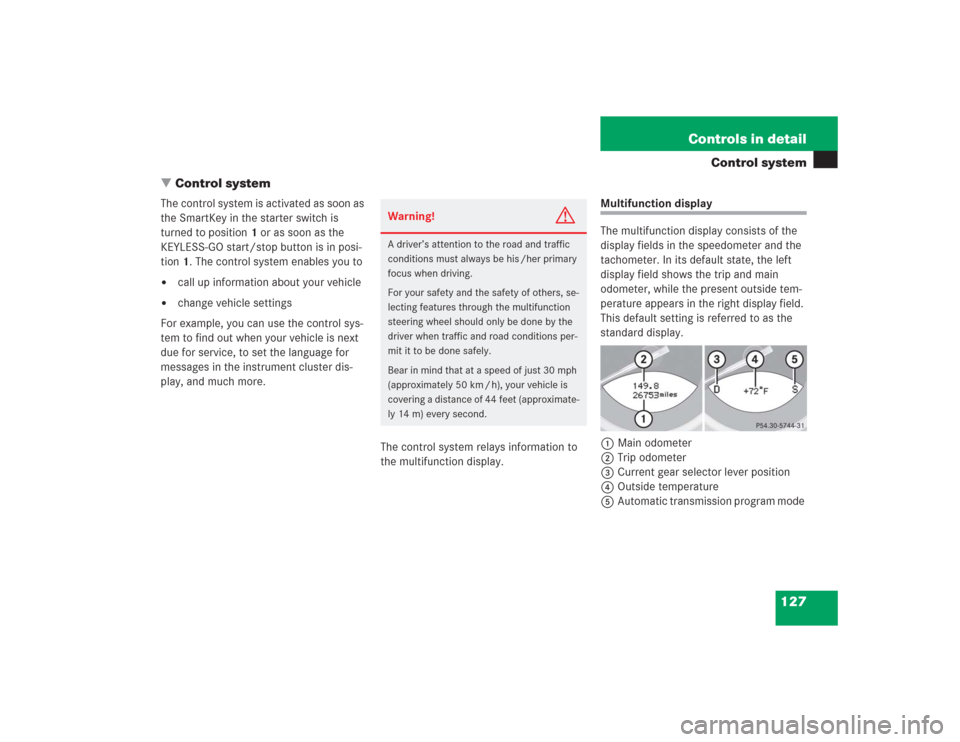
The multifunction display consists of the
display fields in the speedometer and the
tachometer. In its default state, the left
display field shows the trip and main
odometer, while the present outside tem-
perature appears in the right display field.
This default setting is referred to as the
standard display.
1Main odometer
2Trip odometer
3Current gear selector lever position
4Outside temperature
5Automatic transmission program mode
Warning!
G
A driver’s attention to the road and traffic
conditions must always be his /her primary
focus when driving.
For your safety and the safety of others, se-
lecting features through the multifunction
steering wheel should only be done by the
driver when traffic and road conditions per-
mit it to be done safely.
Bear in mind that at a speed of just 30 mph
(approximately 50 km / h), your vehicle is
covering a distance of 44 feet (approximate-
ly 14 m) every second.
Page 138 of 434
137 Controls in detail
Control system
Settings menu
In the
Settings
menu there are two func-
tions:
�
The function
Reset
, with which you can
reset all the settings to those set at the
factory.
�
A collection of submenus with which
you can make individual settings for
your vehicle.
�
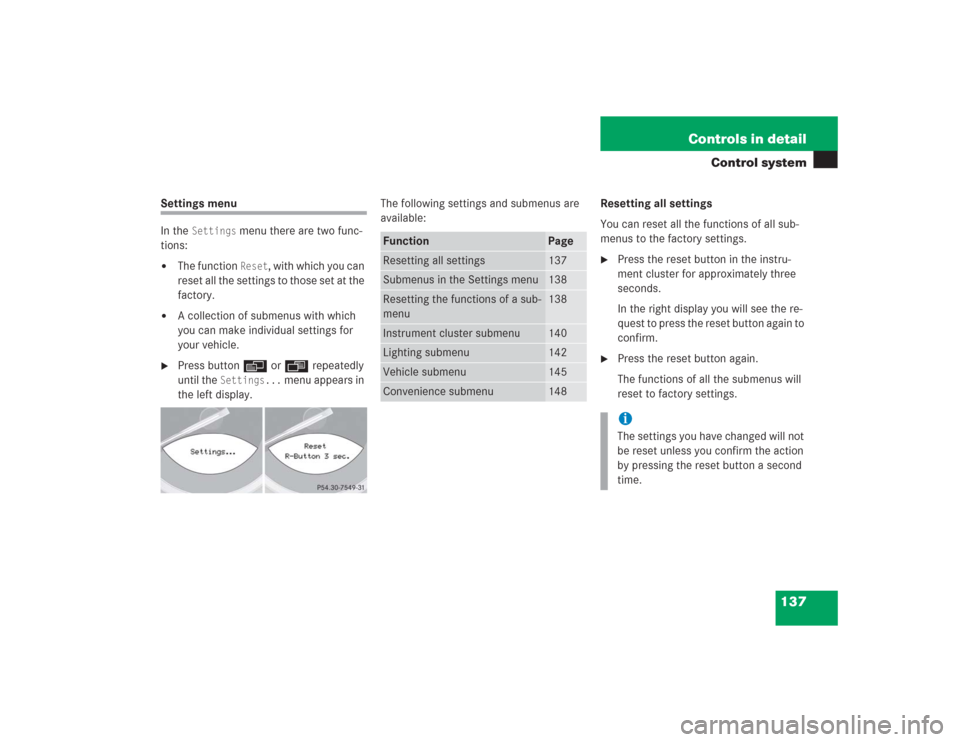
Press button è or ÿ repeatedly
until the
Settings...
menu appears in
the left display.The following settings and submenus are
available:Resetting all settings
You can reset all the functions of all sub-
menus to the factory settings.
�
Press the reset button in the instru-
ment cluster for approximately three
seconds.
In the right display you will see the re-
quest to press the reset button again to
confirm.
�
Press the reset button again.
The functions of all the submenus will
reset to factory settings.
Function
Page
Resetting all settings
137
Submenus in the Settings menu
138
Resetting the functions of a sub-
menu
138
Instrument cluster submenu
140
Lighting submenu
142
Vehicle submenu
145
Convenience submenu
148
iThe settings you have changed will not
be reset unless you confirm the action
by pressing the reset button a second
time.
Page 140 of 434
139 Controls in detail
Control system
The table below shows what settings can
be changed within the various menus. De-
tailed instructions on making individual
settings can be found on the following pag-
es.Instrument cluster
Lighting
Vehicle
Convenience
Select time display mode
Set daytime running
lamp mode (USA only)
Set station selection
mode (radio)
Activate easy-entry/exit
feature
Select temperature dis-
play mode
Set locator lighting
Set automatic locking
Set key-dependency
Select speedometer dis-
play mode
Exterior lamps delayed
switch-off
Tire pressure display*
Set parking position for
exterior rear view mirror
Select language
Interior lighting delayed
switch-off
Page 141 of 434
140 Controls in detailControl systemInstrument cluster submenu
Access the
Inst. cluster
menu via the
Settings
menu. Use the
Inst. cluster
submenu to change the instrument cluster
display settings. The following functions
are available:Selecting time display mode
�
Move the selection marker with the
æ or ç button to the
Inst.
cluster
submenu.
�
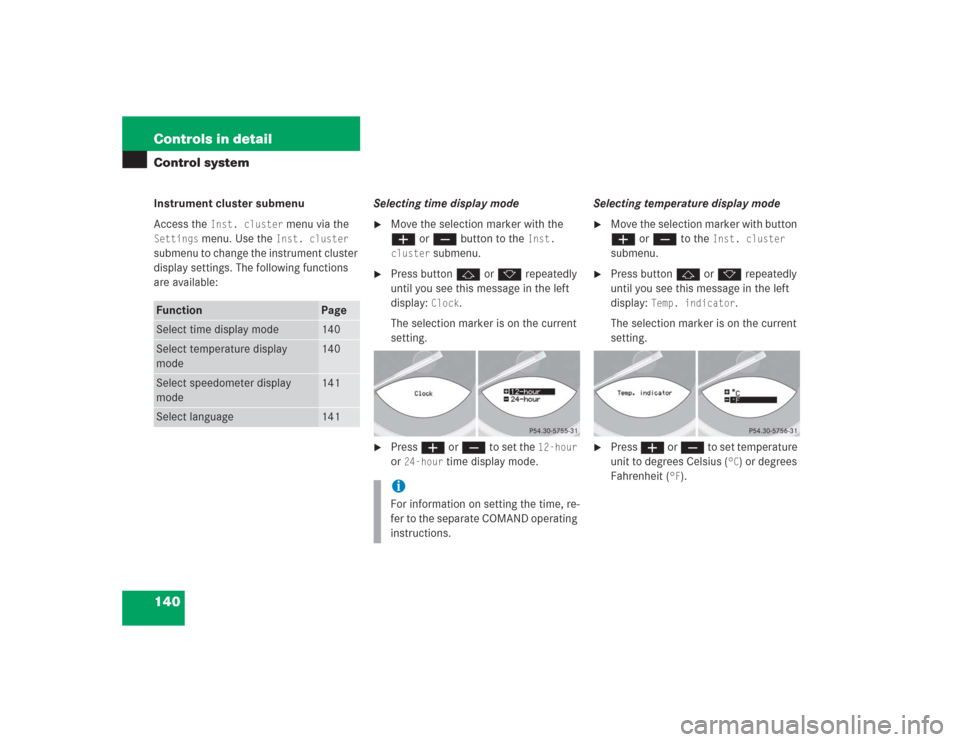
Press button j or k repeatedly
until you see this message in the left
display:
Clock
.
The selection marker is on the current
setting.
�
Press æ or ç to set the
12-hour
or
24-hour
time display mode.Selecting temperature display mode
�
Move the selection marker with button
æ or ç to the
Inst. cluster
submenu.
�
Press button j or k repeatedly
until you see this message in the left
display:
Temp. indicator
.
The selection marker is on the current
setting.
�
Press æ or ç to set temperature
unit to degrees Celsius (
°C) or degrees
Fahrenheit (
°F).
Function
Page
Select time display mode
140
Select temperature display
mode
140
Select speedometer display
mode
141
Select language
141
iFor information on setting the time, re-
fer to the separate COMAND operating
instructions.
Page 152 of 434
151 Controls in detail
Control system
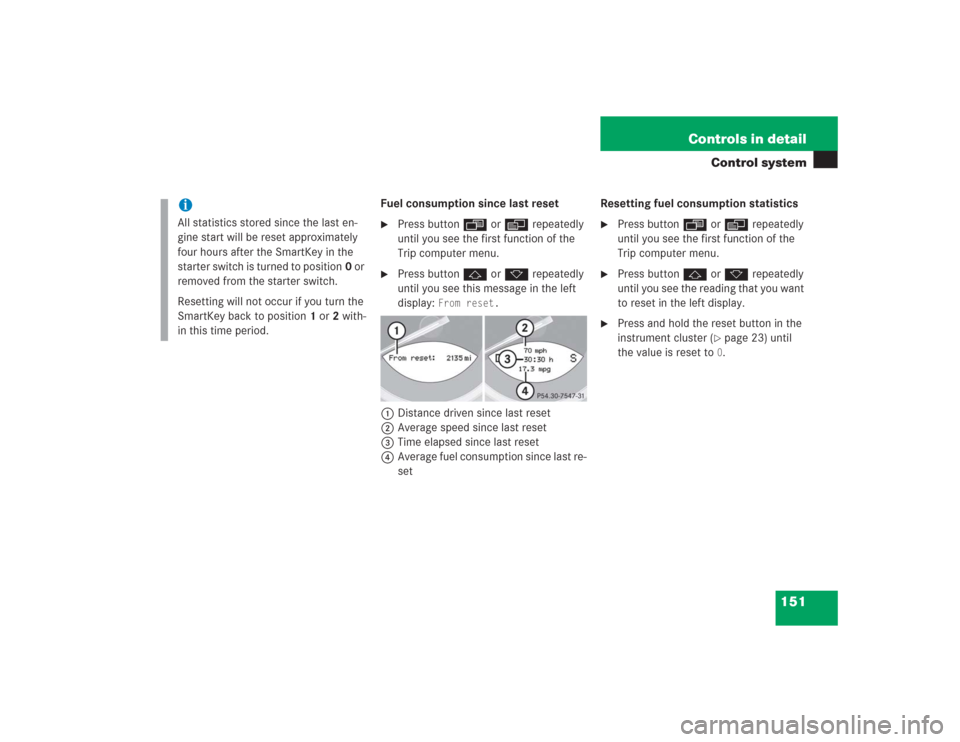
Fuel consumption since last reset�
Press button ÿ or è repeatedly
until you see the first function of the
Trip computer menu.
�
Press button j or k repeatedly
until you see this message in the left
display:
From reset.
1Distance driven since last reset
2Average speed since last reset
3Time elapsed since last reset
4Average fuel consumption since last re-
setResetting fuel consumption statistics
�
Press button ÿ or è repeatedly
until you see the first function of the
Trip computer menu.
�
Press button j or k repeatedly
until you see the reading that you want
to reset in the left display.
�
Press and hold the reset button in the
instrument cluster (
�page 23) until
the value is reset to 0.
iAll statistics stored since the last en-
gine start will be reset approximately
four hours after the SmartKey in the
starter switch is turned to position0 or
removed from the starter switch.
Resetting will not occur if you turn the
SmartKey back to position1 or2 with-
in this time period.
Page 221 of 434
220 Controls in detailUseful features
Heated steering wheel* (SL 500, SL 600)
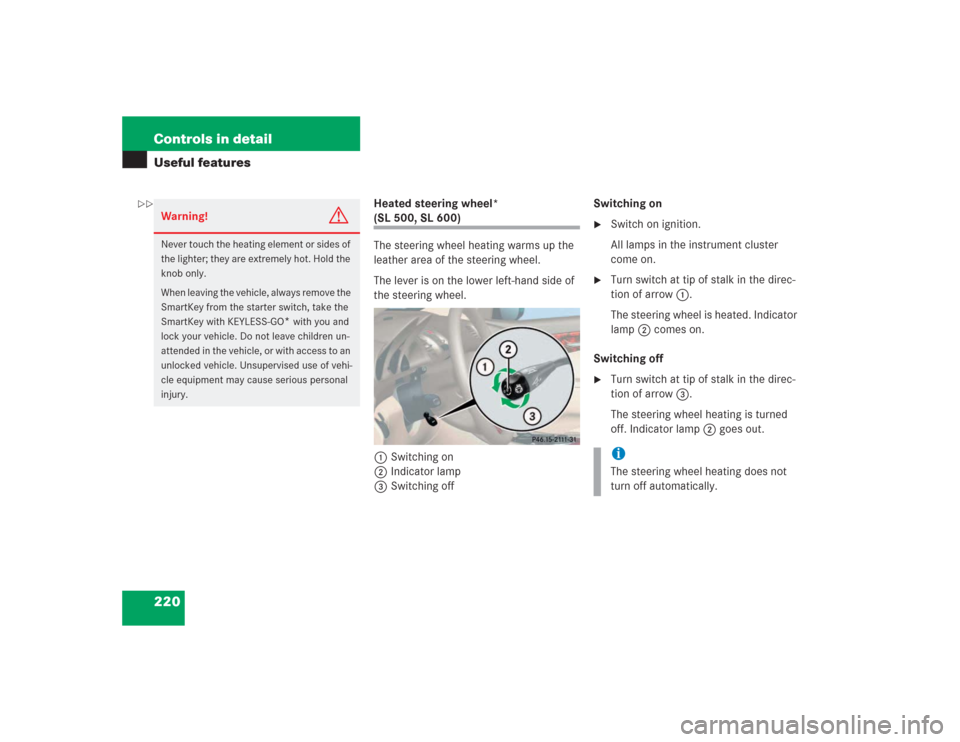
The steering wheel heating warms up the
leather area of the steering wheel.
The lever is on the lower left-hand side of
the steering wheel.
1Switching on
2Indicator lamp
3Switching offSwitching on
�
Switch on ignition.
All lamps in the instrument cluster
come on.
�
Turn switch at tip of stalk in the direc-
tion of arrow1.
The steering wheel is heated. Indicator
lamp2 comes on.
Switching off
�
Turn switch at tip of stalk in the direc-
tion of arrow3.
The steering wheel heating is turned
off. Indicator lamp2 goes out.
Warning!
G
Never touch the heating element or sides of
the lighter; they are extremely hot. Hold the
knob only.
When leaving the vehicle, always remove the
SmartKey from the starter switch, take the
SmartKey with KEYLESS-GO
* with you and
lock your vehicle. Do not leave children un-
attended in the vehicle, or with access to an
unlocked vehicle. Unsupervised use of vehi-
cle equipment may cause serious personal
injury.
iThe steering wheel heating does not
turn off automatically.
��
Page 231 of 434

230 Controls in detailUseful features
Remote door unlock
In case you have locked your vehicle unin-
tentionally (e.g. SmartKey inside vehicle),
and the reserve SmartKey is not handy:�
Contact the Mercedes-Benz Response
Center at 1-800-756-9018 (in the USA)
or 1-888-923-8367 (in Canada).
You will be asked to provide your pass-
word which you provided when you
completed the subscriber agreement.
�
Then return to your vehicle and pull the
trunk recessed handle for a minimum
of 20 seconds until the SOS button is
flashing.
The message
Emergency call –
Call connected
appears in the multi-
function display.
As an alternative, you may unlock the vehi-
cle via Internet using the ID and password
sent to you shortly after the completion of
your acquaintance call.The Response Center will then unlock your
vehicle with the remote door unlocking
feature.
iWhen a Tele Aid call has been initiated,
the COMAND system audio is muted
and the selected mode (radio or CD)
pauses. The optional cellular phone (if
installed) switches off. If you must use
this phone, the vehicle must be parked.
Disconnect the coiled cord and place
the call. The navigation system (if en-
gaged) will continue to run. The display
in the instrument cluster is available for
use and spoken commands are only
available by pressing the RPT button on
the COMAND unit. A pop-up window
will appear in the COMAND display to
indicate that a Tele Aid call is in
progress.
iThe remote door unlock feature is avail-
able if the relevant cellular phone net-
work is available.
The SOS button will flash and the mes-
sageEmergency call - Call connected
will appear in the multifunction display
to indicate receipt of the door unlock
command.
Once the vehicle is unlocked, a Re-
sponse Center specialist will attempt
to establish voice contact with the ve-
hicle occupants.
If the trunk recessed handle was pulled
for more than 20 seconds before door
unlock authorization was received by
the Response Center, you must wait
15 minutes before pulling the trunk re-
cessed handle again.