Page 205 of 435
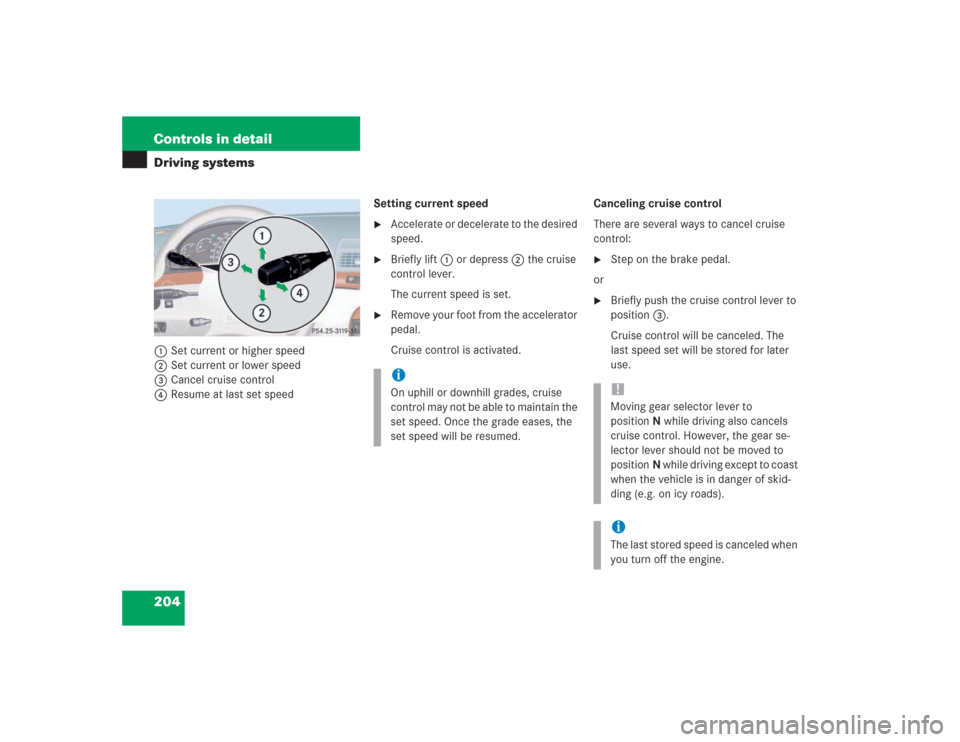
204 Controls in detailDriving systems1Set current or higher speed
2Set current or lower speed
3Cancel cruise control
4Resume at last set speedSetting current speed
�
Accelerate or decelerate to the desired
speed.
�
Briefly lift1 or depress2 the cruise
control lever.
The current speed is set.
�
Remove your foot from the accelerator
pedal.
Cruise control is activated.Canceling cruise control
There are several ways to cancel cruise
control:
�
Step on the brake pedal.
or
�
Briefly push the cruise control lever to
position3.
Cruise control will be canceled. The
last speed set will be stored for later
use.
iOn uphill or downhill grades, cruise
control may not be able to maintain the
set speed. Once the grade eases, the
set speed will be resumed.
!Moving gear selector lever to
positionN while driving also cancels
cruise control. However, the gear se-
lector lever should not be moved to
positionN while driving except to coast
when the vehicle is in danger of skid-
ding (e.g. on icy roads).iThe last stored speed is canceled when
you turn off the engine.
Page 206 of 435
205 Controls in detail
Driving systems
Setting a higher speed�
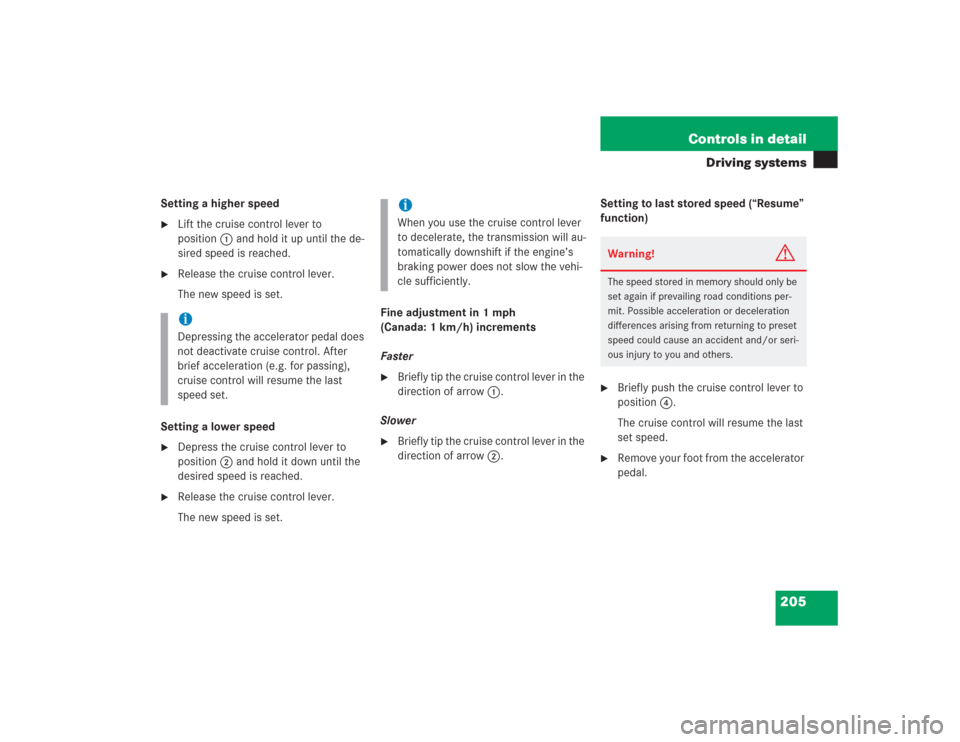
Lift the cruise control lever to
position1 and hold it up until the de-
sired speed is reached.
�
Release the cruise control lever.
The new speed is set.
Setting a lower speed
�
Depress the cruise control lever to
position2 and hold it down until the
desired speed is reached.
�
Release the cruise control lever.
The new speed is set.Fine adjustment in 1 mph
(Canada: 1 km/h) increments
Faster
�
Briefly tip the cruise control lever in the
direction of arrow1.
Slower
�
Briefly tip the cruise control lever in the
direction of arrow2.Setting to last stored speed (“Resume”
function)
�
Briefly push the cruise control lever to
position4.
The cruise control will resume the last
set speed.
�
Remove your foot from the accelerator
pedal.
iDepressing the accelerator pedal does
not deactivate cruise control. After
brief acceleration (e.g. for passing),
cruise control will resume the last
speed set.
iWhen you use the cruise control lever
to decelerate, the transmission will au-
tomatically downshift if the engine’s
braking power does not slow the vehi-
cle sufficiently.
Warning!
G
The speed stored in memory should only be
set again if prevailing road conditions per-
mit. Possible acceleration or deceleration
differences arising from returning to preset
speed could cause an accident and/or seri-
ous injury to you and others.
Page 214 of 435
213 Controls in detail
Driving systems
Deactivating Distronic
There are several ways to deactivate the
Distronic system:�
Briefly tip the cruise control lever in the
direction of arrow3 (
�page 210).
or
�
Step on the brake pedal.
Distronic will be deactivated. The last
speed set will be stored into memory.Distronic deactivates automatically when:
�
you set the parking brake
�
you drive slower than
25 mph (40 km/h)
�
the ESP is active (
�page 79) or you de-
activate the ESP
�
you move the gear selector lever into
positionN
A signal will sound. The
DISTRONIC OFF
message appears in the multifunction
display for approximately five seconds.Setting the following distance in
Distronic
You can set the specified following dis-
tance for Distronic by varying the time set-
ting between 1.0 and 2.0 seconds. Using
this time setting and the current speed of
your vehicle, Distronic calculates and sets
the required following distance to the vehi-
cle ahead. The set distance will be shown
in the multifunction display field.
The thumbwheel for making the time set-
ting is located on the lower section of the
center console.
iThe following message will appear in
the multifunction display for approxi-
mately five seconds:
DISTRONIC OFF
.
The last stored speed is deleted when
you turn off the engine.
Warning!
G
Distronic switches off and releases the
brakes when the vehicle decelerates below
the minimum speed of approximately
25 mph (40 km / h) by operation of the sys-
tem. At that time the driver must apply the
brakes in order to reduce vehicle speed fur-
ther or bring it to a stop.
Warning!
G
It is up to the driver to exercise discretion to
select the appropriate setting given road
conditions, traffic, driver’s preferred driving
style and applicable laws and driving recom-
mendations for safe following distance.
Page 219 of 435
218 Controls in detailDriving systemsAIRMATIC
AIRMATIC automatically selects the opti-
mum suspension tuning and ride height for
your vehicle. AIRMATIC consists of two
components:�
Adaptive Damping System (ADS)
�
Level control system
The ADS automatically selects the opti-
mum damping for the respective driving
conditions. At the same time the suspen-
sion is set to either sporty or regular.Suspension tuning
The suspension tuning is set according to:
�
Your driving style
�
Road surface conditions
�
Your choice of suspension style,
“sport” or “convenience”, which you
select using the damping switch.
The following suspension styles are avail-
able:
�
Convenience
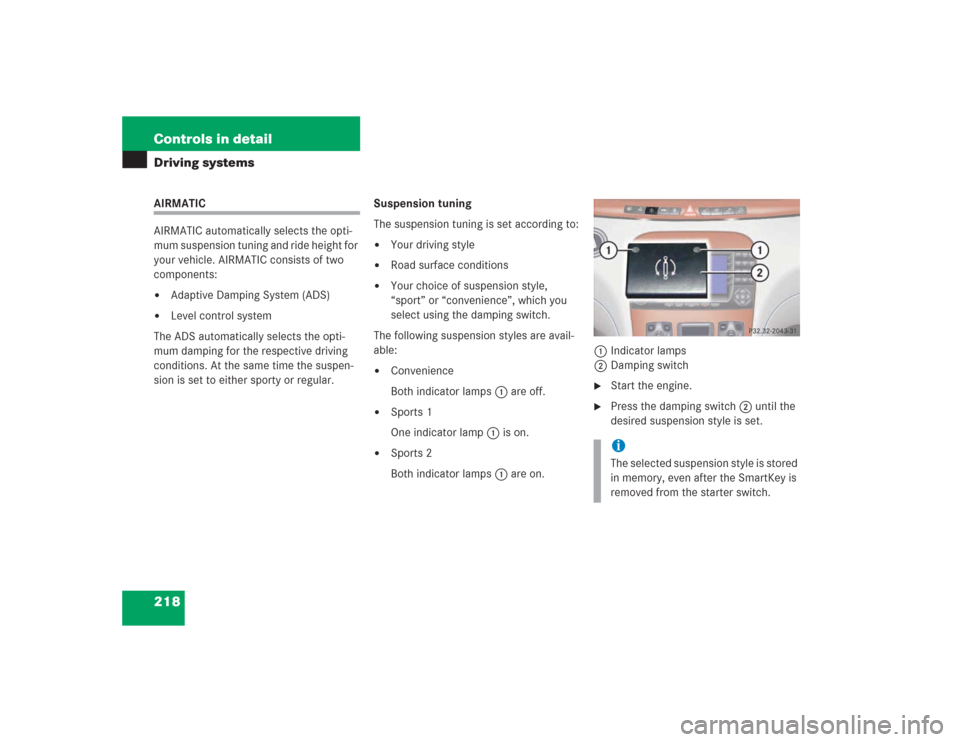
Both indicator lamps1 are off.
�
Sports 1
One indicator lamp1 is on.
�
Sports 2
Both indicator lamps1 are on.1Indicator lamps
2Damping switch
�
Start the engine.
�
Press the damping switch2 until the
desired suspension style is set.iThe selected suspension style is stored
in memory, even after the SmartKey is
removed from the starter switch.
Page 221 of 435
220 Controls in detailDriving systems
The indicator lamp is then lit. The dis-
play switches off when the vehicle is
raised.
�
Press switch2 again to lower the ve-
hicle. The indicator lamp is off.
The selected vehicle level setting remains
stored in memory even if the engine is
turned off and restarted except when you
�
exceed a speed of 75 mph (120 km/h)
or
�
maintain a speed of between 50 mph
(80 km/h) and 75 mph (120 km/h) for
more than 5 minutes
The vehicle then lowers to regular level.
The message:
AIRMATIC
LEV. SELECT. CANCELED!appears in the multifunction display and
the indicator lamp is off. The display
switches off when the vehicle is raised.
Active Body Control (ABC)*
The ABC system automatically selects the
optimum suspension tuning and ride
height for your vehicle.
Suspension tuning
The suspension tuning is set according to:�
Your driving style
�
Road surface conditions
�
The vehicle loading
�
Your choice of suspension style,
“sporty” or “regular”, which you select
using the ABC button
The selected suspension style is stored
in memory, even after the SmartKey is
removed from the starter switch.The ABC switch with the indicator lamps is
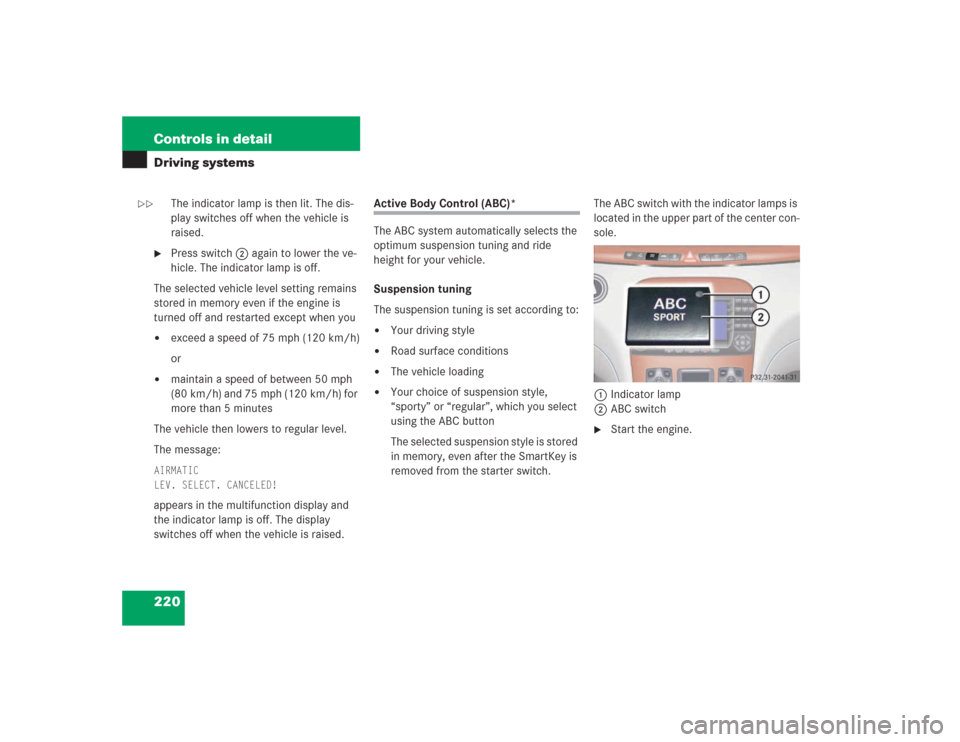
located in the upper part of the center con-
sole.
1Indicator lamp
2ABC switch
�
Start the engine.
��
Page 239 of 435
238 Controls in detailUseful featuresParcel net in trunk
You can hang a parcel net in the trunk. The
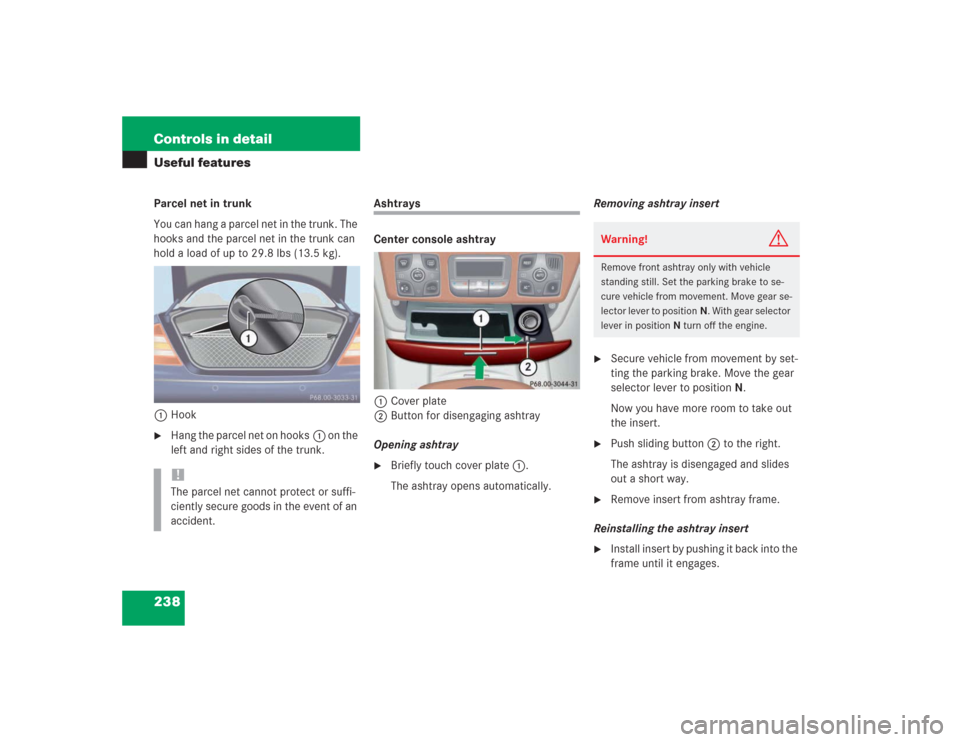
hooks and the parcel net in the trunk can
hold a load of up to 29.8 lbs (13.5 kg).
1Hook�
Hang the parcel net on hooks1 on the
left and right sides of the trunk.
Ashtrays
Center console ashtray
1Cover plate
2Button for disengaging ashtray
Opening ashtray�
Briefly touch cover plate1.
The ashtray opens automatically.Removing ashtray insert
�
Secure vehicle from movement by set-
ting the parking brake. Move the gear
selector lever to positionN.
Now you have more room to take out
the insert.
�
Push sliding button2 to the right.
The ashtray is disengaged and slides
out a short way.
�
Remove insert from ashtray frame.
Reinstalling the ashtray insert
�
Install insert by pushing it back into the
frame until it engages.
!The parcel net cannot protect or suffi-
ciently secure goods in the event of an
accident.
Warning!
G
Remove front ashtray only with vehicle
standing still. Set the parking brake to se-
cure vehicle from movement. Move gear se-
lector lever to positionN. With gear selector
lever in positionN turn off the engine.
Page 242 of 435
241 Controls in detail
Useful features
Switching on�
Switch on ignition.
All the lamps in the instrument cluster
should come on.
�
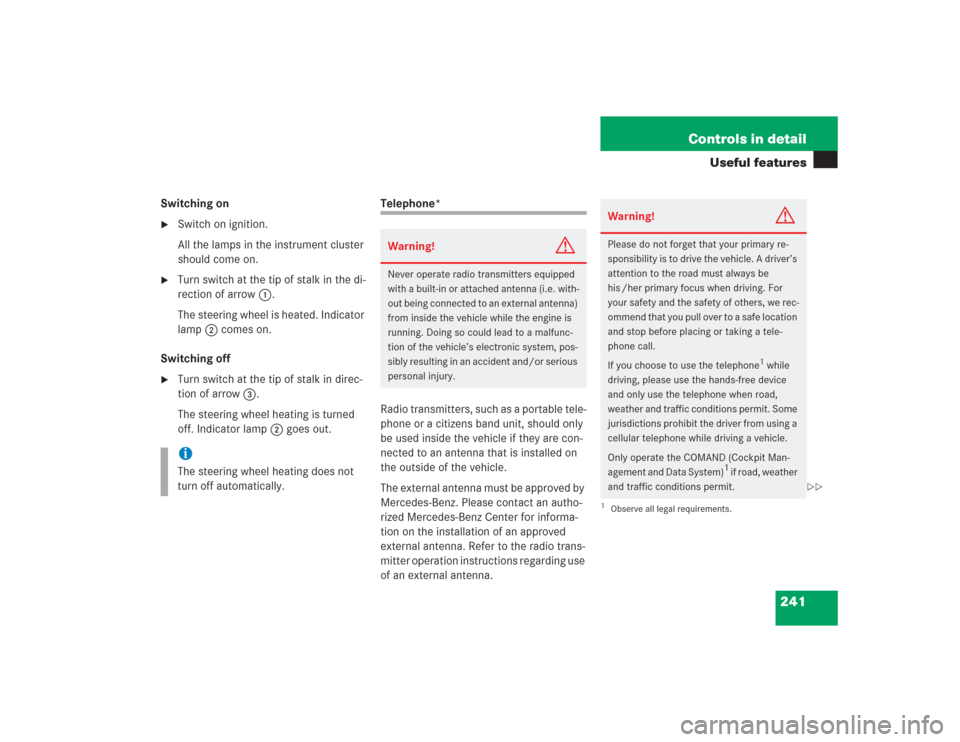
Turn switch at the tip of stalk in the di-
rection of arrow1.
The steering wheel is heated. Indicator
lamp2 comes on.
Switching off
�
Turn switch at the tip of stalk in direc-
tion of arrow3.
The steering wheel heating is turned
off. Indicator lamp2 goes out.
Telephone*
Radio transmitters, such as a portable tele-
phone or a citizens band unit, should only
be used inside the vehicle if they are con-
nected to an antenna that is installed on
the outside of the vehicle.
The external antenna must be approved by
Mercedes-Benz. Please contact an autho-
rized Mercedes-Benz Center for informa-
tion on the installation of an approved
external antenna. Refer to the radio trans-
mitter operation instructions regarding use
of an external antenna.
iThe steering wheel heating does not
turn off automatically.
Warning!
G
Never operate radio transmitters equipped
with a built-in or attached antenna (i.e. with-
out being connected to an external antenna)
from inside the vehicle while the engine is
running. Doing so could lead to a malfunc-
tion of the vehicle’s electronic system, pos-
sibly resulting in an accident and/or serious
personal injury.
Warning!
G
Please do not forget that your primary re-
sponsibility is to drive the vehicle. A driver’s
attention to the road must always be
his /her primary focus when driving. For
your safety and the safety of others, we rec-
ommend that you pull over to a safe location
and stop before placing or taking a tele-
phone call.
If you choose to use the telephone
1 while
driving, please use the hands-free device
and only use the telephone when road,
weather and traffic conditions permit. Some
jurisdictions prohibit the driver from using a
cellular telephone while driving a vehicle.
Only operate the COMAND (Cockpit Man-
agement and Data System)
1 if road, weather
and traffic conditions permit.
1Observe all legal requirements.
��
Page 258 of 435
257 Operation
The first 1000 miles (1500 km)
Driving instructions
At the gas station
Engine compartment
Tires and wheels
Winter driving
Maintenance
Vehicle care