Page 178 of 435

177 Controls in detail
Good visibility
Windshield wipers
For more information on the windshield
wipers, see “Windshield wipers”
(�page 48).
A rain sensor automatically controls the
windshield wipers depending on how wet
the windshield is.
�
Switch on ignition.
�
Set wiper switch to position I
(�page 48).
After the initial wipe, pauses between
wipes are automatically controlled by the
rain sensor.Headlamp cleaning system*
(Standard on S 500, S 600, S 55 AMG)
The switch is located on the left side of the
dashboard.
1Headlamp washer switch�
Switch on ignition.
�
Press switch1.
The headlamps are cleaned with a
high-pressure water jet.
For information on filling up the washer
reservoir, see “Windshield washer system
and headlamp cleaning system*”
(
�page 281).
iIntermittent wiping is interrupted when
the vehicle is at a standstill and a front
door is opened.
!Do not leave windshield wipers in inter-
mittent setting when vehicle is taken to
an automatic car wash or during wind-
shield cleaning. Wipers will operate in
the presence of water sprayed on the
windshield, and wipers may be dam-
aged as a result.
The switch should not be left in inter-
mittent setting as the wipers will wipe
the windshield once every time the en-
gine is started. Dust that accumulates
on the windshield might scratch the
glass and/or damage the wiper blades
when wiping occurs on a dry wind-
shield.
Page 183 of 435
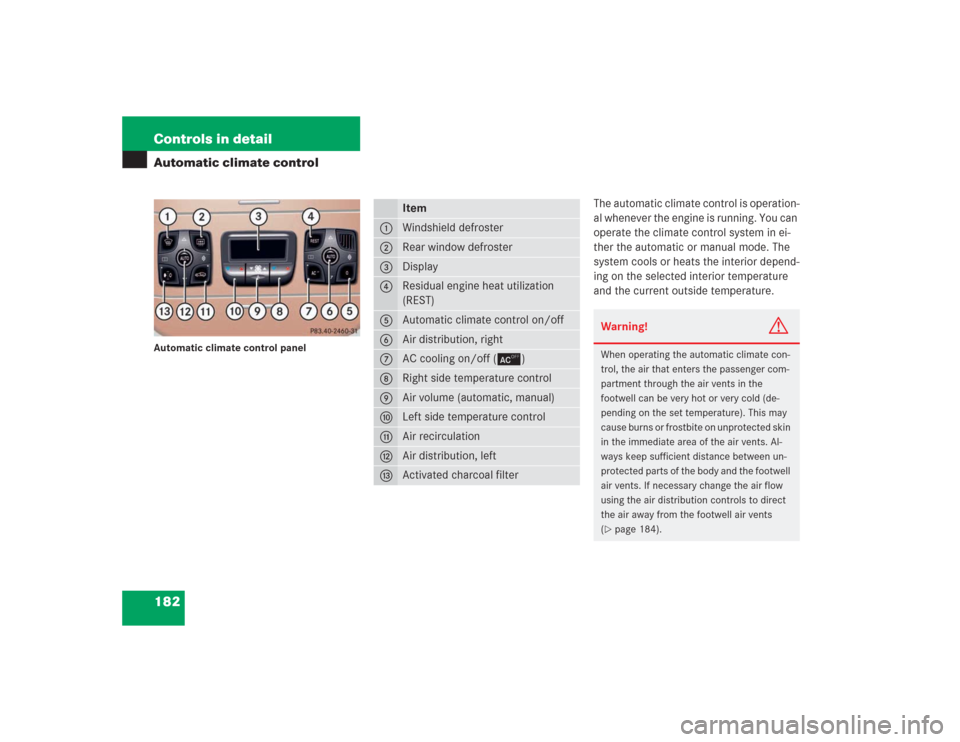
182 Controls in detailAutomatic climate controlAutomatic climate control panel
The automatic climate control is operation-
al whenever the engine is running. You can
operate the climate control system in ei-
ther the automatic or manual mode. The
system cools or heats the interior depend-
ing on the selected interior temperature
and the current outside temperature.
Item
1
Windshield defroster
2
Rear window defroster
3
Display
4
Residual engine heat utilization
(REST)
5
Automatic climate control on/off
6
Air distribution, right
7
AC cooling on/off (±)
8
Right side temperature control
9
Air volume (automatic, manual)
a
Left side temperature control
b
Air recirculation
c
Air distribution, left
d
Activated charcoal filter
Warning!
G
When operating the automatic climate con-
trol, the air that enters the passenger com-
partment through the air vents in the
footwell can be very hot or very cold (de-
pending on the set temperature). This may
cause burns or frostbite on unprotected skin
in the immediate area of the air vents. Al-
ways keep sufficient distance between un-
protected parts of the body and the footwell
air vents. If necessary change the air flow
using the air distribution controls to direct
the air away from the footwell air vents
(�page 184).
Page 184 of 435
183 Controls in detail
Automatic climate control
Nearly all dust particles, pollutants and
odors are filtered out before outside air en-
ters the passenger compartment through
the air distribution system.
The air conditioning will not engage (no
cooling) if the ± mode is selected
(�page 190).
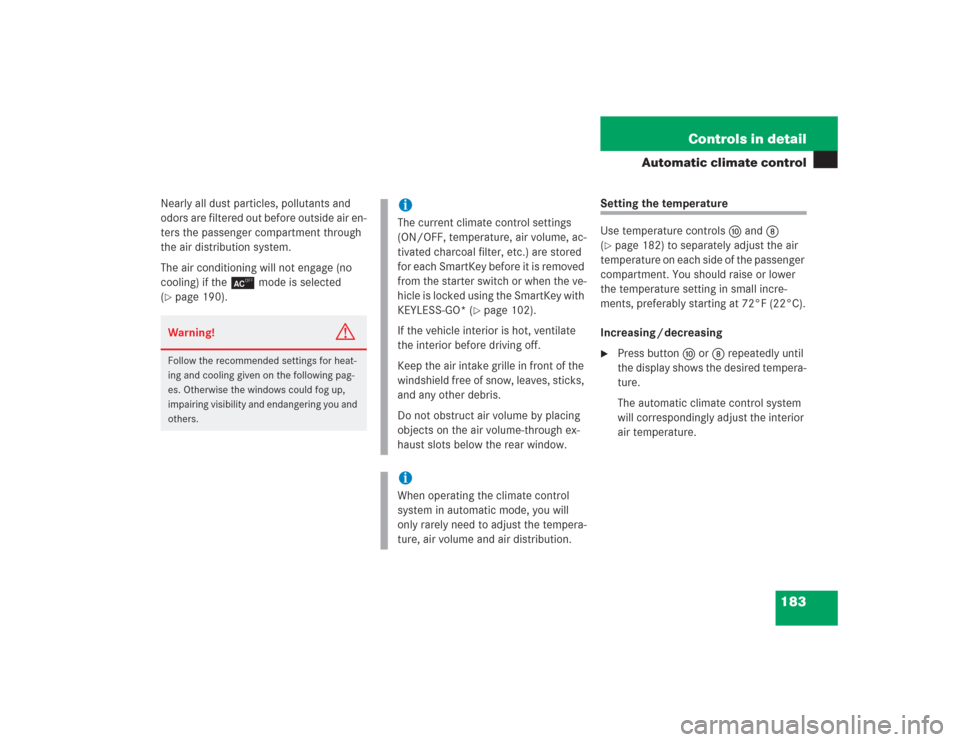
Setting the temperature
Use temperature controls aand8
(�page 182) to separately adjust the air
temperature on each side of the passenger
compartment. You should raise or lower
the temperature setting in small incre-
ments, preferably starting at 72°F (22°C).
Increasing / decreasing
�
Press button a or 8 repeatedly until
the display shows the desired tempera-
ture.
The automatic climate control system
will correspondingly adjust the interior
air temperature.
Warning!
G
Follow the recommended settings for heat-
ing and cooling given on the following pag-
es. Otherwise the windows could fog up,
impairing visibility and endangering you and
others.
iThe current climate control settings
(ON/OFF, temperature, air volume, ac-
tivated charcoal filter, etc.) are stored
for each SmartKey before it is removed
from the starter switch or when the ve-
hicle is locked using the SmartKey with
KEYLESS-GO* (
�page 102).
If the vehicle interior is hot, ventilate
the interior before driving off.
Keep the air intake grille in front of the
windshield free of snow, leaves, sticks,
and any other debris.
Do not obstruct air volume by placing
objects on the air volume-through ex-
haust slots below the rear window.
iWhen operating the climate control
system in automatic mode, you will
only rarely need to adjust the tempera-
ture, air volume and air distribution.
Page 186 of 435
185 Controls in detail
Automatic climate control
Adjusting manually�
Press left or right buttonU.
The button emerges and theh,
», d and csymbols become
visible.
�
Turn the marking on the regulator to
the desired symbol.
The air will be directed to the vents cor-
responding to this symbol.
Adjusting automatically
�
Press left or right buttonU until it
clicks in.
Theh, », d and
csymbols are no longer visible.
The air distribution is adjusted auto-
matically.Windows fogged on the inside
�
Press button± to switch on the air
conditioning (
�page 182).
The indicator lamp in the button goes
out.
�
Press button, to switch off the air
recirculation (
�page 182).
The indicator lamp on the button goes
out.
�
Make sure left and right buttonU
emerges.
Theh, », d and
csymbols become visible.
�
Press left and rightd button.
�
Set blower to the maximum speed.
�
Adjust left and right air vents1
and6 upwards (
�page 180).
�
Increase temperature setting.
�
Open side air vents9 and direct them
onto the side windows (
�page 180).
Windshield fogged on the outside
�
Switch the windshield wipers on
(�page 48).
�
Press on both U buttons until they
click in.
Theh, », d and c sym-
bols are no longer visible.
Page 257 of 435
256 Controls in detailUseful featuresInfrared reflecting windshield
1Mounting location for electronic toll
collection devices (infrared transpar-
ent)
2Infrared transparent area
(pass-through for electronic signals)
331.5 in (80 cm)
419.0 in (48 cm)
51.75 in (4.5 cm)Your vehicle is equipped with infrared re-
flecting glass which reduces the amount of
radiated heat entering the interior through
the windows.
The infrared reflecting glass also prevents
the transmission of signals through the
glass by in-vehicle electronic devices (e.g.
electronic toll collection devices).
To allow the use of these devices in the ve-
hicle, two infrared transparent areas
(1and2) are placed in the windshield.
Page 271 of 435
270 OperationAt the gas station�
Replace the fuel cap by turning it to the
right.
You will hear when the fuel cap is tight-
ened.
�
Close the fuel filler flap.
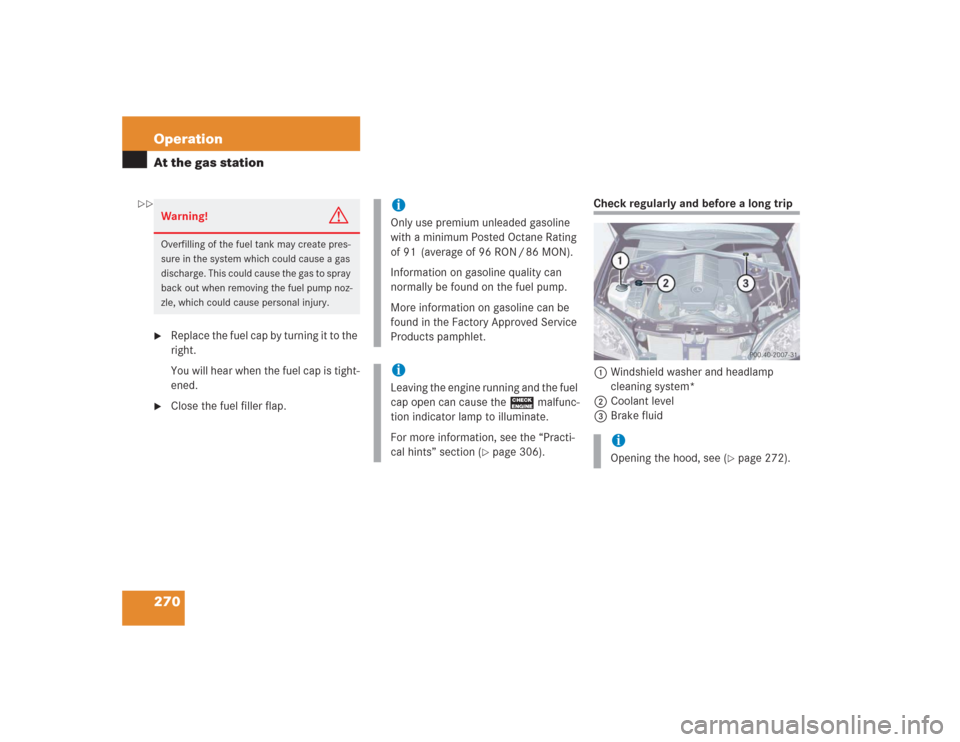
Check regularly and before a long trip
1Windshield washer and headlamp
cleaning system*
2Coolant level
3Brake fluid
Warning!
G
Overfilling of the fuel tank may create pres-
sure in the system which could cause a gas
discharge. This could cause the gas to spray
back out when removing the fuel pump noz-
zle, which could cause personal injury.
iOnly use premium unleaded gasoline
with a minimum Posted Octane Rating
of 91 (average of 96 RON / 86 MON).
Information on gasoline quality can
normally be found on the fuel pump.
More information on gasoline can be
found in the Factory Approved Service
Products pamphlet.iLeaving the engine running and the fuel
cap open can cause the ? malfunc-
tion indicator lamp to illuminate.
For more information, see the “Practi-
cal hints” section (
�page 306).
iOpening the hood, see (
�page 272).
��
Page 272 of 435
271 Operation
At the gas station
Windshield washer system and head-
lamp cleaning system*
For more information on refilling the wash-
er reservoir, see “Windshield washer sys-
tem and headlamp cleaning system*”
(�page 281).
Coolant
For more information on coolant, see
“Coolant” (
�page 278) and see “Fuels,
coolants, lubricants, etc.” (
�page 391).Brake fluid
For information on brake fluid, see “Brake
fluid” (
�page 394)Engine oil level
For more information on engine oil, see
“Engine oil” (
�page 273).
Vehicle lighting
Check function and cleanliness. For more
information on replacing light bulbs, see
“Replacing bulbs” (
�page 353).
For more information, see “Switching on
headlamps” (
�page 47).
Tire inflation pressure
For information on tire inflation pressure,
see “Checking tire inflation pressure”
(
�page 283).
!If you find that the brake fluid in the
brake fluid reservoir has fallen to the
minimum mark or below, have the
brake system checked for brake pad
thickness and leaks immediately.
Notify an authorized Mercedes-Benz
Center immediately. Do not add brake
fluid as this will not solve the problem.
For more information, see “Practical
hints” (
�page 305).
Page 273 of 435
272 OperationEngine compartment
�Engine compartmentHood
Opening
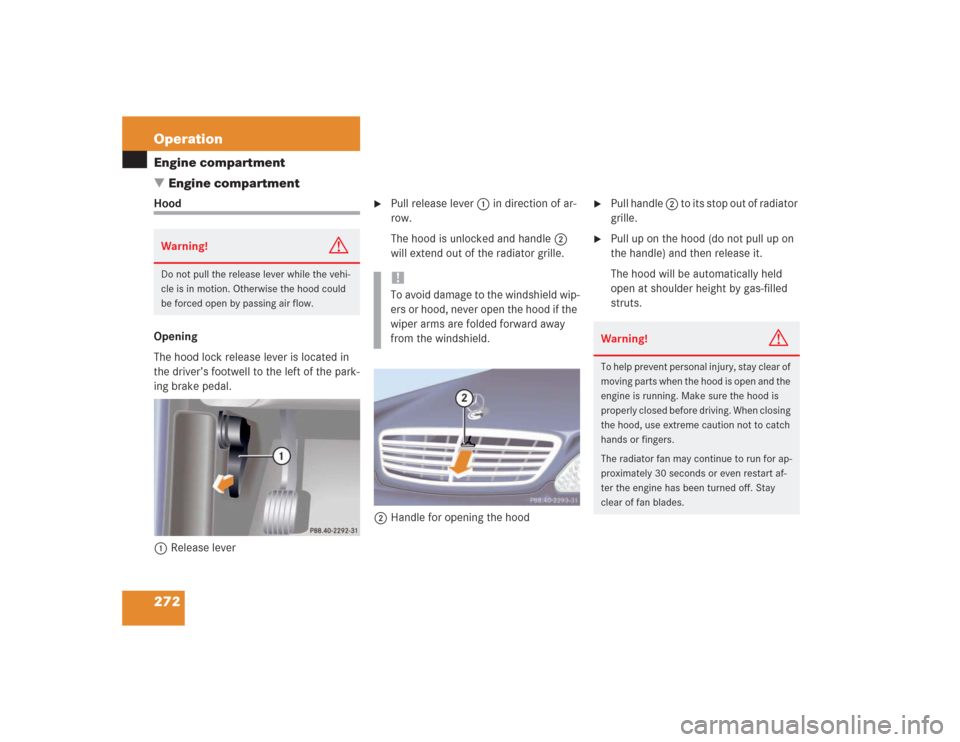
The hood lock release lever is located in
the driver’s footwell to the left of the park-
ing brake pedal.
1Release lever
�
Pull release lever 1 in direction of ar-
row.
The hood is unlocked and handle2
will extend out of the radiator grille.
2Handle for opening the hood
�
Pull handle 2 to its stop out of radiator
grille.
�
Pull up on the hood (do not pull up on
the handle) and then release it.
The hood will be automatically held
open at shoulder height by gas-filled
struts.
Warning!
G
Do not pull the release lever while the vehi-
cle is in motion. Otherwise the hood could
be forced open by passing air flow.
!To avoid damage to the windshield wip-
ers or hood, never open the hood if the
wiper arms are folded forward away
from the windshield.
Warning!
G
To help prevent personal injury, stay clear of
moving parts when the hood is open and the
engine is running. Make sure the hood is
properly closed before driving. When closing
the hood, use extreme caution not to catch
hands or fingers.
The radiator fan may continue to run for ap-
proximately 30 seconds or even restart af-
ter the engine has been turned off. Stay
clear of fan blades.