Page 355 of 435
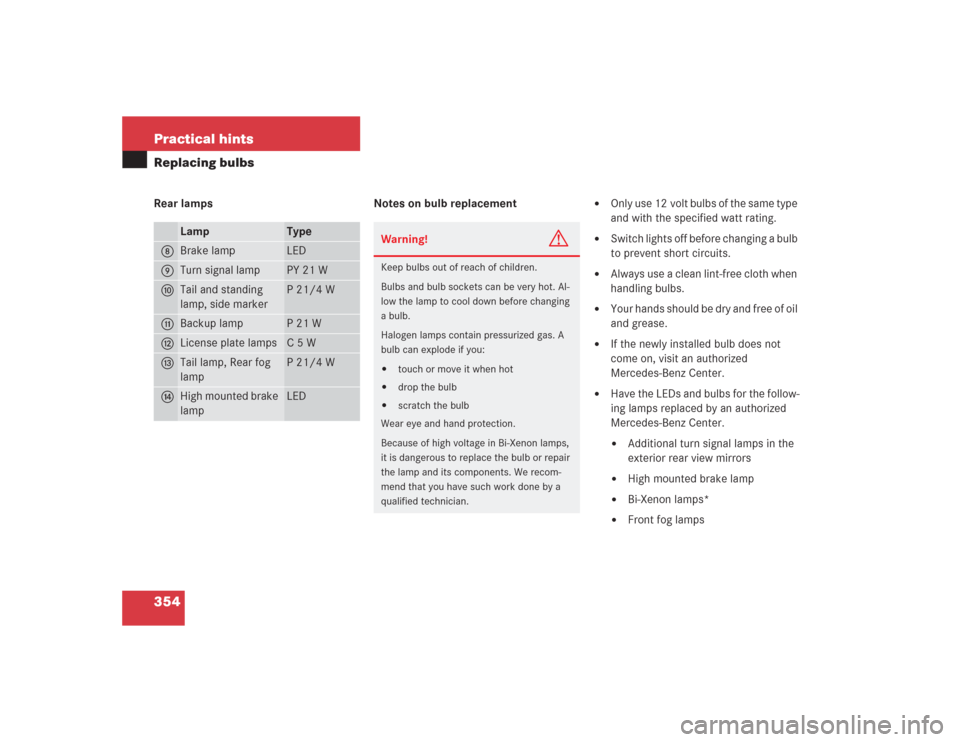
354 Practical hintsReplacing bulbsRear lamps Notes on bulb replacement
�
Only use 12 volt bulbs of the same type
and with the specified watt rating.
�
Switch lights off before changing a bulb
to prevent short circuits.
�
Always use a clean lint-free cloth when
handling bulbs.
�
Your hands should be dry and free of oil
and grease.
�
If the newly installed bulb does not
come on, visit an authorized
Mercedes-Benz Center.
�
Have the LEDs and bulbs for the follow-
ing lamps replaced by an authorized
Mercedes-Benz Center.�
Additional turn signal lamps in the
exterior rear view mirrors
�
High mounted brake lamp
�
Bi-Xenon lamps*
�
Front fog lamps
Lamp
Type
8
Brake lamp
LED
9
Turn signal lamp
PY 21 W
a
Tail and standing
lamp, side marker
P 21/4 W
b
Backup lamp
P21W
c
License plate lamps
C5W
d
Tail lamp, Rear fog
lamp
P 21/4 W
e
High mounted brake
lamp
LED
Warning!
G
Keep bulbs out of reach of children.
Bulbs and bulb sockets can be very hot. Al-
low the lamp to cool down before changing
a bulb.
Halogen lamps contain pressurized gas. A
bulb can explode if you:�
touch or move it when hot
�
drop the bulb
�
scratch the bulb
Wear eye and hand protection.
Because of high voltage in Bi-Xenon lamps,
it is dangerous to replace the bulb or repair
the lamp and its components. We recom-
mend that you have such work done by a
qualified technician.
Page 356 of 435
355 Practical hints
Replacing bulbs
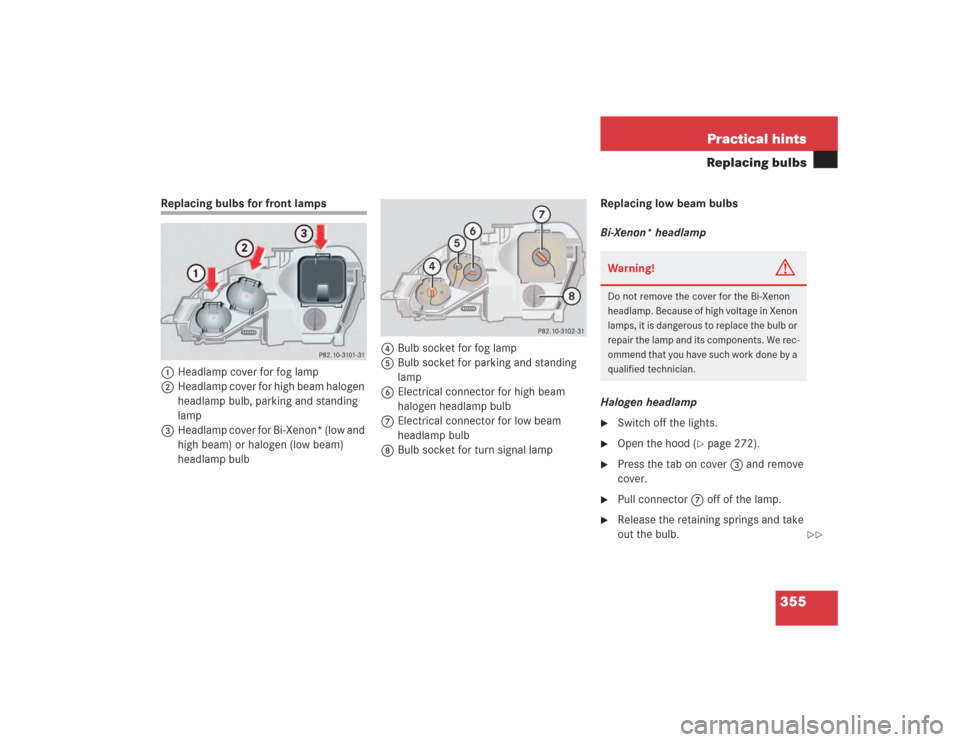
Replacing bulbs for front lamps
1Headlamp cover for fog lamp
2Headlamp cover for high beam halogen
headlamp bulb, parking and standing
lamp
3Headlamp cover for Bi-Xenon* (low and
high beam) or halogen (low beam)
headlamp bulb4Bulb socket for fog lamp
5Bulb socket for parking and standing
lamp
6Electrical connector for high beam
halogen headlamp bulb
7Electrical connector for low beam
headlamp bulb
8Bulb socket for turn signal lampReplacing low beam bulbs
Bi-Xenon* headlamp
Halogen headlamp
�
Switch off the lights.
�
Open the hood (
�page 272).
�
Press the tab on cover3 and remove
cover.
�
Pull connector7 off of the lamp.
�
Release the retaining springs and take
out the bulb.Warning!
G
Do not remove the cover for the Bi-Xenon
headlamp. Because of high voltage in Xenon
lamps, it is dangerous to replace the bulb or
repair the lamp and its components. We rec-
ommend that you have such work done by a
qualified technician.
��
Page 357 of 435
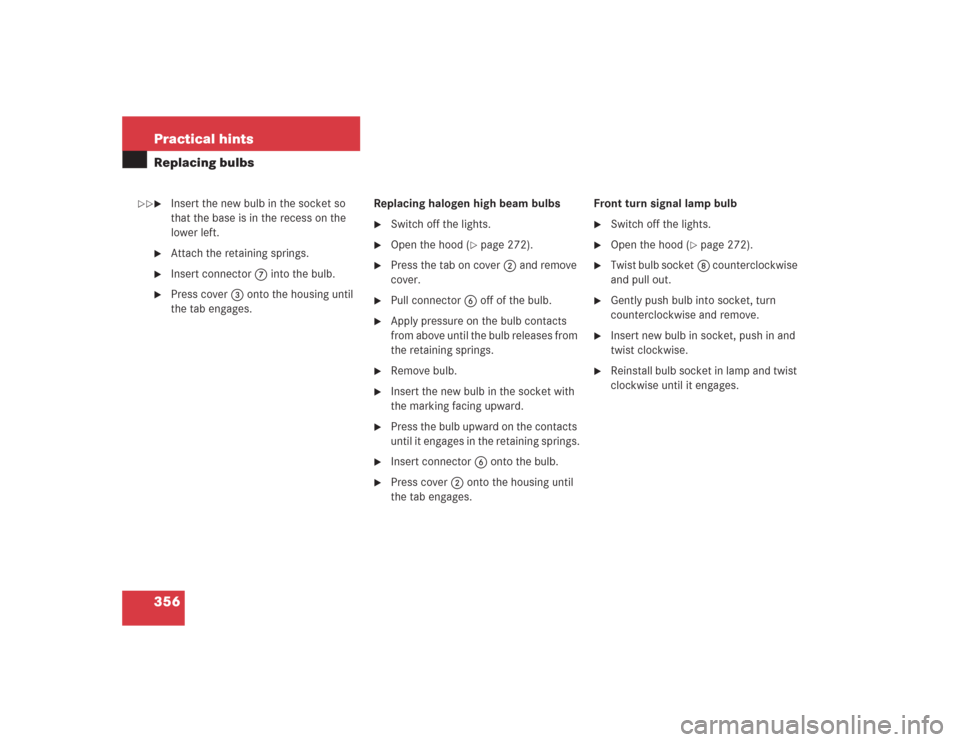
356 Practical hintsReplacing bulbs�
Insert the new bulb in the socket so
that the base is in the recess on the
lower left.
�
Attach the retaining springs.
�
Insert connector7 into the bulb.
�
Press cover3 onto the housing until
the tab engages.Replacing halogen high beam bulbs
�
Switch off the lights.
�
Open the hood (
�page 272).
�
Press the tab on cover2 and remove
cover.
�
Pull connector 6 off of the bulb.
�
Apply pressure on the bulb contacts
from above until the bulb releases from
the retaining springs.
�
Remove bulb.
�
Insert the new bulb in the socket with
the marking facing upward.
�
Press the bulb upward on the contacts
until it engages in the retaining springs.
�
Insert connector6 onto the bulb.
�
Press cover2 onto the housing until
the tab engages.Front turn signal lamp bulb
�
Switch off the lights.
�
Open the hood (
�page 272).
�
Twist bulb socket8 counterclockwise
and pull out.
�
Gently push bulb into socket, turn
counterclockwise and remove.
�
Insert new bulb in socket, push in and
twist clockwise.
�
Reinstall bulb socket in lamp and twist
clockwise until it engages.
��
Page 358 of 435
357 Practical hints
Replacing bulbs
Parking and standing lamp bulb�
Switch off the lights.
�
Open the hood (
�page 272).
�
Press the tab on cover2 and remove
cover.
�
Pull out the bulb socket5 with the
bulb.
�
Pull the bulb out of the bulb socket.
�
Insert a new bulb in the socket.
�
Reinstall the bulb socket.
�
Press cover2 onto the housing until
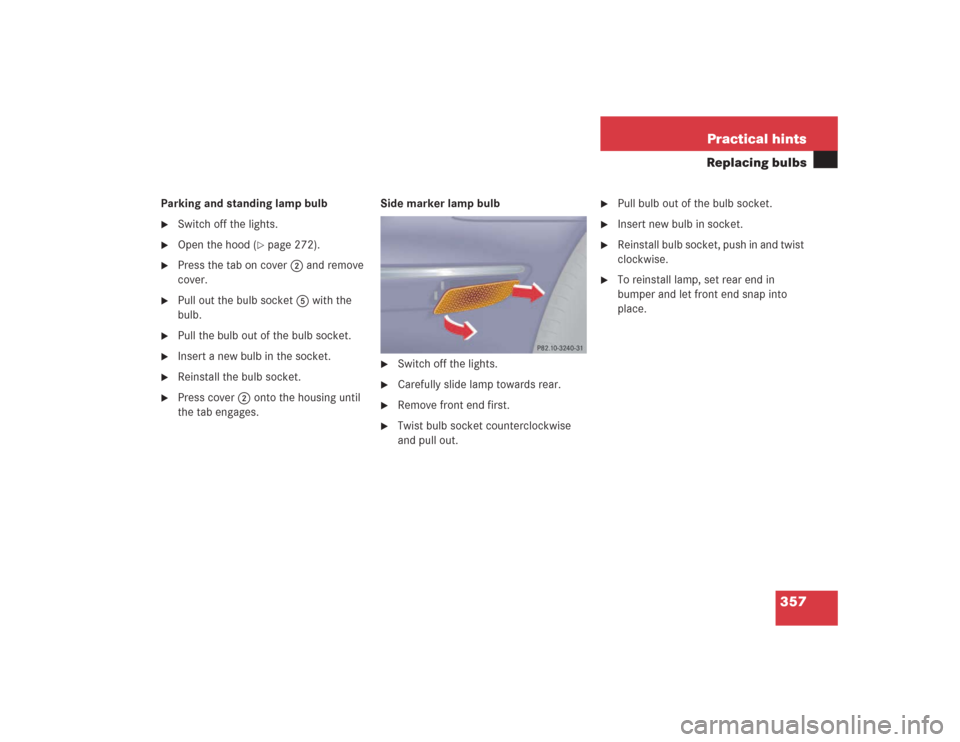
the tab engages.Side marker lamp bulb
�
Switch off the lights.
�
Carefully slide lamp towards rear.
�
Remove front end first.
�
Twist bulb socket counterclockwise
and pull out.
�
Pull bulb out of the bulb socket.
�
Insert new bulb in socket.
�
Reinstall bulb socket, push in and twist
clockwise.
�
To reinstall lamp, set rear end in
bumper and let front end snap into
place.
Page 359 of 435
358 Practical hintsReplacing bulbsReplacing bulbs for rear lamps
Tail lamp assemblies
1Turn signal lamp (white socket)
2Tail, parking, standing, and side marker
lamp (red socket)
3Tail lamp, rear fog lamp (red socket)
4Backup lamp (black socket)
�
Switch off the lights.
�
Open trunk.
�
Turn the catch, and move the trim to
the side.
�
Turn bulb socket counterclockwise and
pull out.
�
Gently twist bulb counterclockwise and
pull out of bulb holder.
�
Insert new bulb into the holder and turn
it clockwise.
�
Reinstall bulb socket.
The bulb socket should audibly click.
�
Replace trim and secure with lock. License plate lamp
1Screws
�
Switch off the lights.
�
Loosen both screws1 and remove
lamp.
�
Replace the tubular lamp and reinstall
it.
�
Retighten the screws.
Page 360 of 435
359 Practical hints
Replacing wiper blades
�Replacing wiper blades
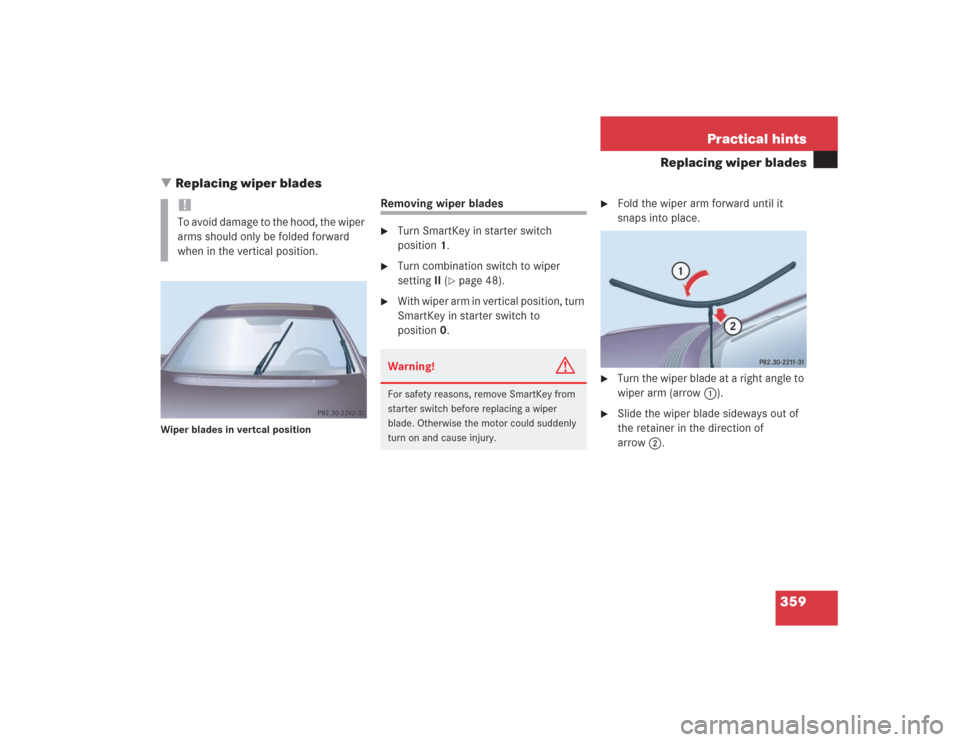
Wiper blades in vertcal position
Removing wiper blades�
Turn SmartKey in starter switch
position1.
�
Turn combination switch to wiper
settingII (
�page 48).
�
With wiper arm in vertical position, turn
SmartKey in starter switch to
position0.
�
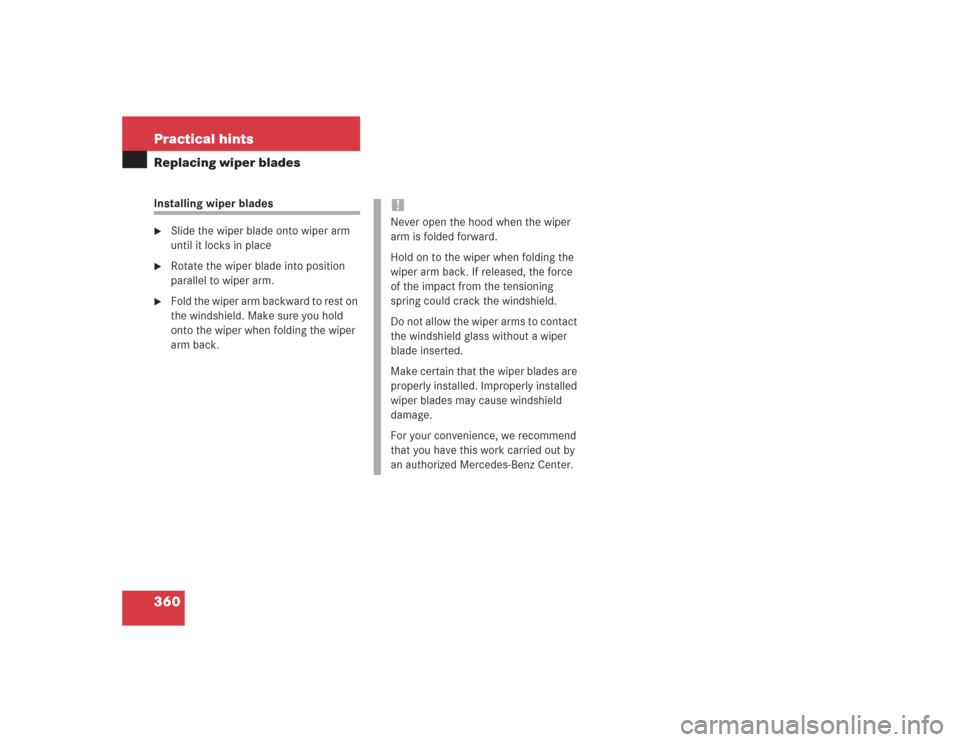
Fold the wiper arm forward until it
snaps into place.
�
Turn the wiper blade at a right angle to
wiper arm (arrow 1).
�
Slide the wiper blade sideways out of
the retainer in the direction of
arrow2.
!To avoid damage to the hood, the wiper
arms should only be folded forward
when in the vertical position.
Warning!
G
For safety reasons, remove SmartKey from
starter switch before replacing a wiper
blade. Otherwise the motor could suddenly
turn on and cause injury.
Page 361 of 435
360 Practical hintsReplacing wiper bladesInstalling wiper blades�
Slide the wiper blade onto wiper arm
until it locks in place
�
Rotate the wiper blade into position
parallel to wiper arm.
�
Fold the wiper arm backward to rest on
the windshield. Make sure you hold
onto the wiper when folding the wiper
arm back.
!Never open the hood when the wiper
arm is folded forward.
Hold on to the wiper when folding the
wiper arm back. If released, the force
of the impact from the tensioning
spring could crack the windshield.
Do not allow the wiper arms to contact
the windshield glass without a wiper
blade inserted.
Make certain that the wiper blades are
properly installed. Improperly installed
wiper blades may cause windshield
damage.
For your convenience, we recommend
that you have this work carried out by
an authorized Mercedes-Benz Center.
Page 362 of 435
361 Practical hints
Flat tire
�Flat tire
Preparing the vehicle�
Park the vehicle as far as possible from
moving traffic on a hard surface.
�
Turn on the hazard warning flashers.
�
Turn the steering wheel so that the
front wheels are in a straight ahead
position.
�
Set the parking brake.
�
Move the gear selector lever toP.
Vehicles with SmartKey:
�
Turn off the engine (
�page 53).
�
Remove the SmartKey from the starter
switch.Vehicles with SmartKey with
KEYLESS-GO*:
�
Turn off the engine by pressing the
KEYLESS-GO* button on the gear se-
lector lever once (
�page 54).
�
Open the driver’s door (this puts the
starter switch in position0, same as
with the SmartKey removed from the
starter switch). The driver’s door then
can be closed again.
�
Have any passenger exit the vehicle at
a safe distance from the roadway.
Mounting the spare wheel
iOpen door only when conditions are
safe to do so.
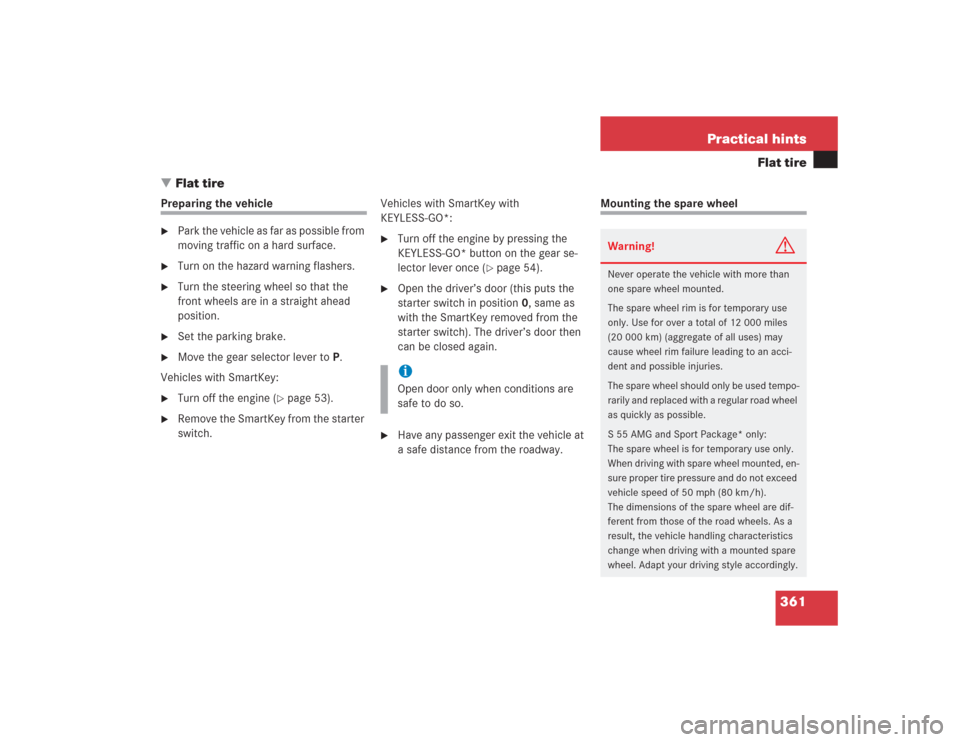
Warning!
G
Never operate the vehicle with more than
one spare wheel mounted.
The spare wheel rim is for temporary use
only. Use for over a total of 12 000 miles
(20 000 km) (aggregate of all uses) may
cause wheel rim failure leading to an acci-
dent and possible injuries.
The spare wheel should only be used tempo-
rarily and replaced with a regular road wheel
as quickly as possible.
S 55 AMG and Sport Package* only:
The spare wheel is for temporary use only.
When driving with spare wheel mounted, en-
sure proper tire pressure and do not exceed
vehicle speed of 50 mph (80 km/h).
The dimensions of the spare wheel are dif-
ferent from those of the road wheels. As a
result, the vehicle handling characteristics
change when driving with a mounted spare
wheel. Adapt your driving style accordingly.