Page 106 of 435
105 Controls in detail
Locking and unlocking
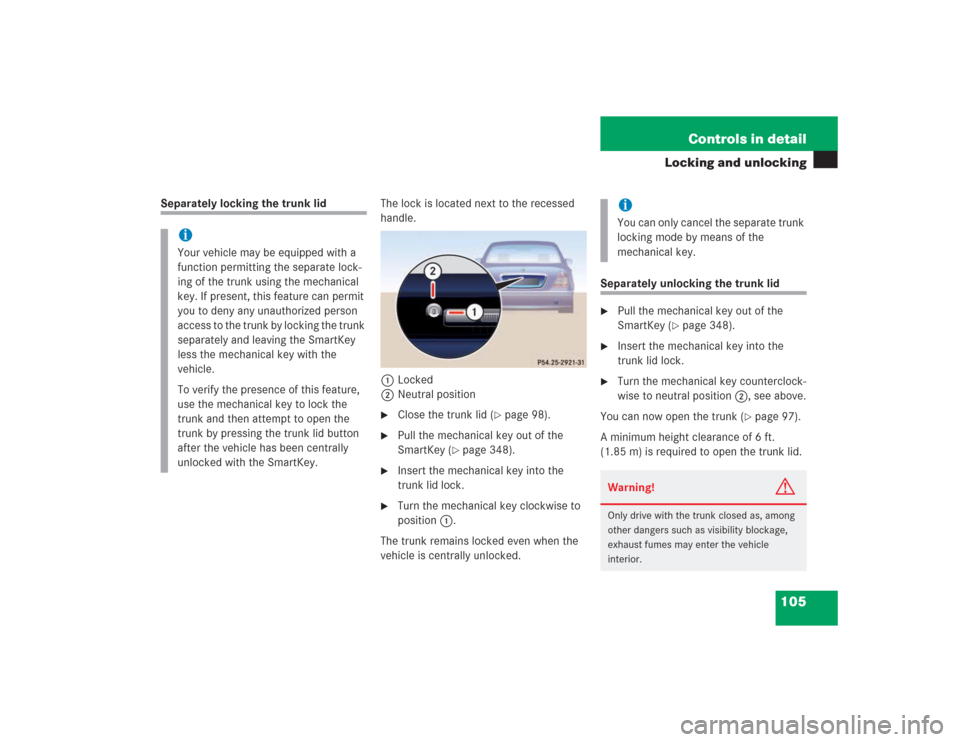
Separately locking the trunk lidThe lock is located next to the recessed
handle.
1Locked
2Neutral position
�
Close the trunk lid (
�page 98).
�
Pull the mechanical key out of the
SmartKey (
�page 348).
�
Insert the mechanical key into the
trunk lid lock.
�
Turn the mechanical key clockwise to
position1.
The trunk remains locked even when the
vehicle is centrally unlocked.
Separately unlocking the trunk lid�
Pull the mechanical key out of the
SmartKey (
�page 348).
�
Insert the mechanical key into the
trunk lid lock.
�
Turn the mechanical key counterclock-
wise to neutral position2, see above.
You can now open the trunk (
�page 97).
A minimum height clearance of 6 ft.
(1.85 m) is required to open the trunk lid.
iYour vehicle may be equipped with a
function permitting the separate lock-
ing of the trunk using the mechanical
key. If present, this feature can permit
you to deny any unauthorized person
access to the trunk by locking the trunk
separately and leaving the SmartKey
less the mechanical key with the
vehicle.
To verify the presence of this feature,
use the mechanical key to lock the
trunk and then attempt to open the
trunk by pressing the trunk lid button
after the vehicle has been centrally
unlocked with the SmartKey.
iYou can only cancel the separate trunk
locking mode by means of the
mechanical key.Warning!
G
Only drive with the trunk closed as, among
other dangers such as visibility blockage,
exhaust fumes may enter the vehicle
interior.
Page 110 of 435
109 Controls in detailSeats
Removing and installing front seat head restraints
For information on head restraint adjust-
ment, see the “Getting started” section
(�page 36)
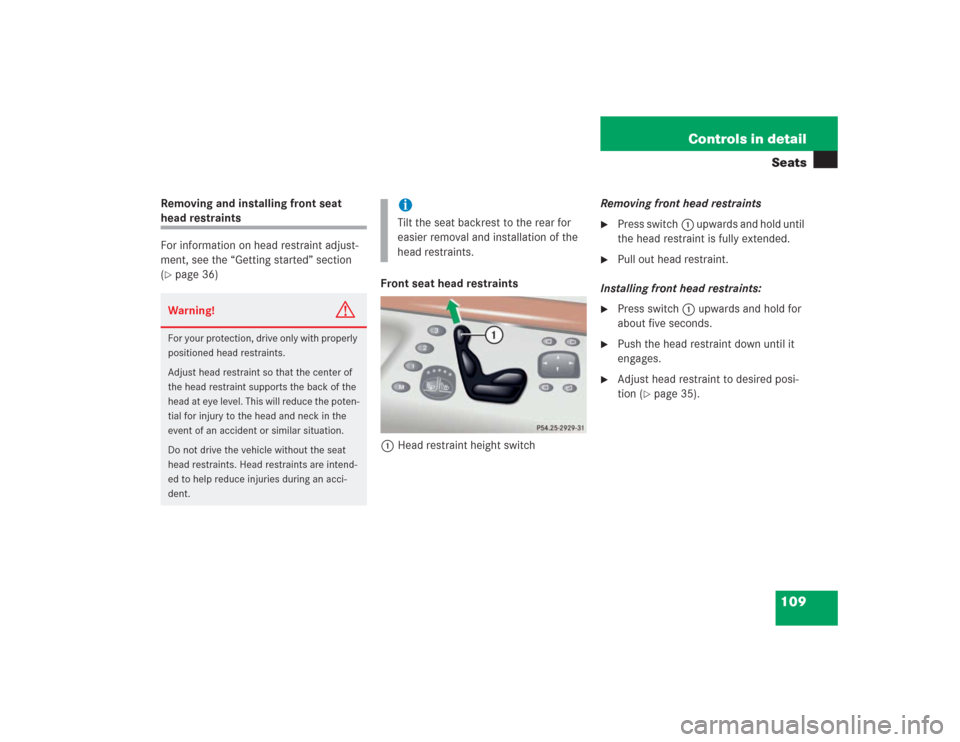
Front seat head restraints
1Head restraint height switchRemoving front head restraints
�
Press switch1 upwards and hold until
the head restraint is fully extended.
�
Pull out head restraint.
Installing front head restraints:
�
Press switch1 upwards and hold for
about five seconds.
�
Push the head restraint down until it
engages.
�
Adjust head restraint to desired posi-
tion (
�page 35).
Warning!
G
For your protection, drive only with properly
positioned head restraints.
Adjust head restraint so that the center of
the head restraint supports the back of the
head at eye level. This will reduce the poten-
tial for injury to the head and neck in the
event of an accident or similar situation.
Do not drive the vehicle without the seat
head restraints. Head restraints are intend-
ed to help reduce injuries during an acci-
dent.
iTilt the seat backrest to the rear for
easier removal and installation of the
head restraints.
Page 113 of 435
112 Controls in detailSeatsLumbar support
You can adjust the contour of the seat’s
lumbar support to best support your spine.
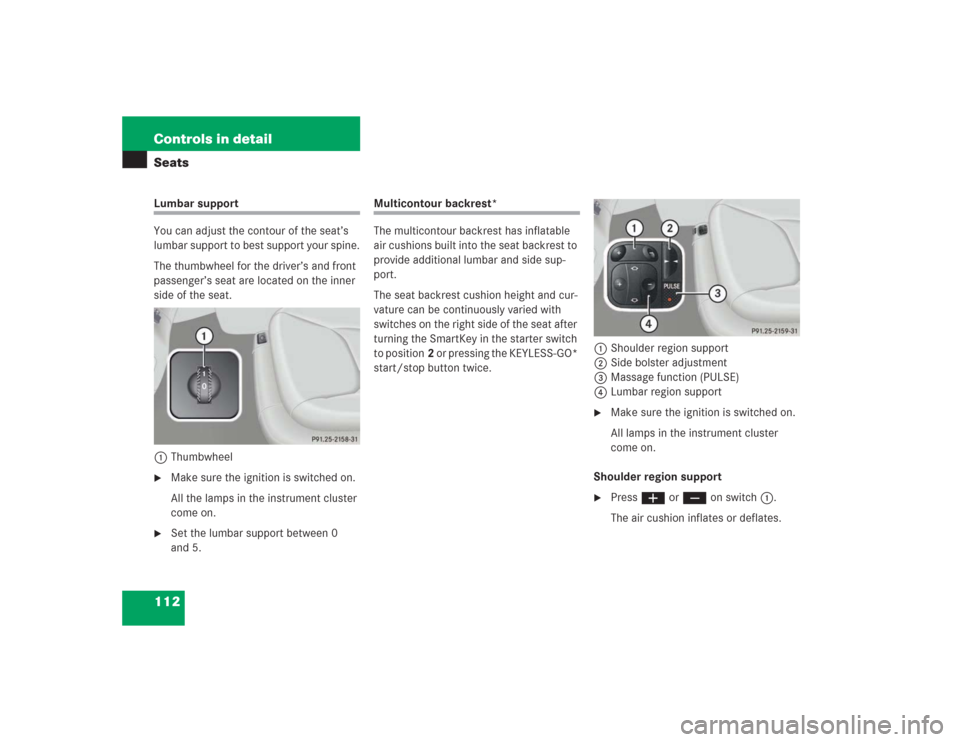
The thumbwheel for the driver’s and front
passenger’s seat are located on the inner
side of the seat.
1Thumbwheel�
Make sure the ignition is switched on.
All the lamps in the instrument cluster
come on.
�
Set the lumbar support between 0
and 5.
Multicontour backrest*
The multicontour backrest has inflatable
air cushions built into the seat backrest to
provide additional lumbar and side sup-
port.
The seat backrest cushion height and cur-
vature can be continuously varied with
switches on the right side of the seat after
turning the SmartKey in the starter switch
to position2 or pressing the KEYLESS-GO*
start/stop button twice.1Shoulder region support
2Side bolster adjustment
3Massage function (PULSE)
4Lumbar region support
�
Make sure the ignition is switched on.
All lamps in the instrument cluster
come on.
Shoulder region support
�
Press æ or ç on switch1.
The air cushion inflates or deflates.
Page 119 of 435
118 Controls in detailSeatsRear seats
Power seat bench*
The switches for adjusting the seat bench
are located at the respective rear doors.
1Seat bench fore and aft adjustment
2Head restraint fold/place uprightSeat bench fore and aft adjustment
�
Press switch forward or backward in di-
rection of arrow1.
Head restraint folding
�
Press switch up or down in direction of
arrow2.
The head restraint is folded or placed
upright.
For information on switching on seat heat-
ing* and seat ventilation*, see
(
�page 117) and (
�page 114).Individual power seats*
The switches for adjusting the seats are lo-
cated at the respective rear doors.
1Seat fore and aft adjustment
2Seat height
3Head restraint fold/place upright
Page 120 of 435
119 Controls in detailSeats
Seat fore and aft adjustment�
Press switch forward or backward in di-
rection of arrow1.
Seat height
�
Press switch up or down in the direc-
tion of arrow2.
Head restraint folding
�
Press switch up or down in direction of
arrow3.
The head restraint is folded or placed
upright.
For information on switching on seat heat-
ing* and seat ventilation*, see
(
�page 117) and (
�page 114).Power seat, setting front passenger
seat position from rear*
This function lets you adjust the position of
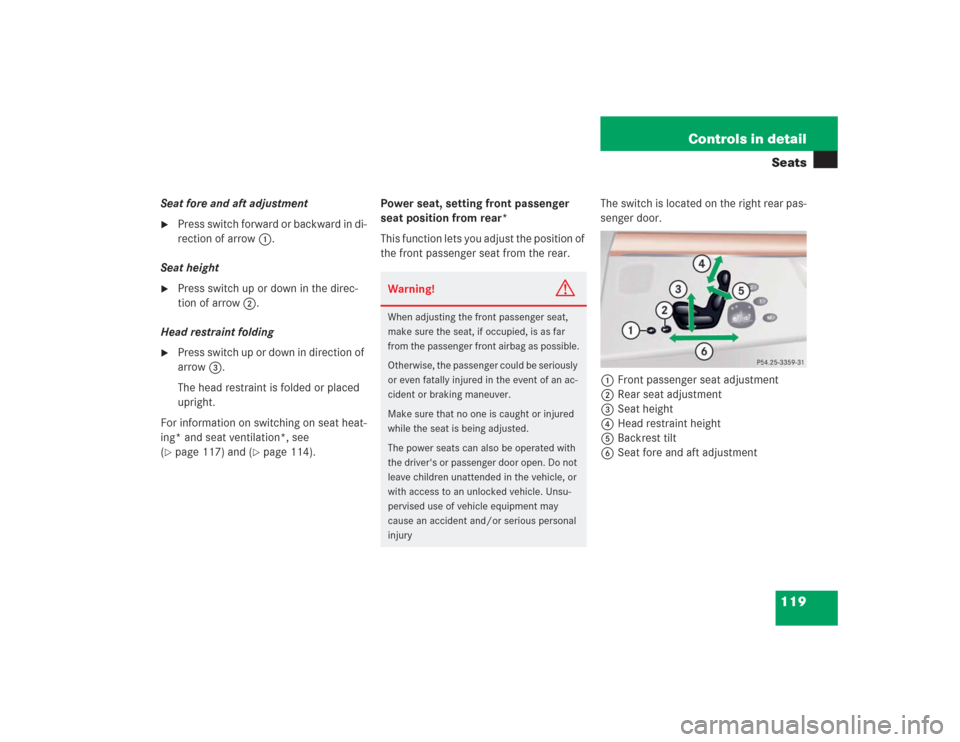
the front passenger seat from the rear.The switch is located on the right rear pas-
senger door.
1Front passenger seat adjustment
2Rear seat adjustment
3Seat height
4Head restraint height
5Backrest tilt
6Seat fore and aft adjustment
Warning!
G
When adjusting the front passenger seat,
make sure the seat, if occupied, is as far
from the passenger front airbag as possible.
Otherwise, the passenger could be seriously
or even fatally injured in the event of an ac-
cident or braking maneuver.
Make sure that no one is caught or injured
while the seat is being adjusted.
The power seats can also be operated with
the driver's or passenger door open. Do not
leave children unattended in the vehicle, or
with access to an unlocked vehicle. Unsu-
pervised use of vehicle equipment may
cause an accident and/or serious personal
injury
Page 121 of 435
120 Controls in detailSeats�
Switch on ignition.
or
�
Open the right rear passenger door.
�
Press button1 to adjust the front
passenger seat.Passenger seat fore and aft adjustment
�
Press the switch forward or backward
in direction of arrow6.
Passenger seat backrest tilt
�
Press the switch forward or backward
in direction of arrow5.
Passenger seat height
�
Press the switch up or down in the
direction of arrow3.
Passenger seat head restraint height
�
Press the switch up or down in
direction of arrow4.
Press button2 to adjust the rear seat
(
�page 119).
iAdjusting the passenger seat position
from the rear is not possible if you de-
activate the operation of the rear door
windows (
�page 74).
!Do not move the front passenger seat
completely forward if objects are
stored in the parcel net in the front pas-
senger-side footwell. Items in the net
may be damaged
Page 122 of 435
121 Controls in detail
Memory function
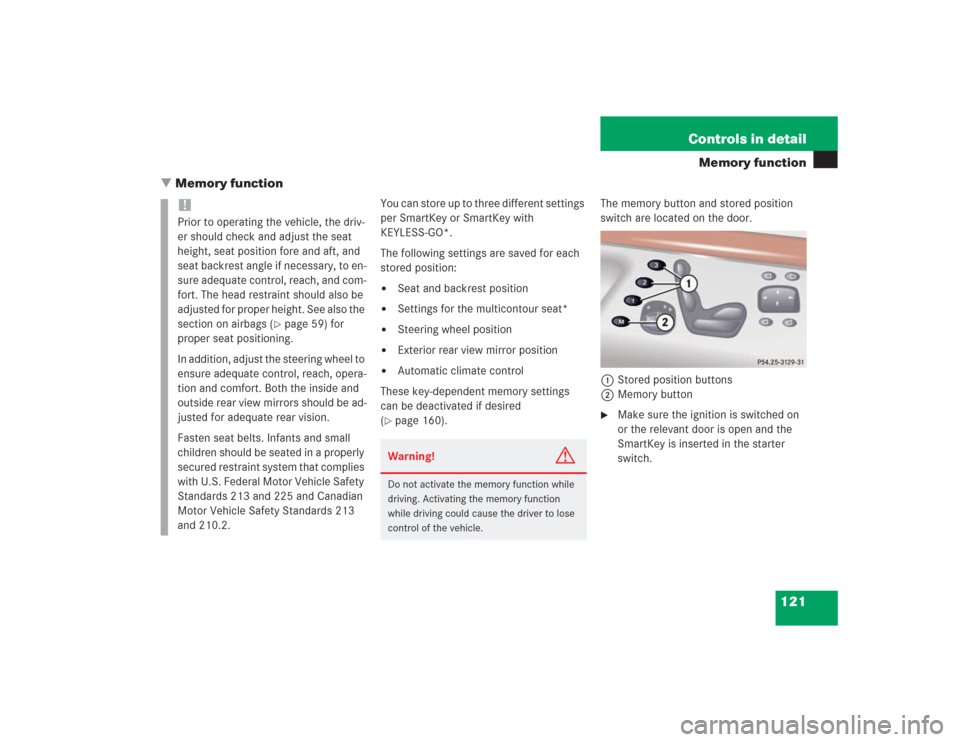
�Memory function
You can store up to three different settings
per SmartKey or SmartKey with
KEYLESS-GO*.
The following settings are saved for each
stored position:�
Seat and backrest position
�
Settings for the multicontour seat*
�
Steering wheel position
�
Exterior rear view mirror position
�
Automatic climate control
These key-dependent memory settings
can be deactivated if desired
(
�page 160).The memory button and stored position
switch are located on the door.
1 Stored position buttons
2Memory button
�
Make sure the ignition is switched on
or the relevant door is open and the
SmartKey is inserted in the starter
switch.
!Prior to operating the vehicle, the driv-
er should check and adjust the seat
height, seat position fore and aft, and
seat backrest angle if necessary, to en-
sure adequate control, reach, and com-
fort. The head restraint should also be
adjusted for proper height. See also the
section on airbags (
�page 59) for
proper seat positioning.
In addition, adjust the steering wheel to
ensure adequate control, reach, opera-
tion and comfort. Both the inside and
outside rear view mirrors should be ad-
justed for adequate rear vision.
Fasten seat belts. Infants and small
children should be seated in a properly
secured restraint system that complies
with U.S. Federal Motor Vehicle Safety
Standards 213 and 225 and Canadian
Motor Vehicle Safety Standards 213
and 210.2.
Warning!
G
Do not activate the memory function while
driving. Activating the memory function
while driving could cause the driver to lose
control of the vehicle.
Page 154 of 435
153 Controls in detail
Control system
The table below shows what settings can
be changed within the various menus. De-
tailed instructions on making individual
settings can be found on the following pag-
es.INSTRUMENT CLUSTER
LIGHTING
VEHICLE
CONVENIENCE
Select temperature display
mode
Set daytime running lamp mode
(USA only)
Set automatic locking
Set key-dependency
Select multifunction display
mode
Set locator lighting
Limiting opening height of trunk
lid*
Activate easy-entry/exit feature
Select language
Exterior lamps delayed shut-off
Set parking position for exterior
rear view mirror
Interior lighting delayed shut-off
Set fold-in function for exterior
rear view mirrorsAdjusting the drive-dynamic
seat (driver’s side)