Page 34 of 344
34 Getting startedAdjusting
�AdjustingSeats
The seats can be adjusted either manually
or electrically, depending on the vehicle’s
equipment.Warning!
G
All seat, head restraint, steering wheel, and
rear view mirror adjustments, as well as fas-
tening of seat belts, must be done before
the vehicle is put into motion.Warning!
G
Do not adjust the driver’s seat while driving.
Adjusting the seat while driving could cause
the driver to lose control of the vehicle.
Never ride in a moving vehicle with the seat
back reclined. Sitting in an excessively re-
clined position can be dangerous. You could
slide under the seat belt in a collision. If you
slide under it, the belt would apply force at
the abdomen or neck.
That could cause serious or fatal injuries.
The seat back and seat belts provide the
best restraint when the wearer is in an up-
right position and belts are properly posi-
tioned on the body. Your seat must be
adjusted so that you can correctly fasten
your seat belt (
�page 42).
Never place hands under the seat or near
any moving parts while a seat is being ad-
justed.
Warning!
G
When leaving the vehicle, always remove the
key from the steering lock and lock your
vehicle.
The power seats* can also be operated with
the appropriate door open. Do not leave
children unattended in the vehicle or with
access to an unlocked vehicle. Unsuper-
vised use of vehicle equipment may cause
an accident and / or serious personal injury.
Warning!
G
Children 12 years old and under must never
ride in the front seat, except in a
Mercedes-Benz authorized BabySmart
TM1
compatible child seat, which operates with
the BabySmart
TM system installed in the ve-
hicle to deactivate the passenger front air-
bag when it is properly installed. Otherwise
they will be struck by the airbag when it in-
flates in a crash. If this happens, serious or
fatal injury will result.
According to accident statistics, children
are safer when properly restrained in the
rear seating positions than in the front seat-
ing positions. Infants and small children
must ride in back seats and be seated in an
appropriate infant or child restraint system,
which is properly secured with the vehicle's
seat belt and top tether strap, or secured via
lower anchors and top tether strap, fully in
accordance with the child seat manufactur-
er’s instructions.
1BabySmart
TMis a trademark of Siemens
Automotive Corp.
Page 36 of 344
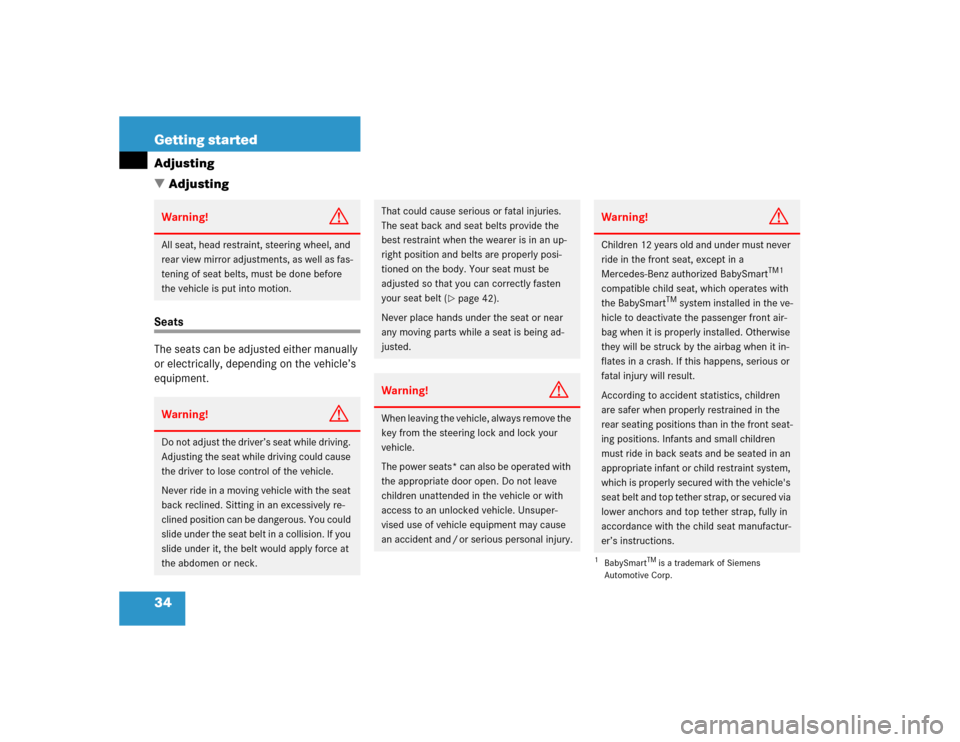
36 Getting startedAdjustingSeat backrest tilt�
Turn handwheel2 forward or back-
ward until your hands are slightly ang-
led when holding the steering wheel.
Seat height
�
Lift handle3.
�
Use your body weight to push the seat
downwards.
�
Lift your weight off the seat to obtain a
higher seat position.
�
Release lever3.Head restraint height
1Release button
Raising:
�
Manually adjust the height of the head
restraint by pulling it upward.
Lowering:
�
To lower the head restraint, push
release button1 and press down on
the head restraint.
Warning!
G
For your protection, drive only with properly
positioned head restraints.
Adjust head restraint so that the head re-
straint supports the back of the head at eye
level. This will reduce the potential for injury
to the head and neck in the event of an ac-
cident or similar situation.
Do not drive the vehicle without the seat
head restraints. Head restraints are intend-
ed to help reduce injuries during an acci-
dent.
Page 38 of 344
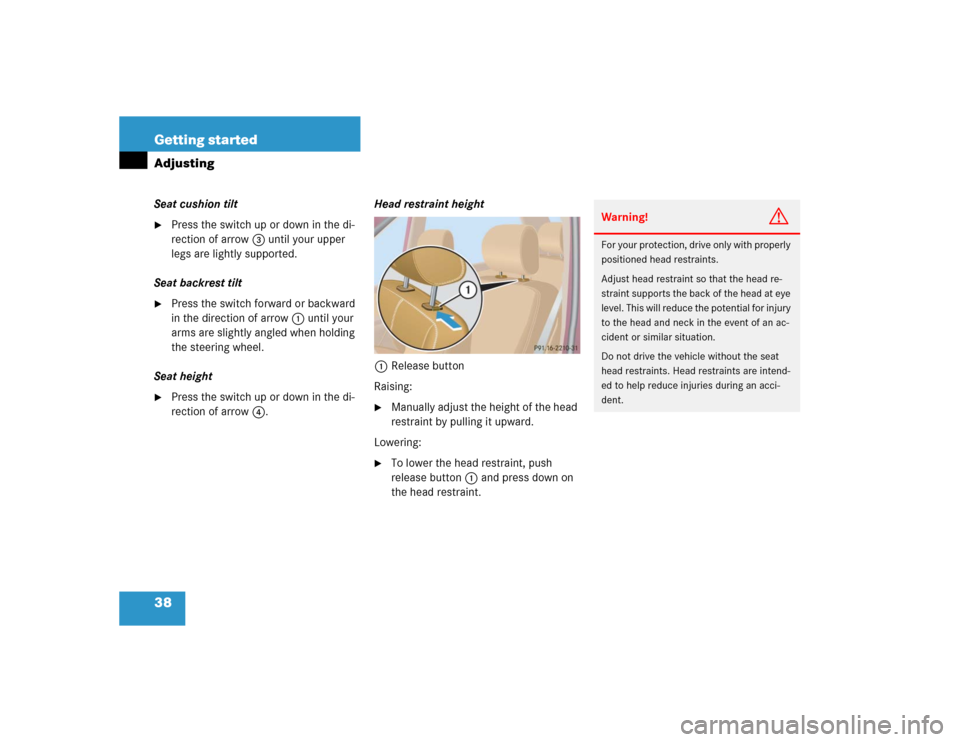
38 Getting startedAdjustingSeat cushion tilt�
Press the switch up or down in the di-
rection of arrow3 until your upper
legs are lightly supported.
Seat backrest tilt
�
Press the switch forward or backward
in the direction of arrow1 until your
arms are slightly angled when holding
the steering wheel.
Seat height
�
Press the switch up or down in the di-
rection of arrow4.Head restraint height
1Release button
Raising:
�
Manually adjust the height of the head
restraint by pulling it upward.
Lowering:
�
To lower the head restraint, push
release button1 and press down on
the head restraint.
Warning!
G
For your protection, drive only with properly
positioned head restraints.
Adjust head restraint so that the head re-
straint supports the back of the head at eye
level. This will reduce the potential for injury
to the head and neck in the event of an ac-
cident or similar situation.
Do not drive the vehicle without the seat
head restraints. Head restraints are intend-
ed to help reduce injuries during an acci-
dent.
Page 39 of 344
39 Getting started
Adjusting
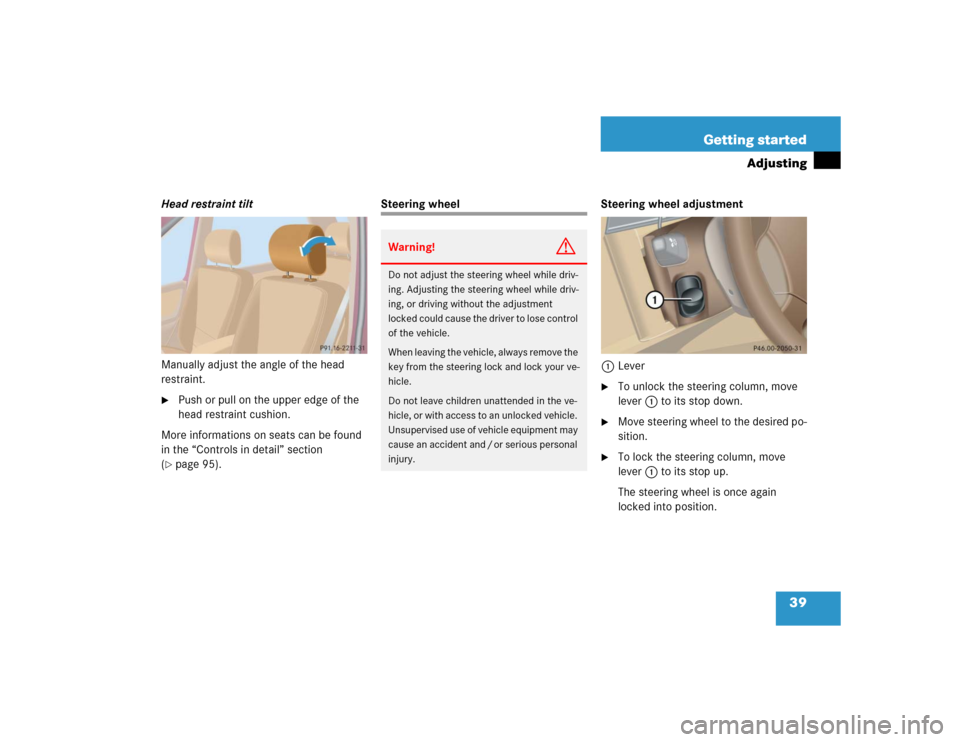
Head restraint tilt
Manually adjust the angle of the head
restraint.�
Push or pull on the upper edge of the
head restraint cushion.
More informations on seats can be found
in the “Controls in detail” section
(
�page 95).
Steering wheel Steering wheel adjustment
1Lever
�
To unlock the steering column, move
lever1 to its stop down.
�
Move steering wheel to the desired po-
sition.
�
To lock the steering column, move
lever1 to its stop up.
The steering wheel is once again
locked into position.
Warning!
G
Do not adjust the steering wheel while driv-
ing. Adjusting the steering wheel while driv-
ing, or driving without the adjustment
locked could cause the driver to lose control
of the vehicle.
When leaving the vehicle, always remove the
key from the steering lock and lock your ve-
hicle.
Do not leave children unattended in the ve-
hicle, or with access to an unlocked vehicle.
Unsupervised use of vehicle equipment may
cause an accident and / or serious personal
injury.
Page 41 of 344
41 Getting started
Adjusting
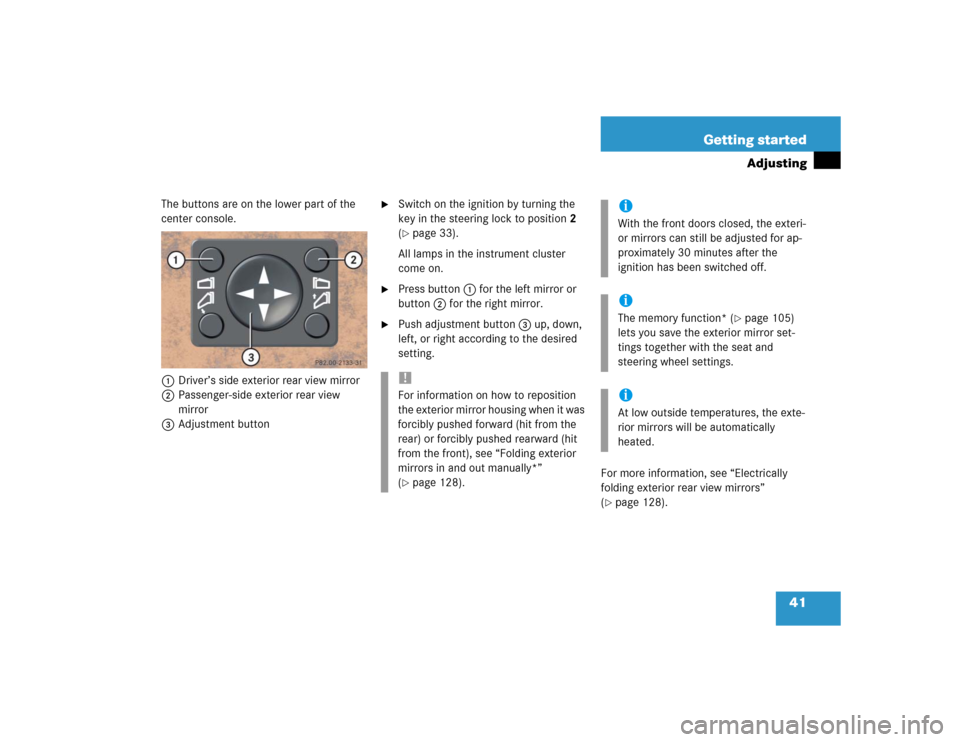
The buttons are on the lower part of the
center console.
1Driver’s side exterior rear view mirror
2Passenger-side exterior rear view
mirror
3Adjustment button
�
Switch on the ignition by turning the
key in the steering lock to position2
(�page 33).
All lamps in the instrument cluster
come on.
�
Press button1 for the left mirror or
button2 for the right mirror.
�
Push adjustment button3 up, down,
left, or right according to the desired
setting.
For more information, see “Electrically
folding exterior rear view mirrors”
(
�page 128).
!For information on how to reposition
the exterior mirror housing when it was
forcibly pushed forward (hit from the
rear) or forcibly pushed rearward (hit
from the front), see “Folding exterior
mirrors in and out manually*”
(�page 128).
iWith the front doors closed, the exteri-
or mirrors can still be adjusted for ap-
proximately 30 minutes after the
ignition has been switched off.iThe memory function* (
�page 105)
lets you save the exterior mirror set-
tings together with the seat and
steering wheel settings.
iAt low outside temperatures, the exte-
rior mirrors will be automatically
heated.
Page 48 of 344
48 Getting startedDrivingAfter a cold start, the automatic transmis-
sion shifts at a higher engine revolution.
This allows the catalytic converter to reach
its operating temperature earlier.
More information can be found in the “Op-
eration” section (
�page 191).
For information on off-road driving, see
“Driving instructions” (
�page 200).
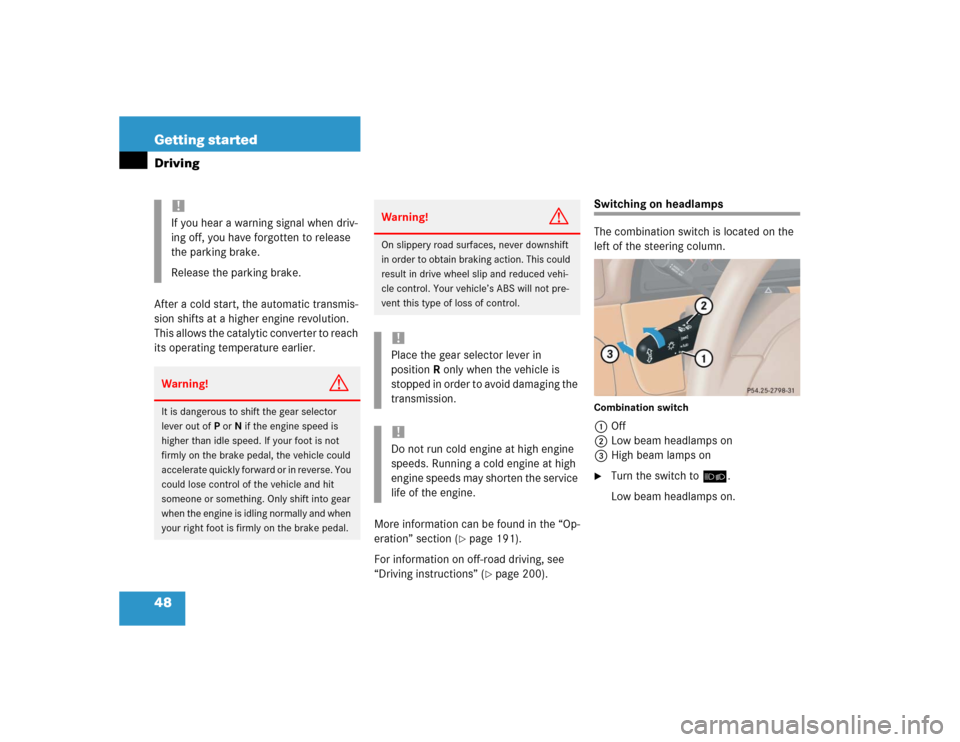
Switching on headlamps
The combination switch is located on the
left of the steering column.Combination switch1 Off
2Low beam headlamps on
3High beam lamps on�
Turn the switch toõ.
Low beam headlamps on.
!If you hear a warning signal when driv-
ing off, you have forgotten to release
the parking brake.
Release the parking brake.Warning!
G
It is dangerous to shift the gear selector
lever out ofP orN if the engine speed is
higher than idle speed. If your foot is not
firmly on the brake pedal, the vehicle could
accelerate quickly forward or in reverse. You
could lose control of the vehicle and hit
someone or something. Only shift into gear
when the engine is idling normally and when
your right foot is firmly on the brake pedal.
Warning!
G
On slippery road surfaces, never downshift
in order to obtain braking action. This could
result in drive wheel slip and reduced vehi-
cle control. Your vehicle’s ABS will not pre-
vent this type of loss of control.!Place the gear selector lever in
positionR only when the vehicle is
stopped in order to avoid damaging the
transmission.!Do not run cold engine at high engine
speeds. Running a cold engine at high
engine speeds may shorten the service
life of the engine.
Page 49 of 344
49 Getting started
Driving
High beam�
Push the combination switch forward.
The high beam indicatorA in the
instrument cluster comes on.
More information can be found in the
“Controls in detail” section (
�page 110).
Turn signals
The combination switch is on the left of the
steering column.Combination switch1Turn signals, right
2Turn signals, left
�
Press the combination switch up1 or
down2.
The switch is automatically cancelled
when the steering wheel is turned to a
large enough degree.
Windshield wipers
The wiper switch is located on the right of
the steering column.Wiper switch0Windshield wipers off
1Intermittent wiping
2Normal wiper speed
3Fast wiper speed
4Wiping with windshield wiper fluid
iTo signal minor directional changes,
move combination switch to point of
resistance only and release. The turn
signal flashes three times.
Page 53 of 344
53 Getting started
Parking and locking
�Parking and locking
You have now completed your first drive.
You have properly stopped and parked
your vehicle. End your drive as follows.
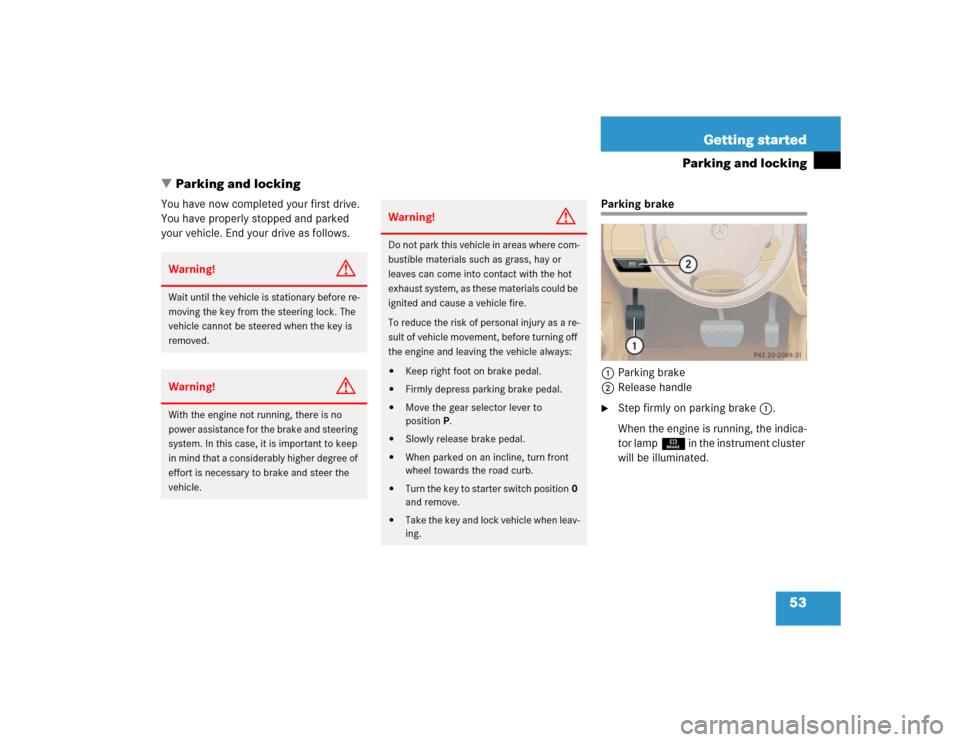
Parking brake
1Parking brake
2Release handle�
Step firmly on parking brake1.
When the engine is running, the indica-
tor lampÉ in the instrument cluster
will be illuminated.
Warning!
G
Wait until the vehicle is stationary before re-
moving the key from the steering lock. The
vehicle cannot be steered when the key is
removed.Warning!
G
With the engine not running, there is no
power assistance for the brake and steering
system. In this case, it is important to keep
in mind that a considerably higher degree of
effort is necessary to brake and steer the
vehicle.
Warning!
G
Do not park this vehicle in areas where com-
bustible materials such as grass, hay or
leaves can come into contact with the hot
exhaust system, as these materials could be
ignited and cause a vehicle fire.
To reduce the risk of personal injury as a re-
sult of vehicle movement, before turning off
the engine and leaving the vehicle always:�
Keep right foot on brake pedal.
�
Firmly depress parking brake pedal.
�
Move the gear selector lever to
positionP.
�
Slowly release brake pedal.
�
When parked on an incline, turn front
wheel towards the road curb.
�
Turn the key to starter switch position0
and remove.
�
Take the key and lock vehicle when leav-
ing.