Page 16 of 376

16 IntroductionSymbols
�SymbolsThe following symbols are found in this
Operator’s Manual:
* Optional equipment is identified
with an asterisk. Since standard
equipment varies between models,
the descriptions and illustrations in
this manual may differ slightly from
the actual equipment of your vehi-
cle.
�
This symbol points to instructions for
you to follow.
�
A number of these symbols appearing
in succession indicates a multiple-step
procedure.
� Page This symbol tells you where to
look for further information on a
topic.��
This continuation symbol marks
an interrupted procedure which
will be continued on the next
page.
-> In the glossary of technical
terms, this symbol is used to in-
dicate cross-references to term
definitions.
Display
Words appearing in the multi-
function display are printed in
the type shown here.
Warning!
G
Warning notices draw your attention to haz-
ards that may endanger your health or life,
or the health or life of others.!Highlights hazards that may result in
damage to your vehicle.iHelpful hints or further information you
may find useful.
Page 39 of 376
39 Getting started
Adjusting
�
Make sure the ignition is switched on.
All the lights in the instrument cluster
come on.
�
Press button2 for driver’s side exteri-
or rear view mirror or button3 for
passenger-side exterior rear view mir-
ror.
�
Push adjustment button1 up, down,
left or right according to the setting de-
sired.
For more information, see “Storing exterior
rear view mirror parking position”
(
�page 103).iThe memory function (
�page 101) lets
you store the setting for the exterior
rear view mirrors together with the set-
ting for the steering wheel and the seat
position.
!If an exterior rear view mirror housing
is forcibly pushed forward or rearward,
reposition it by applying firm pressure
until it snaps into place. The exterior
rear view mirror housing is now proper-
ly positioned and you can adjust the
mirror normally.
Page 105 of 376
.
Automatic headlamp mode
The")
105 Controls in detail
Lighting
Manual headlamp mode
The low beam headlamps and parking
lamps can be switched on and off with the
exterior lamp switch, see (
�page 104).
Automatic headlamp mode
The parking lamps, low beam headlamps
and license plate lamps switch on and off
automatically depending on the brightness
of the ambient light.
�
Turn the exterior lamp switch to U.
iIf you remove the SmartKey and open
the driver’s door while the parking
lamps or low beam headlamps are
switched on: �
a warning sounds
�
$ appears in the multifunction
display
�
the message
TURN OFF LIGHTS!
ap-
pears in the multifunction display
iWith the daytime running lamp mode
activated and the engine running, the
low beam headlamps cannot be
switched off manually.
Warning!
G
If the exterior lamp switch is set toU,�
the headlamps may switch off unexpect-
edly when the system senses bright am-
bient light, for example light from
oncoming traffic.
�
the headlamps will not be automatically
switched on under foggy conditions.
To minimize risk to you and to others, acti-
vate headlamps by turning exterior lamp
switch to
B
when driving or when traffic
and / or ambient lighting conditions require
you to do so.
In low ambient lighting conditions, only
switch from position
U
to
B
with the
vehicle at a standstill. Switching from U
to
B
will briefly switch off the head-
lamps. Doing so while driving in low ambient
lighting conditions may result in an acci-
dent.
The automatic headlamp feature is only an
aid to the driver. The driver is responsible for
the operation of the vehicle’s lights at all
times.
Page 131 of 376

Use the
HEADLIGHTS DELAYED SHUT-OFF
function to set whether and for how long
you woul")
131 Controls in detail
Control system
Setting night security illumination
(Exterior lamps delayed switch-off)
Use the
HEADLIGHTS DELAYED SHUT-OFF
function to set whether and for how long
you would like the exterior lamps to illumi-
nate during darkness after all doors are
closed. When the delayed shut-off feature
is activated and the exterior lamp switch is
in position U, the following lamps will
remain lit after you remove the SmartKey
from the starter switch:
�
parking lamps
�
tail lamps
�
license plate lamps
�
front fog lamps
�
Move the selection marker with
theæ orç button to the
LIGHT-
ING
submenu.
�
Press buttonj ork repeatedly
until you see this message in the dis-
play:
HEADLIGHTS DELAYED SHUT-OFF
.
The selection marker is on the current
setting.
�
Pressæ orç to select the de-
sired lamp-on period.
You can select:�
0 s
, the delayed switch-off feature
is deactivated
�
15 s
, 30 s
, 45 s
or
60 s
, the delayed
switch-off feature is activated
You can temporarily deactivate the de-
layed switch-off feature:
�
Before leaving the vehicle, turn the
SmartKey in the starter switch to
position0.
�
Then turn it to position2 and back
to0.
The delayed switch-off feature is deac-
tivated. It will reactivate as soon as you
reinsert the SmartKey in the starter
switch.
iYou can reactivate this function within
ten minutes by opening a door.
If you do not open a door after remov-
ing the SmartKey, the lamps will auto-
matically switch off after 60 seconds.
Page 174 of 376

174 Controls in detailDriving systemsWarning indicator
Visual signals indicate to the driver the rel-
ative distance between the sensors and an
obstacle. The warning indicator is located
next to the tailgate.Warning indicatorAs your vehicle approaches an object, one
or more segments will come on, depending
on the distance. When the sixth segment
lights, you have reached the minimum dis-
tance.An intermittent acoustic warning will
sound when the first yellow segment
comes on. This signal quickens with each
additional segment lit. When all segments
illuminate, the acoustic warning becomes
a constant signal. The signal is canceled
when the gear selector lever is placed in
position D or P.
Rear Parking Assist malfunction
There is a malfunction in the Rear Parking
Assist system if:
�
a low warning tone sounds while the
vehicle is reversing
The Rear Parking Assist sensors are
dirty or malfunctioning.�
Clean the Rear Parking Assist sys-
tem sensors (
�page 247).
�
Switch on the ignition again.
�
no segments come on and no warning
sounds
The Rear Parking Assist is malfunction-
ing.�
Have the Rear Parking Assist sys-
tem checked by an authorized
Mercedes-Benz Light Truck Center
as soon as possible.
Malfunction may also be caused by inter-
ference from other radio or ultrasonic sig-
nals.
�
Check the Rear Parking Assist opera-
tion at another location to rule out in-
terference from outside radio or
ultrasonic signals.
Page 276 of 376

276 Practical hintsWhat to do if …Display symbol
Display message
Possible cause
Possible solution
.
LIGHT SENSOR
DRIVE TO WORKSHOP!
The lamp sensor is malfunctioning. The
headlamps switch on automatically.
�
In the control system, set lamp opera-
tion to manual (
�page 129).
�
Switch on headlamps using the exteri-
or lamp switch (
�page 104).
�
Visit an authorized Mercedes-Benz
Light Truck Center as soon as possi-
ble.
LICENSE PLATE LIGHT, L
CHECK LIGHT!
The left license plate lamp is malfunction-
ing.
�
Replace the bulb as soon as possible.
LICENSE PLATE LIGHT R
CHECK LIGHT!
The right license plate lamp is malfunc-
tioning.
�
Replace the bulb as soon as possible.
LIGHTS
TURN OFF LIGHTS!
The display appears if the driver’s door is
opened with the engine shut off and no
SmartKey in the starter switch.
�
Insert SmartKey in the starter switch.
�
Switch off the lights (
�page 104).
LOW BEAM, L
CHECK LIGHT!
The left low beam lamp is malfunctioning.
�
Visit an authorized Mercedes-Benz
Light Truck Center as soon as possi-
ble.
LOW BEAM, R
CHECK LIGHT!
The right low beam lamp is malfunction-
ing.
�
Visit an authorized Mercedes-Benz
Light Truck Center as soon as possi-
ble.
Page 293 of 376
293 Practical hints
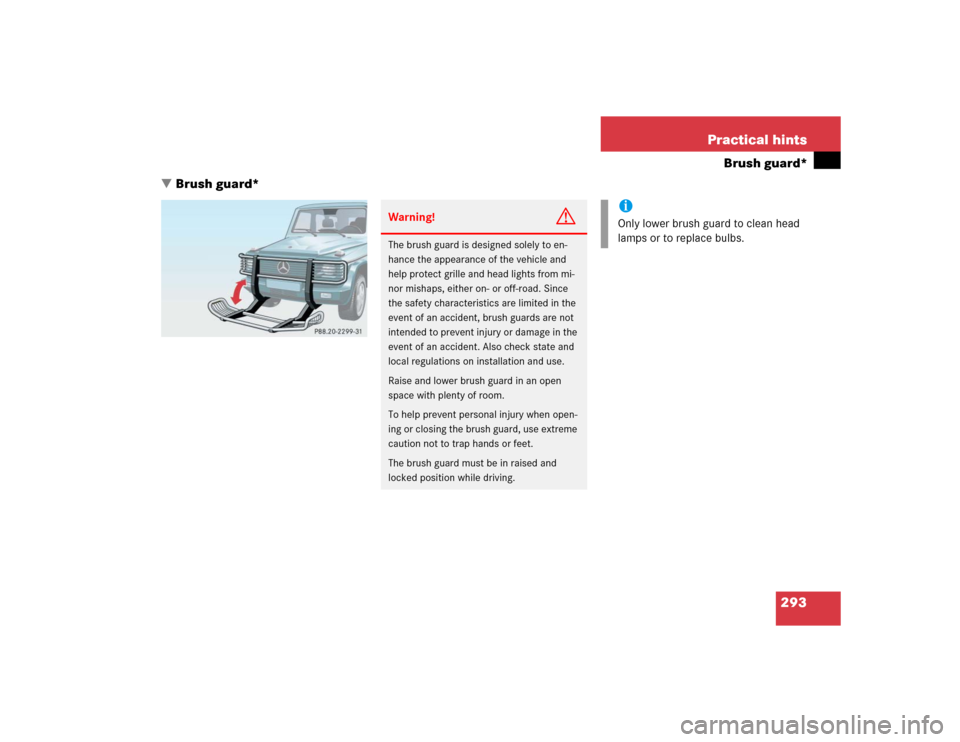
Brush guard*
�Brush guard*
Warning!
G
The brush guard is designed solely to en-
hance the appearance of the vehicle and
help protect grille and head lights from mi-
nor mishaps, either on- or off-road. Since
the safety characteristics are limited in the
event of an accident, brush guards are not
intended to prevent injury or damage in the
event of an accident. Also check state and
local regulations on installation and use.
Raise and lower brush guard in an open
space with plenty of room.
To help prevent personal injury when open-
ing or closing the brush guard, use extreme
caution not to trap hands or feet.
The brush guard must be in raised and
locked position while driving.
iOnly lower brush guard to clean head
lamps or to replace bulbs.
Page 296 of 376

296 Practical hintsReplacing bulbsRear lamps Notes on bulb replacement
�
Use only 12 volt bulbs of the same type
and with the specified watt rating.
�
Switch lights off before changing a bulb
to prevent short circuits.
�
Always use a clean lint-free cloth when
handling bulbs.
�
Your hands should be dry and free of oil
and grease.
�
If the newly installed bulb does not
come on, visit an authorized
Mercedes-Benz Light Truck Center.
�
Have the LEDs for the following lamps
replaced by an authorized
Mercedes-Benz Light Truck Center.�
The additional turn signals in the ex-
terior rear view mirrors
�
The high mounted brake lamp
Lamp
Type
6
High mounted brake
lamp
LED
7
Turn signal lamp
PY 21 W
Brake lamp
P 21 W
Tail, parking and
standing lamp
R 5 W
8
Backup lamp
P 21 W
9
License plate lamps
C 5 W
a
Rear fog lamp
P 21 W
b
Side marker lamp
T 4 W
Warning!
G
Keep bulbs out of reach of children.
Bulbs and bulb sockets can be very hot. Al-
low the lamp to cool down before changing
a bulb.
Halogen lamps contain pressurized gas. A
bulb can explode if you:�
touch or move it when hot
�
drop the bulb
�
scratch the bulb
Wear eye and hand protection.
iHave the headlamp settings checked
regularly by a Mercedes-Benz Light
Truck Center.
Do not turn the headlamp adjusting
screws. If the adjusting screws are
turned, the headlamp setting must be
checked by a Mercedes-Benz Light
Truck Center.