Page 97 of 376
97 Controls in detail
Seats
Removing rear seat head restraints�
Pull out head restraint with both hands.
Installing rear seat head restraints
�
Insert the head restraint and push it
down to the stop.
Ensure proper head restraint positioning
(
�page 36).
Multicontour seat*
The multicontour seat has a movable seat
cushion and inflatable air cushions built
into the seat backrest to provide additional
lumbar and side support.
The seat cushion movement and amount of
seat backrest cushion height and curva-
ture can be continuously varied with regu-
lators on the right side of the seat after
turning the SmartKey in the starter switch
to position2.1Seat cushion length
2Backrest bottom
3Backrest center
4Backrest side bolsters
�
Make sure the ignition is switched on.
All the lamps in the instrument cluster
come on.
Seat cushion length
�
Adjust the seat cushion to the length of
your upper leg using switch1.
iThe head restraint(s) should be stored
in a secure place.
Page 98 of 376
98 Controls in detailSeatsBackrest contour�
Adjust the contour of the backrest to
the desired position using switches2
and 3.
Backrest side bolsters
�
Adjust the backrest side bolsters so
that they provide good lateral support
using switch4.
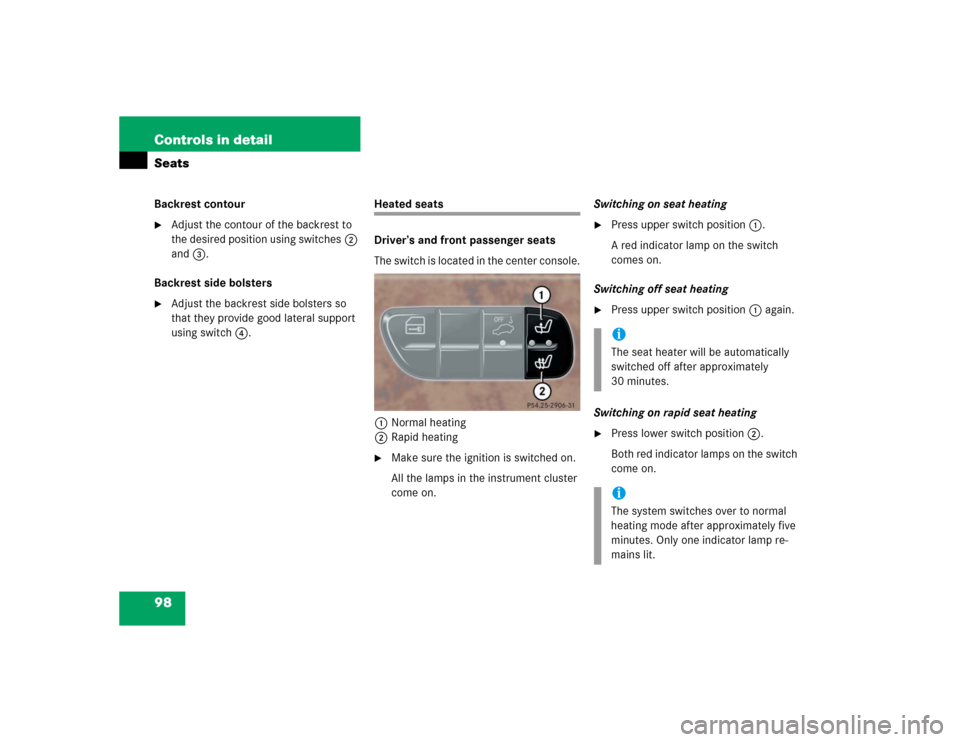
Heated seats
Driver’s and front passenger seats
The switch is located in the center console.
1Normal heating
2Rapid heating�
Make sure the ignition is switched on.
All the lamps in the instrument cluster
come on.Switching on seat heating
�
Press upper switch position1.
A red indicator lamp on the switch
comes on.
Switching off seat heating
�
Press upper switch position1 again.
Switching on rapid seat heating
�
Press lower switch position2.
Both red indicator lamps on the switch
come on.iThe seat heater will be automatically
switched off after approximately
30 minutes.iThe system switches over to normal
heating mode after approximately five
minutes. Only one indicator lamp re-
mains lit.
Page 99 of 376
 pil-
lar.
1Normal heating
2Rapid heating
�
Make sure")
99 Controls in detail
Seats
Switching off rapid seat heating�
Press lower switch position2 again.Rear seats
The switch is located on the B (center) pil-
lar.
1Normal heating
2Rapid heating
�
Make sure the ignition is switched on.
All the lamps in the instrument cluster
come on.Switching on seat heating
�
Press upper switch position1.
A red indicator lamp on the switch
comes on.
Switching off seat heating
�
Press upper switch position1 again.
Switching on rapid seat heating
�
Press lower switch position2.
Both red indicator lamps on the switch
come on.
iIf one or both of the lamps on the seat
heater switch are blinking, there is in-
sufficient voltage available as too many
electrical consumers are turned on.
The seat heater switches off automati-
cally.
The seat heater will switch back on
again automatically as soon as suffi-
cient voltage is available.
iThe seat heater will be automatically
switched off after approximately
30 minutes.iThe system switches over to normal
heating mode after approximately five
minutes. Only one indicator lamp re-
mains lit.
Page 102 of 376
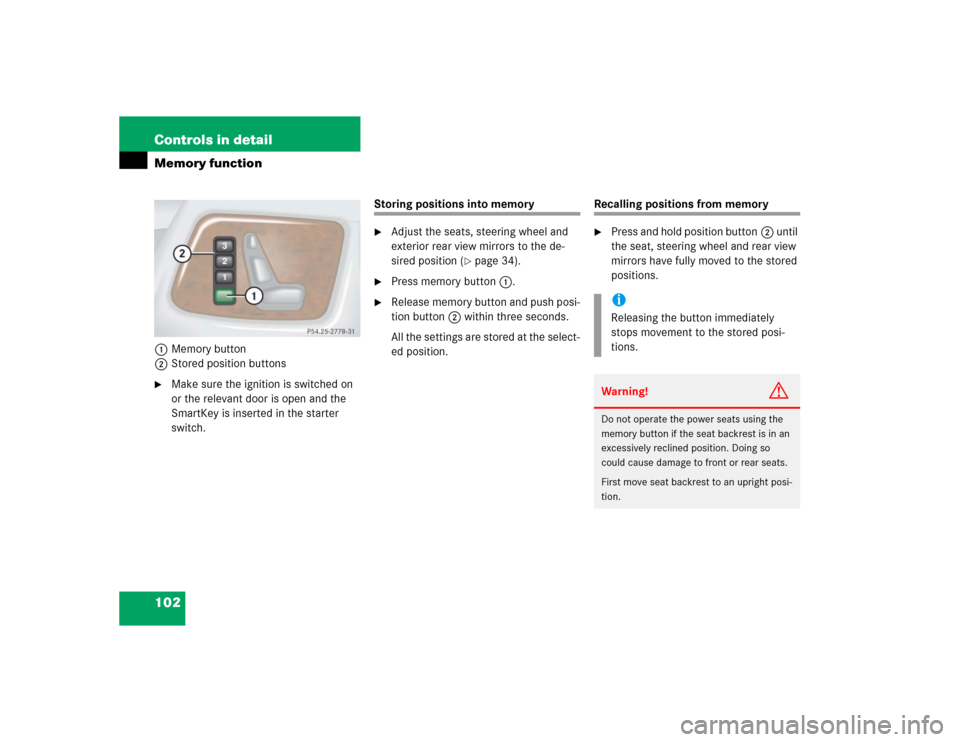
102 Controls in detailMemory function1Memory button
2Stored position buttons�
Make sure the ignition is switched on
or the relevant door is open and the
SmartKey is inserted in the starter
switch.
Storing positions into memory�
Adjust the seats, steering wheel and
exterior rear view mirrors to the de-
sired position (
�page 34).
�
Press memory button1.
�
Release memory button and push posi-
tion button2 within three seconds.
All the settings are stored at the select-
ed position.
Recalling positions from memory�
Press and hold position button2 until
the seat, steering wheel and rear view
mirrors have fully moved to the stored
positions.iReleasing the button immediately
stops movement to the stored posi-
tions.Warning!
G
Do not operate the power seats using the
memory button if the seat backrest is in an
excessively reclined position. Doing so
could cause damage to front or rear seats.
First move seat backrest to an upright posi-
tion.
Page 103 of 376

103 Controls in detail
Memory function
Storing exterior rear view mirror park-ing position
For easier parking, you can adjust the pas-
senger-side exterior rear view mirror so
that you can see the right rear wheel as
soon as you engage reverse gearR.
For information on activating the parking
position, see “Activating exterior rear view
mirror parking position” (
�page 153).
1Adjustment button
2Driver’s side mirror
3Passenger-side mirror
4Memory button
�
Stop the vehicle.
�
Switch ignition on (if not already on).
�
Press button3.
The passenger-side exterior rear view
mirror is selected.
�
Adjust the exterior rear view mirror
with button1 so that you see the rear
wheel and the curb.
�
Press memory button4 on the door.
�
Within three seconds, press bottom of
adjustment button1 above the exteri-
or lamp switch.
The parking position is stored if the
mirror does not move.
iYou can store a parking position for the
passenger-side exterior rear view mir-
ror for each SmartKey using the memo-
ry switch.
iIf the mirror does move, repeat the
above steps. After the setting is stored
you can move the mirror again.
Page 107 of 376

107 Controls in detail
Lighting
If a door is opened, the lamp on this side
goes out. If no doors are opened, the
lamps go out:�
when the ignition is switched on
�
after a maximum of 40 seconds
Switching on front fog lamps
�
Make sure the low beam headlamps
are switched on.
�
Pull out exterior lamp switch to first
stop.
The green indicator lamp‡ in the
lamp switch comes on.Switching on rear fog lamp
�
Check that the low beam headlamps
are switched on.
�
Pull out exterior lamp switch to second
stop.
The yellow indicator lamp† in the
lamp switch comes on.
Combination switch
The combination switch is located on the
left side of the steering column.
1High beam
2High beam flasher
Warning!
G
In low ambient lighting or foggy conditions,
only switch from position
U
to
B
with the vehicle at a standstill. Switching
from
U
to
B
will briefly switch off
the headlamps. Doing so while driving in low
ambient lighting conditions may result in an
accident.
iFog lamps will operate with the parking
lamps and/or the low beam headlamps
on. Fog lamps should only be used in
conjunction with low beam headlamps.
Consult your State or Province Motor
Vehicle Regulations regarding allow-
able lamp operation.
Page 108 of 376
108 Controls in detailLightingSwitching on high beams�
Turn exterior lamp switch to
positionB or toU
(�page 104).
�
Push the combination switch in
direction1.
The high beam headlamp
indicatorA in the instrument clus-
ter comes on.
High beam flasher
�
Pull the combination switch briefly in
direction2.
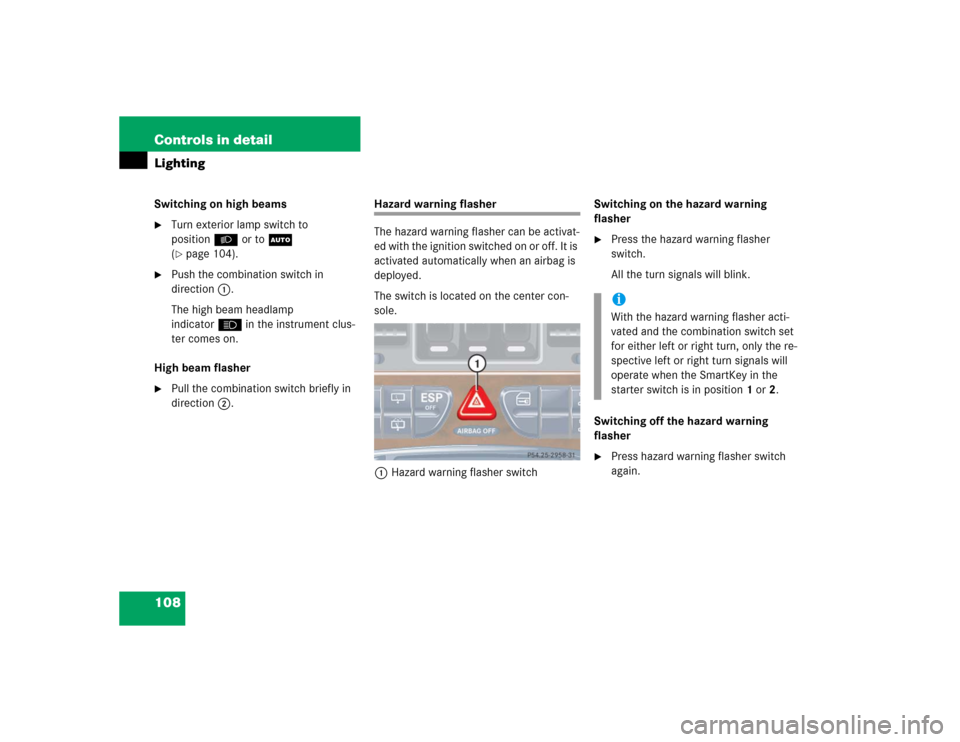
Hazard warning flasher
The hazard warning flasher can be activat-
ed with the ignition switched on or off. It is
activated automatically when an airbag is
deployed.
The switch is located on the center con-
sole.
1Hazard warning flasher switchSwitching on the hazard warning
flasher
�
Press the hazard warning flasher
switch.
All the turn signals will blink.
Switching off the hazard warning
flasher
�
Press hazard warning flasher switch
again.iWith the hazard warning flasher acti-
vated and the combination switch set
for either left or right turn, only the re-
spective left or right turn signals will
operate when the SmartKey in the
starter switch is in position1 or2.
Page 112 of 376
.
1Reset button")
112 Controls in detailInstrument cluster
�Instrument clusterA full view illustration of the instrument
cluster can be found in the “At a glance”
section of this manual (
�page 24).
1Reset button
The instrument cluster is activated when
you:
�
open a door
�
turn on the ignition
�
press reset button1
�
switch on the exterior lamps
You can change the instrument cluster set-
tings in the Instrument cluster submenu of
the control system (
�page 127).
Instrument cluster illumination
Use the reset button to adjust the illumina-
tion brightness for the instrument cluster.
To brighten illumination�
Turn reset button1 in the instrument
cluster clockwise.
The instrument cluster illumination will
brighten.To dim illumination
�
Turn reset button1 in the instrument
cluster counterclockwise.
The instrument cluster illumination will
dim.
Coolant temperature display
iThe instrument cluster illumination is
dimmed or brightened automatically to
suit ambient light conditions.
The instrument cluster illumination will
also be adjusted automatically when
you switch on the vehicle’s exterior
lamps.
Warning!
G
�
Driving when your engine is badly over-
heated can cause some fluids which
may have leaked into the engine com-
partment to catch fire. You could be se-
riously burned.
�
Steam from an overheated engine can
cause serious burns and can occur just
by opening the hood. Stay away from
the engine if you see or hear steam com-
ing from it.
Turn off the engine, get out of the vehicle
and do not stand near the vehicle until the
engine has cooled down.