Page 175 of 442
175 Controls in detail
Climate control
Rear air vents
The storage compartment between the
front seats can be ventilated (
�page 244).
Item
1
Climate control panel
2
Thumbwheel for air volume control
for left center air vent
3
Left center air vent, adjustable
4
Center air vent, fixed
5
Right center air vent, adjustable
6
Thumbwheel for air volume control
for right center air vent
7
Thumbwheel for air volume control
for adding cold air
8
Thumbwheel for air volume control
for side air vent
9
Side defroster vent, fixed
a
Side air vent, adjustable
iFor draft-free ventilation, move the
sliders for the center vents 3 and 5
to the middle position.
Item
1
Left rear center air vent, adjustable
2
Right rear center air vent, adjust-
able
3
Thumbwheel for air volume control
for right rear center air vent
4
Thumbwheel for air volume control
for left rear center air vent
Page 179 of 442
179 Controls in detail
Climate control
Adjusting center air vents:
The thumbwheels for left2 and right6
center air vents are automatically posi-
tioned for optimum interior airflow. In this
position, center air vent4 and adjustable
left and right center vents3 and5 are
fully opened.
Heating:
Only in manual mode is it possible to lower
the temperature in the headroom by regu-
lating the cold-airflow using
thumbwheel7 (
�page 174).Windshield fogged on the outside
�
Switch the windshield wipers on
(�page 48).
�
Press the Ubutton.
The indicator lamp on the button
comes on.
Adjusting air volume
Adjusting manually
Five blower speeds are available.�
Press� to decrease orQ to in-
crease air volume to the desired level.
The
Auto
display disappears and the
automatic mode is switched off. The
selected blower speed is shown in the
display.Adjusting automatically
�
Press the U button.
The air volume is adjusted automatical-
ly.
Defrosting
Activating�
Press buttonP.
The indicator lamp on the button
comes on.
or
�
Switch off air recirculation, if selected.
Press buttonO.
The indicator lamp on the button goes
out.iThese settings should only be selected
for a short time.
��
Page 185 of 442
185 Controls in detail
Automatic climate control*
Item
1
Automatic climate control panel
2
Thumbwheel for air volume control
for left center air vent
3
Left center air vent, adjustable
4
Air vent, fixed
5
Right center air vent, adjustable
6
Thumbwheel for air volume control
for right center air vent
7
Thumbwheel for air volume control
for adding cold air
8
Thumbwheel for air volume control
for side air vent
9
Side defroster vent, fixed
a
Side air vent, adjustable
Item
1
Thumbwheel for air volume control
for side air vent
2
Side air vent, adjustable
Item
1
Left rear center air vent, adjustable
2
Right rear center air vent, adjust-
able
3
Air volume control for right rear
center air vent
4
Temperature rocker switch, right
5
Display
6
Temperature rocker switch, left
7
Air volume control for left rear cen-
ter air vent
Page 189 of 442
189 Controls in detail
Automatic climate control*
Increasing�
Push top of temperature control rocker
switch3 and / or5.
The automatic climate control system
will correspondingly adjust the interior
air temperature.
Decreasing
�
Push bottom of temperature control
rocker switch3 and / or5.
The automatic climate control system
will correspondingly adjust the interior
air temperature.
Heating:
Only in manual air distribution mode is it
possible to lower the temperature in the
headroom by adding outside air using
thumbwheel7 (
�page 184) in the dash-
board.
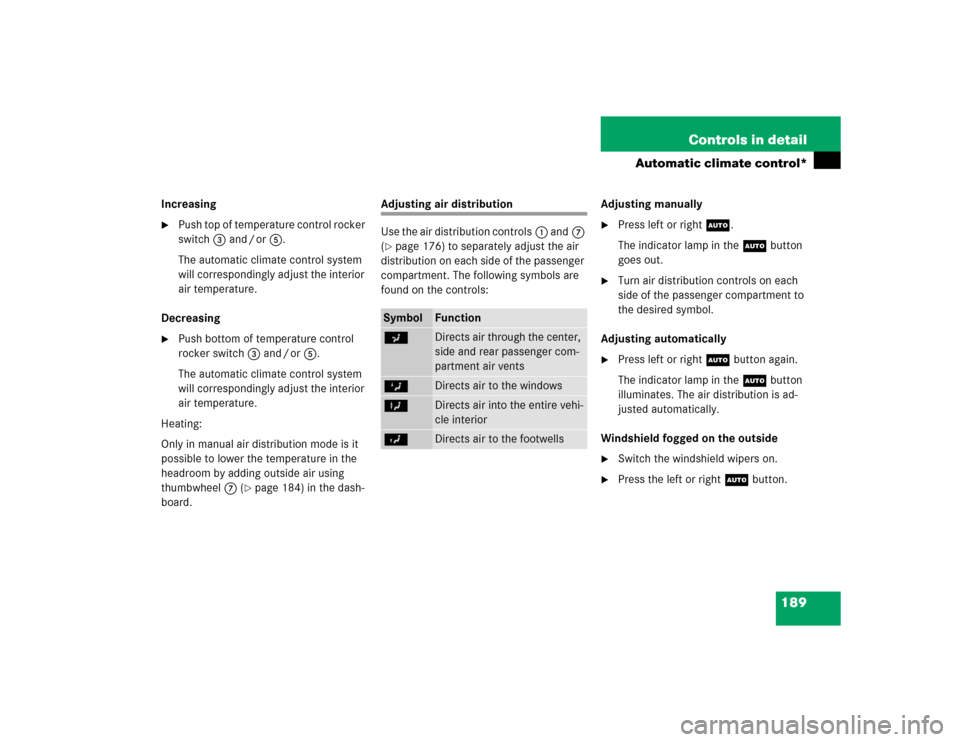
Adjusting air distribution
Use the air distribution controls1 and7
(�page 176) to separately adjust the air
distribution on each side of the passenger
compartment. The following symbols are
found on the controls:Adjusting manually
�
Press left or rightU.
The indicator lamp in theU button
goes out.
�
Turn air distribution controls on each
side of the passenger compartment to
the desired symbol.
Adjusting automatically
�
Press left or rightU button again.
The indicator lamp in theU button
illuminates. The air distribution is ad-
justed automatically.
Windshield fogged on the outside
�
Switch the windshield wipers on.
�
Press the left or rightU button.
Symbol
Function
a
Directs air through the center,
side and rear passenger com-
partment air vents
Z
Directs air to the windows
X
Directs air into the entire vehi-
cle interior
Y
Directs air to the footwells
Page 195 of 442
195 Controls in detail
Automatic climate control*
The residual heat is automatically turned
off�
when the ignition is switched on
�
after about 30 minutes
�
if the battery voltage drops
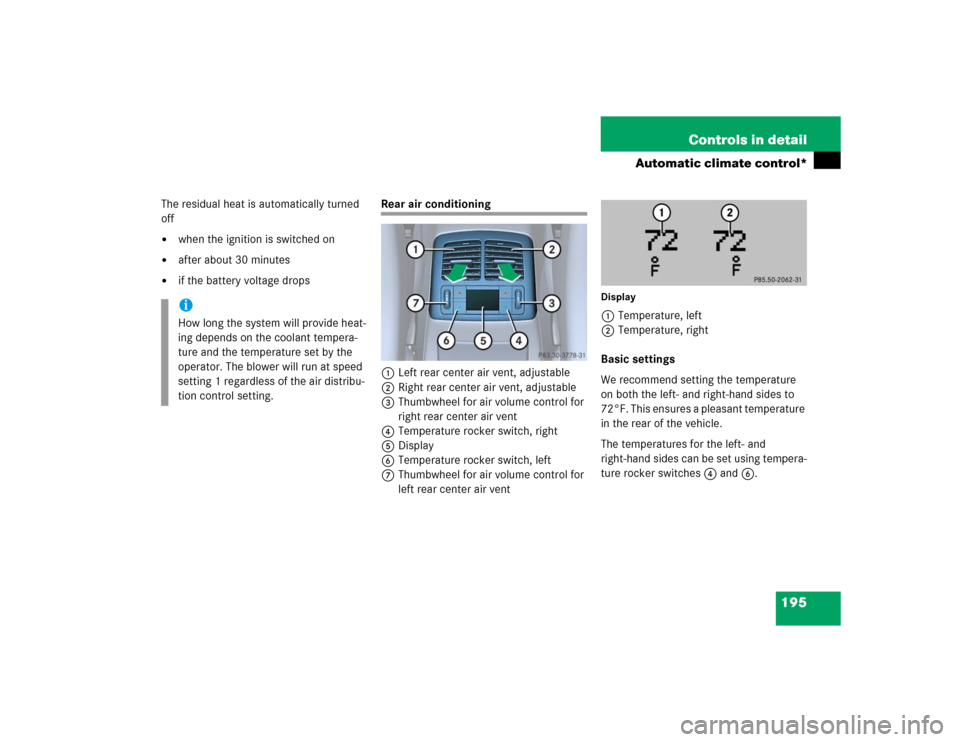
Rear air conditioning
1Left rear center air vent, adjustable
2Right rear center air vent, adjustable
3Thumbwheel for air volume control for
right rear center air vent
4Temperature rocker switch, right
5Display
6Temperature rocker switch, left
7Thumbwheel for air volume control for
left rear center air vent
Display1Temperature, left
2Temperature, right
Basic settings
We recommend setting the temperature
on both the left- and right-hand sides to
72°F. This ensures a pleasant temperature
in the rear of the vehicle.
The temperatures for the left- and
right-hand sides can be set using tempera-
ture rocker switches4 and6.
iHow long the system will provide heat-
ing depends on the coolant tempera-
ture and the temperature set by the
operator. The blower will run at speed
setting 1 regardless of the air distribu-
tion control setting.
Page 211 of 442
211 Controls in detail
Driving systems
�Driving systems
The following driving systems are ex-
plained on the following pages:�
Cruise control and Distronic*, with
which the vehicle can maintain a preset
speed
�
Airmatic* adjusts the vehicle suspen-
sion characteristics automatically and
controls the vehicle level
�
Parktronic system*, which assists the
driver during parking maneuvers
The BAS, ABS, ESP and SBC are described
in the “Safety and Security” section
(
�page 74).
Cruise control
The cruise control automatically maintains
the speed you set for your vehicle.
Use of cruise control is recommended for
driving at a constant speed for extended
periods of time. You can set any speed
over 20 mph (30 km / h).
The cruise control function is operated by
means of the cruise control lever.
The cruise control lever is the uppermost
lever found on the left-hand side of the
steering column (
�page 20).
Warning!
G
Cruise control is a convenience system de-
signed to assist the driver during vehicle op-
eration. The driver is and must always
remain responsible for the vehicle speed
and for safe brake operation.
Only use cruise control if the road, traffic
and weather conditions make it advisable to
travel at a steady speed.�
The use of cruise control can be danger-
ous on winding roads or in heavy traffic
because conditions do not allow safe
driving at a steady speed.
�
The use of cruise control can be danger-
ous on slippery roads. Rapid changes in
tire traction can result in wheel spin and
loss of control.
�
Deactivate cruise control when driving
in fog.
The “Resume” function should only be oper-
ated if the driver is fully aware of the previ-
ously set speed and wishes to resume this
particular preset speed.
Page 215 of 442
215 Controls in detail
Driving systems
Warning!
G
Distronic cannot take street and traffic con-
ditions into account. Only use Distronic if
the road, weather and traffic conditions
make it advisable to travel at a steady
speed.Warning!
G
Use of Distronic can be dangerous on slip-
pery roads. Rapid changes in tire traction
can result in wheel spin and loss of control.
Distronic does not act upon adverse sight
distance conditions. Do not use Distronic
during conditions of fog and heavy rain,
snow or sleet.
Warning!
G
Close attention to road and traffic condi-
tions is imperative at all times, regardless of
whether or not Distronic is activated.
Use of Distronic can be dangerous on wind-
ing roads or in heavy traffic because condi-
tions do not allow safe driving at a steady
speed.
Distronic will not react to stationary objects
in the roadway (e.g. a stopped vehicle in a
traffic jam or a disabled vehicle). Distronic
will also not respond to oncoming vehicles.
Switch off Distronic:�
when changing from the left to the right
lane if vehicles are moving more slowly
in the left lane
�
when entering a turn lane or highway off
ramp
�
in complex driving situations, such as in
highway construction zones
In these situations, Distronic will continue to
maintain the set speed unless deactivated.
Distronic is designed and intended only to
maintain a set speed and keep a set dis-
tance from moving objects in front of it.Warning!
G
The “Resume” function should only be oper-
ated if the driver is fully aware of the previ-
ously set speed and wishes to resume this
particular preset speed.
Page 221 of 442
221 Controls in detail
Driving systems
Deactivating Distronic
There are several ways to deactivate the
Distronic system:�
Briefly tip the cruise control lever in the
direction of arrow3 (
�page 218).
or
�
Step on the brake pedal.
Distronic will be deactivated. The last
speed set will be stored in memory.Distronic deactivates automatically when:
�
you set the parking brake
�
you drive slower than 25 mph
(40 km / h)
�
the ESP is active (
�page 76) or you de-
activate the ESP
�
you move the transmission selector le-
ver into positionN
A signal will sound. The
Distronic off
message appears in the multifunction
display for approximately five seconds.Setting the following distance in
Distronic
You can set the specified following dis-
tance for Distronic by varying the time set-
ting between 1.0 and 2.0 seconds. Using
this time setting and the current speed of
your vehicle, Distronic calculates and sets
the required following distance to the vehi-
cle ahead. The set distance will be shown
in the multifunction display field.
The thumbwheel for making the time set-
ting is located on the lower section of the
center console.
iThe following message will appear in
the multifunction display for approxi-
mately five seconds:
Distronic off
.
The last stored speed is deleted when
you turn off the engine.
Warning!
G
Distronic switches off and releases the
brakes when the vehicle decelerates below
the minimum speed of approximately
25 mph (40 km / h) by operation of the sys-
tem. At that time the driver must apply the
brakes in order to reduce vehicle speed fur-
ther or bring it to a stop.
Warning!
G
It is up to the driver to exercise discretion to
select the appropriate setting given road
conditions, traffic, driver’s preferred driving
style and applicable laws and driving recom-
mendations for safe following distance.