Page 164 of 442

164 Controls in detailAutomatic transmissionProgram mode selector switch
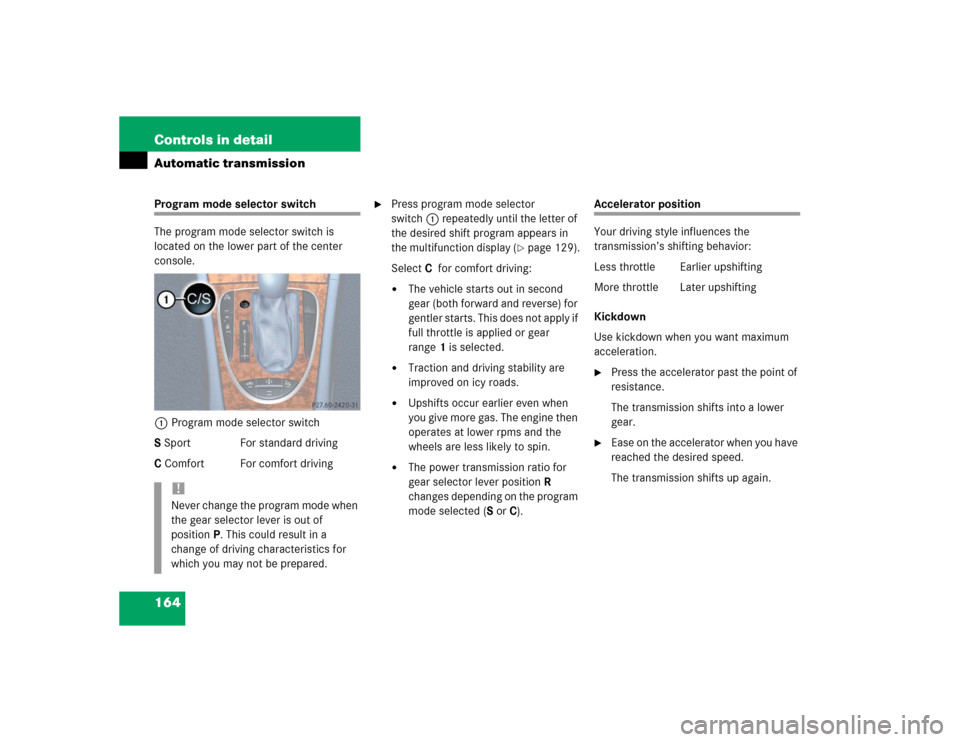
The program mode selector switch is
located on the lower part of the center
console.
1Program mode selector switch
S Sport For standard driving
C Comfort For comfort driving
�
Press program mode selector
switch1 repeatedly until the letter of
the desired shift program appears in
the multifunction display (
�page 129).
SelectCfor comfort driving:
�
The vehicle starts out in second
gear (both forward and reverse) for
gentler starts. This does not apply if
full throttle is applied or gear
range1 is selected.
�
Traction and driving stability are
improved on icy roads.
�
Upshifts occur earlier even when
you give more gas. The engine then
operates at lower rpms and the
wheels are less likely to spin.
�
The power transmission ratio for
gear selector lever positionR
changes depending on the program
mode selected (SorC).
Accelerator position
Your driving style influences the
transmission’s shifting behavior:
Less throttle Earlier upshifting
More throttle Later upshifting
Kickdown
Use kickdown when you want maximum
acceleration.�
Press the accelerator past the point of
resistance.
The transmission shifts into a lower
gear.
�
Ease on the accelerator when you have
reached the desired speed.
The transmission shifts up again.
!Never change the program mode when
the gear selector lever is out of
positionP. This could result in a
change of driving characteristics for
which you may not be prepared.
Page 165 of 442

165 Controls in detail
Automatic transmission
Manual shift program E 55 AMG
In the manual shift program mode you can
change the gears manually (
�page 162)
on the steering wheel or by using the gear
selector lever (
�page 159).
Allow engine to warm up under low load
use. Do not place full load on the engine
until the operating temperature has been
reached. Shift into reverse gear only when
the vehicle is stopped.Program mode selector switch
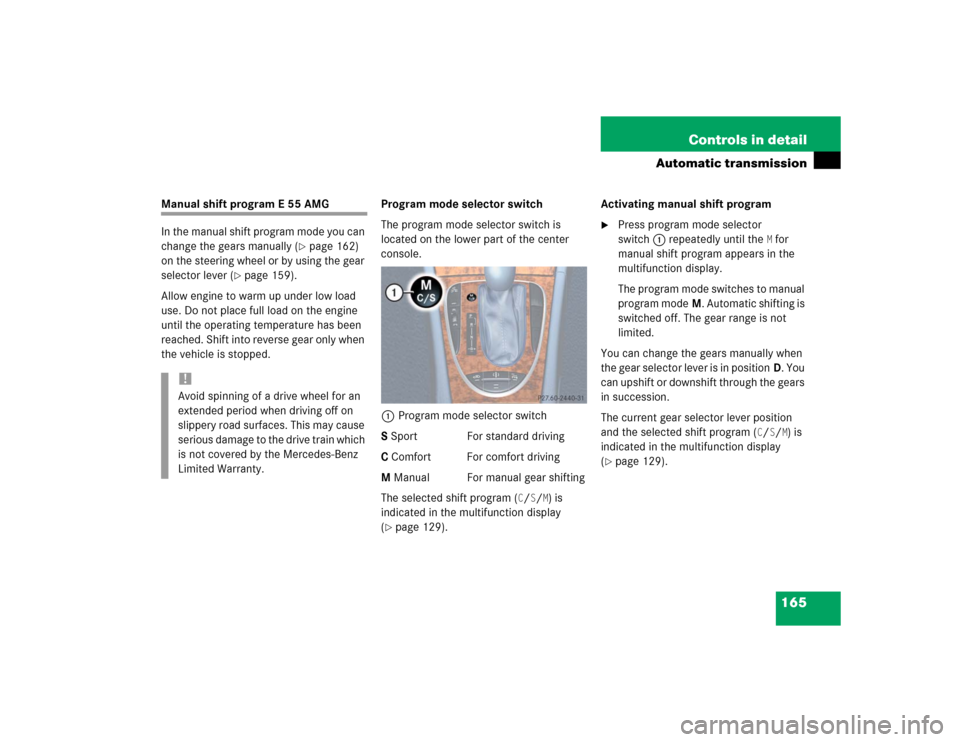
The program mode selector switch is
located on the lower part of the center
console.
1Program mode selector switch
S Sport For standard driving
C Comfort For comfort driving
M Manual For manual gear shifting
The selected shift program (
C/S/M) is
indicated in the multifunction display
(
�page 129).Activating manual shift program
�
Press program mode selector
switch1 repeatedly until the
M for
manual shift program appears in the
multifunction display.
The program mode switches to manual
program modeM. Automatic shifting is
switched off. The gear range is not
limited.
You can change the gears manually when
the gear selector lever is in positionD. You
can upshift or downshift through the gears
in succession.
The current gear selector lever position
and the selected shift program (
C/S/M) is
indicated in the multifunction display
(
�page 129).
!Avoid spinning of a drive wheel for an
extended period when driving off on
slippery road surfaces. This may cause
serious damage to the drive train which
is not covered by the Mercedes-Benz
Limited Warranty.
Page 166 of 442

166 Controls in detailAutomatic transmissionDownshifting�
Briefly press the gear selector lever to
the left in theD-direction
(�page 159).
or
�
Press button1 on the left side of the
steering wheel (
�page 162).
The transmission shifts to the next
lower gear.Upshifting
�
Briefly press the gear selector lever to
the right in theD+direction
(�page 159).
or
�
Press button2 on the right side of the
steering wheel (
�page 162).
The transmission shifts to the next
higher gear.Kickdown
The kickdown can also be used for
maximum acceleration when driving in the
manual program mode.
�
Press the accelerator past the point of
resistance.
The transmission shifts to a lower gear.
�
Shift up once the desired speed has
been reached.
Warning!
G
On slippery road surfaces, never downshift
in order to obtain braking action. This could
result in drive wheel slip and reduced
vehicle control. Your vehicle’s ABS will not
prevent this type of loss of control.
iWhen driving at full throttle, the trans-
mission shifts to the next higher gear
when maximum engine speed has been
reached.
When you brake or stop, the transmis-
sion shifts down to a gear from which
you can easily accelerate or take off.
Page 168 of 442

168 Controls in detailGood visibility
�Good visibilityInformation on the windshield wipers
(�page 48) and for setting the rear view
mirrors (
�page 38) is found in the “Get-
ting started” section.
Rear view mirror
Automatic antiglare rear view mirror
The reflection brightness of the exterior
rear view mirror on the driver’s side and
the interior rear view mirror will respond
automatically to glare when:�
the ignition is switched on, and
�
incoming light from headlamps falls on
the sensor in the interior rear view mir-
ror
The rear view mirror will not react if
�
reverse gear is engaged
�
the interior lighting is turned on
Warning!
G
The automatic antiglare function does not
react if incoming light is not aimed directly
at sensors in the interior rear view mirror.
The interior rear view mirror and the exterior
rear view mirror on the driver’s side do not
react, for example, if the rear window sun-
shade is in raised position.
Glare can endanger you and others.Warning!
G
In the case of an accident liquid electrolyte
may escape from the mirror housing if the
mirror glass breaks.
Electrolyte has an irritating effect. Do not al-
low the liquid to come into contact with
eyes, skin, clothing, or respiratory system.
In case it does, immediately flush affected
area with water, and seek medical help if
necessary.
Warning!
G
Exercise care when using the passenger
side exterior rear view mirror. The mirror
surface is convex (outwardly curved surface
for a wider field of view). Objects in mirror
are closer than they appear. Check your in-
terior rear view mirror or glance over your
shoulder before changing lanes.!Electrolyte drops coming into contact
with the vehicle paint finish can be
completely removed only while in the
liquid state by applying plenty of water.
Page 169 of 442

169 Controls in detail
Good visibility
Activating exterior rear view mirror
parking position
Follow these steps to activate the mirror
parking position so that the passen-
ger-side exterior rear view mirror will be
turned downward to the stored position.�
Make sure you have stored a parking
position for the passenger-side exterior
rear view mirror (
�page 118).
�
Make sure the
Mirror adjustment
parking aid function in the
Conve-
nience
submenu of the control system
is switched on (
�page 152).
�
Switch on ignition (if not already on).
�
Press button2 for the passenger-side
exterior rear view mirror.
�
Place the gear selector lever in reverse
gearR.
The passenger-side exterior rear view
mirror will be turned downward to the
stored position.1Driver’s side exterior rear view mirror
button
2Passenger-side exterior rear view
mirror button
The exterior rear view mirror returns to its
previously stored driving position:
�
ten seconds after you put the gear se-
lector lever out of positionR
�
immediately once your vehicle exceeds
a speed of approximately 6 mph
(10 km/h)
�
immediately when you press button1
for driver’s side mirror.
Windshield wipers
Information on the windshield wipers is
found in the “Getting started” section
(�page 48).
A rain sensor automatically controls the
windshield wipers depending on how wet
the windshield is.
�
Switch on ignition.
�
Set the wiper switch to positionI
(�page 48).
After the initial wipe, pauses between
wipes are automatically controlled by the
rain sensor.
iIntermittent wiping is interrupted when
the vehicle is at a standstill and a front
door is opened.
Page 170 of 442

170 Controls in detailGood visibility
Headlamp cleaning system*
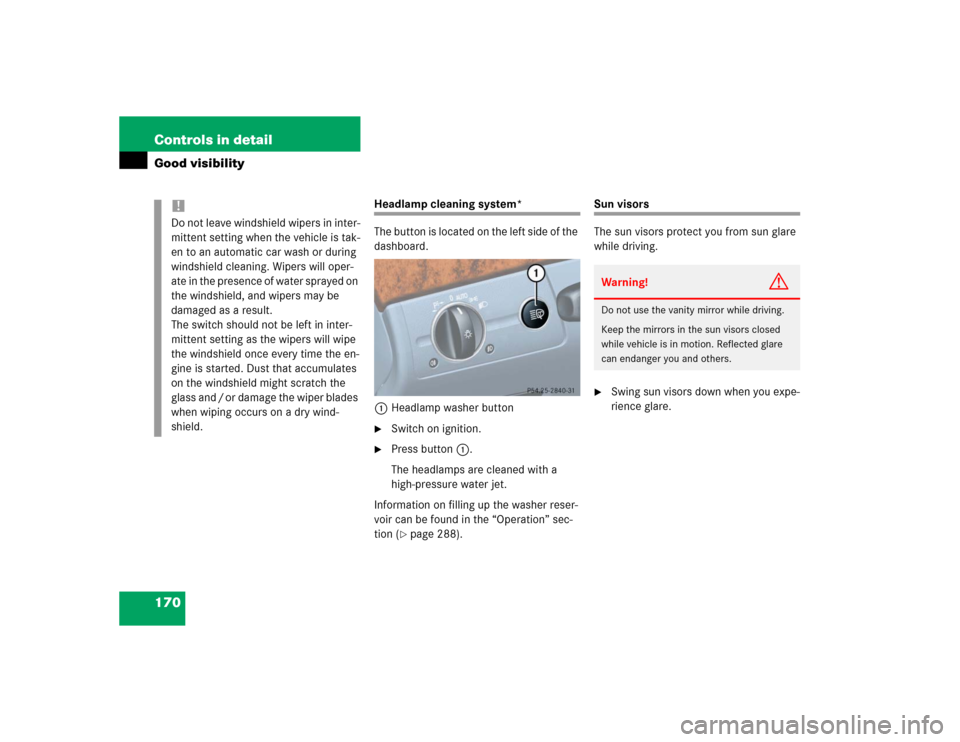
The button is located on the left side of the
dashboard.
1Headlamp washer button�
Switch on ignition.
�
Press button1.
The headlamps are cleaned with a
high-pressure water jet.
Information on filling up the washer reser-
voir can be found in the “Operation” sec-
tion (�page 288).
Sun visors
The sun visors protect you from sun glare
while driving.�
Swing sun visors down when you expe-
rience glare.
!Do not leave windshield wipers in inter-
mittent setting when the vehicle is tak-
en to an automatic car wash or during
windshield cleaning. Wipers will oper-
ate in the presence of water sprayed on
the windshield, and wipers may be
damaged as a result.
The switch should not be left in inter-
mittent setting as the wipers will wipe
the windshield once every time the en-
gine is started. Dust that accumulates
on the windshield might scratch the
glass and / or damage the wiper blades
when wiping occurs on a dry wind-
shield.
Warning!
G
Do not use the vanity mirror while driving.
Keep the mirrors in the sun visors closed
while vehicle is in motion. Reflected glare
can endanger you and others.
Page 173 of 442

173 Controls in detail
Good visibility
Rear window defroster
The rear window defroster uses a large
amount of power. To keep the battery
drain to a minimum, switch off the defrost-
er as soon as the rear window is clear. The
defroster is automatically deactivated af-
ter approximately 6 to 17 minutes of oper-
ation depending on the outside
temperature.
Activating�
Press buttonFon the climate con-
trol panel (
�page 173) or the automat-
ic climate control panel (
�page 176).
The indicator lamp on the button
comes on.Deactivating
�
Press buttonF again.
The indicator lamp on the button goes
out.
!Always guide the sunblind by hand. Do
not let it snap back, as the retractor
could be damaged.
Warning!
G
Any accumulation of snow and ice should be
removed from the rear window before driv-
ing. Visibility could otherwise be impaired,
endangering you and others.!If the rear window defroster switches
off too soon and the indicator lamp
starts flashing, this means that too
many electrical consumers are operat-
ing simultaneously and there is insuffi-
cient voltage in the battery. The system
responds automatically by deactivating
the rear window defroster.
As soon as the battery has sufficient
voltage, the rear window defroster au-
tomatically turns itself back on.
Page 175 of 442
175 Controls in detail
Climate control
Rear air vents
The storage compartment between the
front seats can be ventilated (
�page 244).
Item
1
Climate control panel
2
Thumbwheel for air volume control
for left center air vent
3
Left center air vent, adjustable
4
Center air vent, fixed
5
Right center air vent, adjustable
6
Thumbwheel for air volume control
for right center air vent
7
Thumbwheel for air volume control
for adding cold air
8
Thumbwheel for air volume control
for side air vent
9
Side defroster vent, fixed
a
Side air vent, adjustable
iFor draft-free ventilation, move the
sliders for the center vents 3 and 5
to the middle position.
Item
1
Left rear center air vent, adjustable
2
Right rear center air vent, adjust-
able
3
Thumbwheel for air volume control
for right rear center air vent
4
Thumbwheel for air volume control
for left rear center air vent