Page 25 of 442
25 At a glance
Center console
�Center console
Upper part
Item
Page
1
Automatic climate control*
184
2
COMAND system, see sep-
arate operating instruc-
tions
3
Seat heater*, front passen-
ger side
113
4
Electronic Stability Pro-
gram (ESP) control switch
78
5
Central locking switch
107
6
Opening/closing button
for storage tray or CD
changer*, see separate op-
erating instructions
243
7
Rear seat head restraints
switch, folding down
110
Item
Page
8
Rear window sunshade*
78
9
Seat heater*, driver’s side
113
a
Hazard warning flasher
switch
123
b
PASSENGER AIRBAG OFF
indicator lamp
67
Page 69 of 442

69 Safety and Security
Occupant safety
Installation of infant and child restraint
systems
This vehicle is equipped with tether an-
chorages for a top tether strap at each of
the rear seating positions.Not foldable rear seat backrest
1Cover
�
Remove cover1 from anchorage ring.
�
Guide tether strap between head re-
straint and top of the seat back.
�
Head restraint must be positioned such
that the top tether strap can pass freely
between the head restraint and the top
of the seat back.
Make sure the tether strap is not twist-
ed.
Warning!
G
When using a BabySmart
TM compatible
child seat on the front passenger seat, the
passenger front airbag will not deploy only if
the PASSENGER AIRBAG OFF indicator lamp
remains illuminated.
Please be sure to check the indicator every
time you use the special system child seat.
Should the light go out while the restraint is
installed, please check installation. If the
light remains out, do not use the
BabySmart
TM restraint to transport children
on the front passenger seat until the system
has been repaired.
Warning!
G
Do not place powered-on laptops, cell
phones and like electronic devices on the
front passenger seat. Signals from such de-
vices may interfere with the BabySmart
TM
system. Such signal interference may cause
the PASSENGER AIRBAG OFF indicator lamp
not to come on during self-test or be contin-
uously lit, indicating that the system is not
functioning.
��
Page 70 of 442
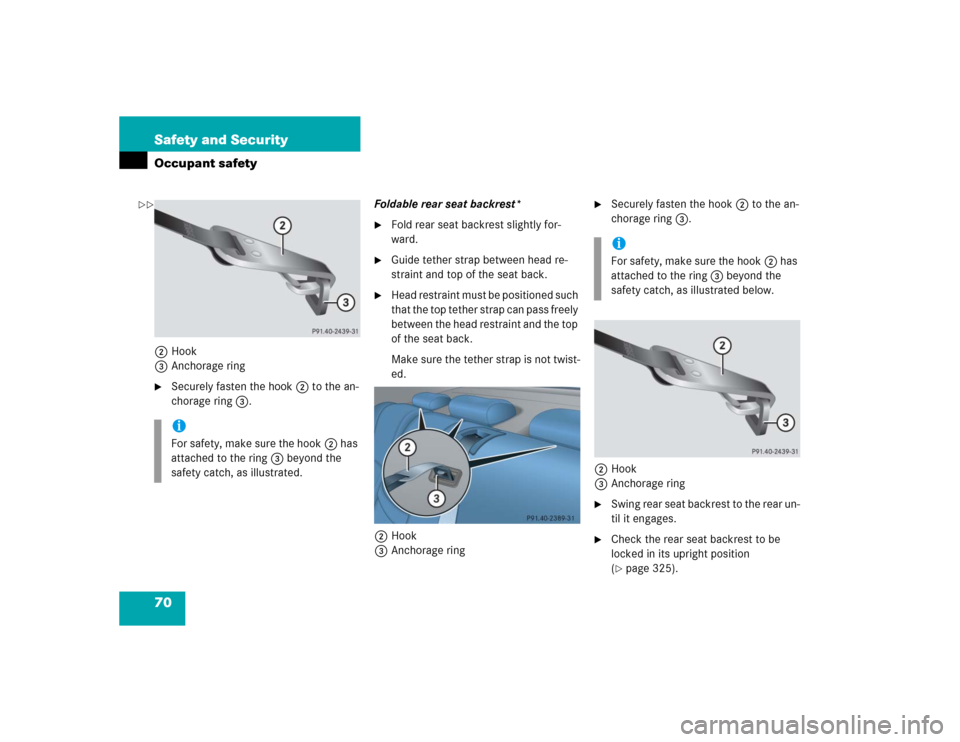
70 Safety and SecurityOccupant safety2Hook
3Anchorage ring�
Securely fasten the hook2 to the an-
chorage ring3.Foldable rear seat backrest*
�
Fold rear seat backrest slightly for-
ward.
�
Guide tether strap between head re-
straint and top of the seat back.
�
Head restraint must be positioned such
that the top tether strap can pass freely
between the head restraint and the top
of the seat back.
Make sure the tether strap is not twist-
ed.
2Hook
3Anchorage ring
�
Securely fasten the hook2 to the an-
chorage ring3.
2Hook
3Anchorage ring
�
S w i n g r e a r s e a t b a c k r e s t t o t h e r e a r u n -
til it engages.
�
Check the rear seat backrest to be
locked in its upright position
(�page 325).
iFor safety, make sure the hook2 has
attached to the ring3 beyond the
safety catch, as illustrated.
iFor safety, make sure the hook2 has
attached to the ring3 beyond the
safety catch, as illustrated below.
��
Page 110 of 442
110 Controls in detailSeatsRear seat head restraints
Folding head restraints back with
switch in the center console
The rear seat head restraints can be folded
backward for increased visibility.
1Head restraint release switch
�
Make sure the ignition is switched on.
All the lights in the instrument cluster
come on.
�
Press the symbol-side on rocker
switch1to release the head re-
straints.
The head restraints will fold backward.Placing head restraints upright
�
Pull the head restraint forward until it
locks into position.
!The rear seat head restraints cannot be
adjusted.
Warning!
G
For safety reasons, always drive with the
rear head restraints in the upright position
when the rear seats are occupied.
Keep the area around head restraints clear
of articles (e.g. clothing) to not obstruct the
folding operation of the head restraints.
!Make sure the head restraints engage
when placing them upright. Otherwise
their protective function cannot be as-
sured.
Page 233 of 442
233 Controls in detail
Loading
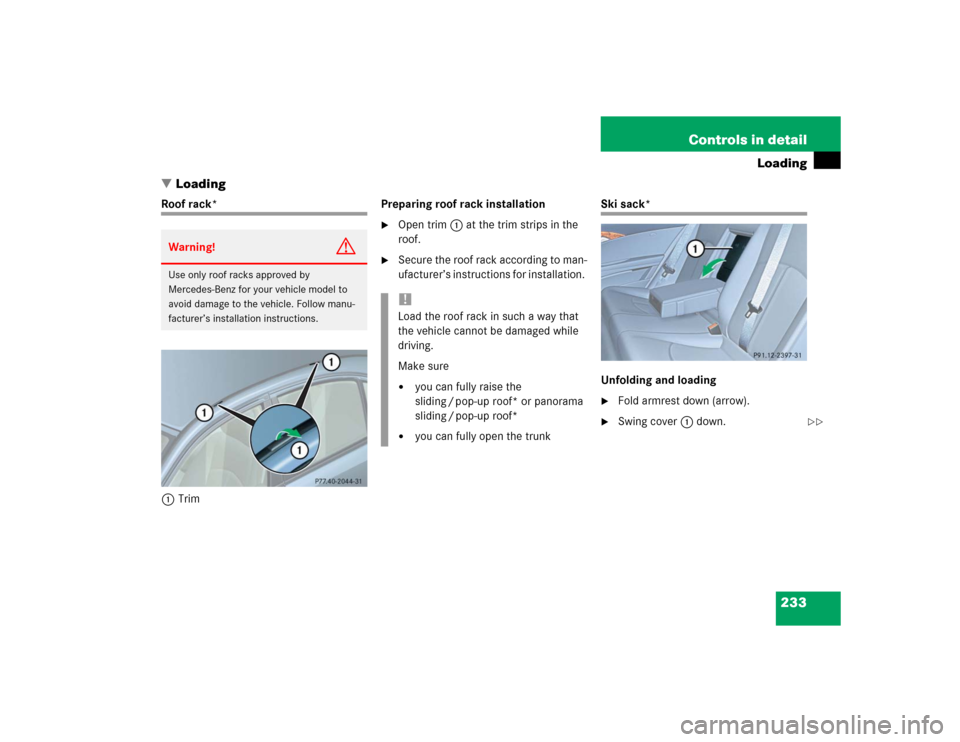
�Loading
Roof rack*
1TrimPreparing roof rack installation
�
Open trim1 at the trim strips in the
roof.
�
Secure the roof rack according to man-
ufacturer’s instructions for installation.
Ski sack*
Unfolding and loading�
Fold armrest down (arrow).
�
Swing cover1 down.
Warning!
G
Use only roof racks approved by
Mercedes-Benz for your vehicle model to
avoid damage to the vehicle. Follow manu-
facturer’s installation instructions.
!Load the roof rack in such a way that
the vehicle cannot be damaged while
driving.
Make sure�
you can fully raise the
sliding / pop-up roof* or panorama
sliding / pop-up roof*
�
you can fully open the trunk
��
Page 234 of 442
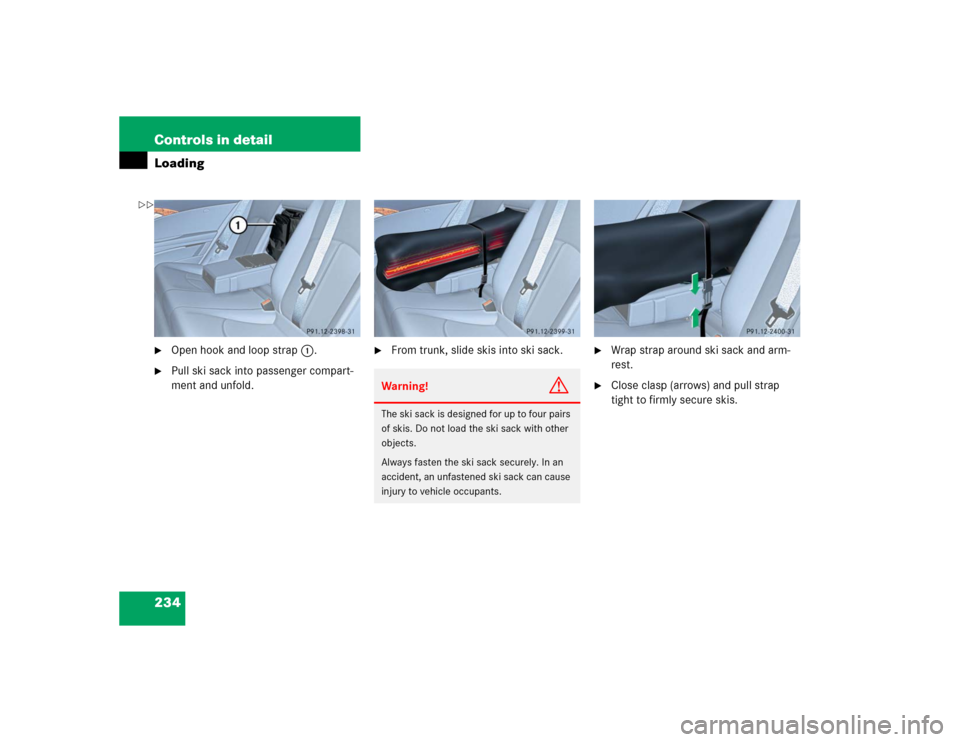
234 Controls in detailLoading�
Open hook and loop strap1.
�
Pull ski sack into passenger compart-
ment and unfold.
�
From trunk, slide skis into ski sack.
�
Wrap strap around ski sack and arm-
rest.
�
Close clasp (arrows) and pull strap
tight to firmly secure skis.
Warning!
G
The ski sack is designed for up to four pairs
of skis. Do not load the ski sack with other
objects.
Always fasten the ski sack securely. In an
accident, an unfastened ski sack can cause
injury to vehicle occupants.
��
Page 235 of 442
235 Controls in detail
Loading
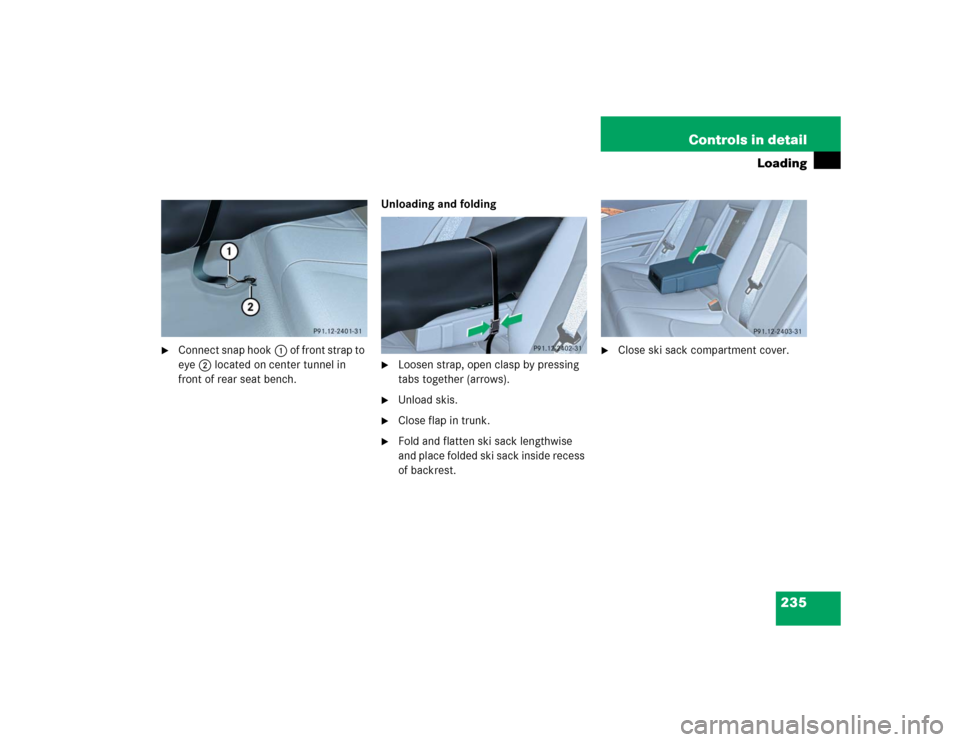
�
Connect snap hook1 of front strap to
eye2 located on center tunnel in
front of rear seat bench.Unloading and folding
�
Loosen strap, open clasp by pressing
tabs together (arrows).
�
Unload skis.
�
Close flap in trunk.
�
Fold and flatten ski sack lengthwise
and place folded ski sack inside recess
of backrest.
�
Close ski sack compartment cover.
Page 236 of 442

236 Controls in detailLoadingRemoval of ski sack
For removal of the ski sack we recommend
that you contact an authorized
Mercedes-Benz Center.
Split rear bench seat*
To expand the trunk, you can fold down the
left and right rear seat backrests.
The two sections can be folded down sep-
arately to enlarge the trunk.Folding the backrest forward
1Release handle
Warning!
G
Never drive vehicle with trunk open while
the ski sack is removed. Deadly carbon
monoxide (CO) gases may enter vehicle in-
terior, resulting in unconsciousness and
death.iTo prevent unauthorized persons from
access to the trunk, always close the
cover.
Warning!
G
When expanding the luggage compartment,
always fold the seat cushions fully forward.
Unless you are transporting cargo, the back-
rests must remain properly locked in the up-
right position.
In an accident, during hard braking or sud-
den maneuvers, loose items will be thrown
around inside the vehicle, and cause injury
to vehicle occupants unless the items are
securely fastened in the vehicle.
Always use the cargo tie down rings
(�page 241).
!You must always release the seat cush-
ion and fold it up before folding the seat
backrests forward. The upholstery on
the seat backrest may otherwise be
damaged.