Page 245 of 442
245 Controls in detail
Useful features
�
To open air vent slide the lever up.
�
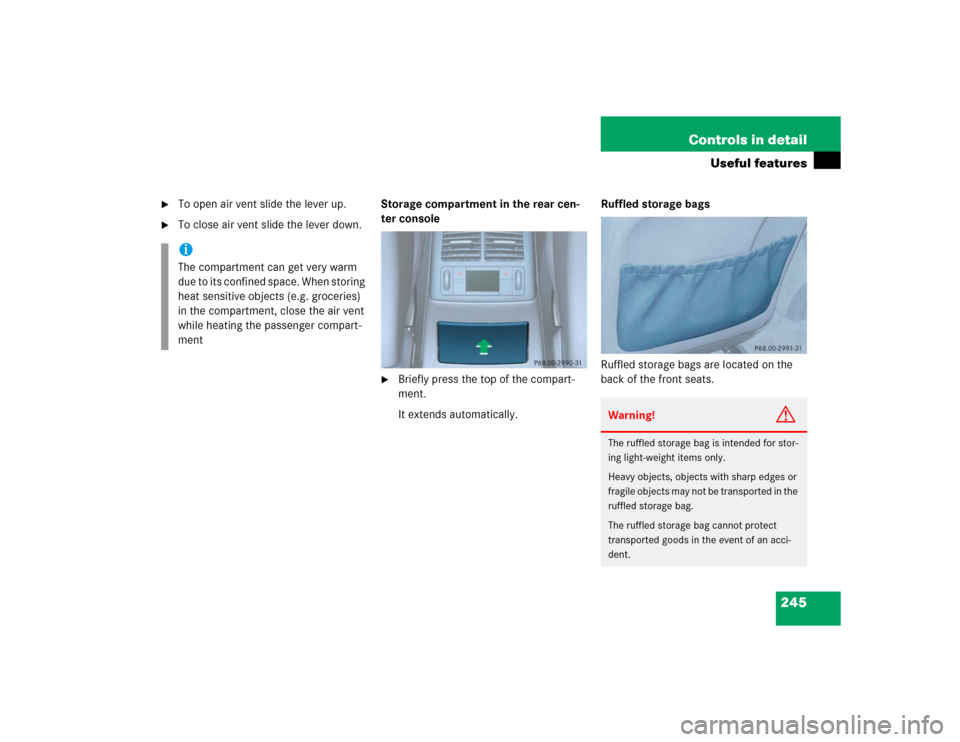
To close air vent slide the lever down.Storage compartment in the rear cen-
ter console
�
Briefly press the top of the compart-
ment.
It extends automatically.Ruffled storage bags
Ruffled storage bags are located on the
back of the front seats.
iThe compartment can get very warm
due to its confined space. When storing
heat sensitive objects (e.g. groceries)
in the compartment, close the air vent
while heating the passenger compart-
ment
Warning!
G
The ruffled storage bag is intended for stor-
ing light-weight items only.
Heavy objects, objects with sharp edges or
fragile objects may not be transported in the
ruffled storage bag.
The ruffled storage bag cannot protect
transported goods in the event of an acci-
dent.
Page 247 of 442

247 Controls in detail
Useful features
Removing ashtray insert
�
Secure vehicle from movement by set-
ting the parking brake. Move the gear
selector lever to positionN.
Now you have more room to take out
the insert.
�
Push sliding button2 to the right and
hold.
�
Grip and remove insert from ashtray
frame.
Reinstalling ashtray insert
�
Install insert by pushing it back into
frame until it engages again.
Rear seat ashtrayOpening rear seat ashtray
�
Briefly press the top of the ashtray.
The ashtray opens.
Cigarette lighter
The cigarette lighter is located in the cen-
ter console compartment in front of the
armrest (
�page 26).
1Cigarette lighter
�
Turn ignition on.
�
Push in cigarette lighter1.
The lighter will pop out automatically
when hot. it in a convenient location in the vehi-
cle.
Warning!
G
Only use rubber mat in conjunction with
storing coins / tokens. Always remove rub-
ber mat and / or all other contents and rein-
sert ashtray insert before placing hot
cigarettes or other hot smoking materials in
this compartment.Warning!
G
Remove front ashtray only with vehicle
standing still. Set the parking brake to se-
cure vehicle from movement. Move gear se-
lector lever to positionN. With gear selector
lever in positionN, turn off the engine.
Page 248 of 442
248 Controls in detailUseful features
12-V socket*
The socket is located in the rear of the cen-
ter console storage compartment.
The socket can be used for accessories up
to a maximum of 180 W.
Heated steering wheel*
The steering wheel heating warms up the
leather area of the steering wheel.
The stalk with the heated steering wheel
switch is on the lower left-hand side of the
steering wheel.
1Indicator lamp
2Switching off
3Switching on
Warning!
G
Never touch the heating element or sides of
the lighter; they are extremely hot. Hold the
knob only.
When leaving the vehicle, always remove the
SmartKey from the starter switch, take the
SmartKey with KEYLESS-GO* with you, and
lock your vehicle. Do not leave children un-
attended in the vehicle, or with access to an
unlocked vehicle. Unsupervised use of vehi-
cle equipment may cause an accident
and / or serious personal injury.iThe lighter socket can be used to ac-
commodate electrical accessories up
to a maximum 85 W.
Page 259 of 442

259 Controls in detail
Useful features
Programming or reprogramming the in-
tegrated remote control
Step 1:�
Switch on ignition.
Step 2:
�
If you have previously programmed an
integrated signal transmitter button
and wish to retain its programming,
proceed to step 3. Otherwise, press
and hold the two outer signal transmit-
ter buttons1 and3 and release
them only when the indicator light be-
gins to flash after approximately 20
seconds (do not hold the button for
longer than 30 seconds). This proce-
dure erases any previous settings for
all three channels and initializes the
memory. If you later wish to program a
second and/or third hand-held trans-
mitter to the remaining two signal
transmitter buttons, do not repeat this
step and begin directly with step 3.
iCertain types of garage door openers
are incompatible with the integrated
opener. If you should experience diffi-
culties with programming the transmit-
ter, contact your authorized
Mercedes-Benz Center, or call
Mercedes-Benz Customer Assistance
Center (in the USA only) at
1-800-FOR-MERCedes, or Customer
Service (in Canada) at
1-800-387-0100.
iFor operation in the USA only:
This device complies with Part 15 of
the FCC Rules. Operation is subject to
the following two conditions:
(1) This device may not cause harmful
interference, and
(2) this device must accept any inter-
ference received, including interfer-
ence that may cause undesired
operation.
Any unauthorized modification to this
device could void the user’s authority
to operate the equipment.
��
Page 260 of 442
 away from the surface
of")
260 Controls in detailUseful featuresStep 3:�
Hold the end of the hand-held remote
control transmitter6 of the device
you wish to train approximately 2 to
5 in (5 to12 cm) away from the surface
of the integrated remote control locat-
ed on the interior rear view mirror,
keeping the indicator lamp4 in view.
Step 4:
�
Using both hands, simultaneously
press the hand-held transmitter
button5 and the desired integrated
signal transmitter button (1, 2
or3). Do not release the buttons until
completing step 5.
The indicator lamp4 on the integrat-
ed remote control will flash, first slowly
and then rapidly.Step 5:
�
When the indicator lamp4 flashes
rapidly, release both buttons.
Step 6:
�
Press and hold the just-trained inte-
grated signal transmitter button and
observe the indicator lamp4.
If the indicator lamp4 stays on con-
stantly, programming is complete and
your device should activate when the
integrated signal transmitter button is
pressed and released.Step 7:
�
To program the remaining two buttons,
repeat the steps above starting with
step 3.
iThe indicator lamp4 flashes the first
time the signal transmitter button is
programmed. If this button has already
been programmed, the indicator lamp
will only start flashing after 20 sec-
onds.
iIf the indicator lamp4 blinks rapidly
for about two seconds and then turns
to a constant light, continue with pro-
gramming steps 8 through 12 as your
garage door opener may be equipped
with the “rolling code” feature.
��
Page 261 of 442
 with the rolling code fea-
ture, follow these instructions after
comple")
261 Controls in detail
Useful features
Rolling code programming
To train a garage door opener (or other roll-
ing code devices) with the rolling code fea-
ture, follow these instructions after
completing the “Programming” portion
(steps 1 through 6) of this text. (A second
person may make the following training
procedures quicker and easier.)
Step 8:�
Locate “training” button on the garage
door opener motor head unit.
Exact location and color of the button
m a y v a r y b y g a r a g e d o o r o p e n e r b r a n d .
Depending on manufacturer, the “train-
ing” button may also be referred to as
“learn”or “smart” button. If there is dif-
ficulty locating the transmitting button,
refer to the garage door opener opera-
tor’s manual. Step 9:
�
Press “training” button on the garage
door opener motor head unit.
The “training light” is activated.
You have 30 seconds to initiate the follow-
ing step.
Step 10:
�
Firmly press, hold for two seconds and
release the programmed integrated
signal transmitter button (1, 2
or3).
Step 11:
�
Press, hold for two seconds and re-
lease same button a second time to
complete the training process.
Some garage door openers (or other rolling
code equipped devices) may require you to
perform this procedure a third time to
complete the training.Step 12:
�
Confirm the garage door operation by
pressing the programmed integrated
signal transmitter button (1, 2
or3).
Step 13:
�
To program the remaining two buttons,
repeat the steps above starting with
step 3.
Page 304 of 442

304 OperationVehicle careEngine cleaning
Prior to cleaning the engine compartment,
make sure to protect electrical compo-
nents and connectors from contact with
water and cleaning agents.
Corrosion protection, such as MB Anticor-
rosion Wax should be applied to the engine
compartment after every engine cleaning.
Before applying, all control linkage bush-
ings and joints should be lubricated. The
poly-V-belt and all pulleys should be pro-
tected from any wax.
Vehicle washing
Do not use hot water or wash your vehicle
in direct sunlight. Use only a mild car wash
detergent, such as Mercedes-Benz ap-
proved Car Shampoo.
Thoroughly spray the vehicle with a dif-
fused jet of water. Direct only a very weak
spray towards the ventilation intake. Use
plenty of water and rinse the sponge and
chamois frequently. Rinse with clear water and thoroughly dry
with a chamois. Do not allow cleaning
agents to dry on the finish.
Due to the width of the vehicle, fold in out-
side mirrors prior to running the vehicle
through an automatic car wash to prevent
damage to the mirrors.
In the winter, thoroughly remove all traces
of road salt as soon as possible.
When washing the undercarriage, do not
forget to clean the inner sides of the
wheels.Ornamental moldings
For regular cleaning and care of very dirty
chrome-plated parts, use a chrome clean-
er.
Headlamps, tail lamps, side markers,
turn signal lenses
Use a mild car wash detergent, such as
Mercedes-Benz approved Car Shampoo,
with plenty of water.
To prevent scratches, never apply strong
force and use only a soft, non-scratchy
cloth when cleaning the lenses. Do not at-
tempt to wipe dirty lenses with a dry cloth
or sponge.
iVehicles with KEYLESS-GO*:
If a door handle is hit by a strong jet of
water, and a SmartKey with KEY-
LESS-GO* is in close proximity, i.e.
within approximately 3 ft (approxi-
mately 1 m), the vehicle could be inad-
vertently locked or unlocked.
Page 339 of 442

339 Practical hints
What to do if …
Display symbol
Display messages
Possible cause
Possible solution
.
Marker light
,
front left
The front left side marker lamp is mal-
functioning.
�
Replace the bulb as soon as possible.
Marker light
front right
The front right side marker lamp is mal-
functioning.
�
Replace the bulb as soon as possible.
Park. light, front left
Back-up light on!
The left parking lamps are malfunction-
ing. A backup bulb is being used.
�
Visit an authorized Mercedes-Benz
Center as soon as possible.
Park. light,
front right
Back-up light on!
The right parking lamps are malfunction-
ing. A backup bulb is being used.
�
Visit an authorized Mercedes-Benz
Center as soon as possible.
Rear foglight
Back-up light on!
The rear fog lamp is malfunctioning. A
backup bulb is being used.
�
Replace the bulb as soon as possible.
Reverse light, left
The left reverse light is malfunctioning.
�
Replace the bulb as soon as possible.
Reverse light, right
The right backup lamp is malfunctioning.
�
Replace the bulb as soon as possible.
Switch off lights!
Lamps have been turned on although the
SmartKey in the starter switch is in posi-
tion 0.
�
Switch off the headlights.
Tail light, left
Back-up light on!
The left tail lamp is malfunctioning. A
backup bulb is being used.
�
Visit an authorized Mercedes-Benz
Center as soon as possible.
Tail light, right
Back-up light on!
The right tail lamp is malfunctioning. A
backup bulb is being used.
�
Visit an authorized Mercedes-Benz
Center as soon as possible.