Page 245 of 442
245 Controls in detail
Useful features
�
To open air vent slide the lever up.
�
To close air vent slide the lever down.Storage compartment in the rear cen-
ter console
�
Briefly press the top of the compart-
ment.
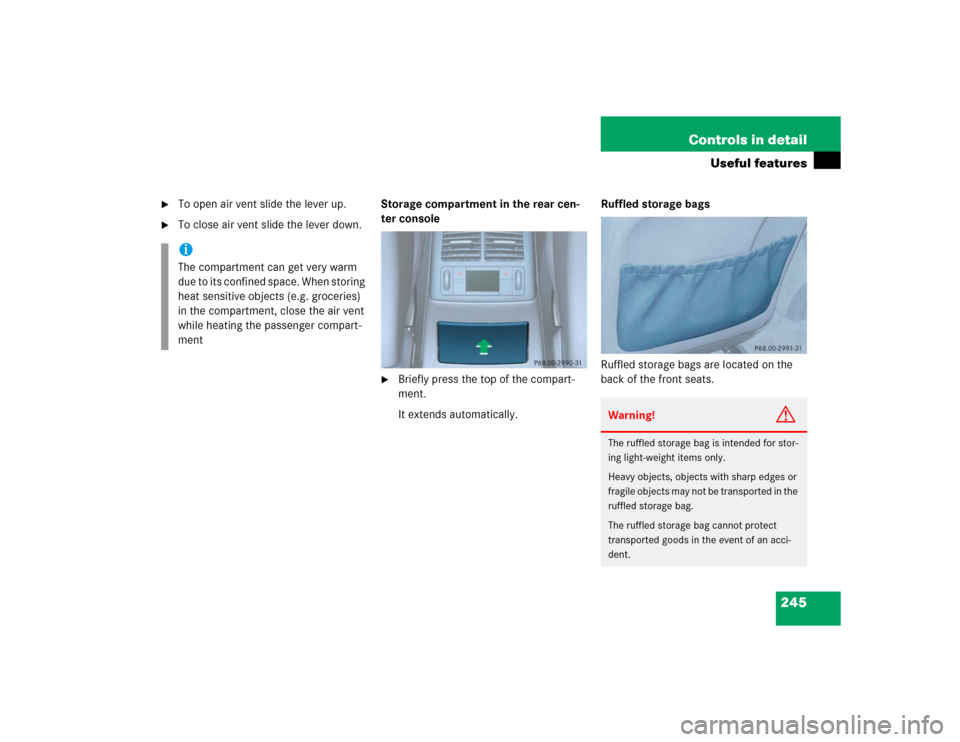
It extends automatically.Ruffled storage bags
Ruffled storage bags are located on the
back of the front seats.
iThe compartment can get very warm
due to its confined space. When storing
heat sensitive objects (e.g. groceries)
in the compartment, close the air vent
while heating the passenger compart-
ment
Warning!
G
The ruffled storage bag is intended for stor-
ing light-weight items only.
Heavy objects, objects with sharp edges or
fragile objects may not be transported in the
ruffled storage bag.
The ruffled storage bag cannot protect
transported goods in the event of an acci-
dent.
Page 247 of 442

247 Controls in detail
Useful features
Removing ashtray insert
�
Secure vehicle from movement by set-
ting the parking brake. Move the gear
selector lever to positionN.
Now you have more room to take out
the insert.
�
Push sliding button2 to the right and
hold.
�
Grip and remove insert from ashtray
frame.
Reinstalling ashtray insert
�
Install insert by pushing it back into
frame until it engages again.
Rear seat ashtrayOpening rear seat ashtray
�
Briefly press the top of the ashtray.
The ashtray opens.
Cigarette lighter
The cigarette lighter is located in the cen-
ter console compartment in front of the
armrest (
�page 26).
1Cigarette lighter
�
Turn ignition on.
�
Push in cigarette lighter1.
The lighter will pop out automatically
when hot. it in a convenient location in the vehi-
cle.
Warning!
G
Only use rubber mat in conjunction with
storing coins / tokens. Always remove rub-
ber mat and / or all other contents and rein-
sert ashtray insert before placing hot
cigarettes or other hot smoking materials in
this compartment.Warning!
G
Remove front ashtray only with vehicle
standing still. Set the parking brake to se-
cure vehicle from movement. Move gear se-
lector lever to positionN. With gear selector
lever in positionN, turn off the engine.
Page 248 of 442
248 Controls in detailUseful features
12-V socket*
The socket is located in the rear of the cen-
ter console storage compartment.
The socket can be used for accessories up
to a maximum of 180 W.
Heated steering wheel*
The steering wheel heating warms up the
leather area of the steering wheel.
The stalk with the heated steering wheel
switch is on the lower left-hand side of the
steering wheel.
1Indicator lamp
2Switching off
3Switching on
Warning!
G
Never touch the heating element or sides of
the lighter; they are extremely hot. Hold the
knob only.
When leaving the vehicle, always remove the
SmartKey from the starter switch, take the
SmartKey with KEYLESS-GO* with you, and
lock your vehicle. Do not leave children un-
attended in the vehicle, or with access to an
unlocked vehicle. Unsupervised use of vehi-
cle equipment may cause an accident
and / or serious personal injury.iThe lighter socket can be used to ac-
commodate electrical accessories up
to a maximum 85 W.
Page 274 of 442

Standing water
Passenger compartmentDriving abroad
Abroad, there is an extensive
Mercedes-Benz service net")
274 OperationDriving instructionsFor more information, see “Winter driving”
(�page 295)
Standing water
Passenger compartmentDriving abroad
Abroad, there is an extensive
Mercedes-Benz service network at your
disposal. If you plan to drive into areas
which are not listed in the index of your
Mercedes-Benz Center directory, you
should request pertinent information from
your authorized Mercedes-Benz Center.
Warning!
G
If the vehicle becomes stuck in snow, make
sure that snow is kept clear of the exhaust
pipe and from around the vehicle with the
engine running. Otherwise, deadly carbon
monoxide (CO) gases may enter vehicle in-
terior resulting in unconsciousness and
death.
To assure sufficient fresh air ventilation,
open a window slightly on the side of the ve-
hicle not facing the windWarning!
G
The outside temperature indicator is not de-
signed to serve as an ice-warning device and
is therefore unsuitable for that purpose. In-
dicated temperatures just above the freez-
ing point do not guarantee that the road
surface is free of ice.
!Do not drive through flooded areas or
water of unknown depth. Before driving
through water, determine its depth.
Never accelerate before driving into
water. The bow wave could force water
into the engine and auxiliary equip-
ment, thus damaging them.
If you must drive through standing wa-
ter, drive slowly to prevent water from
entering the passenger compartment
or the engine compartment. Water in
these areas could cause damage to
electrical components or wiring of the
engine or transmission, or could result
in water being ingested by the engine
through the air intake causing severe
internal engine damage. Any such dam-
age is not covered by the
Mercedes-Benz Limited Warranty.
Warning!
G
Always fasten items being carried as secure-
ly as possible.
In an accident, during hard braking or sud-
den maneuvers, loose items will be thrown
around inside the vehicle, and cause injury
to vehicle occupants unless the items are
securely fastened in the vehicle.
The trunk is the preferred place to carry ob-
jects.
Page 290 of 442

290 OperationTires and wheelsLife of tire
The service life of a tire is dependent upon
varying factors including but not limited to:�
Driving style
�
Tire pressure
�
Distance driven
Direction of rotation
Unidirectional tires offer added advantag-
es, such as better hydroplaning perfor-
mance. To benefit, however, you must
ensure that the tires rotate in the direction
specified.
An arrow on the sidewall indicates the in-
tended direction of tire rotation.Checking tire inflation pressure
Regularly check your tire pressure at inter-
vals of no more than 14 days.
Correct the tire pressure only when tires
are cold.If the tires are warm, you should only cor-
rect the tire pressure if it is too low for cur-
rent operating conditions.
A table on the fuel filler flap lists the spec-
ified tire inflation pressures for warm and
cold tires as well as for various operating
conditions.
Warning!
G
Tires and spare tire should be replaced after
six years, regardless of the remaining tread.!Keep unmounted tires in a cool, dry
place with as little exposure to light as
possible. Protect tires from contact
with oil, grease and gasoline.
Warning!
G
If the tire pressure drops repeatedly:�
Check the tires for punctures from for-
eign objects.
�
Check to see whether air is leaking from
the valves or from around the rim.
iThe pressures listed for light loads are
minimum values offering high driving
comfort.
Increased inflation pressures listed for
heavier loads may also be used for light
loads. These higher pressures produce
favorable handling characteristics. The
ride of the vehicle, however, will be
somewhat harder. Never exceed the
maximum values or inflate tires below
the minimum values listed in the fuel
filler flap.
Page 307 of 442

307 Operation
Vehicle care
Light alloy wheels
Mercedes-Benz approved Wheel Care
should be used for regular cleaning of the
light alloy wheels.
If possible, clean wheels once a week with
Mercedes-Benz approved Wheel Care, us-
ing a soft bristle brush and a strong spray
of water.
Follow the instructions on the container.
Instrument cluster
Use a gentle dishwashing detergent or
mild detergent for delicate fabrics as a
washing solution. Wipe with a cloth moist-
ened in a lukewarm solution. Do not use
scouring agents.Steering wheel and gear selector lever
Wipe with a damp cloth and dry thoroughly
or clean with Mercedes-Benz approved
Leather Care.
Cup holder
Use a gentle dishwashing detergent or
mild detergent for delicate fabrics as a
washing solution. Wipe with a cloth moist-
ened in lukewarm solution. Do not use
scouring agents.
Hard plastic trim items
Pour Mercedes-Benz approved Interior
Care onto a soft, lint-free cloth and apply
with light pressure.
Headliner and shelf below rear window
Clean with a soft bristle brush, or use a
dry-shampoo cleaner in case of excessive
dirt.Seat belts
The webbing must not be treated with
chemical cleaning agents. Use only clear,
lukewarm water and soap. Do not dry the
webbing at temperatures above 176°F
(80°C) or in direct sunlight.
iUse only acid-free cleaning materials.
Acid could lead to corrosion.
Warning!
G
Do not bleach or dye seat belts as this may
severely weaken them. In a crash they may
not be able to provide adequate protection.
Page 360 of 442

360 Practical hintsReplacing bulbsRear lamps Notes on bulb replacement
�
Use only 12 volt bulbs of the same type
and with the specified watt rating.
�
Switch lights off before changing a bulb
to prevent short circuits.
�
Always use a clean lint-free cloth when
handling bulbs.
�
Your hands should be dry and free of oil
and grease.
�
If the newly installed bulb does not light
up, visit an authorized Mercedes-Benz
Center.
�
Have the LEDs and bulbs for the follow-
ing lamps replaced by an authorized
Mercedes-Benz Center:�
Additional turn signal lamps in the
exterior rear view mirrors
�
High mounted brake lamp
�
Bi-Xenon* lamps
�
Front fog lamps
Lamp
Type
7
High mounted brake
lamp
LED
8
Brake, tail, parking,
standing, backup lamps
and turn signal lamps.
Rear fog lamp (driver's
side).
HiP
LED*
9
License plate lamps
C 5 W
Warning!
G
Keep bulbs out of reach of children.
Bulbs and bulb sockets can be very hot. Al-
low the lamp to cool down before changing
a bulb.
Halogen lamps contain pressurized gas. A
bulb can explode if you:�
touch or move it when hot
�
drop the bulb
�
scratch the bulb
Wear eye and hand protection.
Because of high voltage in Bi-Xenon* lamps,
it is dangerous to replace the bulb or repair
the lamp and its components. We recom-
mend that you have such work done by a
qualified technician.
Page 361 of 442
361 Practical hints
Replacing bulbs
Replacing bulbs for front lamps
1Bulb socket for turn signal lamp
2High beam halogen bulb
3Bulb socket for parking and standing
lamp
4Cover for Bi-Xenon* (low beam and
high beam) or halogen (low beam)
headlampBi-Xenon* headlamps Low beam halogen bulb
�
Switch off the lights.
�
Open the hood (
�page 281).
�
Turn the locking mechanism counter-
clockwise and remove headlamp
cover4.
�
Pull electrical connector off.
�
Release the retaining springs and take
out the bulb.
�
Insert the new bulb in the socket so
that the base is in the recess on the
lower left.
�
Attach the retaining springs.
�
Insert connector into the bulb.
�
Align headlamp cover and click into
place.
Warning!
G
Do not remove the cover4 for the Bi-Xe-
non headlamp. Because of high voltage in
Xenon lamps, it is dangerous to replace the
bulb or repair the lamp and its components.
We recommend that you have such work
done by a qualified technician.