Page 309 of 442
309 Practical hints
What to do if …
Where will I find ...?
Unlocking / locking in an emergency
Opening / closing in an emergency
Replacing bulbs
Replacing wiper blades
Flat tire
Batteries
Jump starting
Towing the vehicle
Fuses
Page 328 of 442

328 Practical hintsWhat to do if …Display symbol
Display messages
Possible cause
Possible solution
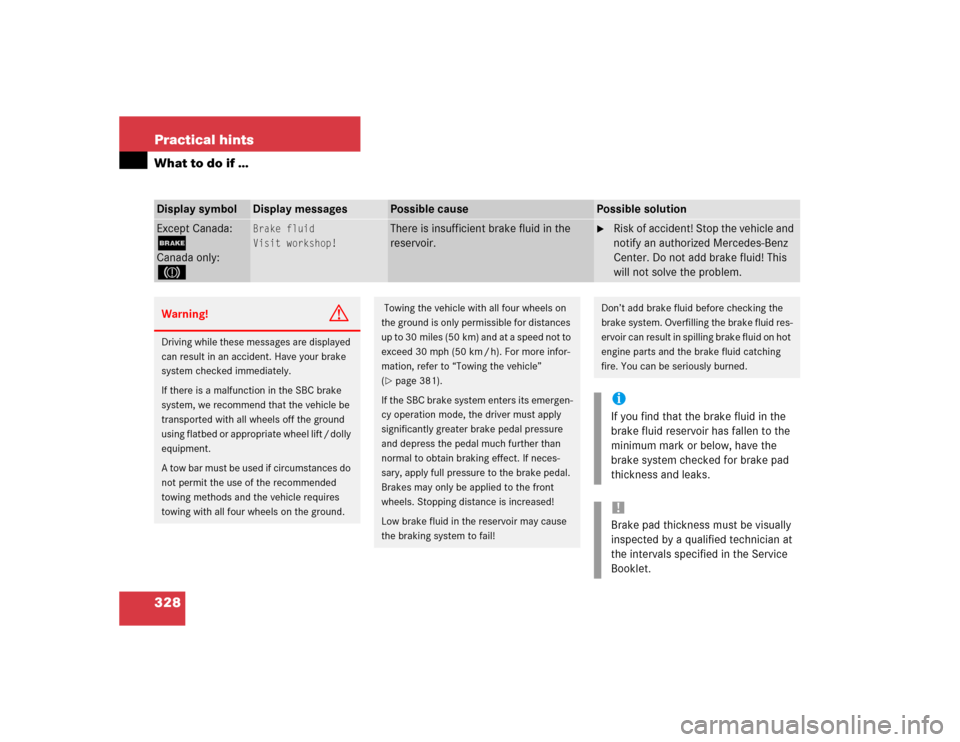
Except Canada:;Canada only:3
Brake fluid
Visit workshop!
There is insufficient brake fluid in the
reservoir.
�
Risk of accident! Stop the vehicle and
notify an authorized Mercedes-Benz
Center. Do not add brake fluid! This
will not solve the problem.
Warning!
G
Driving while these messages are displayed
can result in an accident. Have your brake
system checked immediately.
If there is a malfunction in the SBC brake
system, we recommend that the vehicle be
transported with all wheels off the ground
using flatbed or appropriate wheel lift / dolly
equipment.
A tow bar must be used if circumstances do
not permit the use of the recommended
towing methods and the vehicle requires
towing with all four wheels on the ground.
Towing the vehicle with all four wheels on
the ground is only permissible for distances
up to 30 miles (50 km) and at a speed not to
exceed 30 mph (50 km / h). For more infor-
mation, refer to “Towing the vehicle”
(�page 381).
If the SBC brake system enters its emergen-
cy operation mode, the driver must apply
significantly greater brake pedal pressure
and depress the pedal much further than
normal to obtain braking effect. If neces-
sary, apply full pressure to the brake pedal.
Brakes may only be applied to the front
wheels. Stopping distance is increased!
Low brake fluid in the reservoir may cause
the braking system to fail!
Don’t add brake fluid before checking the
brake system. Overfilling the brake fluid res-
ervoir can result in spilling brake fluid on hot
engine parts and the brake fluid catching
fire. You can be seriously burned.iIf you find that the brake fluid in the
brake fluid reservoir has fallen to the
minimum mark or below, have the
brake system checked for brake pad
thickness and leaks.!Brake pad thickness must be visually
inspected by a qualified technician at
the intervals specified in the Service
Booklet.
Page 349 of 442

349 Practical hints
What to do if …
Warning!
G
Driving while these messages are displayed
can result in an accident. Have your brake
system checked immediately.
If there is a malfunction in the SBC brake
system, we recommend that the vehicle be
transported with all wheels off the ground
using flatbed or appropriate wheel lift / dolly
equipment.
A tow bar must be used if circumstances do
not permit the use of the recommended
towing methods and the vehicle requires
towing with all four wheels on the ground.
Towing the vehicle with all four wheels on
the ground is only permissible for distances
u p t o 3 0 m i l e s ( 5 0 k m ) a n d a t a s p e e d n o t t o
exceed 30 mph (50 km / h). For more infor-
mation, refer to “Towing the vehicle”
(�page 381).
If the SBC brake system enters its emergen-
cy operation mode, the driver must apply
significantly greater brake pedal pressure
and depress the pedal much further than
normal to obtain braking effect. If neces-
sary, apply full pressure to the brake pedal.
Brakes may only be applied to the front
wheels. Stopping distance is increased!
Low brake fluid in the reservoir may cause
the braking system to fail!
Don’t add brake fluid before checking the
brake system. Overfilling the brake fluid res-
ervoir can result in spilling brake fluid on hot
engine parts and the brake fluid catching
fire. You can be seriously burned.
iIf you find that the brake fluid in the
brake fluid reservoir has fallen to the
minimum mark or below, have the
brake system checked for brake pad
thickness and leaks.!Brake pad thickness must be visually
inspected by a qualified technician at
the intervals specified in the Service
Booklet.
Page 352 of 442
352 Practical hintsWhere will I find ...?Install luggage box�
Insert luggage box into trunk so that
fastening clips are in line with fastening
bolts.
�
Push front edge of luggage box in direc-
tion of arrow under cover of trunk sill.
�
Press fastening clips onto fastening
bolts until they lock into place.
Vehicle tool kit
The vehicle tool kit is stored in the com-
partment underneath the trunk floor
(�page 350).
The vehicle tool kit includes:
�
One towing eye bolt
�
One wheel wrench
�
One alignment bolt
�
One fuse extractor
�
Spare fuses
Page 357 of 442
357 Practical hints
Unlocking / locking in an emergency
Fuel filler flap emergency release
In case the central locking system does
not release the fuel filler flap, you can open
it manually.
1Release knob�
Open trunk lid.
�
Remove right-side tail trim.
�
Turn release knob1 clockwise (ar-
row).
The fuel filler flap can know be opened.Manually unlocking the transmission
selector lever
In the case of power failure, the transmis-
sion selector lever can be manually un-
locked, e.g. to tow the vehicle.
1Pin
�
Open the storage compartment in the
center console (
�page 244).
�
Take out the cup holder*.
Using two fingers in the horizontal slot
at the upper rear side of the cup holder,
lift cup holder upwards to remove.
�
Hold the cover at a 45° angle.
�
Insert a suitable object1 (e.g. a pin)
through the hole and press the pin
downward.
�
Remove pin1. iThe selector lever is locked again when
moving it to positionP.
Page 363 of 442

363 Practical hints
Replacing bulbs
Side marker lamp bulb�
Switch off the lights.
�
Carefully slide lamp towards front.
�
Remove rear end first.
�
Twist bulb socket counterclockwise
and pull out.
�
Pull bulb out of the bulb socket.
�
Insert new bulb in socket.
�
Reinstall bulb socket, push in and twist
clockwise.
�
To reinstall lamp, set rear end in
bumper and let front end snap into
place.
Replacing bulbs for rear lamps
Tail lamp assemblies
The tail lamps are equipped with HiP bulbs.License plate lamp
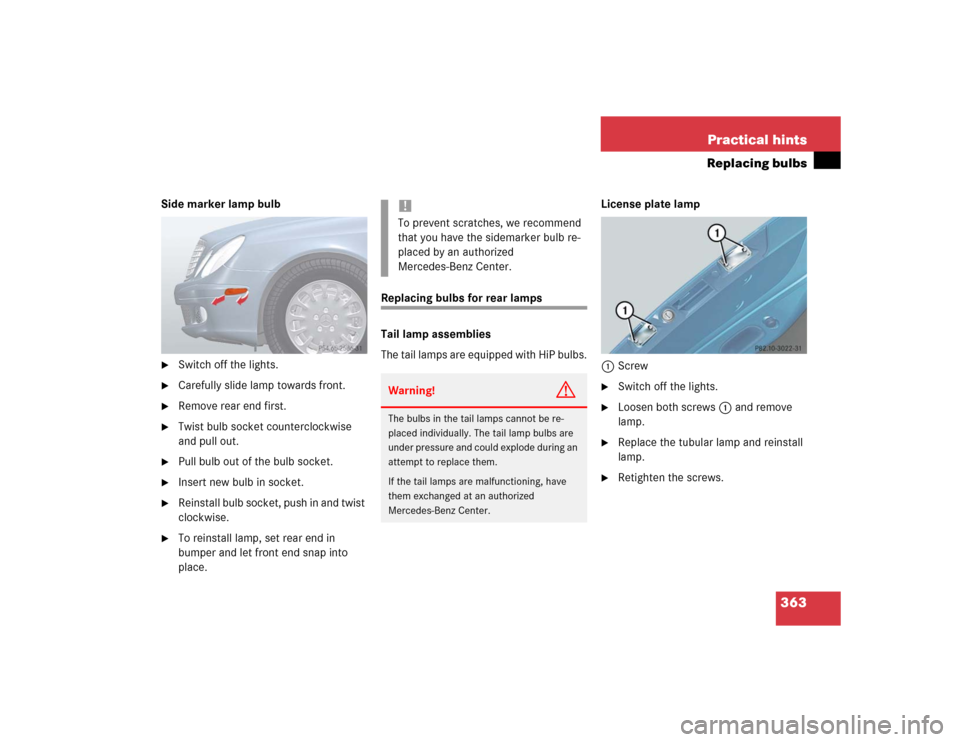
1Screw
�
Switch off the lights.
�
Loosen both screws1 and remove
lamp.
�
Replace the tubular lamp and reinstall
lamp.
�
Retighten the screws.
!To prevent scratches, we recommend
that you have the sidemarker bulb re-
placed by an authorized
Mercedes-Benz Center.Warning!
G
The bulbs in the tail lamps cannot be re-
placed individually. The tail lamp bulbs are
under pressure and could explode during an
attempt to replace them.
If the tail lamps are malfunctioning, have
them exchanged at an authorized
Mercedes-Benz Center.
Page 374 of 442

374 Practical hintsFlat tireIn the case of a flat tire, you may tempo-
rarily use the Minispare wheel when ob-
serving the following restrictions:�
Do not exceed a vehicle speed of
50 mph (80 km / h).
�
Drive to the nearest tire repair facility
to have the flat tire repaired or re-
placed as appropriate.
�
Do not operate vehicle with more than
one spare wheel mounted.Lowering the vehicle
�
Lower vehicle by turning crank coun-
terclockwise until vehicle is resting ful-
ly on its own weight.
�
Remove the jack.
1-5 Wheel bolts
�
Tighten the five wheel bolts evenly, fol-
lowing the diagonal sequence illustrat-
ed (1 to 5), until all bolts are tight.
Observe a tightening torque of 96 lb-ft
(130 Nm).
�
Before storing the jack in the trunk, it
should be fully collapsed.
Warning!
G
The dimensions of the Minispare wheel are
different from those of the road wheels. As
a result, the vehicle handling characteristics
change when driving with a Minispare wheel
mounted.
The spare wheel should only be used tempo-
rarily, and replaced with a regular road
wheel as quickly as possible.
Warning!
G
Have the tightening torque checked after
changing a wheel. The wheels could come
loose if they are not tightened to a torque of
96 lb-ft (130 Nm).iWrap the damaged wheel in the protec-
tive film that comes with the spare
wheel and put the wheel in the trunk.
You can also place the damaged wheel
down into the spare wheel well. In this
case, you must stow the holder from
the spare wheel well in the trunk.
Do not activate the tire inflation pres-
sure monitor until the depressurized
tire is no longer in the vehicle.
Page 380 of 442
380 Practical hintsJump starting�
Start engine of the vehicle with the
charged battery and run at idle speed.
�
Connect negative terminals4 and2
of the batteries with the jumper cable.
Clamp cable to charged battery4
first.
�
Start the engine of the disabled vehi-
cle.Now you can again turn on the electrical
consumers. Do not turn on the lights under
any circumstances.
�
Remove the jumper cables first from
negative terminals2 and4 and then
from positive terminals1 and3.
Now you can turn on the lights.
�
Have the battery checked at the near-
est authorized Mercedes-Benz Center.
iThe message
Malfunction - electric
consumers switched off
may appear
in the instrument cluster. It will disap-
pear as soon as the battery is suffi-
ciently charged.
!Do not tow-start the vehicle.