Page 170 of 442

170 Controls in detailGood visibility
Headlamp cleaning system*
The button is located on the left side of the
dashboard.
1Headlamp washer button�
Switch on ignition.
�
Press button1.
The headlamps are cleaned with a
high-pressure water jet.
Information on filling up the washer reser-
voir can be found in the “Operation” sec-
tion (�page 288).
Sun visors
The sun visors protect you from sun glare
while driving.�
Swing sun visors down when you expe-
rience glare.
!Do not leave windshield wipers in inter-
mittent setting when the vehicle is tak-
en to an automatic car wash or during
windshield cleaning. Wipers will oper-
ate in the presence of water sprayed on
the windshield, and wipers may be
damaged as a result.
The switch should not be left in inter-
mittent setting as the wipers will wipe
the windshield once every time the en-
gine is started. Dust that accumulates
on the windshield might scratch the
glass and / or damage the wiper blades
when wiping occurs on a dry wind-
shield.
Warning!
G
Do not use the vanity mirror while driving.
Keep the mirrors in the sun visors closed
while vehicle is in motion. Reflected glare
can endanger you and others.
Page 179 of 442

179 Controls in detail
Climate control
Adjusting center air vents:
The thumbwheels for left2 and right6
center air vents are automatically posi-
tioned for optimum interior airflow. In this
position, center air vent4 and adjustable
left and right center vents3 and5 are
fully opened.
Heating:
Only in manual mode is it possible to lower
the temperature in the headroom by regu-
lating the cold-airflow using
thumbwheel7 (
�page 174).Windshield fogged on the outside
�
Switch the windshield wipers on
(�page 48).
�
Press the Ubutton.
The indicator lamp on the button
comes on.
Adjusting air volume
Adjusting manually
Five blower speeds are available.�
Press� to decrease orQ to in-
crease air volume to the desired level.
The
Auto
display disappears and the
automatic mode is switched off. The
selected blower speed is shown in the
display.Adjusting automatically
�
Press the U button.
The air volume is adjusted automatical-
ly.
Defrosting
Activating�
Press buttonP.
The indicator lamp on the button
comes on.
or
�
Switch off air recirculation, if selected.
Press buttonO.
The indicator lamp on the button goes
out.iThese settings should only be selected
for a short time.
��
Page 189 of 442

189 Controls in detail
Automatic climate control*
Increasing�
Push top of temperature control rocker
switch3 and / or5.
The automatic climate control system
will correspondingly adjust the interior
air temperature.
Decreasing
�
Push bottom of temperature control
rocker switch3 and / or5.
The automatic climate control system
will correspondingly adjust the interior
air temperature.
Heating:
Only in manual air distribution mode is it
possible to lower the temperature in the
headroom by adding outside air using
thumbwheel7 (
�page 184) in the dash-
board.
Adjusting air distribution
Use the air distribution controls1 and7
(�page 176) to separately adjust the air
distribution on each side of the passenger
compartment. The following symbols are
found on the controls:Adjusting manually
�
Press left or rightU.
The indicator lamp in theU button
goes out.
�
Turn air distribution controls on each
side of the passenger compartment to
the desired symbol.
Adjusting automatically
�
Press left or rightU button again.
The indicator lamp in theU button
illuminates. The air distribution is ad-
justed automatically.
Windshield fogged on the outside
�
Switch the windshield wipers on.
�
Press the left or rightU button.
Symbol
Function
a
Directs air through the center,
side and rear passenger com-
partment air vents
Z
Directs air to the windows
X
Directs air into the entire vehi-
cle interior
Y
Directs air to the footwells
Page 281 of 442

281 Operation
Engine compartment
�Engine compartment
Hood
Opening
1Hood release
�
Pull lever1 downwards.
The hood is unlocked and handle2
will extend out of the radiator grille.
2Handle for opening the hood
�
Pull handle2 to its stop out of radia-
tor grille.
�
Pull up on the hood (do not pull up on
the handle) and then release it.
The hood will be automatically held
open at shoulder height by gas-filled
struts.
Warning!
G
Do not pull the release lever while the vehi-
cle is in motion. Otherwise the hood could
be forced open by passing air flow.
!To avoid damage to the windshield wip-
ers or hood, never open the hood if the
wiper arms are folded forward away
from the windshield.
Warning!
G
To help prevent personal injury, stay clear of
moving parts when the hood is open and the
engine is running. Make sure the hood is
properly closed before driving. When closing
the hood, use extreme caution not to catch
hands or fingers.
The radiator fan may continue to run for ap-
proximately 30 seconds or even restart af-
ter the engine has been turned off. Stay
clear of fan blades.
Page 305 of 442

305 Operation
Vehicle care
Cleaning the Distronic* system sensor
cover
1Distronic system sensor cover
Use a mild car wash detergent, such as
Mercedes-Benz approved Car Shampoo,
with plenty of water to clean sensor
cover1.
To prevent scratches, never apply strong
force and use only a soft, non-scratchy
cloth when cleaning the sensor cover. Do
not attempt to wipe dirty sensors with a
dry cloth or sponge.Cleaning the Parktronic* system
sensors
1Parktronic* sensors
Use a mild car wash detergent, such as
Mercedes-Benz approved Car Shampoo
with plenty of water.
When using a steam cleaner or power
washer, aim nozzle only briefly from a min-
imum distance of 11.8 in (30 cm) at
sensors1.To prevent scratches, never apply strong
force and use only a soft, non-scratchy
cloth when cleaning the sensor. Do not at-
tempt to wipe dirty sensors with a dry cloth
or sponge.
Wiper blades
�
Turn on the wipers and place it in a ver-
tical position.
For information on placing the wipers in a
vertical position, see “Replacing wiper
blades” (
�page 364).
iRestart the engine after cleaning sen-
sor cover1.
!Fold the windshield wiper arms away
from the windshield to a vertical posi-
tion only. They could otherwise dam-
age the hood.
��
Page 306 of 442

306 OperationVehicle care�
Clean the wiper blade inserts with a
clean cloth and detergent solution.Window cleaning
�
Turn on the wipers and place it in a ver-
tical position.
For information on placing the wipers in a
vertical position, see “Replacing wiper
blades” (
�page 364).Use a window cleaning solution on all glass
surfaces. An automotive glass cleaner is
recommended.
Warning!
G
For safety reasons, switch off wipers and re-
move SmartKey from starter switch before
cleaning the wiper blades, otherwise the
wiper motor might suddenly turn on and
cause injury.!Fold the windshield wiper arms back
onto the windshield before turning the
SmartKey in the starter switch.
Hold on to the wiper when folding the
wiper arm back. If released, the force
of the impact from the tensioning
spring could crack the windshield.
!Fold the windshield wiper arms away
from the windshield to a vertical posi-
tion only. They could otherwise dam-
age the hood. Warning!
G
For safety reasons, switch off wipers and re-
move SmartKey from starter switch before
cleaning the windshield, otherwise the wiper
motor might suddenly turn on and cause in-
jury.
!Fold the windshield wiper arms back
onto the windshield before turning the
SmartKey in the starter switch.
Hold on to the wiper when folding the
wiper arm back. If released, the force
of the impact from the tensioning
spring could crack the windshield.
��
Page 309 of 442
309 Practical hints
What to do if …
Where will I find ...?
Unlocking / locking in an emergency
Opening / closing in an emergency
Replacing bulbs
Replacing wiper blades
Flat tire
Batteries
Jump starting
Towing the vehicle
Fuses
Page 364 of 442
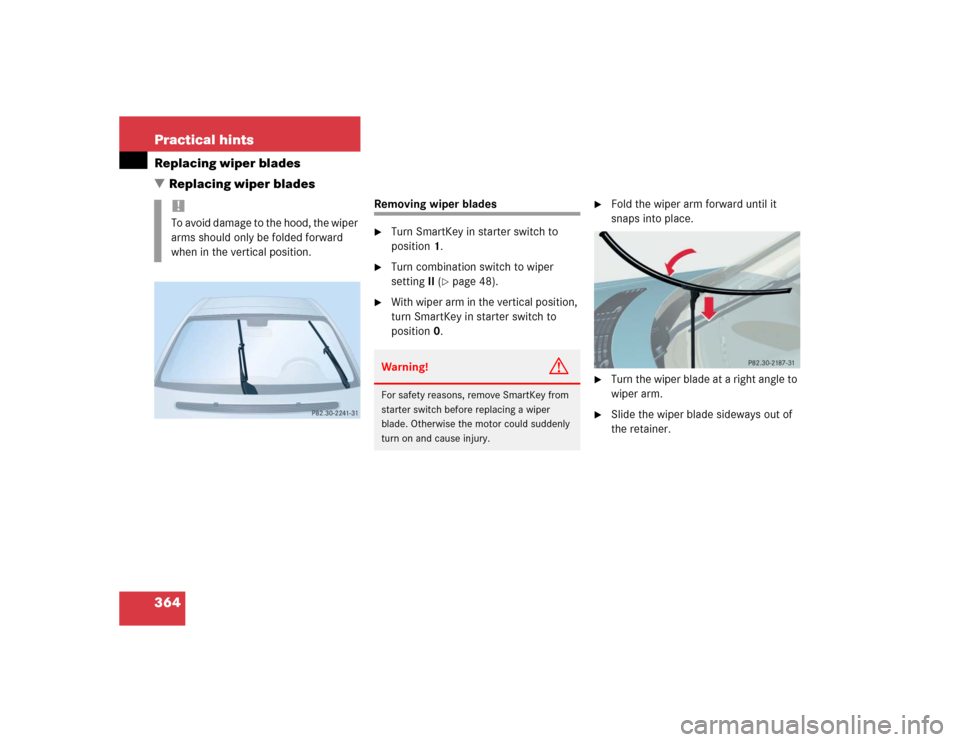
364 Practical hintsReplacing wiper blades
�Replacing wiper blades
Removing wiper blades�
Turn SmartKey in starter switch to
position1.
�
Turn combination switch to wiper
settingII (
�page 48).
�
With wiper arm in the vertical position,
turn SmartKey in starter switch to
position0.
�
Fold the wiper arm forward until it
snaps into place.
�
Turn the wiper blade at a right angle to
wiper arm.
�
Slide the wiper blade sideways out of
the retainer.
!To avoid damage to the hood, the wiper
arms should only be folded forward
when in the vertical position.
Warning!
G
For safety reasons, remove SmartKey from
starter switch before replacing a wiper
blade. Otherwise the motor could suddenly
turn on and cause injury.