Page 161 of 440
161 Controls in detail
Automatic transmission
Steering wheel gearshift control (Speedshift) CLK 55 AMG
In the manual shift program mode you can
change the gears manually on the steering
wheel or by using the gear selector lever
(�page 158).
Allow engine to warm up under low load
use. Do not place full load on the engine
until the operating temperature has been
reached. Shift into reverse gear only when
the vehicle is stopped.
!Coasting the vehicle, or driving for any
other reason with gear selector lever
inN can result in transmission damage
that is not covered by the
Mercedes-Benz Limited Warranty.Warning!
G
Getting out of your vehicle with the gear
selector lever not fully engaged in positionP
is dangerous. Also, positionP alone is not
intended to or capable of preventing your
vehicle from moving, possibly hitting people
or objects.
Always set the parking brake in addition to
shifting to positionP (
�page 46).
When parked on an incline, turn the front
wheels towards the road curb.
Do not park this vehicle in areas where com-
bustible materials such as gras, hay, or
leaves can come into contact with the hot
exhaust system, as these materials could be
ignited and cause a vehicle fire.
Warning!
G
When leaving the vehicle, always remove the
SmartKey from the starter switch, take the
SmartKey with KEYLESS-GO* with you and
lock the vehicle. Do not leave children unat-
tended in the vehicle, or with access to an
unlocked vehicle. Children could move the
gear selector lever from positionP, which
could result in an accident and/or serious
personal injury.
!Avoid spinning of a drive wheel for an
extended period when driving off on
slippery road surfaces. This may cause
serious damage to the drive train which
is not covered by the Mercedes-Benz
Limited Warranty.
Page 165 of 440
165 Controls in detail
Automatic transmission
Downshifting�
Briefly press the gear selector lever to
the left in theD-direction
(�page 158).
or
�
Press button2 on the left side of the
steering wheel (
�page 161).
The transmission shifts to the next
lower gear.
Upshifting
�
Briefly press the gear selector lever to
the right in theD+direction
(�page 158).
or
�
Press button3 on the right side of the
steering wheel (
�page 161).
The transmission shifts to the next
higher gear.
Deactivating manual shift program
�
Press the program mode selector
switch repeatedly until
S or
C appears
in the right multifunction display field.
or
�
Restart the engine.
The transmission will go into the last
shift program mode selected (SorC).
Program modeM is not stored.Emergency operation (Limp Home
Mode)
If vehicle acceleration worsens or the
transmission no longer shifts, the trans-
mission is most likely operating in limp
home (emergency operation) mode. In this
mode, only second gear and reverse gear
can be activated.�
Stop the vehicle.
�
Move gear selector lever toP.
�
Turn off the engine.
�
Wait at least ten seconds before
restarting.
�
Restart the engine.
�
Move gear selector lever to positionD
(for second gear) orR.
�
Have the transmission checked at an
authorized Mercedes-Benz Center as
soon as possible.
Warning!
G
On slippery road surfaces, never downshift
in order to obtain braking action. This could
result in drive wheel slip and reduced
vehicle control. Your vehicle’s ABS will not
prevent this type of loss of control.
iThe last selected automatic program
mode (S orC) is switched on when the
engine is restarted in the automatic
program mode.
Page 170 of 440
170 Controls in detailGood visibilityRear window sunshade*
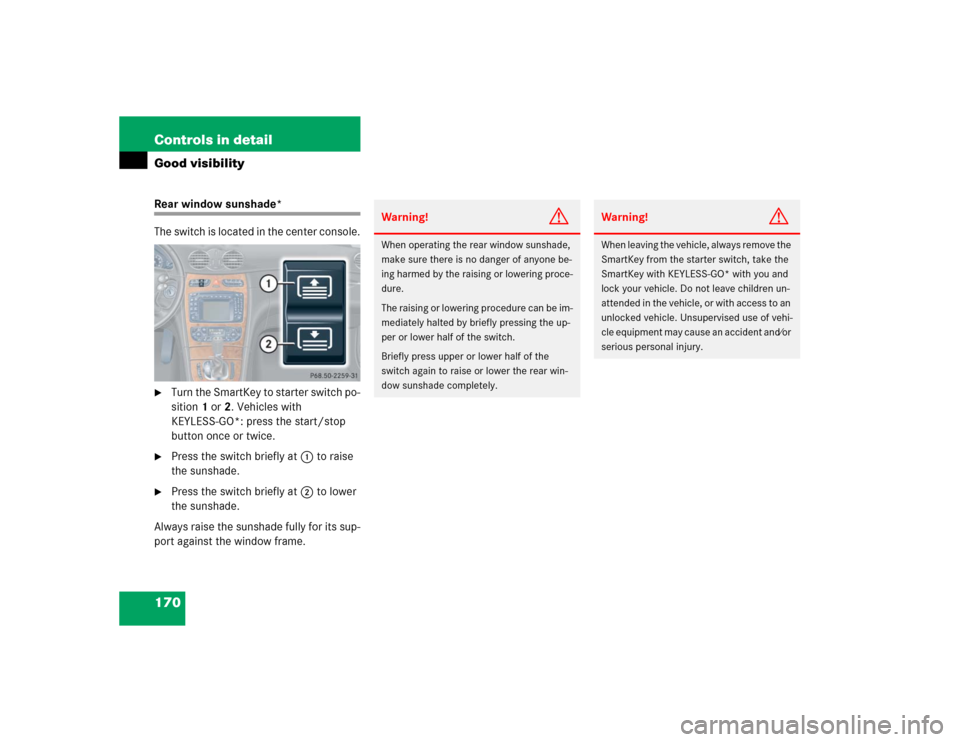
The switch is located in the center console.�
Turn the SmartKey to starter switch po-
sition 1 or 2. Vehicles with
KEYLESS-GO*: press the start/stop
button once or twice.
�
Press the switch briefly at 1 to raise
the sunshade.
�
Press the switch briefly at 2 to lower
the sunshade.
Always raise the sunshade fully for its sup-
port against the window frame.
Warning!
G
When operating the rear window sunshade,
make sure there is no danger of anyone be-
ing harmed by the raising or lowering proce-
dure.
The raising or lowering procedure can be im-
mediately halted by briefly pressing the up-
per or lower half of the switch.
Briefly press upper or lower half of the
switch again to raise or lower the rear win-
dow sunshade completely.
Warning!
G
When leaving the vehicle, always remove the
SmartKey from the starter switch, take the
SmartKey with KEYLESS-GO* with you and
lock your vehicle. Do not leave children un-
attended in the vehicle, or with access to an
unlocked vehicle. Unsupervised use of vehi-
cle equipment may cause an accident and⁄or
serious personal injury.
Page 197 of 440
197 Controls in detail
Audio system
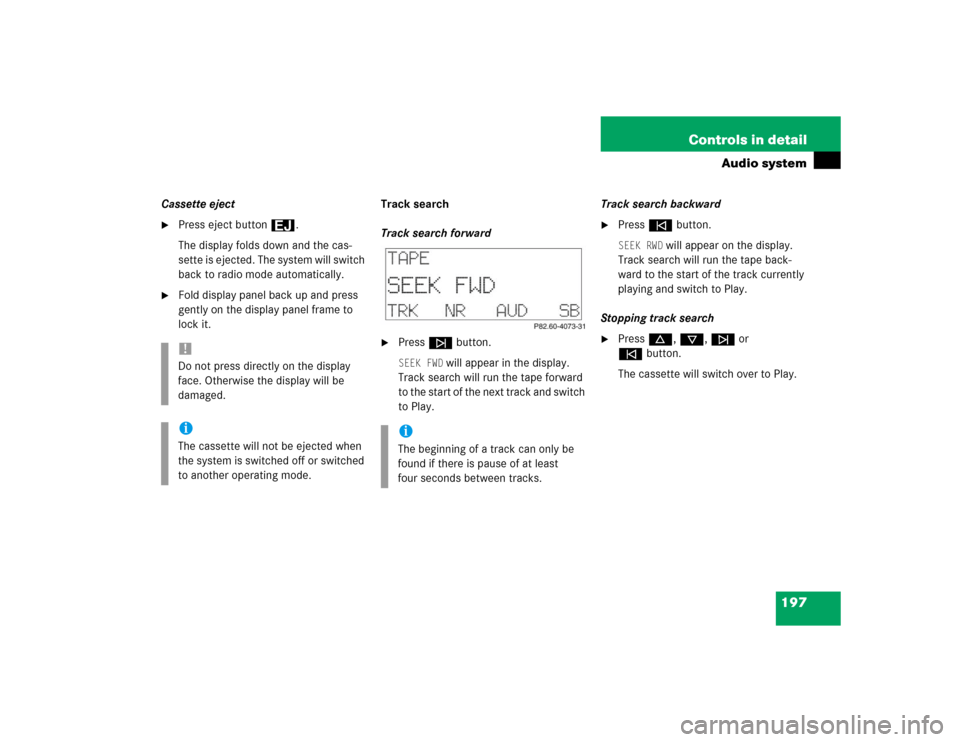
Cassette eject�
Press eject button3.
The display folds down and the cas-
sette is ejected. The system will switch
back to radio mode automatically.
�
Fold display panel back up and press
gently on the display panel frame to
lock it.Track search
Track search forward
�
Pressf button.SEEK FWD
will appear in the display.
Track search will run the tape forward
to the start of the next track and switch
to Play.Track search backward
�
Presse button.SEEK RWD
will appear on the display.
Track search will run the tape back-
ward to the start of the track currently
playing and switch to Play.
Stopping track search
�
Pressd, c, f or
ebutton.
The cassette will switch over to Play.
!Do not press directly on the display
face. Otherwise the display will be
damaged.iThe cassette will not be ejected when
the system is switched off or switched
to another operating mode.
iThe beginning of a track can only be
found if there is pause of at least
four seconds between tracks.
Page 198 of 440
198 Controls in detailAudio systemScanning�
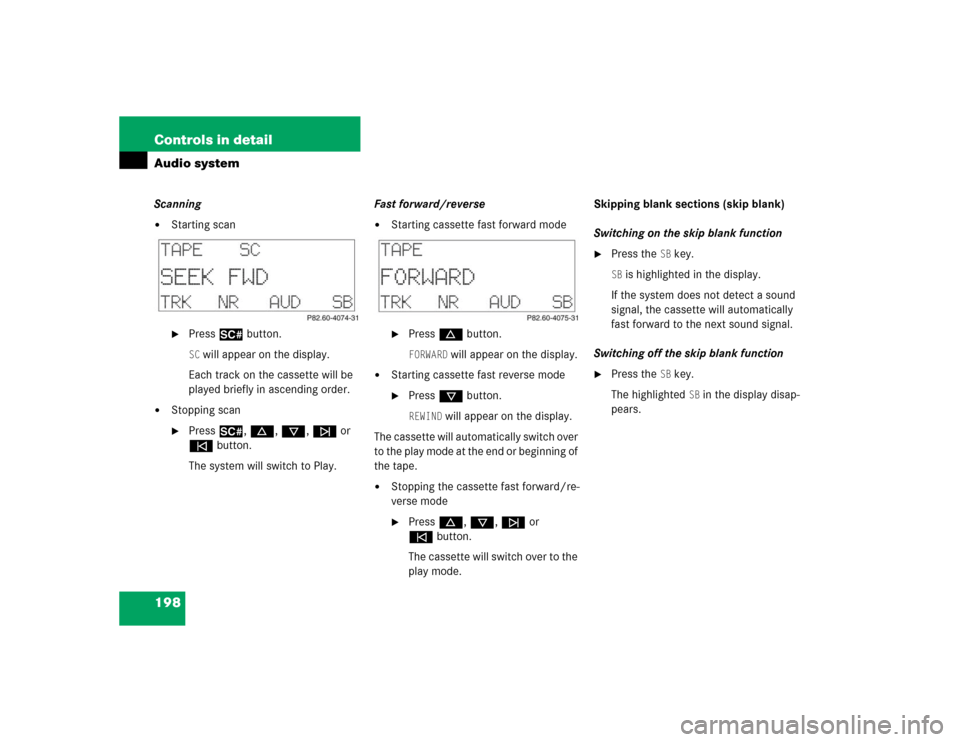
Starting scan�
Press2 button.SC will appear on the display.
Each track on the cassette will be
played briefly in ascending order.
�
Stopping scan�
Press2, d, c, f or
ebutton.
The system will switch to Play.Fast forward/reverse
�
Starting cassette fast forward mode�
Pressd button.FORWARD
will appear on the display.
�
Starting cassette fast reverse mode�
Pressc button.REWIND
will appear on the display.
The cassette will automatically switch over
to the play mode at the end or beginning of
the tape.
�
Stopping the cassette fast forward/re-
verse mode�
Pressd, c, f or
ebutton.
The cassette will switch over to the
play mode.Skipping blank sections (skip blank)
Switching on the skip blank function
�
Press the
SB key.
SB is highlighted in the display.
If the system does not detect a sound
signal, the cassette will automatically
fast forward to the next sound signal.
Switching off the skip blank function
�
Press the
SB key.
The highlighted
SB in the display disap-
pears.
Page 210 of 440
210 Controls in detailPower windows
�Power windowsOpening and closing the windows
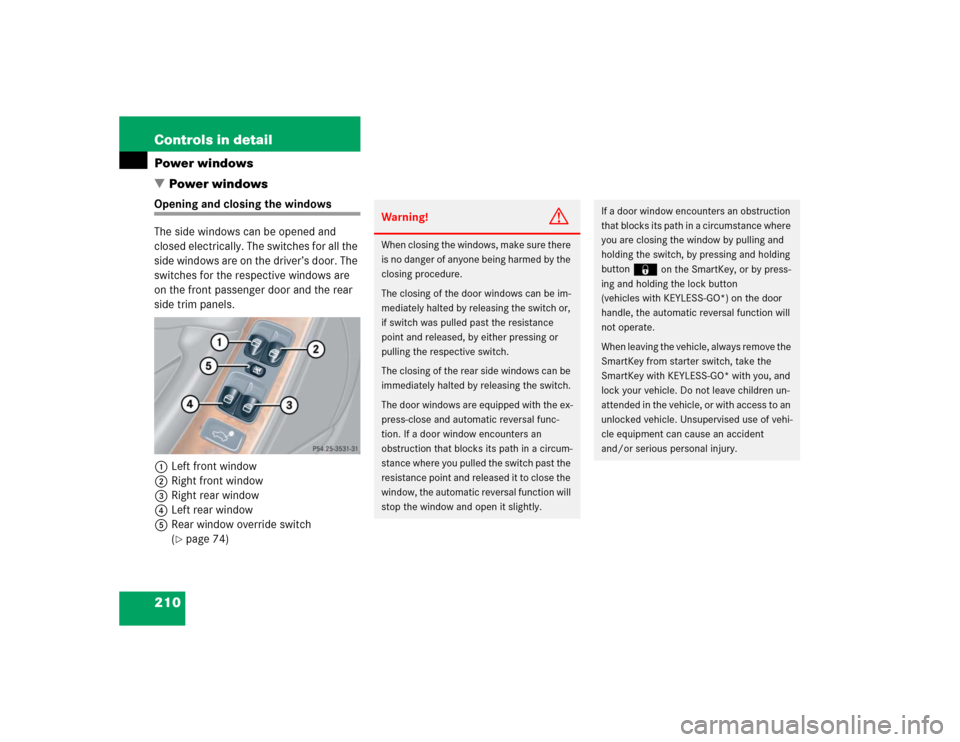
The side windows can be opened and
closed electrically. The switches for all the
side windows are on the driver’s door. The
switches for the respective windows are
on the front passenger door and the rear
side trim panels.
1Left front window
2Right front window
3Right rear window
4Left rear window
5Rear window override switch
(
�page 74)
Warning!
G
When closing the windows, make sure there
is no danger of anyone being harmed by the
closing procedure.
The closing of the door windows can be im-
mediately halted by releasing the switch or,
if switch was pulled past the resistance
point and released, by either pressing or
pulling the respective switch.
The closing of the rear side windows can be
immediately halted by releasing the switch.
The door windows are equipped with the ex-
press-close and automatic reversal func-
tion. If a door window encounters an
obstruction that blocks its path in a circum-
stance where you pulled the switch past the
resistance point and released it to close the
window, the automatic reversal function will
stop the window and open it slightly.
If a door window encounters an obstruction
that blocks its path in a circumstance where
you are closing the window by pulling and
holding the switch, by pressing and holding
button
‹
on the SmartKey, or by press-
ing and holding the lock button
(vehicles with KEYLESS-GO*) on the door
handle, the automatic reversal function will
not operate.
When leaving the vehicle, always remove the
SmartKey from starter switch, take the
SmartKey with KEYLESS-GO* with you, and
lock your vehicle. Do not leave children un-
attended in the vehicle, or with access to an
unlocked vehicle. Unsupervised use of vehi-
cle equipment can cause an accident
and/or serious personal injury.
Page 211 of 440
211 Controls in detail
Power windows
�
Turn SmartKey in the starter switch to
position1 or2 or press the
KEYLESS-GO* start/stop button.Opening the windows
�
Press switch1 to4 to the resistance
point.
The corresponding window will move
downwards until you release the
switch.
Closing the windows
�
Pull on switch1 to4 to the resis-
tance point.
The corresponding window will move
upwards until you release the switch.Fully opening the door windows
(Express-open)
�
Press switch1 or2 past the resis-
tance point and release.
The corresponding window opens com-
pletely.
Fully closing the door windows
(Express-close)
�
Pull switch1 or2 past the resis-
tance point and release.
The corresponding window closes com-
pletely.
iYou can also open or close the win-
dows using the:�
SmartKey (summer opening/con-
venience feature) (
�page 212)
�
button, in the control panel of
the automatic climate control
(�page 173).
�
buttone in the control panel of
the automatic climate control
(�page 173).
Warning!
G
If you pull and hold the switch up when clos-
ing the window, and upward movement of
the window is blocked by some obstruction
including but not limited to arms, hands, fin-
gers, etc., the automatic reversal will not op-
erate.
��
Page 215 of 440
215 Controls in detail
Sliding/pop-up roof*
�
Turn SmartKey in the starter switch to
position1 or2 or press the
KEYLESS-GO* start/stop button.Opening and closing the
sliding/pop-up roof
�
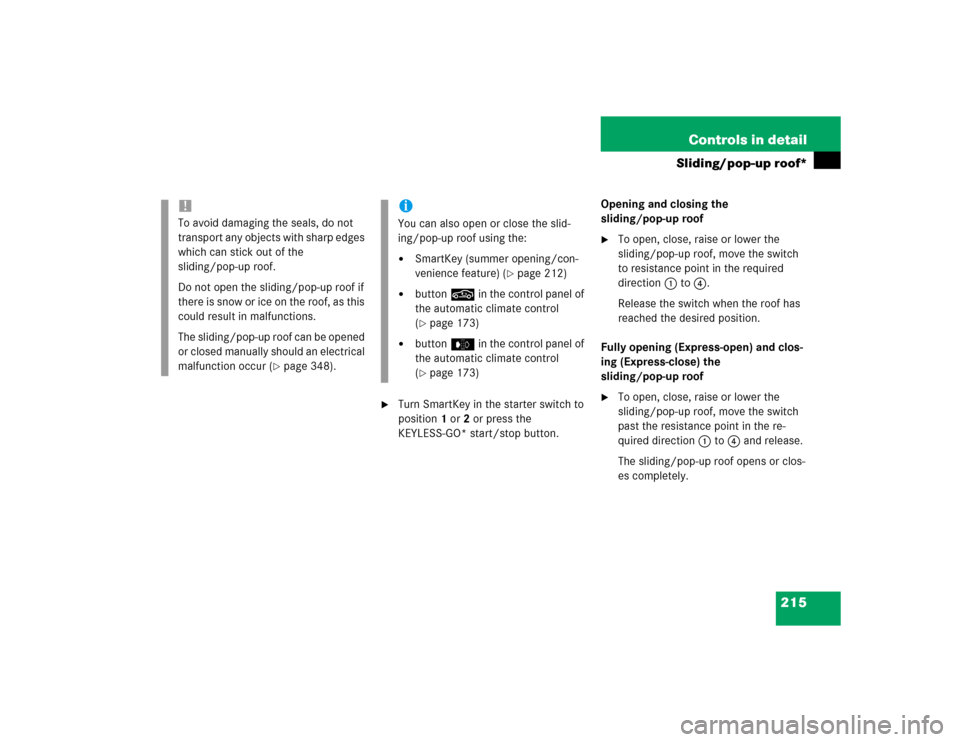
To open, close, raise or lower the
sliding/pop-up roof, move the switch
to resistance point in the required
direction1 to4.
Release the switch when the roof has
reached the desired position.
Fully opening (Express-open) and clos-
ing (Express-close) the
sliding/pop-up roof
�
To open, close, raise or lower the
sliding/pop-up roof, move the switch
past the resistance point in the re-
quired direction1 to4 and release.
The sliding/pop-up roof opens or clos-
es completely.
!To avoid damaging the seals, do not
transport any objects with sharp edges
which can stick out of the
sliding/pop-up roof.
Do not open the sliding/pop-up roof if
there is snow or ice on the roof, as this
could result in malfunctions.
The sliding/pop-up roof can be opened
or closed manually should an electrical
malfunction occur (
�page 348).
iYou can also open or close the slid-
ing/pop-up roof using the:�
SmartKey (summer opening/con-
venience feature) (
�page 212)
�
button, in the control panel of
the automatic climate control
(�page 173)
�
buttone in the control panel of
the automatic climate control
(�page 173)