Page 117 of 464
117 Controls in detail
Memory function
Storing positions into memory�
Adjust the seats, steering wheel and
rear view mirrors to the desired posi-
tion (
�page 34).
�
Turn button2 to selected memory po-
sition.
�
Press memory button1.
�
Release memory button and push
button2 within three seconds.
All the settings are stored at the select-
ed position.
Recalling positions from memory�
Turn button2 to s ele c ted me m ory p o-
sition.
�
Press and hold button2 until the seat,
steering wheel and rear view mirrors
have fully moved to the stored posi-
tions.iReleasing the button immediately
stops movement to the stored posi-
tions.
Warning!
G
Do not operate the power seats using the
memory button if the seat backrest is in an
excessively reclined position. Doing so
could cause damage to front or rear seats.
First move the seat backrest to an upright
position.
ProCarManuals.com
Page 151 of 464

151 Controls in detail
Control system
�
Move the selection marker with
theæ orç button to
the
Convenience
submenu.
�
Press buttonj ork repeatedly
until you see this message in the dis-
play:
Function Easy-entry feature
.
The selection marker is on the current
setting.
�
Pressæ orç to change the
easy-entry/exit setting.
The following settings are available for
the easy-entry/exit feature:Setting key-dependency
Use this function to set whether the mem-
ory settings for the seats, the steering
wheel and the mirrors should be stored
separately for each SmartKey or SmartKey
with KEYLESS-GO (
�page 116).
�
Move the selection marker with
theæ orç button to
the
Convenience
submenu.
�
Press buttonj ork repeatedly
until you see this message in the dis-
play:
Key-dependent
.
The selection marker is on the current
setting.
�
Pressæ orç to set key-depen-
dency to
on or
off
.
Setting parking position for exterior rear
view mirror
Use the
Mirror adjustment parking aid
function to select whether the passen-
ger-side exterior rear view mirror should be
turned downward during parking maneu-
vers, when reverse gear is engaged. For
additional information, see “Activating ex-
terior rear view mirror parking position”
(
�page 169).
off
The easy-entry/ex-
it feature is deacti-
vated.
Steering col.
Only the steering
column is moved.
Steer. col. + seat
Both the steering
column and the
seat are moved.
ProCarManuals.com
Page 183 of 464

183 Controls in detail
Audio system
�Audio system
Audio and telephone, operation
These instructions are intended to help
you become familiar with your
Mercedes-Benz audio system. They con-
tain useful tips and a detailed description
of the user functions.
Operating safety
Sound system
Your vehicle is equipped with a sound sys-
tem. The subwoofer is located between the
rear seats.
Warning!
G
In order to avoid distraction which could
lead to an accident, the driver should enter
system settings with the vehicle at a stand-
still and operate the system only when road
and traffic conditions permit. Always pay full
attention to traffic conditions first before
operating system controls while driving.
Bear in mind that at a speed of just 30 mph
(approximately 50 km/h), your car is cover-
ing a distance of 50 feet (approximately
14 m) every second.
Warning!
G
Any alterations made to electronic compo-
nents can cause malfunctions.
The radio, amplifier, CD changer*, satellite
radio*, telephone* and voice control sys-
tem* are interconnected. When one of the
components is not operational or has not
been removed/replaced properly, the func-
tion of other components may be impaired.
This condition might seriously impair the
operating safety of your vehicle.
We recommend that you have any service
work on electronic components carried out
by an authorized Mercedes-Benz Center.
!Make sure no objects fall into the open-
ings of the subwoofer between the rear
seats.
If necessary, contact an authorized
Mercedes-Benz Center to remove any
objects which may have fallen into the
openings.
ProCarManuals.com
Page 225 of 464
225 Controls in detail
Soft top
�
Pull catch8 back and guide left re-
taining pin into mounting fixture on left
side.
�
Fold upper section of wind screen up
toward head restraints until it stops.Removing
�
Fold upper section of wind screen back
down.
�
Pull catch8 back and pull wind
screen out toward front of vehicle. Be
careful not to damage interior trim with
guide tabs.
�
Fold retaining lugs6 back.
9Catch
�
Press catch 9 and fold upper and low-
er sections back.
�
Place the wind screen back into the
bag.
Warning!
G
Check for secure locking by pulling up on
the wind screen.
To prevent personal injury, remove wind
screen if rear seats are to be occupied by
passengers.
ProCarManuals.com
Page 250 of 464

250 Controls in detailUseful features
�Useful featuresInterior storage spaces
Glove box
1Glove box
2Glove box lid releaseOpening the glove box
�
Pull lid release2.
The glove box lid opens downward.
Closing the glove box
�
Push lid up to close.
Warning!
G
To help avoid personal injury during a colli-
sion or sudden maneuver, exercise care
when stowing objects in the vehicle. Put lug-
g a g e o r c a r g o i n t h e t r u n k i f p o s s i b l e . D o n o t
pile luggage or cargo higher than the seat
backs.
Luggage nets cannot secure hard or heavy
objects.
Keep compartment lids closed. This will help
to prevent stored objects from being thrown
about and injuring vehicle occupants during
an accident.
!Make sure no objects fall into the open-
ings of the subwoofer between the rear
seats.
If necessary, contact an authorized
Mercedes-Benz Center to remove any
objects which may have fallen into the
openings.
iThe glove box lid contains a compart-
ment for eyeglasses.
Close the compartment for glasses first
before closing the glove box.
Audio system/COMAND* with CD
changer*: The CD changer is located in
the glove box.
ProCarManuals.com
Page 252 of 464
252 Controls in detailUseful featuresOpening telephone compartment�
Lift armrest by pushing button2
or3.
Closing telephone compartment
�
Lower armrest until it locks into place.
Locking compartment
�
Remove the mechanical key from the
SmartKey (
�page 348).
�
Turn the compartment lock to
position5.
Unlocking compartment
�
Turn the compartment lock to
position4.
�
Insert the mechanical key in the
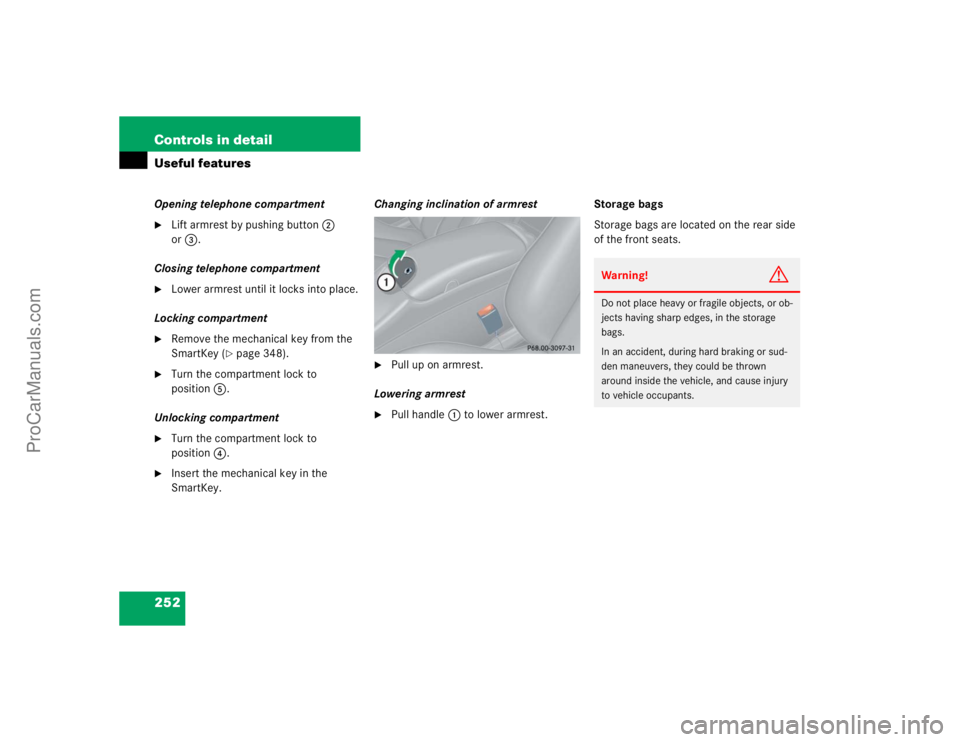
SmartKey.Changing inclination of armrest
�
Pull up on armrest.
Lowering armrest
�
Pull handle1 to lower armrest.Storage bags
Storage bags are located on the rear side
of the front seats.
Warning!
G
Do not place heavy or fragile objects, or ob-
jects having sharp edges, in the storage
bags.
In an accident, during hard braking or sud-
den maneuvers, they could be thrown
around inside the vehicle, and cause injury
to vehicle occupants.
ProCarManuals.com
Page 310 of 464

310 OperationVehicle careHard plastic trim items
Pour Mercedes-Benz approved Interior
Care onto soft lint-free cloth and apply
with light pressure.
Headliner and rear window shelf
Clean with soft bristle brush, or use a
dry-shampoo cleaner in case of excessive
dirt.
Seat belts
The webbing must not be treated with
chemical cleaning agents. Only use clear,
lukewarm water and soap. Do not dry the
webbing at temperatures above 176°F
(80°C) or in direct sunlight.Upholstery
Using aftermarket seat covers or wearing
clothing that have the tendency to give off
coloring (e.g. when wet, etc.) may cause
the upholstery to become permanently dis-
colored. By lining the seats with a proper
intermediate cover, contact-discoloration
will be prevented.
Leather upholstery
Wipe leather upholstery with a damp cloth
and dry thoroughly or clean with
Mercedes-Benz approved Leather Care.
Exercise particular care when cleaning per-
forated leather as its underside should not
become wet.
Nubuck leather upholstery
(CLK 55 AMG)
The nubuck leather upholstery is treated
with a protective coating. Wipe nubuck
leather upholstery with damp microfiber
cloth to remove dust and other light stains.
Carefully dab nubuck leather upholstery
with a microfiber cloth to remove oil stains.Plastic and rubber parts
Do not use oil or wax on these parts.
Wood trims
Dampen cloth using water and use damp
cloth to clean wood trims in your vehicle.
Do not use solvents like tar remover or
wheel cleaner nor polishes or waxes as
these may be abrasive.Warning!
G
Do not bleach or dye seat belts as this may
severely weaken them. In a crash they may
not be able to provide adequate protection.
!Do not use Mercedes-Benz approved
Leather Care or any solvents to clean
nubuck leather upholstery.
Avoid hard scrubbing on nubuck leath-
er upholstery.
ProCarManuals.com
Page 419 of 464

Prevents the wheels from locking up
during braking so that the vehicle can
continue to be steered.
Alignment bolt
Metal pin with thread. The center")
419 Technical terms
ABS
(A
ntilock B
rake S
ystem)
Prevents the wheels from locking up
during braking so that the vehicle can
continue to be steered.
Alignment bolt
Metal pin with thread. The centering
pin is an aid used when changing a tire
to align the wheel with the wheel hub.BabySmart
TM1
airbag deactivation
system
This system detects if a special system
compatible child restraint seat is in-
stalled on the front passenger seat. The
system will automatically deactivate
the passenger front airbag when such a
seat is properly installed (indicator
lamp PASS. AIRBAG OFF in the center
console comes on). See your autho-
rized Mercedes-Benz Center for avail-
ability.
BabySmart
TM compatible child seats
Special restraint system for children.
The sensor system for the passenger
seat prevents deployment of the pas-
senger front airbag if a BabySmart
TM
compatible child seat is installed.BAS
(B
rake A
ssist S
ystem)
System for potentially reducing braking
distances in emergency braking situa-
tions. The system is activated when it
senses an emergency based on how
fast the brake is applied.
Bi-Xenon headlamps*
Headlamps which use an electric arc as
the light source and produce a more in-
tense light than filament headlamps.
Bi-Xenon headlamps produce low
beam and high beam.
1BabySmart
TM
is a trademark of Siemens
Automotive Corp.
ProCarManuals.com