Page 163 of 418
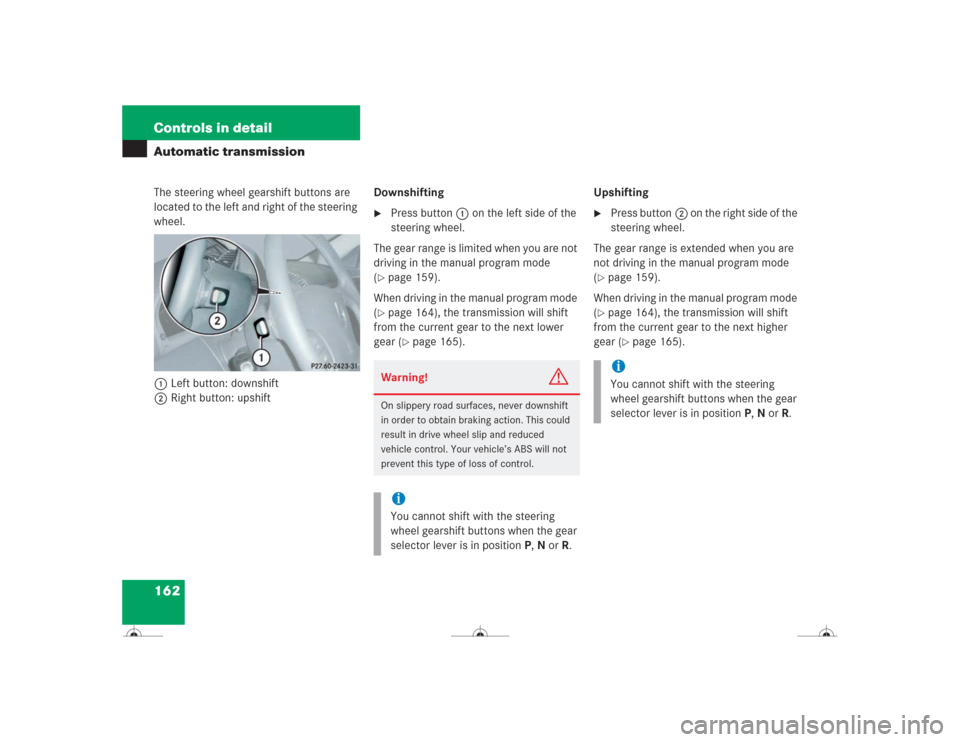
162 Controls in detailAutomatic transmissionThe steering wheel gearshift buttons are
located to the left and right of the steering
wheel.
1Left button: downshift
2Right button: upshiftDownshifting
�
Press button1 on the left side of the
steering wheel.
The gear range is limited when you are not
driving in the manual program mode
(
�page 159).
When driving in the manual program mode
(�page 164), the transmission will shift
from the current gear to the next lower
gear (
�page 165).Upshifting
�
Press button2 on the right side of the
steering wheel.
The gear range is extended when you are
not driving in the manual program mode
(
�page 159).
When driving in the manual program mode
(�page 164), the transmission will shift
from the current gear to the next higher
gear (
�page 165).
Warning!
G
On slippery road surfaces, never downshift
in order to obtain braking action. This could
result in drive wheel slip and reduced
vehicle control. Your vehicle’s ABS will not
prevent this type of loss of control.iYou cannot shift with the steering
wheel gearshift buttons when the gear
selector lever is in positionP,N orR.
iYou cannot shift with the steering
wheel gearshift buttons when the gear
selector lever is in positionP,N orR.
Page 165 of 418
164 Controls in detailAutomatic transmissionManual shift program CL 55 AMG
In the manual shift program mode you can
change the gears manually on the steering
wheel (
�page 161) or by using the gear
selector lever (
�page 158).
Allow engine to warm up under low load
use. Do not place full load on the engine
until the operating temperature has been
reached. Shift into reverse gear only when
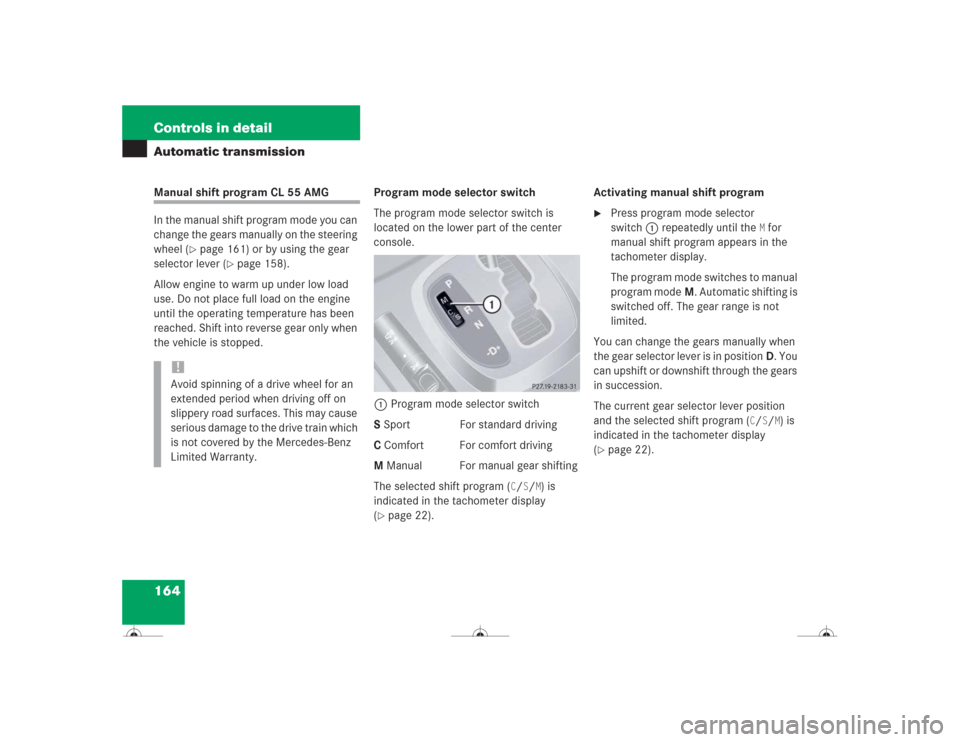
the vehicle is stopped.Program mode selector switch
The program mode selector switch is
located on the lower part of the center
console.
1Program mode selector switch
S Sport For standard driving
C Comfort For comfort driving
M Manual For manual gear shifting
The selected shift program (
C/S/M) is
indicated in the tachometer display
(
�page 22).Activating manual shift program
�
Press program mode selector
switch1 repeatedly until the
M for
manual shift program appears in the
tachometer display.
The program mode switches to manual
program modeM. Automatic shifting is
switched off. The gear range is not
limited.
You can change the gears manually when
the gear selector lever is in positionD. You
can upshift or downshift through the gears
in succession.
The current gear selector lever position
and the selected shift program (
C/S/M) is
indicated in the tachometer display
(
�page 22).
!Avoid spinning of a drive wheel for an
extended period when driving off on
slippery road surfaces. This may cause
serious damage to the drive train which
is not covered by the Mercedes-Benz
Limited Warranty.
Page 166 of 418
165 Controls in detail
Automatic transmission
Downshifting�
Briefly press the gear selector lever to
the left in the D-direction
(�page 158).
or
�
Press button1 on the left side of the
steering wheel (
�page 161).
The transmission shifts to the next
lower gear.Upshifting
�
Briefly press the gear selector lever to
the right in the D+direction
(�page 158).
or
�
Press button2 on the right side of the
steering wheel (
�page 161).
The transmission shifts to the next
higher gear.Kickdown
The kickdown can also be used for
maximum acceleration when driving in the
manual program mode.
�
Press the accelerator past the point of
resistance.
The transmission shifts to a lower gear.
�
Shift up once the desired speed has
been reached.
Warning!
G
On slippery road surfaces, never downshift
in order to obtain braking action. This could
result in drive wheel slip and reduced
vehicle control. Your vehicle’s ABS will not
prevent this type of loss of control.
iWhen driving at full throttle, the trans-
mission shifts to the next higher gear
when maximum engine speed has been
reached.
When you brake or stop, the transmis-
sion shifts down to a gear from which
you can easily accelerate or take off.
Page 196 of 418
195 Controls in detail
Driving systems
�Driving systems
The driving systems of your vehicle are de-
scribed on the following pages:�
Cruise control and Distronic*, with
which the vehicle can maintain a preset
speed.
�
ABC with vehicle level control systems,
with which you can change vehicle sus-
pension characteristics.
�
Parktronic system*, which serves as a
parking assistant.
The BAS, ABS and ESP driving systems are
described in the “Safety and Security” sec-
tion (�page 77).
Cruise control
Cruise control automatically maintains the
speed you set for your vehicle.
Use of cruise control is recommended for
driving at a constant speed for extended
periods of time. You can set or resume
cruise control at any speed over 20 mph
(30 km/h).
The cruise control function is operated by
means of the cruise control lever.
The cruise control lever is the uppermost
lever found on the left-hand side of the
steering column (
�page 20).
Warning!
G
Cruise control is a convenience system de-
signed to assist the driver during vehicle op-
eration. The driver is and must remain at all
times responsible for the vehicle speed and
for safe brake operation.
Only use cruise control if the road, traffic
and weather conditions make it advisable to
travel at a steady speed.�
The use of cruise control can be danger-
ous on winding roads or in heavy traffic
because conditions do not allow safe
driving at a steady speed.
�
The use of cruise control can be danger-
ous on slippery roads. Rapid changes in
tire traction can result in wheel spin and
loss of control.
�
Deactivate cruise control when driving
in fog.
The “Resume” function should only be oper-
ated if the driver is fully aware of the previ-
ously set speed and wishes to resume this
particular preset speed.
Page 199 of 418

198 Controls in detailDriving systemsDistronic*
When activated, the Distronic adaptive
cruise control system increases driving
convenience afforded by the cruise control
during travel on expressways and other
major roads.�
If the Distronic distance sensor detects
a slower moving vehicle directly ahead,
your vehicle speed will be reduced so
that you follow that vehicle at a preset
distance.
�
If there is no vehicle directly ahead of
you, Distronic will function in the same
way as cruise control (
�page 195).
Warning!
G
Distronic adaptive cruise control is no sub-
stitute for active driving involvement. It does
not react to stationary objects, nor recog-
nize or predict the curvature and lane layout
or the movement of vehicles ahead. Distron-
ic can only apply a maximum of 20% of the
vehicle’s braking power.
It is the driver’s responsibility at all times to
be attentive to traffic and road conditions
and to provide the steering, braking and oth-
er driving inputs necessary to retain control
of the vehicle.Warning!
G
Distronic is a convenience system. Its speed
adjustment reduction capability is intended
to make cruise control more effective and
usable when traffic speeds vary. However, it
is not intended to, nor does it, replace the
need for extreme care. The responsibility for
the vehicle speed and the distance to the ve-
hicle ahead, including most importantly
brake operation to assure safe stopping dis-
tance, always rests with the driver.
Distronic cannot take street and traffic con-
ditions into account.
Warning!
G
Distronic requires familiarity with its opera-
tional characteristics. We strongly recom-
mend that you review the following
information carefully before operating the
system.iFor operation in the USA only: This de-
vice complies with Part 15 of the
FCC Rules. Operation is subject to the
following two conditions:�
This device may not cause harmful
interference, and
�
this device must accept any inter-
ference received, including interfer-
ence that may cause undesired
operation.
Any unauthorized modification to this
device could void the user’s authority
to operate the equipment.
Page 203 of 418
202 Controls in detailDriving systemsDistronic deactivated
If Distronic is deactivated, you can see the
standard display of Distronic in the multi-
function display.
1Vehicle ahead, if detected
2Actual distance to vehicle ahead
3Preset distance threshold to vehicle
ahead
4Symbol for activated distance warning
function
5Your vehicleDistronic activated
If you turn Distronic on, you will see the set
speed in the multifunction display for
about five seconds. You then see the fol-
lowing display in the multifunction display.
1Distronic activatedCruise control lever
The Distronic system is operated by means
of the cruise control lever.
The cruise control lever is the uppermost
lever found on the left-hand side of the
steering column.
1Set current or higher speed
2Set current or lower speed
3Deactivate Distronic
4Resume at last set speed
Page 209 of 418

208 Controls in detailDriving systems
The most likely cause for a malfunctioning
system is a dirty sensor (located behind
the hood grille), especially at times of snow
and ice or heavy rain. In such a case, Dis-
tronic will switch off, and the message CURRENTLY UNAVAILABLE SEE OPER.
MANUAL
appears in the multifunction dis-
play.
For cleaning and care of the Distronic sen-
sor, see “Cleaning the Distronic* system
sensor cover” (
�page 287).Turns and bends
In turns or bends, Distronic may not detect
a moving vehicle in front, or it may detect
one too soon. This may cause your vehicle
to brake late or unexpectedly.
Distronic regulates only the distance be-
tween your vehicle and those directly ahead
of it, but does not register stationary objects
in the road, e.g.: �
a stopped vehicle in a traffic jam
�
a disabled vehicle
�
an oncoming vehicle
The driver must always be on the alert, ob-
serve all traffic and intercede as required by
steering or braking the vehicle.
Warning!
G
Distronic should not be used in snowy or icy
road conditions.
iIf the message
CURRENTLY UNAVAILABLE
SEE OPER. MANUAL
disappears during
driving and the last speed stored flash-
es for approximately five seconds, the
dirt (e.g. slush) has dissolved; Distronic
is again operational.
��
Page 229 of 418
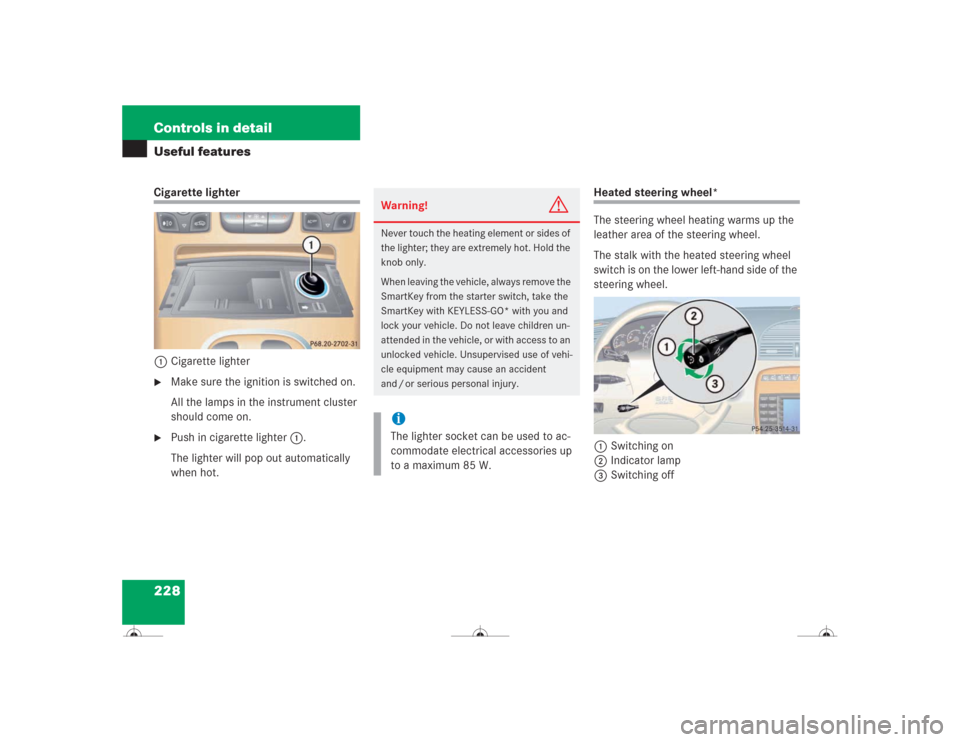
228 Controls in detailUseful featuresCigarette lighter
1Cigarette lighter�
Make sure the ignition is switched on.
All the lamps in the instrument cluster
should come on.
�
Push in cigarette lighter1.
The lighter will pop out automatically
when hot.
Heated steering wheel*
The steering wheel heating warms up the
leather area of the steering wheel.
The stalk with the heated steering wheel
switch is on the lower left-hand side of the
steering wheel.
1Switching on
2Indicator lamp
3Switching off
Warning!
G
Never touch the heating element or sides of
the lighter; they are extremely hot. Hold the
knob only.
When leaving the vehicle, always remove the
SmartKey from the starter switch, take the
SmartKey with KEYLESS-GO* with you and
lock your vehicle. Do not leave children un-
attended in the vehicle, or with access to an
unlocked vehicle. Unsupervised use of vehi-
cle equipment may cause an accident
and / or serious personal injury.iThe lighter socket can be used to ac-
commodate electrical accessories up
to a maximum 85 W.