Page 115 of 418

114 Controls in detailSeatsVehicles with seat ventilation*
The switch is located on the door. The red
indicator lamps on the switch show the
heating level selected:
1Seat heating switch
�
Switch on ignition.
Switching on seat heating
�
Press switch1 twice.
A red indicator lamp above the switch
comes on.
Switching off seat heating
�
Press switch1 again.
Switching on rapid seat heating
�
Press switch1 once.
Both indicator lamps above the switch
come on. Switching off rapid seat heating
�
Press switch1 twice.
Leveloff
No indicator lamp on
1
One indicator lamp on
2
Two indicator lamps on
iThe seat heating will be automatically
switched off after approximately
30 minutes.
iThe system switches over to normal
heating mode after approximately
five minutes. Only the right-hand indi-
cator lamp remains lit. !If one or both of the lamps on the seat
heating switch are flashing, there is in-
sufficient voltage available since too
many electrical consumers are turned
on. The seat heating switches off auto-
matically.
The seat heating will switch back on
again automatically as soon as suffi-
cient voltage is available.
Page 116 of 418

115 Controls in detailSeats
Seat ventilation*
The switch is located on the door. Seat
ventilation can be activated manually with
the SmartKey in starter switch position 1
or 2. The driver’s seat ventilation can be
activated automatically by the summer
opening feature (
�page 189).
The blue indicator lamps on the switch
show the ventilation level selected:
1Seat ventilation switch
�
Switch on ignition.
Switching on seat ventilation
�
Press switch1.
Three blue indicator lamps above the
switch come on.
�
Continue pressing switch1 until the
desired seat ventilation level is
reached.Switching off seat ventilation
�
Press switch1 repeatedly until all in-
dicator lamps go out.
Level3
Three indicator lamps on
2
Two indicator lamps on
1
One indicator lamp on
off
No indicator lamp on
iThe seat ventilation for the driver’s seat
is automatically set to the highest level
if activated via summer opening fea-
ture (
�page 189).
!If one or all of the lamps on the seat
ventilation switch are flashing, there is
insufficient voltage due to too many
electrical consumers being switched
on. The seat ventilation switches off au-
tomatically.
The seat ventilation will switch back on
again automatically as soon as suffi-
cient voltage is available.
Page 118 of 418
.
�
Press memory button2.
�
Release memo")
117 Controls in detail
Memory function
Storing positions into memory�
Adjust the seats, steering wheel and
exterior mirrors to the desired position
(�page 34).
�
Press memory button2.
�
Release memory button2 and push
one of the position buttons1 within
three seconds.
All the settings are stored with the se-
lected position.
Recalling positions from memory�
Press and hold one of the position
buttons1 until the seat, steering
wheel and exterior mirrors have fully
moved to the stored positions.Storing exterior rear view mirror park-
ing position
For easier parking, you can adjust the pas-
senger-side exterior rear view mirror so
that you can see the right rear wheel as
soon as you engage reverse gearR.
For information on activating the parking
position, see “Setting parking position for
exterior rear view mirror” (
�page 156).
iReleasing the button immediately
stops movement to the stored posi-
tions.Warning!
G
Do not operate the power seats using the
memory button if the seat backrest is in an
extremely reclined position. Doing so could
cause damage to front or rear seats.
First move seat backrest to an upright posi-
tion.
iYou can store a parking position for the
passenger-side exterior rear view mir-
ror for each SmartKey or SmartKey
with KEYLESS-GO*.
Page 155 of 418

154 Controls in detailControl systemConvenience submenu
Access the
CONVENIENCE
submenu via the
SETTINGS
menu. Use the
CONVENIENCE
sub-
menu to change the settings for a number
of convenience features. The following
functions are available:Setting key-dependency
Use this function to set whether the mem-
ory settings for the seats, the steering
wheel, the mirrors, and the automatic cli-
mate control should be stored separately
for each SmartKey (
�page 116).
�
Move the selection marker with
theæ orç button to
the
CONVENIENCE
submenu.
�
Press buttonj ork repeatedly
until you see this message in the dis-
play:
SETTINGS KEY-DEPENDENT
.
The selection marker is on the current
setting.
�
Pressæ orç to set key-depen-
dency to
ON or
OFF
. Activating easy-entry / exit feature
Use this function to activate and deacti-
vate the easy-entry / exit feature. When
the feature is activated, the steering wheel
and driver’s seat will move back to facili-
tate exiting when you:
�
remove the SmartKey from the starter
switch
�
open the driver’s door.
However, the engine must be turned off.
Function
Page
Setting key-dependency
154
Activating easy-entry / exit fea-
ture
154
Setting parking position for exte-
rior rear view mirrors
156
Setting fold-in function for exteri-
or rear view mirrors
156
Warning!
G
You must make sure that no one can be-
come trapped or injured by the moving
steering wheel and the driver’s seat when
the easy-entry / exit feature is in operation
and the driver’s door is being opened or the
SmartKey is removed from the starter
switch.
Page 224 of 418
223 Controls in detail
Useful features
Opening storage compartment
(except CL 55 AMG)�
Press button1 and lift the armrest.Opening storage tray and telephone
holder*
The tray contains a coin holder.
�
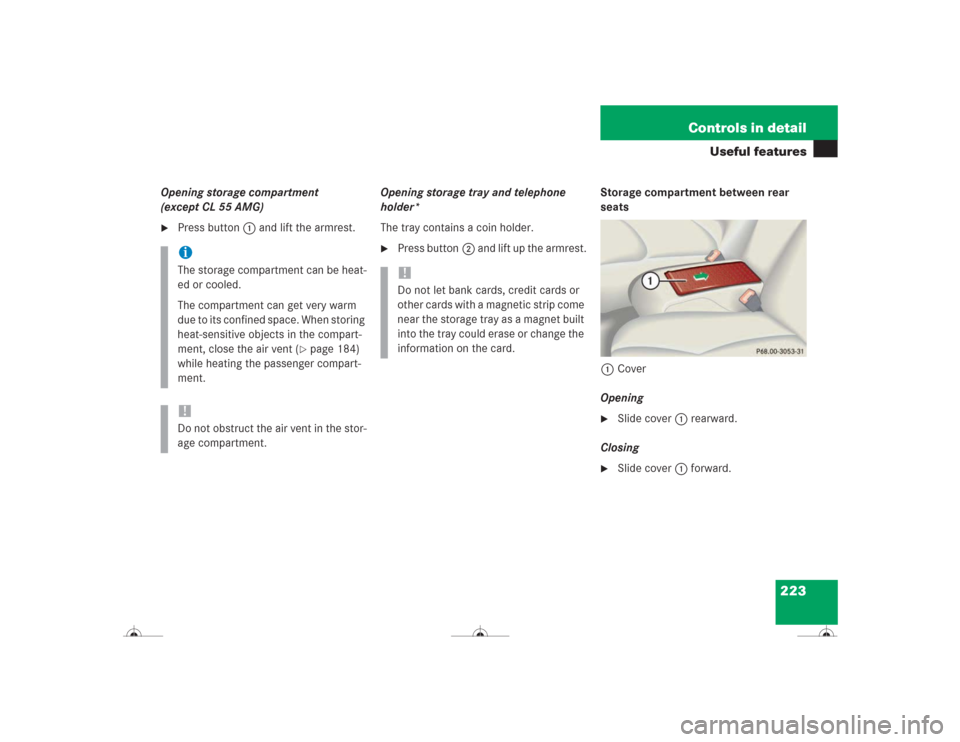
Press button2 and lift up the armrest.Storage compartment between rear
seats
1Cover
Opening
�
Slide cover1 rearward.
Closing
�
Slide cover1 forward.
iThe storage compartment can be heat-
ed or cooled.
The compartment can get very warm
due to its confined space. When storing
heat-sensitive objects in the compart-
ment, close the air vent (
�page 184)
while heating the passenger compart-
ment.
!Do not obstruct the air vent in the stor-
age compartment.
!Do not let bank cards, credit cards or
other cards with a magnetic strip come
near the storage tray as a magnet built
into the tray could erase or change the
information on the card.
Page 225 of 418
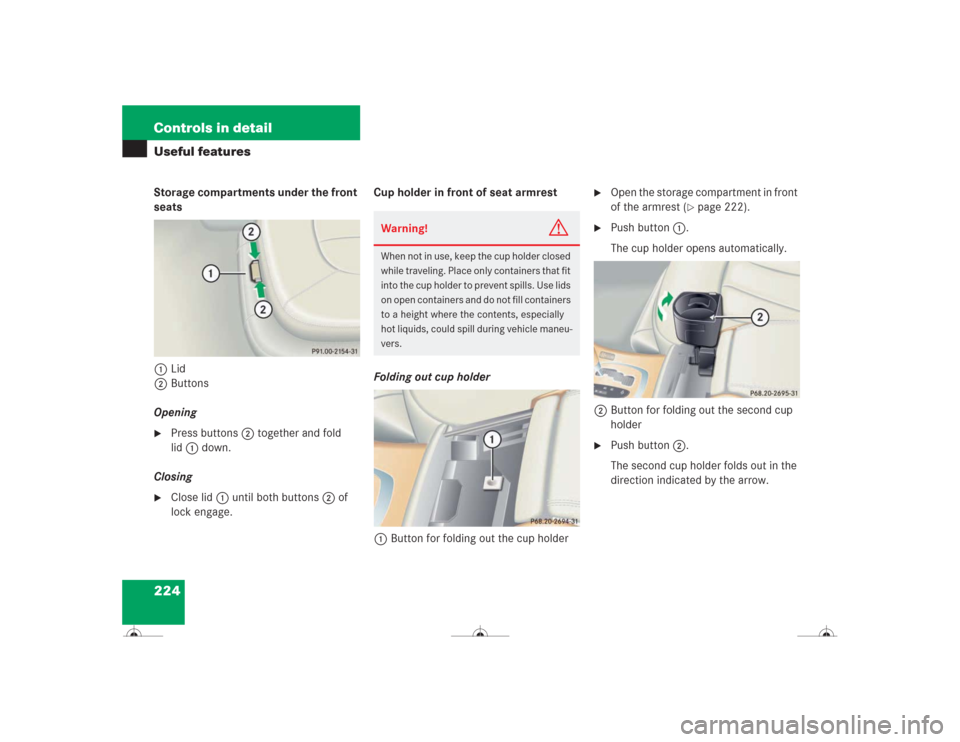
224 Controls in detailUseful featuresStorage compartments under the front
seats
1Lid
2Buttons
Opening�
Press buttons2 together and fold
lid1 down.
Closing
�
Close lid1 until both buttons2 of
lock engage.Cup holder in front of seat armrest
Folding out cup holder
1Button for folding out the cup holder
�
Open the storage compartment in front
of the armrest (
�page 222).
�
Push button1.
The cup holder opens automatically.
2Button for folding out the second cup
holder
�
Push button2.
The second cup holder folds out in the
direction indicated by the arrow.
Warning!
G
When not in use, keep the cup holder closed
while traveling. Place only containers that fit
into the cup holder to prevent spills. Use lids
on open containers and do not fill containers
to a height where the contents, especially
hot liquids, could spill during vehicle maneu-
vers.
Page 291 of 418
 may cause
the upholstery to become permanently")
290OperationVehicle careUpholstery
Using aftermarket seat covers or wearing
clothing that have the tendency to give off
coloring (e.g. when wet, etc.) may cause
the upholstery to become permanently dis-
colored. By lining the seats with a proper
intermediate cover, contact-discoloration
will be prevented.
Leather upholstery
Wipe leather upholstery with a damp cloth
and dry thoroughly or clean with
Mercedes-Benz approved Leather Care.
Exercise particular care when cleaning per-
forated leather as its underside should not
become wet.Nubuck leather upholstery (CL 55 AMG)
The nubuck leather upholstery is treated
with a protective coating. Wipe nubuck
leather upholstery with damp microfiber
cloth to remove dust and other light stains.
Carefully dab nubuck leather upholstery
with a microfiber cloth to remove oil stains.Plastic and rubber parts
Do not use oil or wax on these parts.
Wood trims
Dampen cloth using water and use damp
cloth to clean wood trims in your vehicle.
Do not use solvents like tar remover or
wheel cleaner nor polishes or waxes as
these may be abrasive.
!Do not use Mercedes-Benz approved
Leather Care or any solvents to clean
nubuck leather upholstery.
Avoid hard scrubbing on nubuck leath-
er upholstery.
Page 384 of 418

Active, computer-controlled system
that hydraulically adjusts the suspen-
sion at all four wheels in response to
various driving situations.
ABS
(A
n")
383 Technical terms
ABC
(A
ctive B
ody C
ontrol)
Active, computer-controlled system
that hydraulically adjusts the suspen-
sion at all four wheels in response to
various driving situations.
ABS
(A
ntilock B
rake S
ystem)
Prevents the wheels from locking up
during braking so that the vehicle can
continue to be steered.
Alignment bolt
Metal pin with thread. The centering
pin is an aid used when changing a tire
to align the wheel with the wheel hub.BabySmart
TM airbag deactivation
system
This system detects if a special system
compatible child restraint seat is in-
stalled on the front passenger seat. The
system will automatically deactivate
the passenger front airbag when such a
seat is properly installed (PASSENGER
AIRBAG OFF indicator lamp in the cen-
ter console comes on). See an autho-
rized Mercedes-Benz Center for
availability.
BabySmartTM compatible child seats
Special restraint system for children.
The sensor system for the passenger
seat prevents deployment of the pas-
senger front airbag if a BabySmart
TM
compatible child seat is installed.
BAS
(B
rake A
ssist S
ystem)
System for potentially reducing braking
distances in emergency braking situa-
tions. The system is activated when it
senses an emergency based on how
fast the brake is applied.Bi-Xenon headlamps
Headlamps which use an electric arc as
the light source and produce a more in-
tense light than filament headlamps.
Bi-Xenon headlamps produce low
beam and high beam.
CAC
(C
ustomer A
ssistance C
enter)
Mercedes-Benz customer service cen-
ter, which can help you with any ques-
tions about your vehicle and provide
assistance in the event of a break-
down.
CAN system
(C
ontroller A
rea N
etwork)
Data bus network serving to control ve-
hicle functions such as door locking or
windshield wiping.
Cockpit
All instruments, switches, buttons and
indicator/warning lamps in the passen-
ger compartment needed for vehicle
operation and monitoring.