Page 104 of 400

104 Controls in detailLightingDaytime running lamp mode�
Turn exterior lamp switch to
positionM orU.
When the engine is running, the low beam
headlamps are automatically switched on.
In low ambient light conditions the parking
lamps will also switch on.Canada only
When you shift from a driving position to
positionN orP, the low beam switches off
(with a three-minute delay).
For nighttime driving you should turn the
exterior lamp switch to positionB to
permit activation of the high beam head-
lamps.
USA only
The high beam headlamps can also be
activated when driving with the daytime
running lamp mode activated and exterior
lamp switch in positionM.
To activate the daytime running lamp
mode, see “Setting daytime running lamp
mode (USA only)” (
�page 129).Locator lighting and night security
illumination
Locator lighting and night security illumi-
nation are described in the control system
section under “Setting locator lighting”
(
�page 130) and “Setting night security
illumination” (
�page 131).
Switching on fog lamps
iWith the daytime running lamp mode
activated, the low beam headlamps will
not switch off automatically.iThe front fog lamps and rear fog lamp
cannot be switched on manually with
exterior lamp switch in positionU.
To activate the fog lamps, turn exterior
lamp switch to positionB and pull
the exterior lamp switch to first or
second stop (
�page 102).
iSee notes on the exterior lamp switch
(�page 102).
Warning!
G
In low ambient lighting or foggy conditions,
only switch from positionU toB with
the vehicle at a standstill. Switching
fromU toB will briefly switch off the
headlamps. Doing so while driving in low
ambient lighting conditions may result in an
accident.
Page 105 of 400

105 Controls in detail
Lighting
Switching on front fog lamps�
Make sure the low beam headlamps
are switched on.
�
Pull out exterior lamp switch to first
stop.
The green indicator lamp‡ beside
the lamp switch comes on.
Switching on rear fog lamp
�
Make sure the low beam headlamps
are switched on.
�
Pull out exterior lamp switch to second
stop.
The yellow indicator lamp† beside
the lamp switch comes on.
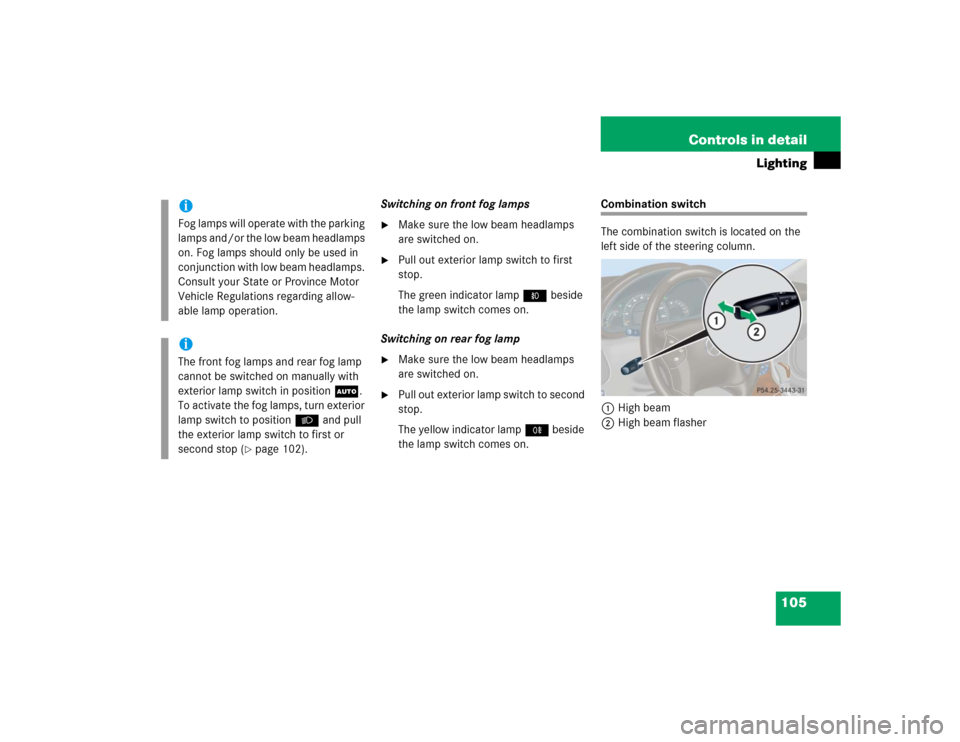
Combination switch
The combination switch is located on the
left side of the steering column.
1High beam
2High beam flasher
iFog lamps will operate with the parking
lamps and/or the low beam headlamps
on. Fog lamps should only be used in
conjunction with low beam headlamps.
Consult your State or Province Motor
Vehicle Regulations regarding allow-
able lamp operation.iThe front fog lamps and rear fog lamp
cannot be switched on manually with
exterior lamp switch in positionU.
To activate the fog lamps, turn exterior
lamp switch to positionB and pull
the exterior lamp switch to first or
second stop (
�page 102).
Page 125 of 400
125 Controls in detail
Control system
The table below shows what settings can
be changed within the various menus.
Detailed instructions on making individual
settings can be found on the following
pages.INSTRUMENT CLUSTER
LIGHTING
VEHICLE
CONVENIENCE
Set time (hours)
Set daytime running lamp mode
(USA only)
Set station selection mode
(radio)
Activate easy-entry/exit feature
Set time (minutes)
Set locator lighting
Set automatic locking
Set key-dependency
Select time display mode
Exterior lamps delayed shut-off
Set parking position for exterior
rear view mirror
Select temperature display
mode
Interior lighting delayed shut-off
Select speedometer display
modeSelect languageSelect display (speed display or
outside temperature)
Page 130 of 400

130 Controls in detailControl system
With daytime running lamp mode
selected and the exterior lamp switch
at position0, the following lamps will
come on automatically when the
engine is turned on:�
Parking lamps and low beam
headlamps
�
License plate lamps (in low ambient
light conditions)Setting locator lighting
During darkness, the following lamps will
come on when the exterior lamp switch is
in positionU, the locator lighting
feature is activated, and the vehicle is
unlocked by SmartKey:
�
Parking lamps
�
Tail lamps
�
License plate lamps
�
Front fog lamps
To activate locator lighting:
�
Make sure the function
LOCATOR
LIGHTING
is set.
�
Turn the exterior lamp switch to
positionU.
The locator lighting switches off when the
driver’s door is opened. It switches off
automatically after a period of approxi-
mately 40 seconds.
�
Move the selection marker with
theæ orç button to the LIGHTING
submenu.
�
Press buttonj ork repeatedly
until you see this message in the
display:
LOCATOR LIGHTING
.
The selection marker is on the current
setting.
�
Pressæ orç to select the
desired setting.
The locator lighting will be switched on
or off.
iIf you turn the exterior lamp switch to
another position, the corresponding
lamp(s) will switch on.
For safety reasons, resetting the LIGHTING
submenu to factory settings
(
�page 124) while driving will not
reset the daytime running lamp mode.
In the display you will then see the
message:
LIGHTING – CANNOT BE
TOTALLY RESET TO FACTORY SETTINGS
WHILE DRIVING
!.
��
Page 131 of 400

131 Controls in detail
Control system
Setting night security illumination
(Exterior lamps delayed shut-off)
Use the
HEADLIGHTS DELAYED SHUT-OFF
function to set whether and for how long
you would like the exterior lamps to illumi-
nate during darkness after all doors are
closed.
When the delayed shut-off feature is acti-
vated and the exterior lamp switch is in
positionU, the following lamps will re-
main lit after you remove the SmartKey
from the starter switch:
�
Parking lamps
�
Tail lamps
�
License plate lamps
�
Front fog lampsTo activate night security illumination:
�
Select delayed shut-off period
(�page 131).
�
Turn the exterior lamp switch to
positionU.
To select delayed shut-off period:
�
Move the selection marker with
theæ orç button to the LIGHTING
submenu.
�
Press buttonj ork repeatedly
until you see this message in the
display:
HEADLIGHTS DELAYED
SHUT-OFF.The selection marker is on the current
setting.
�
Pressæ orç to select the
desired lamp-on period.
You can select:�
0 s
, the delayed shut-off feature is
deactivated
�
15 s
, 30 s
, 45 s
or
60 s
, the delayed
shut-off feature is activated
You can temporarily deactivate the
delayed shut-off feature:
�
Before leaving the vehicle turn the
SmartKey in the starter switch to
position0.
�
Then turn it to position2 and back
to0.
iYou can reactivate this function within
ten minutes by opening a door.
If you do not open a door after
removing the SmartKey, the lamps will
automatically switch off after
60 seconds.
��
Page 133 of 400

133 Controls in detail
Control system
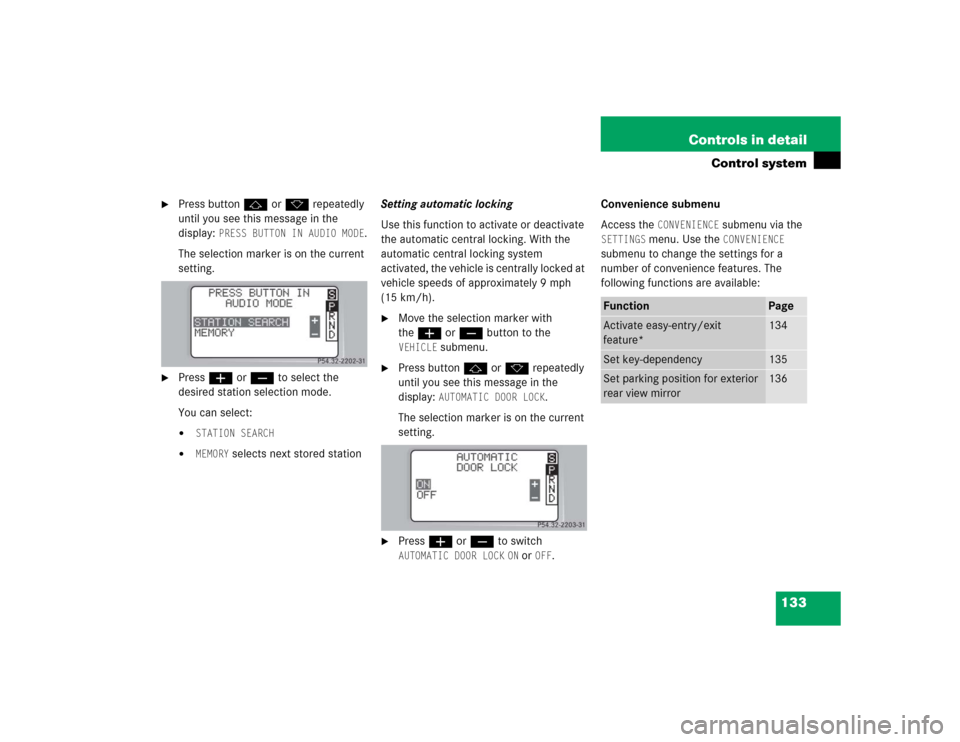
�
Press buttonj ork repeatedly
until you see this message in the
display:
PRESS BUTTON IN AUDIO MODE
.
The selection marker is on the current
setting.
�
Pressæ orç to select the
desired station selection mode.
You can select:�
STATION SEARCH
�
MEMORY
selects next stored stationSetting automatic locking
Use this function to activate or deactivate
the automatic central locking. With the
automatic central locking system
activated, the vehicle is centrally locked at
vehicle speeds of approximately 9 mph
(15 km/h).
�
Move the selection marker with
theæ orç button to the VEHICLE
submenu.
�
Press buttonj ork repeatedly
until you see this message in the
display:
AUTOMATIC DOOR LOCK
.
The selection marker is on the current
setting.
�
Pressæ orç to switch AUTOMATIC DOOR LOCK
ON or
OFF
.Convenience submenu
Access the
CONVENIENCE
submenu via the
SETTINGS
menu. Use the
CONVENIENCE
submenu to change the settings for a
number of convenience features. The
following functions are available:
Function
Page
Activate easy-entry/exit
feature*
134
Set key-dependency
135
Set parking position for exterior
rear view mirror
136
Page 136 of 400
136 Controls in detailControl systemSetting parking position* for exterior
rear view mirror
Use the
MIRROR SETTING WHEN PARKING
function to select whether the passen-
ger-side exterior rear view mirror should be
turned downward during parking maneu-
vers when reverse gearR is engaged.
For additional information, see “Activating
exterior rear view mirror parking posi-
tion*” (
�page 150).
�
Move the selection marker to the CONVENIENCE
submenu using theæ
orç button.
�
Press buttonj ork repeatedly
until you see this message in the
display:
MIRROR SETTING WHEN
PARKING.
The selection marker is on the current
setting.
�
Pressæ orç to switch function ON or
OFF
.
Trip computer menu
Use the trip computer menu to call up
statistical data on your vehicle. The
following information is available:Function
Page
Fuel consumption statistics after
start
137
Fuel consumption statistics
since last reset
137
Call up range (distance to empty)
138
Page 141 of 400

141 Controls in detail
Manual transmission
�Manual transmission
Manual transmission is standard
equipment on select models and not
available on all models.
For information on driving with a manual
transmission, see “Manual transmission”
(�page 43).
Do not exceed the maximum speed in the
individual gears. Refer to tachometer
(�page 111) for engine speeds.
Shifting into reverse�
Stop the vehicle completely.
�
Pull gearshift lever up and shift
inRreverse.
Warning!
G
For vehicles equipped with a manual trans-
mission, getting out of your vehicle with the
gearshift lever not engaged in first or
reverse gear and parking brake engaged is
dangerous.
Also, when parked on an incline, an engaged
first or reverse gear alone may not prevent
your vehicle from moving, possibly hitting
people or objects.
Always set the parking brake in addition to
engaging first or reverse gear (
�page 50).
When parked on an incline, turn front wheels
towards the road curb.
Do not park this vehicle in areas where
combustible materials such as grass, hay or
leaves can come into contact with the hot
exhaust system, as these materials could be
ignited and cause a vehicle fire.Warning!
G
When leaving the vehicle, always remove the
SmartKey from the starter switch, take it
with you and lock the vehicle. Do not leave
children unattended in the vehicle, or with
access to an unlocked vehicle. Children
could move the gearshift lever, which could
result in an accident and/or serious injury.Warning!
G
On slippery road surfaces, never downshift
in order to obtain braking action.
This could result in drive wheel slip and
reduced vehicle control. Your vehicle’s ABS
will not prevent this type of loss of control.!Downshifting gears leading to overrev-
ving the engine can result in engine
damage that is not covered by the
Mercedes-Benz Limited Warranty.
Never hold the vehicle stopped on a hill
by using the clutch pedal. The clutch
may be damaged which is not covered
by the Mercedes-Benz Limited
Warranty.
Do not exceed the engine speed limits
(�page 111).