Page 122 of 400
122 Controls in detailControl systemMalfunction memory menu
Use the malfunction memory menu to scan
malfunction and warning messages that
may be stored in the system. What
information is shown in the display
depends on whether malfunctions have
actually occurred.
�
Press buttonè orÿ repeatedly
until you see the malfunction message
memory in the display.
No malfunction messages
If no malfunctions have occurred, the
message in the display is:
NO MALFUNCTIONMalfunctions have occurred
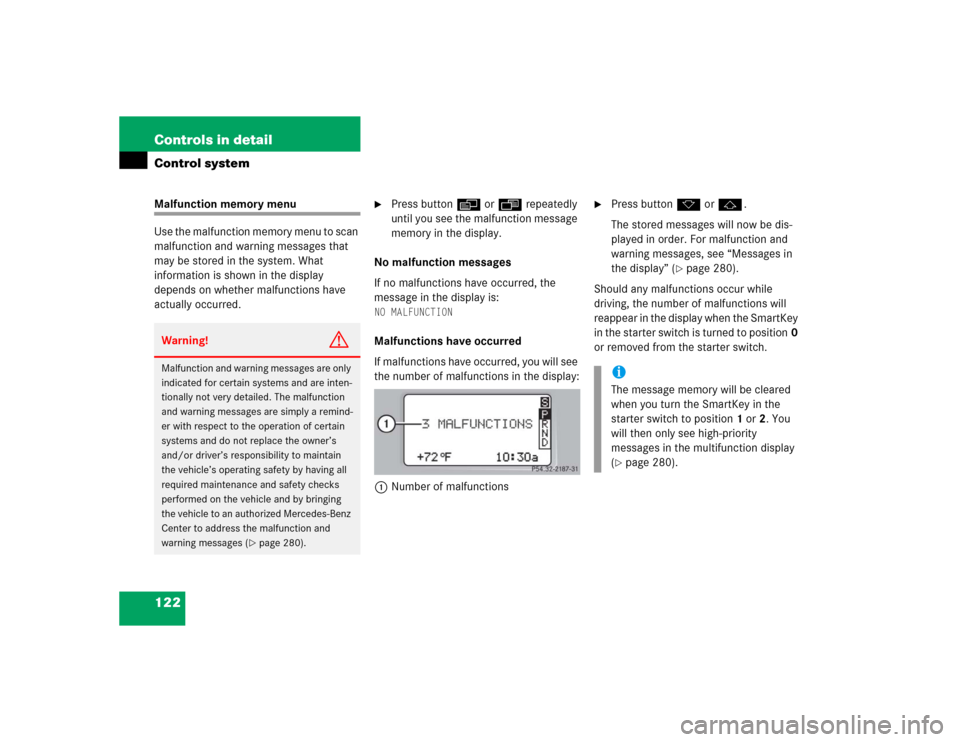
If malfunctions have occurred, you will see
the number of malfunctions in the display:
1Number of malfunctions
�
Press buttonk orj.
The stored messages will now be dis-
played in order. For malfunction and
warning messages, see “Messages in
the display” (
�page 280).
Should any malfunctions occur while
driving, the number of malfunctions will
reappear in the display when the SmartKey
in the starter switch is turned to position0
or removed from the starter switch.
Warning!
G
Malfunction and warning messages are only
indicated for certain systems and are inten-
tionally not very detailed. The malfunction
and warning messages are simply a remind-
er with respect to the operation of certain
systems and do not replace the owner’s
and/or driver’s responsibility to maintain
the vehicle’s operating safety by having all
required maintenance and safety checks
performed on the vehicle and by bringing
the vehicle to an authorized Mercedes-Benz
Center to address the malfunction and
warning messages (
�page 280).
iThe message memory will be cleared
when you turn the SmartKey in the
starter switch to position1 or2. You
will then only see high-priority
messages in the multifunction display
(�page 280).
Page 123 of 400

123 Controls in detail
Control system
Settings menu
In the
SETTINGS
menu there are two
functions:
�
The function
RESET TO FACTORY
SETTINGS
, with which you can reset all
the settings to the original factory
settings.
�
A collection of submenus with which
you can make individual settings for
your vehicle.
�
Press buttonè orÿ repeatedly
until the
SETTINGS
menu is seen in the
display.Resetting all settings
You can reset all the functions of all
submenus to the factory settings.
�
Press the reset button in the
instrument cluster (
�page 22) for
approximately three seconds.
In the display you will see the request
to press the reset button again to
confirm.
�
Press the reset button again.
The functions of all the submenus will
reset to factory settings.
iThe settings you have changed will not
be reset unless you confirm the action
by pressing the reset button a second
time. Approximately five seconds after
pressing the reset button for the
second time, the
SETTINGS...
menu
reappears in the display.
For safety reasons, the following
functions are not reset while driving:
�
the
LIGHT CIRCUIT HEADLIGHT MODE
function in the
LIGHTING
submenu
�
the
SETTINGS KEY-DEPENDENT
function in the
CONVENIENCE
submenu
Page 124 of 400

124 Controls in detailControl systemSubmenus in the Settings menu�
Press buttonk orj.
In the display you see the collection of
the submenus.
�
Press buttonç.
The selection marker moves to the next
submenu.
The submenus are arranged by hierarchy.
Scroll down with theç button, scroll up
with theæ button.
Move within the submenus with thek
orj button to the individual functions.
The settings themselves are made with
buttonæ orç.Resetting the functions of a submenu
For each submenu you can reset all the
functions to the factory settings.
�
Move to a function in the submenu.
�
Press the reset button (
�page 22) in
the instrument cluster for approxi-
mately three seconds.
In the display you will see the request
to press the reset button again to
confirm.
�
Press the reset button again.
All functions of the submenu will reset
to factory settings.
iThe settings you have changed will not
be reset unless you confirm the action
by pressing the reset button a second
time. Approximately five seconds after
pressing the reset button for the
second time, the
SETTINGS...
menu
reappears in the display.
Page 125 of 400
125 Controls in detail
Control system
The table below shows what settings can
be changed within the various menus.
Detailed instructions on making individual
settings can be found on the following
pages.INSTRUMENT CLUSTER
LIGHTING
VEHICLE
CONVENIENCE
Set time (hours)
Set daytime running lamp mode
(USA only)
Set station selection mode
(radio)
Activate easy-entry/exit feature
Set time (minutes)
Set locator lighting
Set automatic locking
Set key-dependency
Select time display mode
Exterior lamps delayed shut-off
Set parking position for exterior
rear view mirror
Select temperature display
mode
Interior lighting delayed shut-off
Select speedometer display
modeSelect languageSelect display (speed display or
outside temperature)
Page 126 of 400

126 Controls in detailControl systemInstrument cluster submenu
Access the
INSTRUMENT CLUSTER
submenu
via the
SETTINGS
menu. Use the
INSTRUMENT CLUSTER
submenu to change
the instrument cluster display settings.
The following functions are available:Set time (hours)
This function can only be seen with audio
system.
�
Move the selection marker with
theæ orç button to the INSTRUMENT CLUSTER
submenu.
�
Press buttonj ork repeatedly
until you see this message in the
display:
TIME SETTINGS – HOURS
.The selection marker is on the hour
setting.
�
Pressæ orç to set the hour.
Set time (minutes)
This function can only be seen with audio
system.
�
Move the selection marker with
theæ orç button to the INSTRUMENT CLUSTER
submenu.
Function
Page
Set time (hours)
126
Set time (minutes)
126
Select time display mode
127
Select temperature display
mode
127
Select speedometer display
mode
128
Select language
128
Select display (speed display or
outside temperature)
129
iVehicles with COMAND*:
For information on setting the time,
refer to the separate COMAND
operating instructions.
iVehicles with COMAND*:
For information on setting the time,
refer to the separate COMAND
operating instructions.
Page 129 of 400
129 Controls in detail
Control system
Selecting display (speed display or
outside temperature)�
Move the selection marker with
theæ orç button to the INSTRUMENT CLUSTER
submenu.
�
Press buttonj ork repeatedly
until you see this message in the
display:
SELECT DISPLAY
.
The selection marker is on the current
setting.
�
Pressæ orç to select the
display permanently shown in the
multifunction display.Lighting submenu
Access the
LIGHTING
submenu via the
SETTINGS
menu. Use the
LIGHTING
submenu to change the lamp and lighting
settings on your vehicle. The following
functions are available:Setting daytime running lamp mode
(USA only)
�
Move the selection marker with
theæ orç button to the LIGHTING
submenu.
�
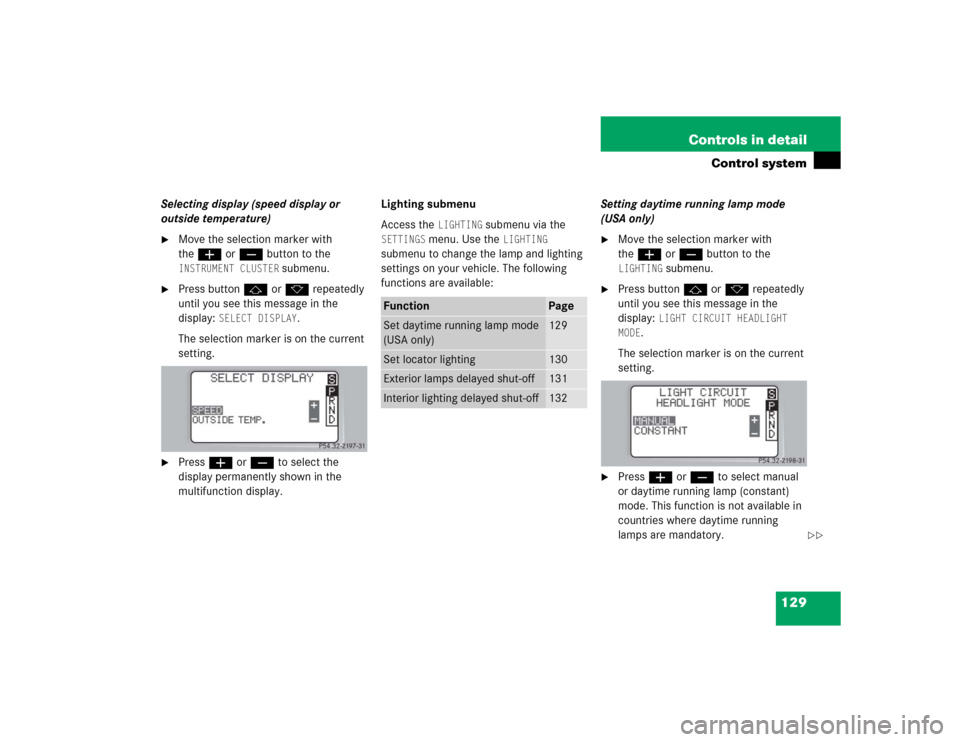
Press buttonj ork repeatedly
until you see this message in the
display:
LIGHT CIRCUIT HEADLIGHT
MODE
.
The selection marker is on the current
setting.
�
Pressæ orç to select manual
or daytime running lamp (constant)
mode. This function is not available in
countries where daytime running
lamps are mandatory.
Function
Page
Set daytime running lamp mode
(USA only)
129
Set locator lighting
130
Exterior lamps delayed shut-off
131
Interior lighting delayed shut-off
132
��
Page 130 of 400

130 Controls in detailControl system
With daytime running lamp mode
selected and the exterior lamp switch
at position0, the following lamps will
come on automatically when the
engine is turned on:�
Parking lamps and low beam
headlamps
�
License plate lamps (in low ambient
light conditions)Setting locator lighting
During darkness, the following lamps will
come on when the exterior lamp switch is
in positionU, the locator lighting
feature is activated, and the vehicle is
unlocked by SmartKey:
�
Parking lamps
�
Tail lamps
�
License plate lamps
�
Front fog lamps
To activate locator lighting:
�
Make sure the function
LOCATOR
LIGHTING
is set.
�
Turn the exterior lamp switch to
positionU.
The locator lighting switches off when the
driver’s door is opened. It switches off
automatically after a period of approxi-
mately 40 seconds.
�
Move the selection marker with
theæ orç button to the LIGHTING
submenu.
�
Press buttonj ork repeatedly
until you see this message in the
display:
LOCATOR LIGHTING
.
The selection marker is on the current
setting.
�
Pressæ orç to select the
desired setting.
The locator lighting will be switched on
or off.
iIf you turn the exterior lamp switch to
another position, the corresponding
lamp(s) will switch on.
For safety reasons, resetting the LIGHTING
submenu to factory settings
(
�page 124) while driving will not
reset the daytime running lamp mode.
In the display you will then see the
message:
LIGHTING – CANNOT BE
TOTALLY RESET TO FACTORY SETTINGS
WHILE DRIVING
!.
��
Page 131 of 400

131 Controls in detail
Control system
Setting night security illumination
(Exterior lamps delayed shut-off)
Use the
HEADLIGHTS DELAYED SHUT-OFF
function to set whether and for how long
you would like the exterior lamps to illumi-
nate during darkness after all doors are
closed.
When the delayed shut-off feature is acti-
vated and the exterior lamp switch is in
positionU, the following lamps will re-
main lit after you remove the SmartKey
from the starter switch:
�
Parking lamps
�
Tail lamps
�
License plate lamps
�
Front fog lampsTo activate night security illumination:
�
Select delayed shut-off period
(�page 131).
�
Turn the exterior lamp switch to
positionU.
To select delayed shut-off period:
�
Move the selection marker with
theæ orç button to the LIGHTING
submenu.
�
Press buttonj ork repeatedly
until you see this message in the
display:
HEADLIGHTS DELAYED
SHUT-OFF.The selection marker is on the current
setting.
�
Pressæ orç to select the
desired lamp-on period.
You can select:�
0 s
, the delayed shut-off feature is
deactivated
�
15 s
, 30 s
, 45 s
or
60 s
, the delayed
shut-off feature is activated
You can temporarily deactivate the
delayed shut-off feature:
�
Before leaving the vehicle turn the
SmartKey in the starter switch to
position0.
�
Then turn it to position2 and back
to0.
iYou can reactivate this function within
ten minutes by opening a door.
If you do not open a door after
removing the SmartKey, the lamps will
automatically switch off after
60 seconds.
��
