Page 221 of 400

221 Controls in detail
Useful features
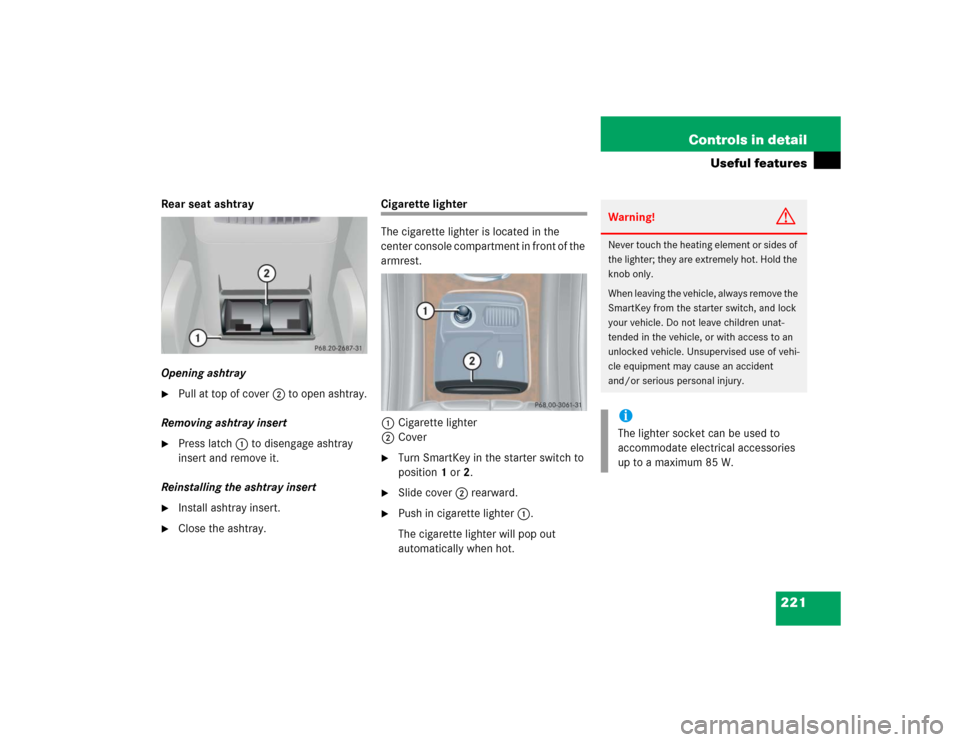
Rear seat ashtray
Opening ashtray�
Pull at top of cover2 to open ashtray.
Removing ashtray insert
�
Press latch1 to disengage ashtray
insert and remove it.
Reinstalling the ashtray insert
�
Install ashtray insert.
�
Close the ashtray.
Cigarette lighter
The cigarette lighter is located in the
center console compartment in front of the
armrest.
1Cigarette lighter
2Cover�
Turn SmartKey in the starter switch to
position1 or2.
�
Slide cover2 rearward.
�
Push in cigarette lighter1.
The cigarette lighter will pop out
automatically when hot.
Warning!
G
Never touch the heating element or sides of
the lighter; they are extremely hot. Hold the
knob only.
When leaving the vehicle, always remove the
SmartKey from the starter switch, and lock
your vehicle. Do not leave children unat-
tended in the vehicle, or with access to an
unlocked vehicle. Unsupervised use of vehi-
cle equipment may cause an accident
and/or serious personal injury.iThe lighter socket can be used to
accommodate electrical accessories
up to a maximum 85 W.
Page 271 of 400

271 Operation
Vehicle care
Steering wheel and gear selector lever
Wipe with a damp cloth and dry thoroughly
or clean with Mercedes-Benz approved
Leather Care.
Cup holder
Use a gentle dishwashing detergent or
mild detergent for delicate fabrics as a
washing solution. Wipe with a cloth moist-
ened in lukewarm solution. Do not use
scouring agents.
Hard plastic trim items
Pour Mercedes-Benz approved Interior
Care onto soft lint-free cloth and apply
with light pressure.Headliner and rear window shelf
Clean with soft bristle brush, or use a
dry-shampoo cleaner in case of excessive
dirt.
Seat belts
The webbing must not be treated with
chemical cleaning agents. Only use clear,
lukewarm water and soap. Do not dry the
webbing at temperatures above 176°F
(80°C) or in direct sunlight.Upholstery
Using aftermarket seat covers or wearing
clothing that have the tendency to give off
coloring (e.g. when wet, etc.) may cause
the upholstery to become permanently dis-
colored. By lining the seats with a proper
intermediate cover, contact-discoloration
will be prevented.
Leather upholstery
Wipe leather upholstery with a damp cloth
and dry thoroughly or clean with
Mercedes-Benz approved Leather Care.
Exercise particular care when cleaning
perforated leather as its underside should
not become wet.
Warning!
G
Do not bleach or dye seat belts as this may
severely weaken them. In a crash they may
not be able to provide adequate protection.
Page 278 of 400

278 Practical hintsWhat to do if …Problem
Possible cause
Suggested solution
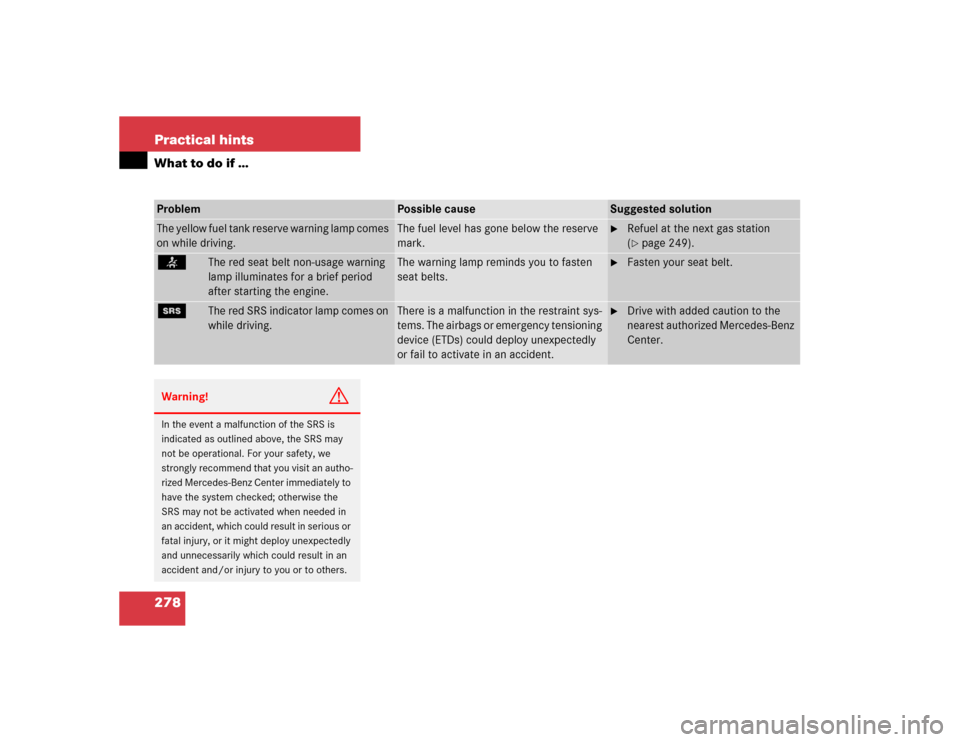
The yellow fuel tank reserve warning lamp comes
on while driving.
The fuel level has gone below the reserve
mark.
�
Refuel at the next gas station
(�page 249).
<
The red seat belt non-usage warning
lamp illuminates for a brief period
after starting the engine.
The warning lamp reminds you to fasten
seat belts.
�
Fasten your seat belt.
1
The red SRS indicator lamp comes on
while driving.
There is a malfunction in the restraint sys-
tems. The airbags or emergency tensioning
device (ETDs) could deploy unexpectedly
or fail to activate in an accident.
�
Drive with added caution to the
nearest authorized Mercedes-Benz
Center.
Warning!
G
In the event a malfunction of the SRS is
indicated as outlined above, the SRS may
not be operational. For your safety, we
strongly recommend that you visit an autho-
rized Mercedes-Benz Center immediately to
have the system checked; otherwise the
SRS may not be activated when needed in
an accident, which could result in serious or
fatal injury, or it might deploy unexpectedly
and unnecessarily which could result in an
accident and/or injury to you or to others.
Page 279 of 400

279 Practical hints
What to do if …
Lamp in center consoleProblem
Possible cause
Suggested solution
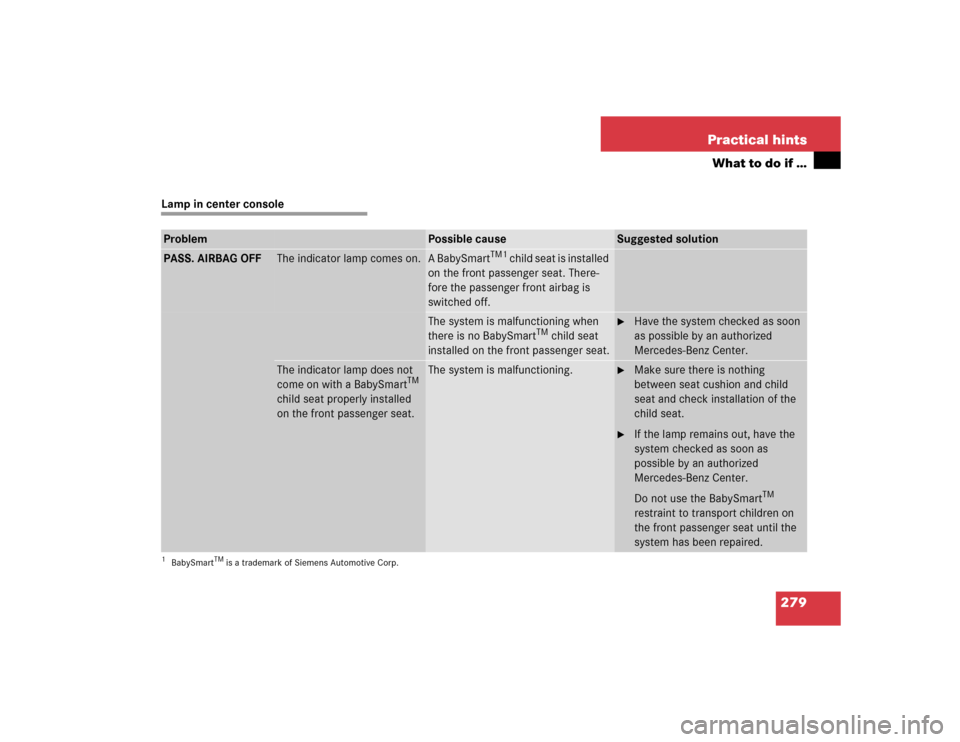
PASS. AIRBAG OFF
The indicator lamp comes on.
A BabySmart
TM1
child seat is installed
on the front passenger seat. There-
fore the passenger front airbag is
switched off.
1BabySmart
TM is a trademark of Siemens Automotive Corp.
The system is malfunctioning when
there is no BabySmart
TM child seat
installed on the front passenger seat.
�
Have the system checked as soon
as possible by an authorized
Mercedes-Benz Center.
The indicator lamp does not
come on with a BabySmart
TM
child seat properly installed
on the front passenger seat.The system is malfunctioning.
�
Make sure there is nothing
between seat cushion and child
seat and check installation of the
child seat.
�
If the lamp remains out, have the
system checked as soon as
possible by an authorized
Mercedes-Benz Center.
Do not use the BabySmart
TM
restraint to transport children on
the front passenger seat until the
system has been repaired.
Page 285 of 400
285 Practical hints
What to do if …
Display symbol
Display message
Possible cause
Possible solution
#
BATTERY/ALTERNATOR
VISIT WORKSHOP!
The battery was charged with a battery
charger or jump started.
�
Have the battery checked at a service
station.
The battery is no longer charging.
Possible causes:�
alternator malfunctioning
�
broken poly-V-belt
�
Stop immediately and check the
poly-V-belt.
If it is broken:
�
Do not continue to drive. Otherwise
the engine will overheat due to an
inoperative water pump which may
result in damage to the engine. Notify
an authorized Mercedes-Benz Center.
If it is intact:
�
Drive immediately to the nearest
authorized Mercedes-Benz Center.
UNDERVOLTAGE
ENGINE ON!
The battery has insufficient voltage and
can no longer supply the convenience
functions such as seat heater*.
�
Start the engine (
�page 43).
UNDERVOLTAGE
SWITCH CONSUMERS OFF!
The battery is malfunctioning.
�
Have the battery checked at a service
station.
Page 297 of 400

297 Practical hints
What to do if …
Display symbol
Display message
Possible cause
Possible solution
<
DRIVER’S SEAT BELT
FASTEN SEAT BELT!
The display reminds you and your
passengers to fasten seat belts.
�
Fasten the seat belts.
FR. PASS. SEAT BELT
FASTEN SEAT BELT!
The display reminds you and your
passengers to fasten seat belts.
�
Fasten the seat belts.
SEAT BELT SYSTEM
DRIVE TO WORKSHOP!
The seat belt system is malfunctioning.
�
Visit an authorized Mercedes-Benz
Center as soon as possible.
1
RESTRAINT SYSTEM
DRIVE TO WORKSHOP!
The system is malfunctioning.
�
Drive with added caution to the
nearest authorized Mercedes-Benz
Center.
Warning!
G
In the event a malfunction of the SRS is indi-
cated as outlined above, the SRS may not be
operational. For your safety, we strongly
recommend that you visit an authorized
Mercedes-Benz Center immediately to have
the system checked; otherwise the SRS may
not be activated when needed in an
accident, which could result in serious or
fatal injury, or it might deploy unexpectedly
and unnecessarily which could also result in
injury.
Page 301 of 400

301 Practical hints
Where will I find ...?
�
Remove vehicle tool kit6.
3Arrow
4Minispare wheel
5Vehicle tool kit storage well casing
6Vehicle tool kit
Wheel wrench
Vehicle jackStoring the vehicle tool kit
�
Place vehicle tool kit6 in vehicle tool
kit storage well casing5.
�
Place storage well casing2 over the
vehicle tool kit storage well casing5
and turn retaining screw1 clockwise
as far it will go to secure the Minispare
wheel.Vehicle jackiArrow3 on vehicle tool kit storage
well casing5 must point in the direc-
tion of travel. Otherwise you cannot
place the storage well casing2 on top
and secure the Minispare wheel with
retaining screw1.!To prevent damage, always disengage
trunk floor handle from upper edge of
trunk and lower trunk floor before
closing the trunk lid.
Warning!
G
The jack is designed exclusively for jacking
up the vehicle at the jack take-up brackets
built into both sides of the vehicle. To help
avoid personal injury, use the jack only to lift
the vehicle during a wheel change. Never
get beneath the vehicle while it is supported
by the jack. Keep hands and feet away from
the area under the lifted vehicle. Always
firmly set parking brake and block wheels
before raising vehicle with jack.
Do not disengage parking brake while the
vehicle is raised. Be certain that the jack is
always vertical (plumb line) when in use,
especially on hills. Always try to use the jack
on level surface. Make sure the jack arm is
fully seated in the jack take-up bracket. Al-
ways lower the vehicle onto sufficient ca-
pacity jackstands before working under the
vehicle.
Page 318 of 400

318 Practical hintsFlat tire
Wheel cover on vehicles with steel rims
(Canada only)�
On wheel to be changed, remove wheel
cover by reaching into two openings of
the wheel cover and pulling away from
the wheel.
�
On wheel to be changed, loosen but do
not yet remove the wheel bolts
(approximately one full turn with
wrench).
Warning!
G
The jack is designed exclusively for jacking
up the vehicle at the jack take-up brackets
built into both sides of the vehicle. To help
avoid personal injury, use the jack only to lift
the vehicle during a wheel change. Never
get beneath the vehicle while it is supported
by the jack. Keep hands and feet away from
the area under the lifted vehicle. Always
firmly set parking brake and block wheels
before raising vehicle with jack.
Do not disengage parking brake while the
vehicle is raised. Be certain that the jack is
always vertical (plumb line) when in use,
especially on hills. Always try to use the jack
on level surface. Make sure the jack arm is
fully seated in the jack take-up bracket. Al-
ways lower the vehicle onto sufficient ca-
pacity jackstands before working under the
vehicle.