Page 132 of 376

132 Controls in detailControl systemSetting parking position for exterior rear
view mirror
Use the
MIRROR SETTING WHEN PARKING
function to select whether the passen-
ger-side exterior rear view mirror should be
turned downward during parking maneu-
vers when reverse gear is engaged. For ad-
ditional information, see “Activating
exterior rear view mirror parking position”
(
�page 147).
You can store a parking position for the
passenger exterior rear view mirror using
the memory switch (
�page 97).
�
Move the selection marker with
the æ orç button to the
CONVE-
NIENCE
submenu.
�
Press button j ork repeatedly
until you see this message in the dis-
play:
MIRROR SETTING WHEN PARKING
.
The selection marker is on the current
setting.
�
Press æ orç to switch function ON or
OFF
.
Trip computer menu
Use the trip computer menu to call up sta-
tistical data on your vehicle. The following
information is available:Function
Page
Fuel consumption statistics after
start
133
Fuel consumption statistics
since last reset
133
Call up range (distance to empty)
134
Page 133 of 376

133
Controls in detail
Control system
Fuel consumption statistics after start�
Press button
ÿ orè repeatedly
until you see the first function of the
Trip computer menu.
�
Press button j ork repeatedly
until you see this message in the dis-
play:
AFTER START
.
1 Distance driven since start
2 Time elapsed since start
3 Average speed since start
4 Average fuel consumption since start Fuel consumption since last reset
�
Press button
ÿ orè repeatedly
until you see the first function of the
Trip computer menu.
�
Press button j ork repeatedly
until you see this message in the dis-
play:
After RESET
.
1 Distance driven since last reset
2 Time elapsed since last reset
3 Average speed since last reset
4 Average fuel consumption since last re-
set Resetting fuel consumption statistics
�
Press button
ÿ orè repeatedly
until you see the first function of the
Trip computer menu.
�
Press button j ork repeatedly
until you see the reading that you want
to reset in the display.
�
Press and hold the reset button in the
instrument cluster (
�page 22) until
the value is reset to 0.
iAll statistics stored since the last en-
gine start will be reset approximately
four hours after the SmartKey in the
starter switch is turned to position 0 or
removed from the starter switch.
Resetting will not occur if you turn the
SmartKey back to position 1 or 2 with-
in this time period.
Page 163 of 376
163
Controls in detail
Audio system
Bass�
Regardless of operating mode, press
the
AUD
key repeatedly until
BASS
appears on the display.
�
Press
+ or
- key to increase or de-
crease level.
or
�
Press both
+ and
- keys simultaneously
to reset the Bass to its center (flat) lev-
el. Treble
�
Regardless of operating mode, press
the
AUD
key repeatedly until
TREBLE
appears on the display.
�
Press
+ or
- key to increase or
decrease level.
or
�
Press both
+ and
- keys simultaneously
to reset the Treble to its center (flat)
level. Fader
�
Regardless of operating mode, press
the
AUD
key repeatedly until
FADER
appears on the display.
�
Press
F or
R key to shift sound accord-
ingly to the front or rear speakers.
or
�
Press both
F and
R keys simultaneously
to reset the Fader to its center level.
iYour vehicle may or may not have the
fader function, depending on the
vehicle equipment and model.
Page 164 of 376
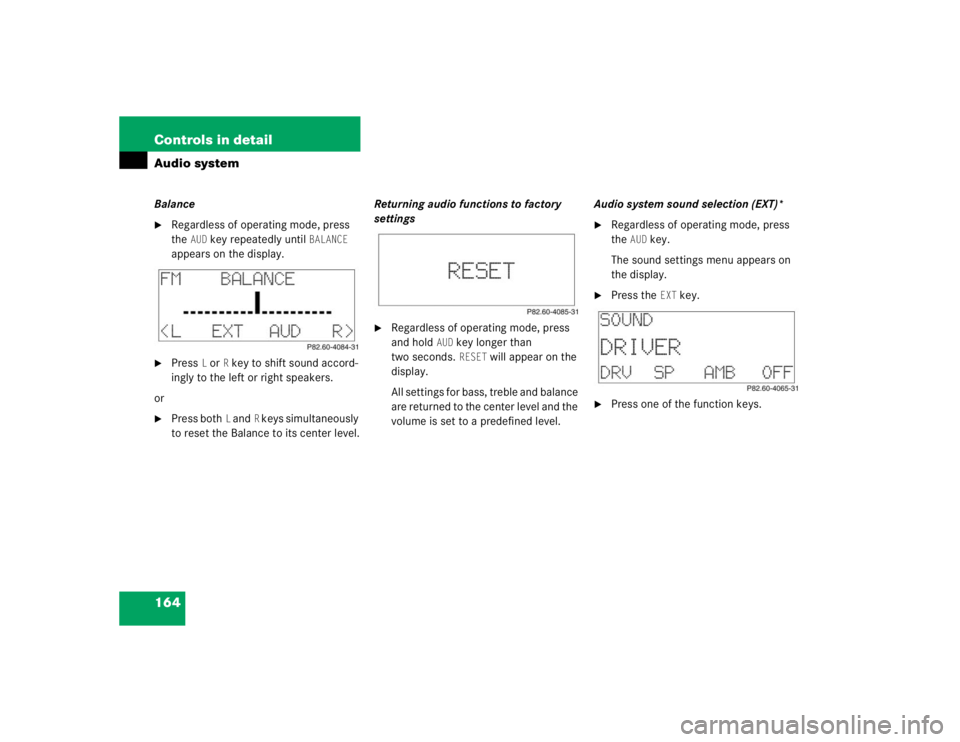
164 Controls in detailAudio systemBalance�
Regardless of operating mode, press
the
AUD
key repeatedly until
BALANCE
appears on the display.
�
Press
L or
R key to shift sound accord-
ingly to the left or right speakers.
or
�
Press both
L and
R keys simultaneously
to reset the Balance to its center level. Returning audio functions to factory
settings
�
Regardless of operating mode, press
and hold
AUD
key longer than
two seconds. RESET
will appear on the
display.
All settings for bass, treble and balance
are returned to the center level and the
volume is set to a predefined level. Audio system sound selection (EXT)*
�
Regardless of operating mode, press
the
AUD
key.
The sound settings menu appears on
the display.
�
Press the
EXT
key.
�
Press one of the function keys.
Page 165 of 376

165
Controls in detail
Audio system
You can select from among the
following settings:�
DRV
: The tone level is set to the
Driver position; sound is directed
toward the passengers.
�
SP: The tone level is set for Speech,
optimizing the sound for the spoken
word.
�
AMB
: The tone level is set for
Ambience, producing a
three-dimensional sound.
�
OFF
: The audio system sound
selection is turned off.
Telephone* muting
If a telephone has been installed in the
vehicle, the radio will switch to telephone
mode when a call is incoming. The current
audio source is muted.
Radio operation
Selecting radio mode�
Press b button.
�
You can now receive radio stations
over the analog FM, AM or WB station
frequencies or you can receive chan-
nels digitally via satellite radio (SAT)*.
Analog station frequencies
Selecting the band
You can select from among FM, AM or WB
frequency bands.
Weather band (
�page 168).
�
Press FM, AM or WB key repeatedly un-
til desired band has been selected.
The FM, AM and WB frequency bands
are called up one after the other.
The frequency band currently selected
appears in the upper left-hand corner
of the display.
Selecting a station
The following options are available for
selecting a station:
�
Direct frequency band input
(�page 166)
�
Manual tuning (
�page 166)
�
Automatic seek tuning (
�page 166)
�
Scan tuning (
�page 167)
�
Preset buttons (
�page 167)
�
Automatic station memory (Autostore)
(�page 167)
iFM frequency band:
FM 87.7......107.9 MHz
AM frequency band:
MW (medium wave) 530......1710 KHz
Page 167 of 376

167
Controls in detail
Audio system
Scan tuning�
Starting scan tuning�
Select desired frequency band.
�
Press
2 button.SC will appear on the display. The
radio briefly tunes in all receivable
stations on the band selected. The
first scan cycle will tune in only the
stations with a strong signal. The
second scan cycle will tune in every
receivable station.
�
Ending scan tuning�
Press 2 button or d, c ,
f ore button.SC disappears from the display. Manual station memory (Presets)
You can store ten AM and ten FM stations.
�
Storing stations�
Tune in the desired station.
�
Press and hold desired station
button
4 toM until a brief
signal tone is heard.
The frequency is stored on the
selected station button.
The frequency band and station
button number are shown in the up-
per left-hand corner of the display.
�
Retrieving a station from memory�
Press desired station button 4
to M . Automatic station memory (Autostore)
The Autostore memory function provides
an additional memory level. The station
memory for manually stored stations is not
overwritten.
�
Calling up Autostore memory level�
Briefly press the
AS key.
AS is highlighted in the display.
The radio finds the ten stations with
the strongest signals. These
stations are stored on the station
buttons 4 toM in order of
signal strength.
�
Retrieving a station from memory�
Press desired station button 4
to M .
�
Leaving the Autostore memory level�
Press the
AS key.
The highlighted
AS in the display
disappears.
Page 170 of 376
170 Controls in detailAudio systemChannel selection
The following options are available for se-
lecting a channel:�
Direct channel input (
�page 170)
�
Manual tuning (
�page 170)
�
Preset channels (
�page 170)
Direct channel input
�
Press “key.
�
Enter desired channel number using
buttons 4 to M . Manual tuning
�
Press and hold f
, d , c or
e button until the desired channel
has been reached.
Preset channels
You can store up to ten channels.
�
Retrieving a channel from memory�
Press the desired channel button
4 to M .
�
Storing channels�
Tune in the desired channel.
�
Press and hold desired channel but-
ton 4 to M until a brief signal
tone sounds.
The channel is stored on the selected
channel button.
iOnly inputs for available channels are
possible.
If a button is not pressed within
four seconds, the radio will return to
the last station tuned.
Page 194 of 376

194 Controls in detailDriving systems
�Driving systemsThe driving system of your vehicle is de-
scribed on the following pages:�
Cruise control, with which the vehicle
can maintain a preset speed
For information on the BAS, ABS and ESP
driving systems, see “Driving safety sys-
tems” (
�page 73).
Cruise control
Cruise control automatically maintains the
speed you set for your vehicle.
Use of cruise control is recommended for
driving at a constant speed for extended
periods of time. You can set or resume
cruise control at any speed over 20 mph
(30 km/h).
The cruise control function is operated by
means of the cruise control lever.
The cruise control lever is the uppermost
lever found on the left-hand side of the
steering column.
Warning!
G
Cruise control is a convenience system de-
signed to assist the driver during vehicle op-
eration. The driver is and must remain at all
times responsible for the vehicle speed and
for safe brake operation.
Only use cruise control if the road, the traffic
and weather conditions make it advisable to
travel at a steady speed.�
The use of cruise control can be danger-
ous on winding roads or in heavy traffic
because conditions do not allow safe
driving at a steady speed.
�
The use of cruise control can be danger-
ous on slippery roads. Rapid changes in
tire traction can result in wheel spin and
loss of control.
�
Deactivate cruise control when driving
in fog.
The “Resume” function should only be oper-
ated if the driver is fully aware of the previ-
ously set speed and wishes to resume this
particular preset speed.