Page 16 of 304
Never remove the coolant reservoir cap while the engine is
running or hot.
Odometer:Registers the total miles
(kilometers) of the vehicle.
Fuel gauge:Indicates
approximately how much fuel is left
in the fuel tank (when the ignition
is in the ON position). The fuel
gauge may vary slightly when the
vehicle is in motion or on a grade.
Refer toFilling the tankin the
Maintenance and Specifications
chapter for more information.
The FUEL icon and arrow indicates which side of the vehicle the fuel
door is located.
REVIEW COPY
2004 Town Car(tow), Owners Guide (post-2002-fmt)(own2002),
Market:USA_English(fus)
Instrument Cluster
16
Page 24 of 304
RADIO RECEPTION FACTORS
There are three factors that can affect radio reception:
•Distance/strength: The further you travel from an FM station, the
weaker the signal and the weaker the reception.
•Terrain: Hills, mountains, tall buildings, power lines, electric fences,
traffic lights and thunderstorms can interfere with your reception.
•Station overload: When you pass a broadcast tower, a stronger signal
may overtake a weaker one and play while the weak station frequency
is displayed.
CASSETTE/PLAYER CARE
Do:
•Use only cassettes that are 90 minutes long or less.
•Tighten very loose tapes by inserting a finger or pencil into the hole
and turning the hub.
•Remove loose labels before inserting tapes.
•Allow tapes which have been subjected to extreme heat, humidity or
cold to reach a moderate temperature before playing.
•Clean the cassette player head with a cassette cleaning cartridge after
10–12 hours of play to maintain good sound/operation.
Don’t:
•Expose tapes to direct sunlight, extreme humidity, heat or cold.
•Leave tapes in the cassette player for a long time when not being
played.
CD/CD PLAYER CARE
Do:
•Handle discs by their edges only. Never touch the playing surface.
•Inspect discs before playing. Clean only with an approved CD cleaner
and wipe from the center out.
Don’t:
•Expose discs to direct sunlight or heat sources for extended periods
of time.
•Insert more than one disc into each slot of the CD changer magazine.
•Clean using a circular motion.
REVIEW COPY
2004 Town Car(tow), Owners Guide (post-2002-fmt)(own2002),
Market:USA_English(fus)
Entertainment Systems
24
Page 28 of 304
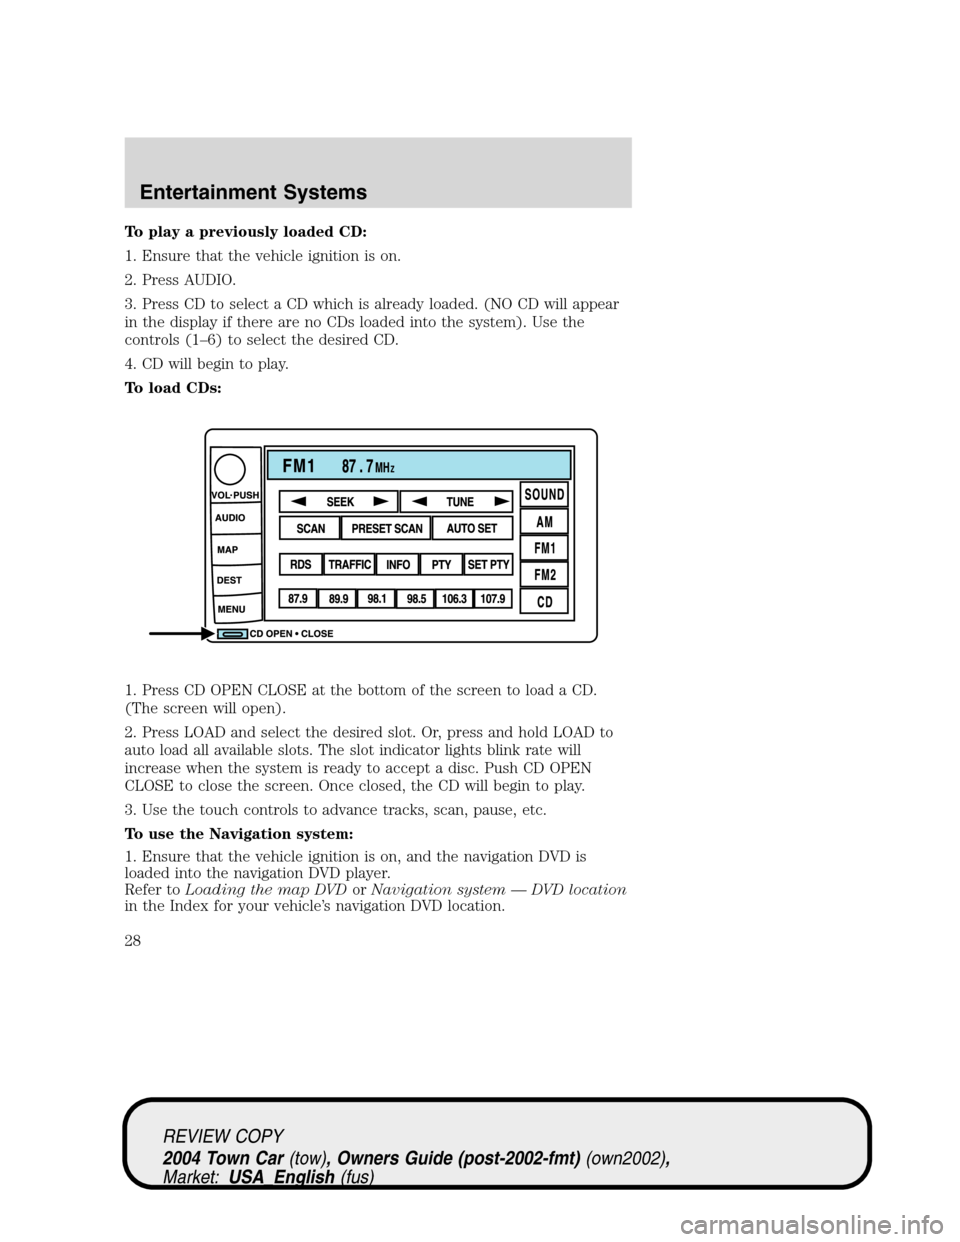
To play a previously loaded CD:
1. Ensure that the vehicle ignition is on.
2. Press AUDIO.
3. Press CD to select a CD which is already loaded. (NO CD will appear
in the display if there are no CDs loaded into the system). Use the
controls (1–6) to select the desired CD.
4. CD will begin to play.
To load CDs:
1. Press CD OPEN CLOSE at the bottom of the screen to load a CD.
(The screen will open).
2. Press LOAD and select the desired slot. Or, press and hold LOAD to
auto load all available slots. The slot indicator lights blink rate will
increase when the system is ready to accept a disc. Push CD OPEN
CLOSE to close the screen. Once closed, the CD will begin to play.
3. Use the touch controls to advance tracks, scan, pause, etc.
To use the Navigation system:
1. Ensure that the vehicle ignition is on, and the navigation DVD is
loaded into the navigation DVD player.
Refer toLoading the map DVDorNavigation system—DVD location
in the Index for your vehicle’s navigation DVD location.
REVIEW COPY
2004 Town Car(tow), Owners Guide (post-2002-fmt)(own2002),
Market:USA_English(fus)
Entertainment Systems
28
Page 44 of 304
2. The navigation screen will fold down, allowing you access to the
in-dash six CD system.
3. Press LOAD and the desired CD slot number. The indicator light will
blink slowly at first, then quickly, signaling the system is ready.
4. Insert a disc.
5.To load more than one disc, press and hold LOAD. This will initiate
autoload and will allow you to load all open CD slots.
After an allotted time, the screen will close automatically or you may
press CD OPEN CLOSE on the bezel again.
6. Once the screen closes, the system will start playing the last CD
loaded.
Track
Press
/to advance to the
next/previous track.
REVIEW COPY
2004 Town Car(tow), Owners Guide (post-2002-fmt)(own2002),
Market:USA_English(fus)
Entertainment Systems
44
Page 53 of 304
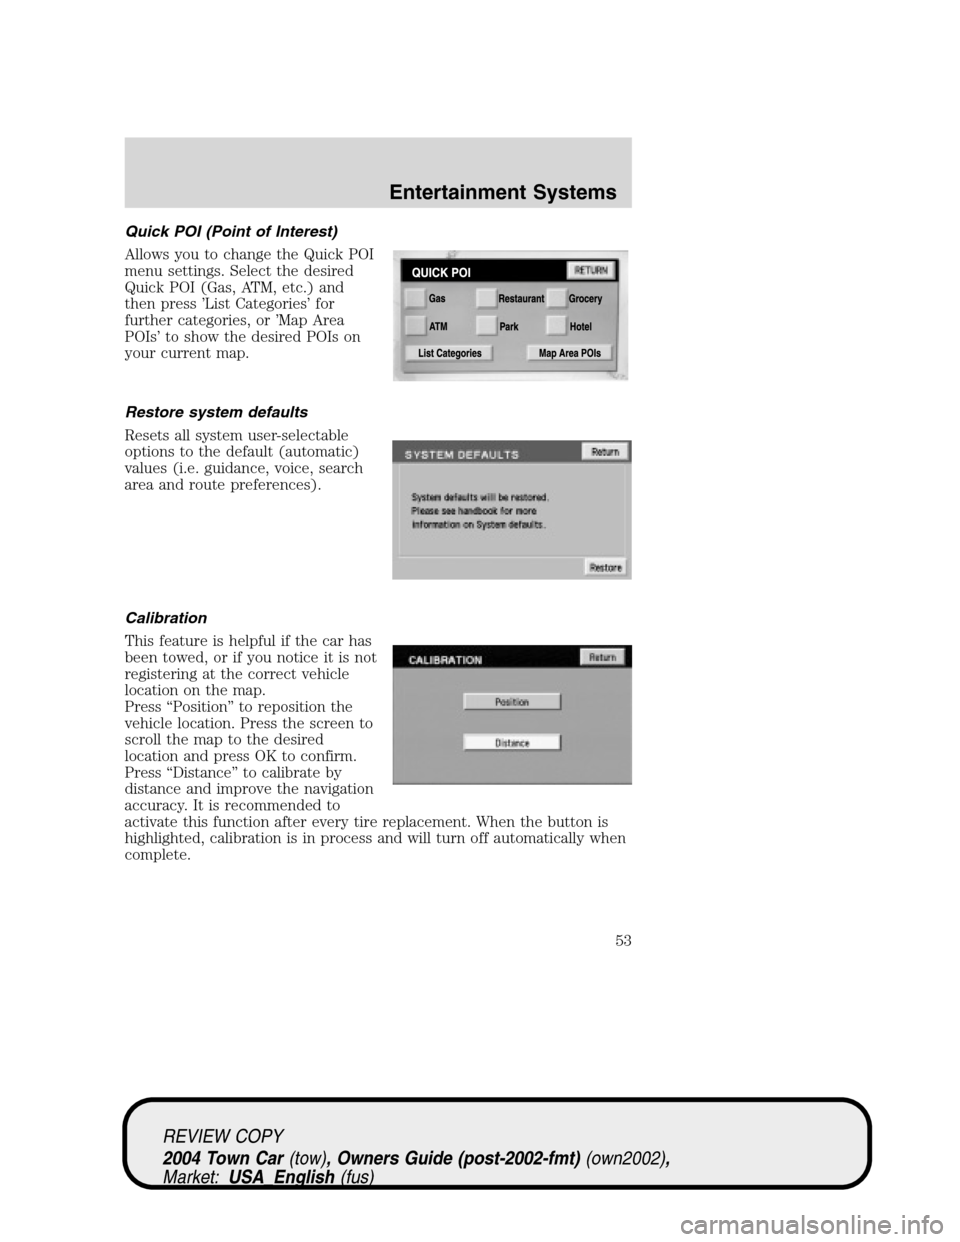
Quick POI (Point of Interest)
Allows you to change the Quick POI
menu settings. Select the desired
Quick POI (Gas, ATM, etc.) and
then press’List Categories’for
further categories, or’Map Area
POIs’to show the desired POIs on
your current map.
Restore system defaults
Resets all system user-selectable
options to the default (automatic)
values (i.e. guidance, voice, search
area and route preferences).
Calibration
This feature is helpful if the car has
been towed, or if you notice it is not
registering at the correct vehicle
location on the map.
Press“Position”to reposition the
vehicle location. Press the screen to
scroll the map to the desired
location and press OK to confirm.
Press“Distance”to calibrate by
distance and improve the navigation
accuracy. It is recommended to
activate this function after every tire replacement. When the button is
highlighted, calibration is in process and will turn off automatically when
complete.
REVIEW COPY
2004 Town Car(tow), Owners Guide (post-2002-fmt)(own2002),
Market:USA_English(fus)
Entertainment Systems
53
Page 67 of 304
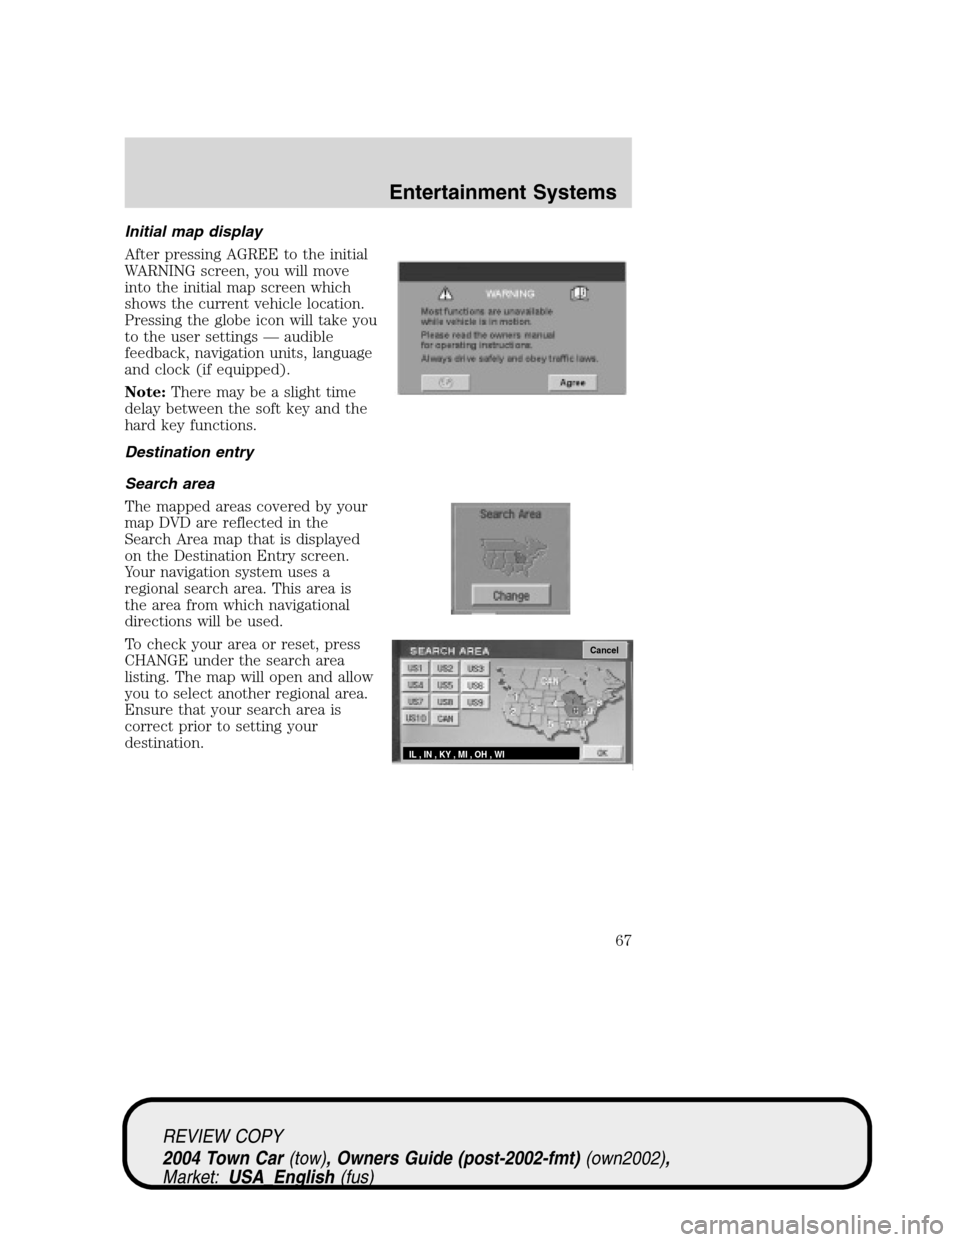
Initial map display
After pressing AGREE to the initial
WARNING screen, you will move
into the initial map screen which
shows the current vehicle location.
Pressing the globe icon will take you
to the user settings—audible
feedback, navigation units, language
and clock (if equipped).
Note:There may be a slight time
delay between the soft key and the
hard key functions.
Destination entry
Search area
The mapped areas covered by your
map DVD are reflected in the
Search Area map that is displayed
on the Destination Entry screen.
Your navigation system uses a
regional search area. This area is
the area from which navigational
directions will be used.
To check your area or reset, press
CHANGE under the search area
listing. The map will open and allow
you to select another regional area.
Ensure that your search area is
correct prior to setting your
destination.
Cancel
IL , IN , KY , MI , OH , WI
REVIEW COPY
2004 Town Car(tow), Owners Guide (post-2002-fmt)(own2002),
Market:USA_English(fus)
Entertainment Systems
67
Page 85 of 304

Radio reception factors
There are certain factors that may effect your radio reception.
•Distance/strength.The further an FM signal travels, the weaker it is.
The listenable range of the average FM station is approximately 40 km
(24 miles). This range can be affected by“signal modulation.”Signal
modulation is a process radio stations use to increase their
strength/volume relative to other stations.
•Terrain.Hills, mountains and tall buildings between your vehicle’s
antenna and the radio station signal can cause FM reception problems.
Static can be caused on AM stations by power lines, electric fences,
traffic lights and thunderstorms. Moving away from an interfering
structure (out of its“shadow”) returns your reception to normal.
•Station overload.Weak signals are sometimes captured by stronger
signals when you pass a broadcast tower. A stronger signal may
temporarily overtake a weaker signal and play while the weak station
frequency is displayed.
Principles of GPS (global positioning system) operation
Your system directs you based on information derived from global
positioning satellites, road maps stored on the DVD, sensors in your vehicle
and the desired destination. The system compiles all necessary information
to guide you to your selected destination. Space satellites determine the
vehicle’s current location and transmit position and time signals to your car.
If the vehicle has been parked for a long period of time, the navigation
function may be temporarily unresponsive. The navigation system will
operate reliably again once GPS reception is available for a few minutes.
Limited GPS reception
System performance may be adversely affected if GPS reception is
interrupted or interference occurs over a distance of several miles. The
following are possible causes for GPS reception being interrupted. If the
vehicle is:
•in multi-story parking garages
•in tunnels and under bridges
•inside or in between buildings
•by forests or tree-lined avenues
•in heavy rain showers and thunderstorms
•in valleys and in mountainous regions
•roads under cliffs
REVIEW COPY
2004 Town Car(tow), Owners Guide (post-2002-fmt)(own2002),
Market:USA_English(fus)
Entertainment Systems
85
Page 92 of 304
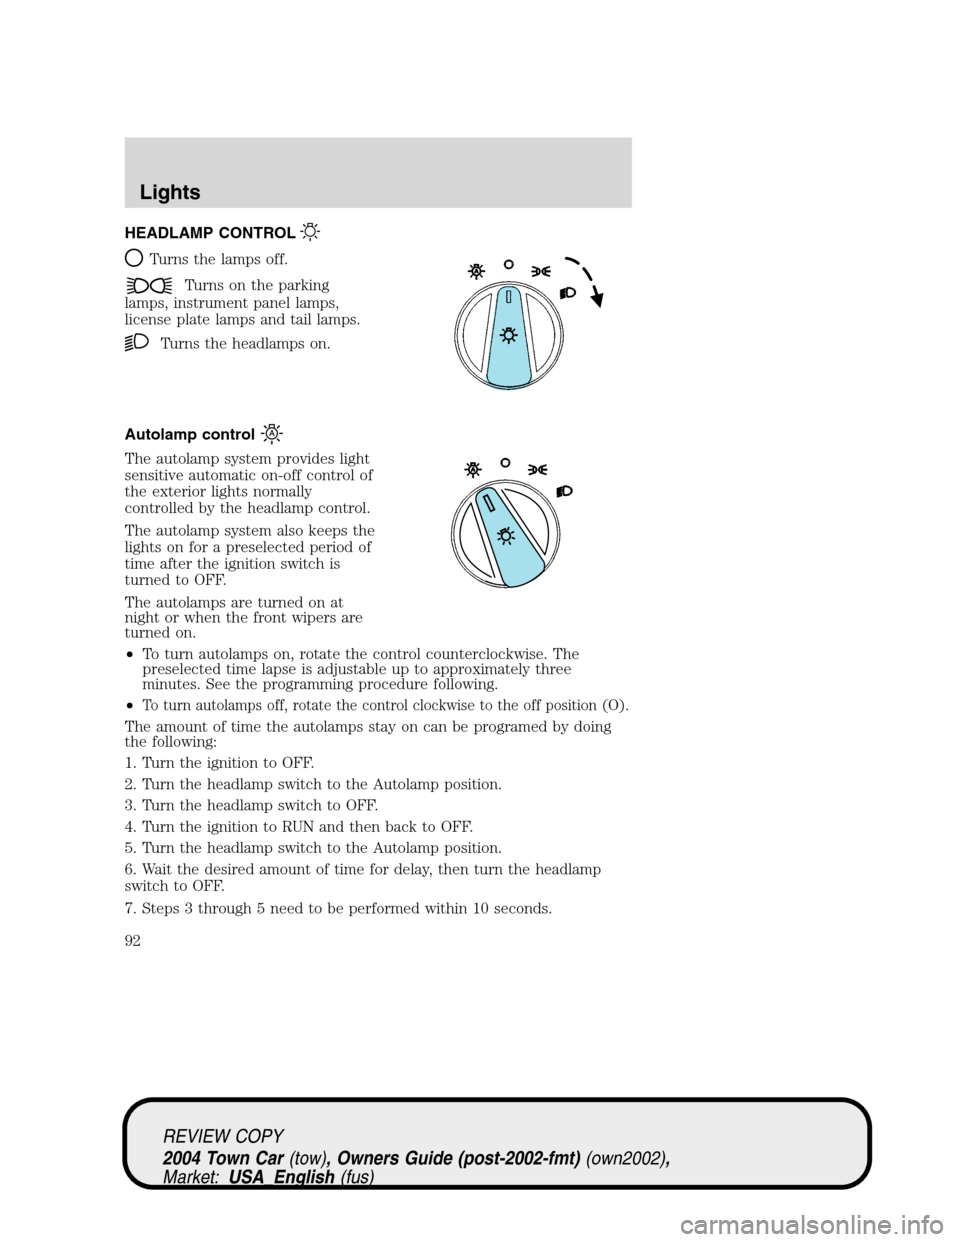
HEADLAMP CONTROL
Turns the lamps off.
Turns on the parking
lamps, instrument panel lamps,
license plate lamps and tail lamps.
Turns the headlamps on.
Autolamp control
The autolamp system provides light
sensitive automatic on-off control of
the exterior lights normally
controlled by the headlamp control.
The autolamp system also keeps the
lights on for a preselected period of
time after the ignition switch is
turned to OFF.
The autolamps are turned on at
night or when the front wipers are
turned on.
•To turn autolamps on, rotate the control counterclockwise. The
preselected time lapse is adjustable up to approximately three
minutes. See the programming procedure following.
•
To turn autolamps off, rotate the control clockwise to the off position (O).
The amount of time the autolamps stay on can be programed by doing
the following:
1. Turn the ignition to OFF.
2. Turn the headlamp switch to the Autolamp position.
3. Turn the headlamp switch to OFF.
4. Turn the ignition to RUN and then back to OFF.
5. Turn the headlamp switch to the Autolamp position.
6. Wait the desired amount of time for delay, then turn the headlamp
switch to OFF.
7. Steps 3 through 5 need to be performed within 10 seconds.
REVIEW COPY
2004 Town Car(tow), Owners Guide (post-2002-fmt)(own2002),
Market:USA_English(fus)
Lights
Lights
92