Page 409 of 482
CHASSIS
384
Ð TIRES AND WHEELS
Tire size
P215/60R16 94V
Tire inflation pressure
Recommended cold tire inflation
pressure
Front 200 kPa (2.0 kgf/cm2 or bar, 29 psi)
Rear 200 kPa (2.0 kgf/cm2 or bar, 29 psi)
For sustained high speeds above 160 km/h (99 mph), in
countries where such speeds are permitted by law, add 40
kPa (0.4 kgf/cm
2 or bar, 6 psi) to the front tires and rear
tires, but never exceed the maximum cold tire inflation
pressure molded on the tire sidewall.
Wheel size16 � 6 1/2 JJ
Wheel nut torque103 N´m (10.5 kgf´m, 76 ft´lbf)
NOTE:
For a complete information on tires (e.g. replacing tires or replacing wheels), see Checking tire inflation pressureº
through Aluminum wheel precautionsº on pages 389 through 407.
Page 414 of 482

CHASSIS
389
CHECKING TIRE INFLATION
PRESSURE
63E035
The recommended cold tire inflation pressures,
tire sizes and the combined weight of occupants
and cargo (vehicle capacity weight) are described
on page 384 and 441. They are also described
on the tire and loading information label as
shown.
You should check the tire inflation pressure every two
weeks, or at least once a month. And do not forget
the spare!
The following instructions for checking tire
inflation pressure should be observed:
�The pressure should be checked only when the
tires are cold. If your vehicle has been parked
for at least 3 hours and has not been driven for
more than 1.5 km or 1 mile since, you will get an
accurate cold tire inflation pressure reading.
�Always use a tire pressure gauge. The
appearance of a tire can be misleading. Besides,
tire inflation pressures that are even just a few
pounds off can degrade handling and ride.
�Do not bleed or reduce tire inflation pressure
after driving. It is normal for the tire inflation
pressure to be higher after driving.
�Never exceed the vehicle capacity weight. The
passengers and luggage weight should be located
so that the vehicle is balanced.
Page 418 of 482

CHASSIS
393
1Summer tire or all season tire: An all season
tire has M+Sº on the sidewall. The tire not
marked with M+Sº is a summer tire. For details,
see Types of tiresº on page 400.
2Tire size: For details, see Tire sizeº on page
394.
3DOT and Tire Identification Number (TIN): For
details, see DOT and Tire Identification Number
(TIN)º on page 394.
4Uniform tire quality grading: For details, see
Uniform tire quality gradingº that follows.
5Location of the tread wear indicators: For
details, see Checking and replacing tiresº on
page 402.
6Tire ply composition and materials: Plies mean
a layer of rubber-coated parallel cords. Cords
mean the strands forming the plies in the tire.
7Radial tires or bias-ply tires: A radial tire has
RADIALº on the sidewall. The tire not marked
with RADIALº is a bias-ply tire.
8TUBELESSº or TUBE TYPEº: A tubeless tire
does not have a tube inside the tire. A tube type
tire has a tube inside the tire and the tube
maintains the air pressure.
9Load limit at maximum cold tire inflation
pressure: For details, see Checking and
replacing tiresº on page 402.
10Maximum cold tire inflation pressure: This
means the pressure to which a tire may be
inflated. For details about recommended cold tire
inflation pressure, see Specificationsº on page
384.
Page 425 of 482

CHASSIS
400
TYPES OF TIRES
Determine what kind of tires your vehicle is originally
equipped with.
1. Summer tires
Summer tires are high-speed capability tires best
suited to highway driving under dry conditions.
Since summer tires do not have the same traction
performance as snow tires, summer tires are
inadequate for driving on snow-covered or icy roads.
For driving on snow-covered or icy roads, we
recommend using snow tires. If installing snow tires,
be sure to replace all four tires.
2. All season tires
All season tires are designed to provide better traction
in snow and to be adequate for driving in most winter
conditions, as well as for use all year round.
All season tires, however, do not have adequate
traction performance compared with snow tires in
heavy or loose snow. Also, all season tires fall short
in acceleration and handling performance compared
with summer tires in highway driving.
The details about how to distinguish summer tires
from all season tires are described on page 392.
CAUTION
�Do not use tires other than the manufacturer's
designated tires, and never mix tires or
wheels of the sizes different from the originals
as this could result in loss of control and
could cause death or serious injury.
�Do not mix summer and all season tires on
your vehicle as this can cause dangerous
handling characteristics, resulting in loss of
control.
Page 428 of 482

CHASSIS
403
Tire selection
When replacing a tire, use a tire of the same size
and construction, and the same or greater
maximum loads as the originally installed tires.
Using any other size or type of tire may seriously
affect handling, ride, speedometer/odometer
calibration, ground clearance, and clearance between
the body and tires or snow chains.
Check that the maximum load of the replaced tire is
greater than 1/2 of the Gross Axle Weight Ratings
(GAWR) of either the front axle or the rear axle,
whichever greater. As for the maximum load of the
tire, see the load limit at maximum cold tire inflation
pressure mentioned on the sidewall of the tire, and
as for the Gross Axle Weight Ratings (GAWR), see
the Certification Label. For details about Certification
Label and sidewall of the tire, see pages 352 and 392.CAUTION
Observe the following instructions. Otherwise,
an accident may occur resulting in death or
serious injuries.
�Do not mix radial, bias belted, or bias-ply tires
on your vehicle, as this may cause dangerous
handling characteristics resulting in loss of
control.
�Do not use tires other than the manufacturer's
recommended size, as this may cause
dangerous handling characteristics resulting
in loss of control.
Page 449 of 482
ELECTRICAL COMPONENTS
424
NOTICE
�Make sure the engine and all accessories are turned
off before performing maintenance.
�When checking the battery, remove the ground cable
first and reinstall it last.
�Be careful not to cause a short circuit with tools.
�Take care no solution gets into the battery when
washing it.
If the battery is disconnected or run down
The moon roof may not operate automatically and the jam
protection function will not function correctly after you
reconnect, replace or recharge the battery. In any of these
cases, you should normalize the moon roof. To normalize the
moon roof, see page 101.
Checking battery condition
Checking by indicator
Check the battery condition by the indicator color.
1BLUE Ð Good condition
2WHITE Ð Charging necessary. Have the battery
checked by your Lexus dealer.
Page 459 of 482

ELECTRICAL COMPONENTS
434
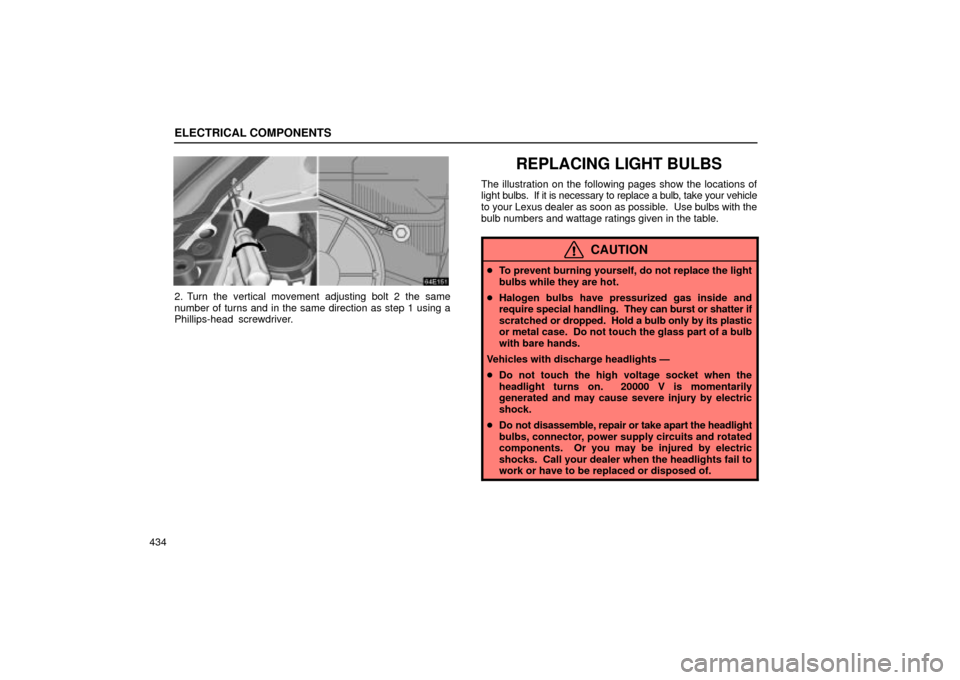
2. Turn the vertical movement adjusting bolt 2 the same
number of turns and in the same direction as step 1 using a
Phillips-head screwdriver.
REPLACING LIGHT BULBS
The illustration on the following pages show the locations of
light bulbs. If it is necessary to replace a bulb, take your vehicle
to your Lexus dealer as soon as possible. Use bulbs with the
bulb numbers and wattage ratings given in the table.
CAUTION
�To prevent burning yourself, do not replace the light
bulbs while they are hot.
�Halogen bulbs have pressurized gas inside and
require special handling. They can burst or shatter if
scratched or dropped. Hold a bulb only by its plastic
or metal case. Do not touch the glass part of a bulb
with bare hands.
Vehicles with discharge headlights Ð
�Do not touch the high voltage socket when the
headlight turns on. 20000 V is momentarily
generated and may cause severe injury by electric
shock.
�Do not disassemble, repair or take apart the headlight
bulbs, connector, power supply circuits and rotated
components. Or you may be injured by electric
shocks. Call your dealer when the headlights fail to
work or have to be replaced or disposed of.
Page 467 of 482

BODY
442
PROTECTING YOUR VEHICLE
FROM CORROSION
Proper care of your Lexus can help ensure long-term
corrosion prevention.
The most common causes of corrosion to your vehicle
are:
�The accumulation of road salt, dirt and moisture in
hard-to-reach areas under the vehicle.
�Chipping of paint or undercoating caused by minor
accidents or by stones and gravel.
The following conditions will cause or accelerate
corrosion of your vehicle, so it is important to keep your
vehicle, particularly the underside, as clean as possible
and to repair any damage to paint or protective coatings
as soon as possible.
�The presence of road salt or dust control chemicals, salt in
the air near the sea coast, industrial air pollution.
�High humidity, especially at temperatures just above
freezing point.
�Certain parts of your vehicle are wet or damp for an
extended period of time, even though other parts of the
vehicle are dry.
�Components of the vehicle which are prevented from
quick-drying due to lack of proper ventilation are exposed
to high temperature.To help prevent corrosion on your Lexus, follow these
guidelines:
Keep your vehicle clean by regular washing. In addition,
observe the following points.
�If you drive on salted roads in the winter or if you live near
the ocean, you should hose off the undercarriage at least
once a month to minimize corrosion.
�High pressure water or steam is effective for cleaning the
vehicle's underside and wheel housings. Pay particular
attention to these areas as it is difficult to see all the mud and
dirt. It will do more harm than good to simply wet the mud
and debris without removing. The lower edge of doors,
rocker panels and frame members have drain holes which
should not be allowed to clog with dirt as trapped water in
these areas can cause corrosion.
�Wash the underside of the vehicle thoroughly when winter
is over.
See Washing and waxingº on page 443 for more tips.
Check the condition of your vehicle's paint and trim. If you
find any chips or scratches in the paint, touch them up
immediately to prevent corrosion from starting. If the chips or
scratches have gone through the bare metal, have a qualified
body shop make the repair.